THIS POST IS SPONSORED BY
DeLallo Foods, who I’m so excited to partner & share with you throughout 2021. DeLallo is the secret to the easiest & best at-home pizza nights! All thoughts & opinions are my own.

Can you cook pizza on a grill?…
Y-E-S, you can, & it’s pretty much the BEST! 🙌🏼
Pizza night is a really special tradition that Chris & I have had ever since we started dating. Our first date was at a pizza joint & we used to always go out for pizza on Sunday nights. These days we like doing pizza night at home, using our wood-fired pizza set up or making our favorite cast iron pizzas. But this year, as I began planning the PWWB Grilling Series, I knew there was one more pizza recipe that I wanted to tackle – the BEST grilled pizza recipe!
Homemade pizza on the grill is one of our favorite summer meals. Because it’s pretty quick to throw together using whatever you already have on hand, it’s the perfect dinnertime contender for busy weeknights, lazy weekends, & backyard summer parties alike.
Plus, cooking pizza on a grill is honestly pretty easy! You don’t need any special equipment like a pizza stone or a grill insert. There is a little technique involved in grilling the perfect pizza, of course, but that’s where I’ve done the heavy lifting for you in testing & tweaking this grilled pizza recipe to perfection. 😉 Consider this your summer to learn how to make pizza on the grill!
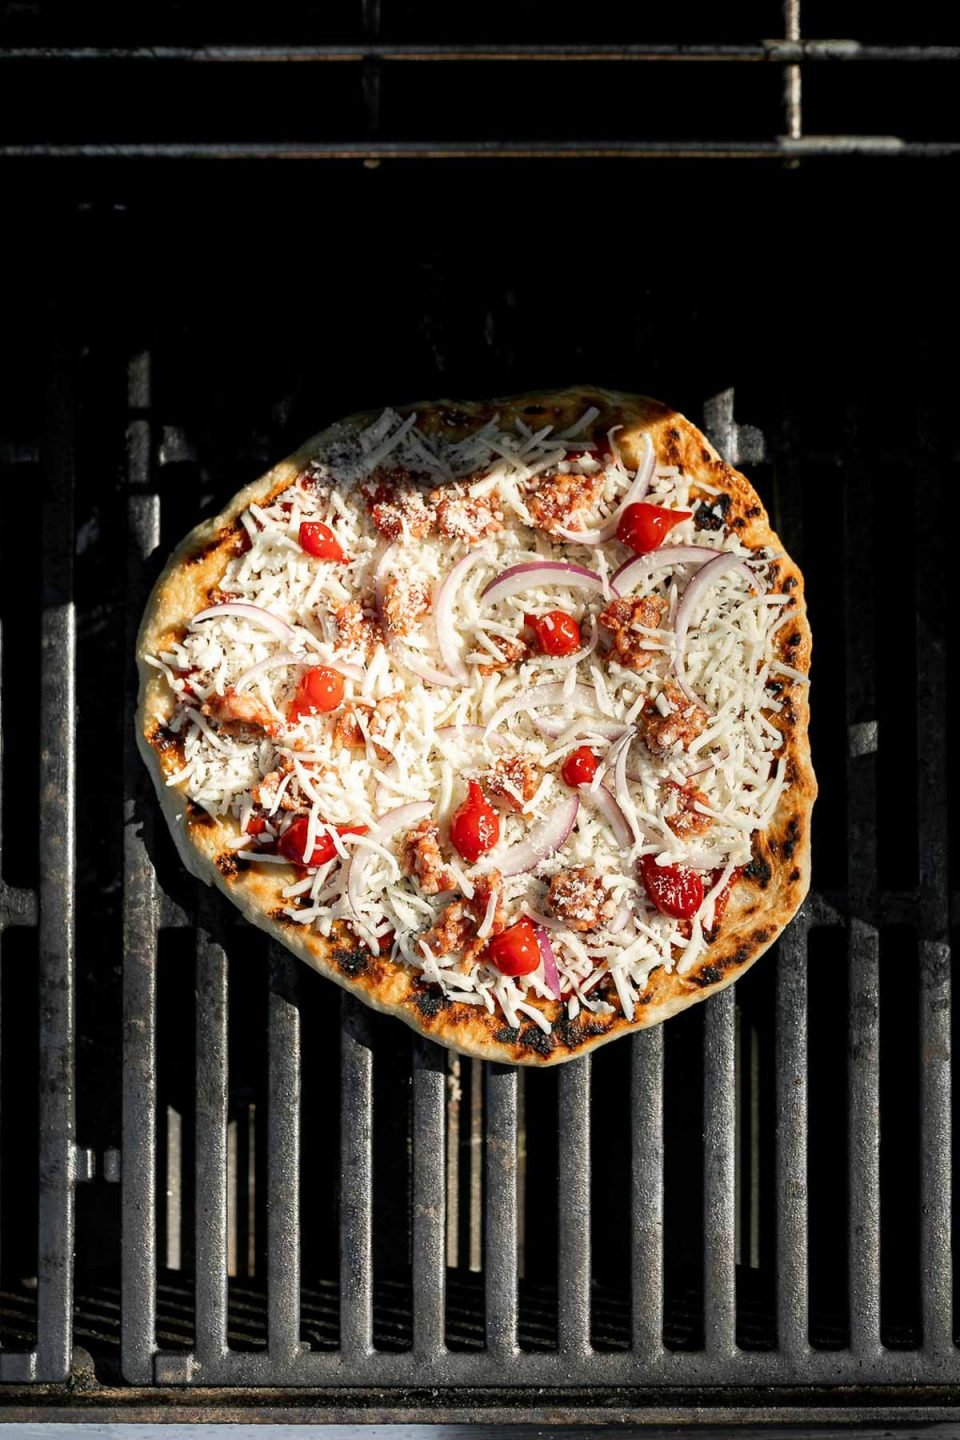
Grilled Pizza Recipe Highlights
This grilled pizza recipe is (click for shortcuts within this post!)…
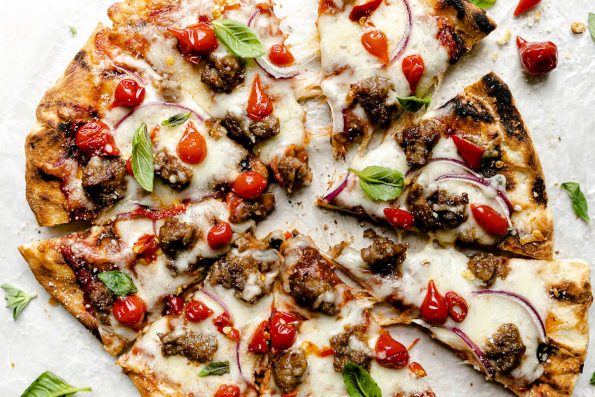
- PERFECT. Yes, absolutely perfect. Beautifully golden brown crust with glorious charred grill marks, ooey-goeey melted cheese, & a hint of smoky flavor from the grill. Summer dinner truly does not get better than homemade pizza on the grill!
- STRAIGHT-FORWARD. Whether you grill with gas or charcoal, this grilled pizza recipe is for you! The pizza is grilled directly on the grill grates leveraging the 2-zone method, so you do not need a pizza stone, a pizza oven kit for your grill, or any other special pizza making accessories.
- VERSATILE. Dress it up with tons of different toppings, grilled pizza is perfect for easy weeknight dinners or for the most epic summer pizza parties!
Homemade pizza on the grill…a real summertime MVP. ♡ Read on to learn more about How to Grill Pizza, or jump straight to the recipe & get grilling!
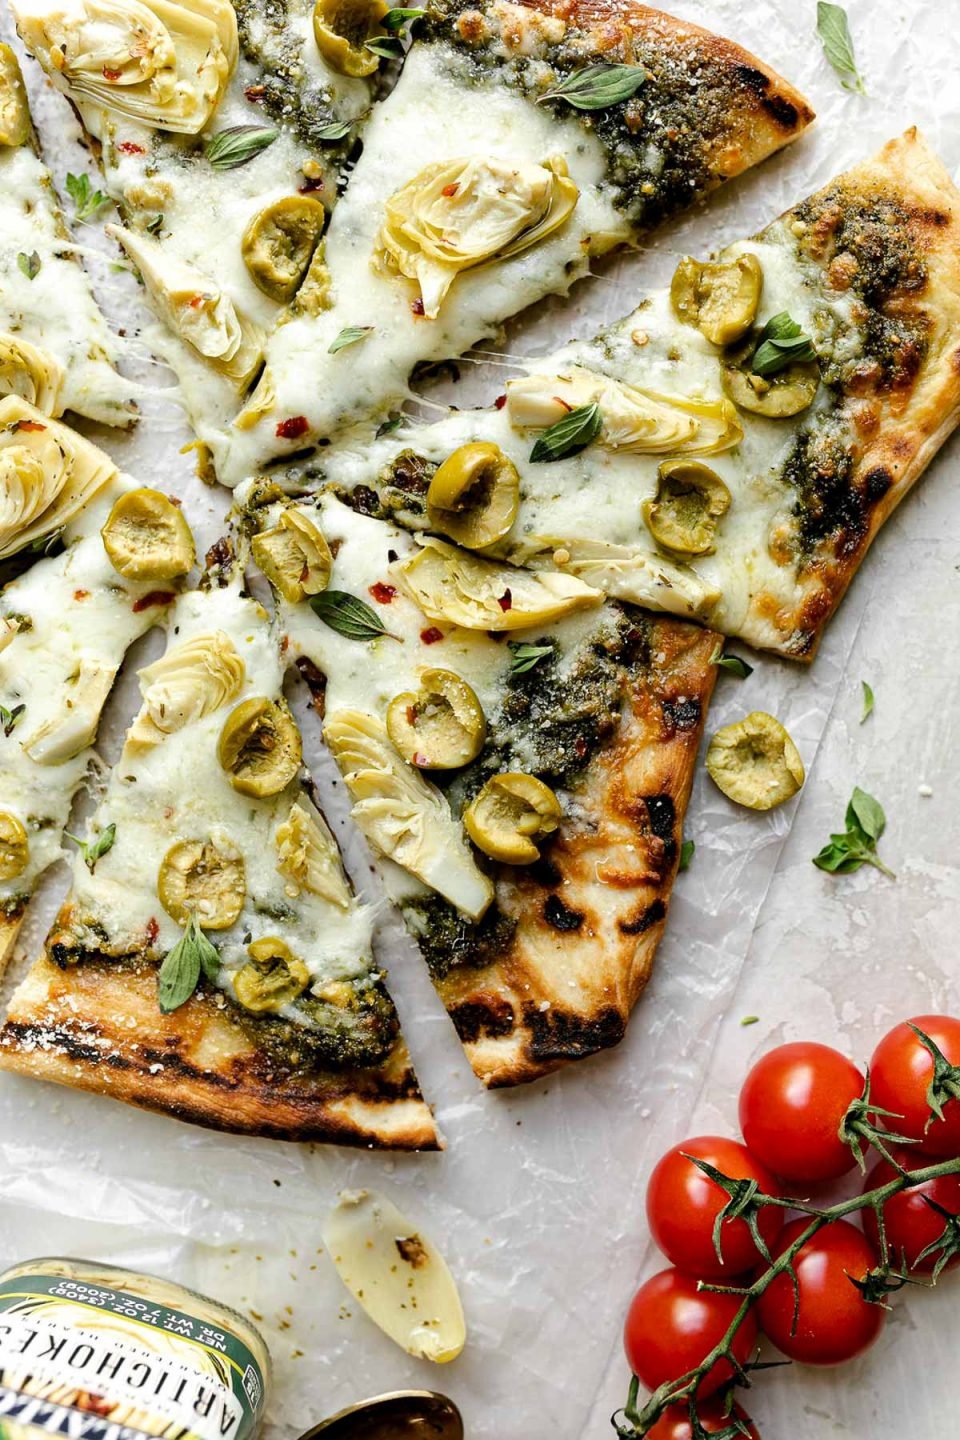
It’s not the Best Grilled Pizza without the Best Grilled Pizza Dough! (A PWWB Fave!)
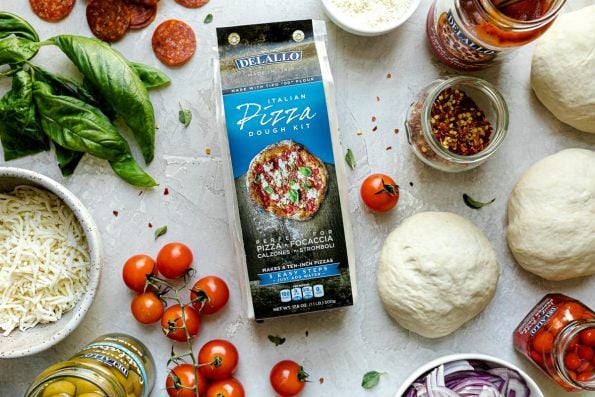
The heart of any pizza is its foundation – the crust. You can’t make good pizza without good crust, & you can’t make good crust without great dough. I absolutely swear by the Pizza Dough Kit from my good friends DeLallo. It’s truly the only pizza dough I use at my house. It’s better than any store-bought dough I’ve ever used AND it trumps every single one of my attempts at homemade pizza dough.
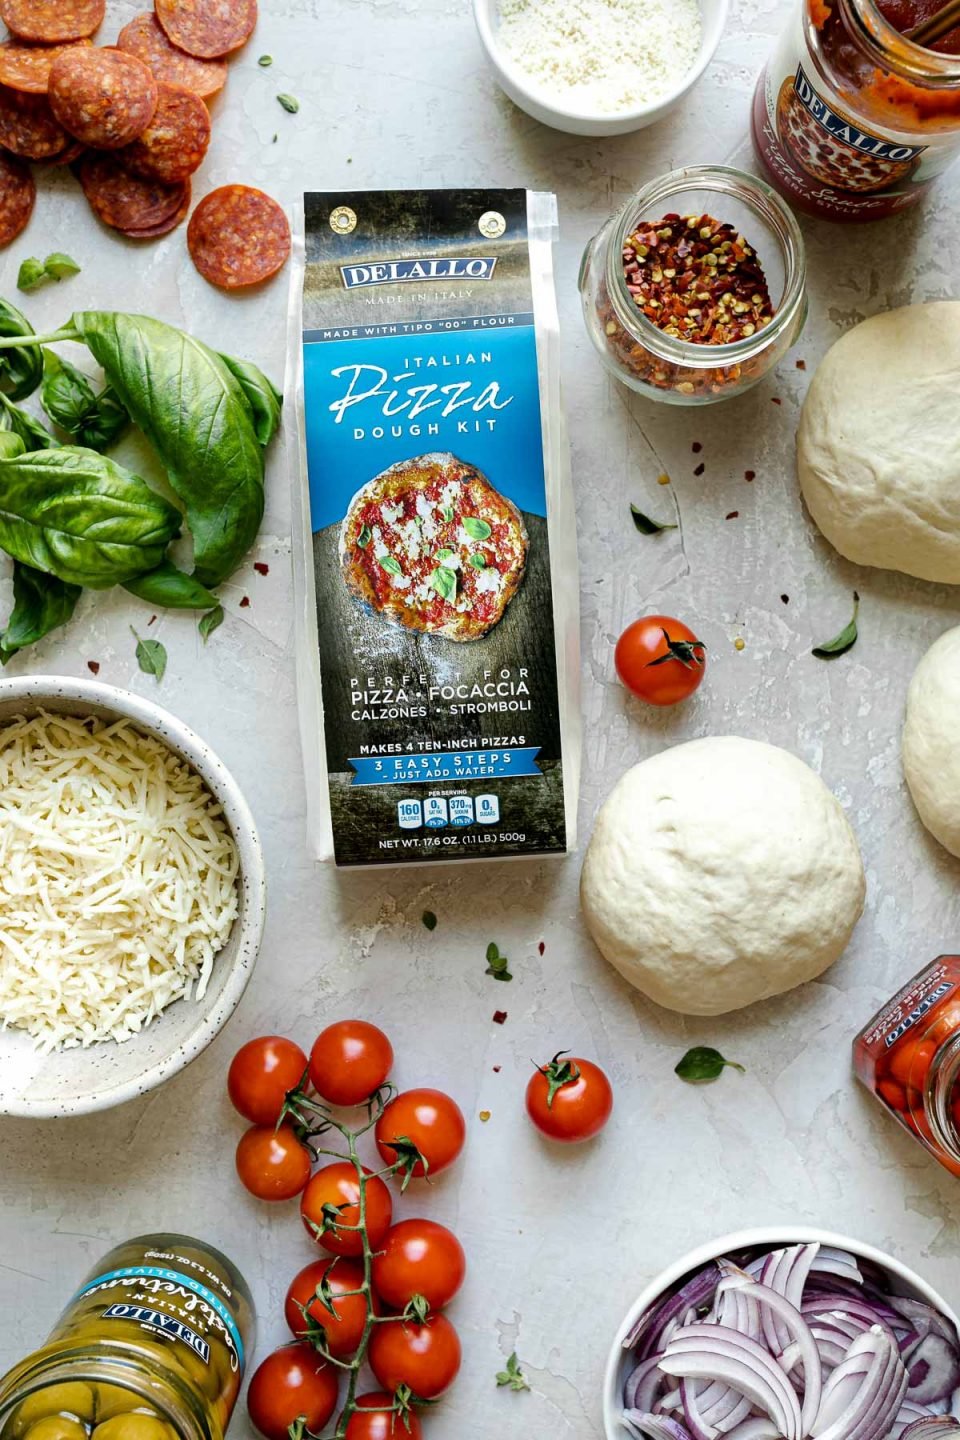
Here’s why it’s the best: The kit consists of yeast & a carefully crafted flour mixture made with Type 00 flour, a super finely ground Italian flour. The 00 flour gives the pizza dough great elasticity, which translates to the kind of restaurant-quality pizza crust that’s perfectly light & chewy all at once. It’s the perfect dough to use in this grilled pizza recipe!
How it works ⇢ About an hour before you’d like to start grilling pizzas, prep your pizza dough kit. Simply mix the kit contents together with a little warm water, give it a quick knead & let it rise until doubled in size. It’s about 10 minutes of active work, & 1 kit yields 3 10-12-inch grilled pizzas.
Needless to say, if making the best homemade pizza on the grill is part of your summer plans, I highly suggest ordering a couple of pizza dough kits. I always have a handful stocked in my pantry for whenever a pizza night craving strikes!
How to Grill Pizza:
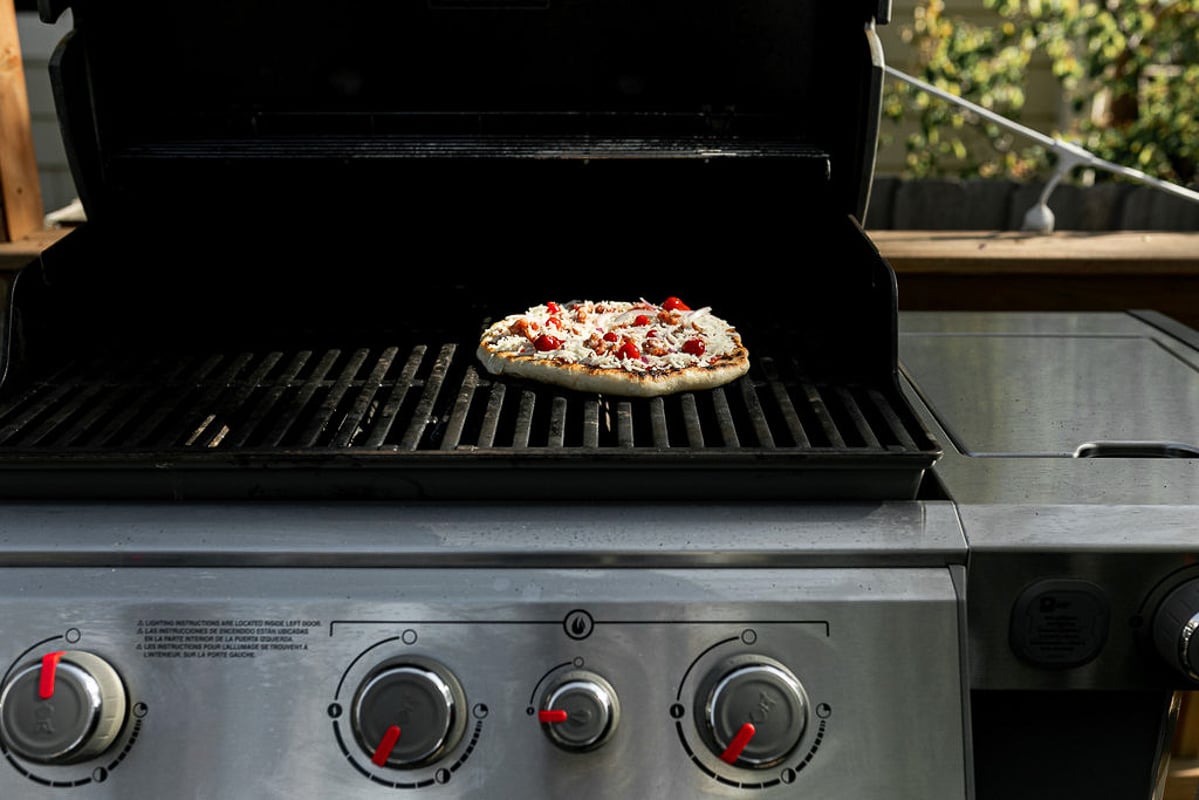
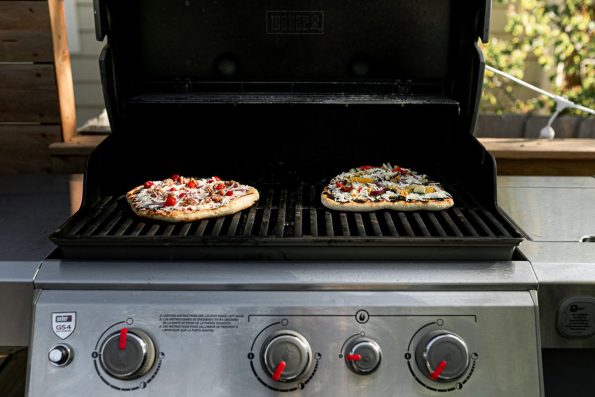
The secret to cooking pizza on a grill is 2-Zone Grilling. By creating 2 zones of heat on your grill (one zone of direct, high heat & a second zone of indirect heat), you can first grill the pizza with direct, high heat, then finishing it off with steady indirect heat. The resulting grilled pizza is perfect every time – ooey-melty cheese, smoky flavor, & a crisp, golden brown crust that’s not burnt on the bottom.
If you’ve never tried 2-zone grilling before, don’t panic. It’s the simplest thing! I’m sharing all of the details below, & you can also check out this post, which will walk you through zone grilling step by step!
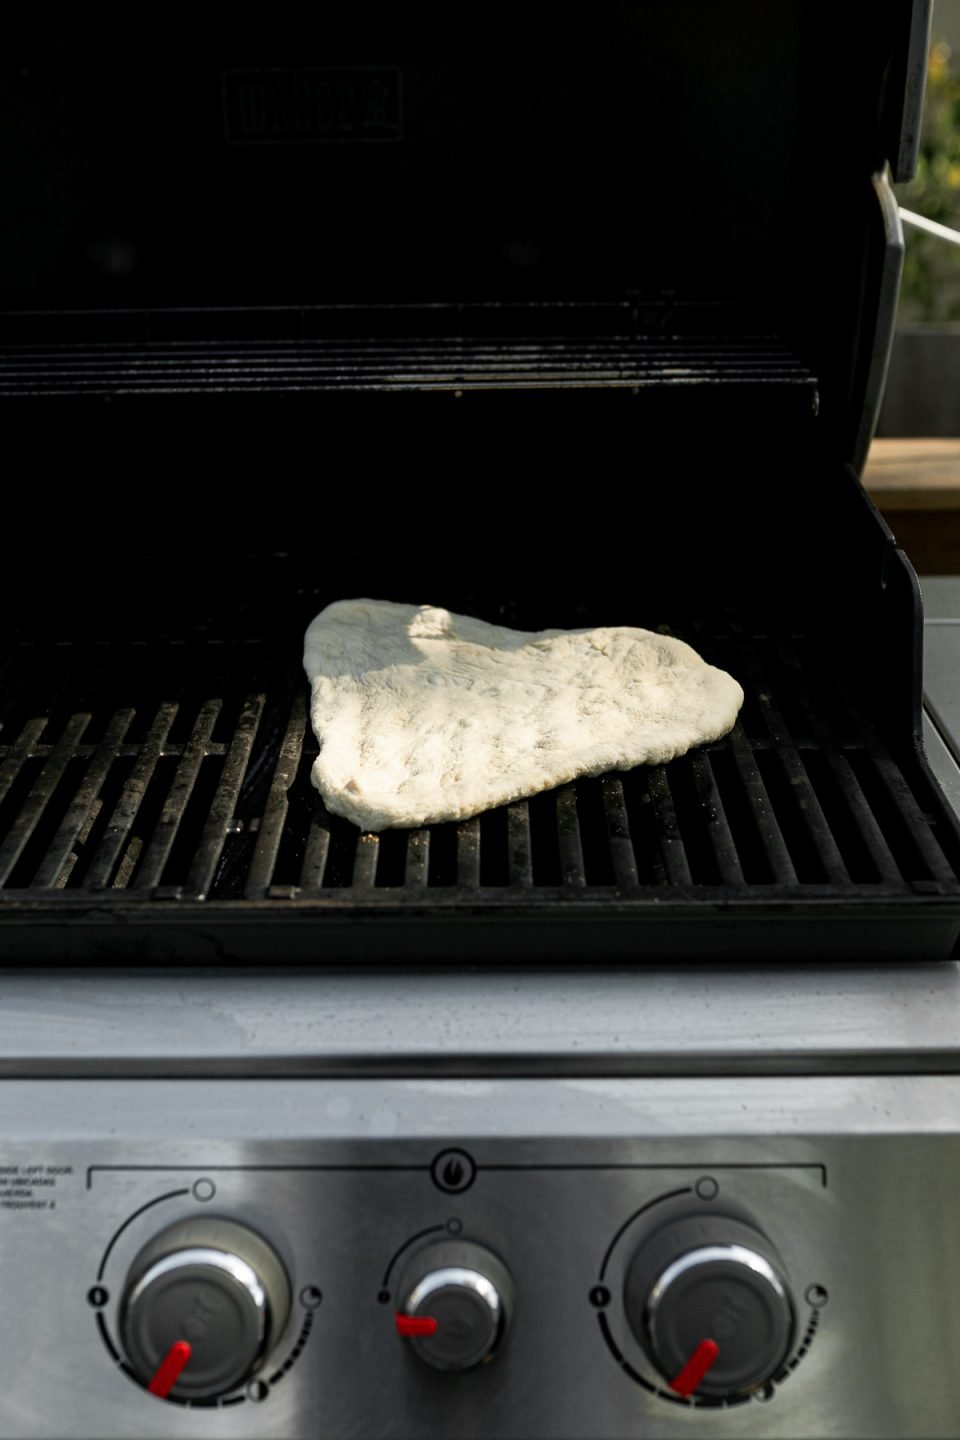
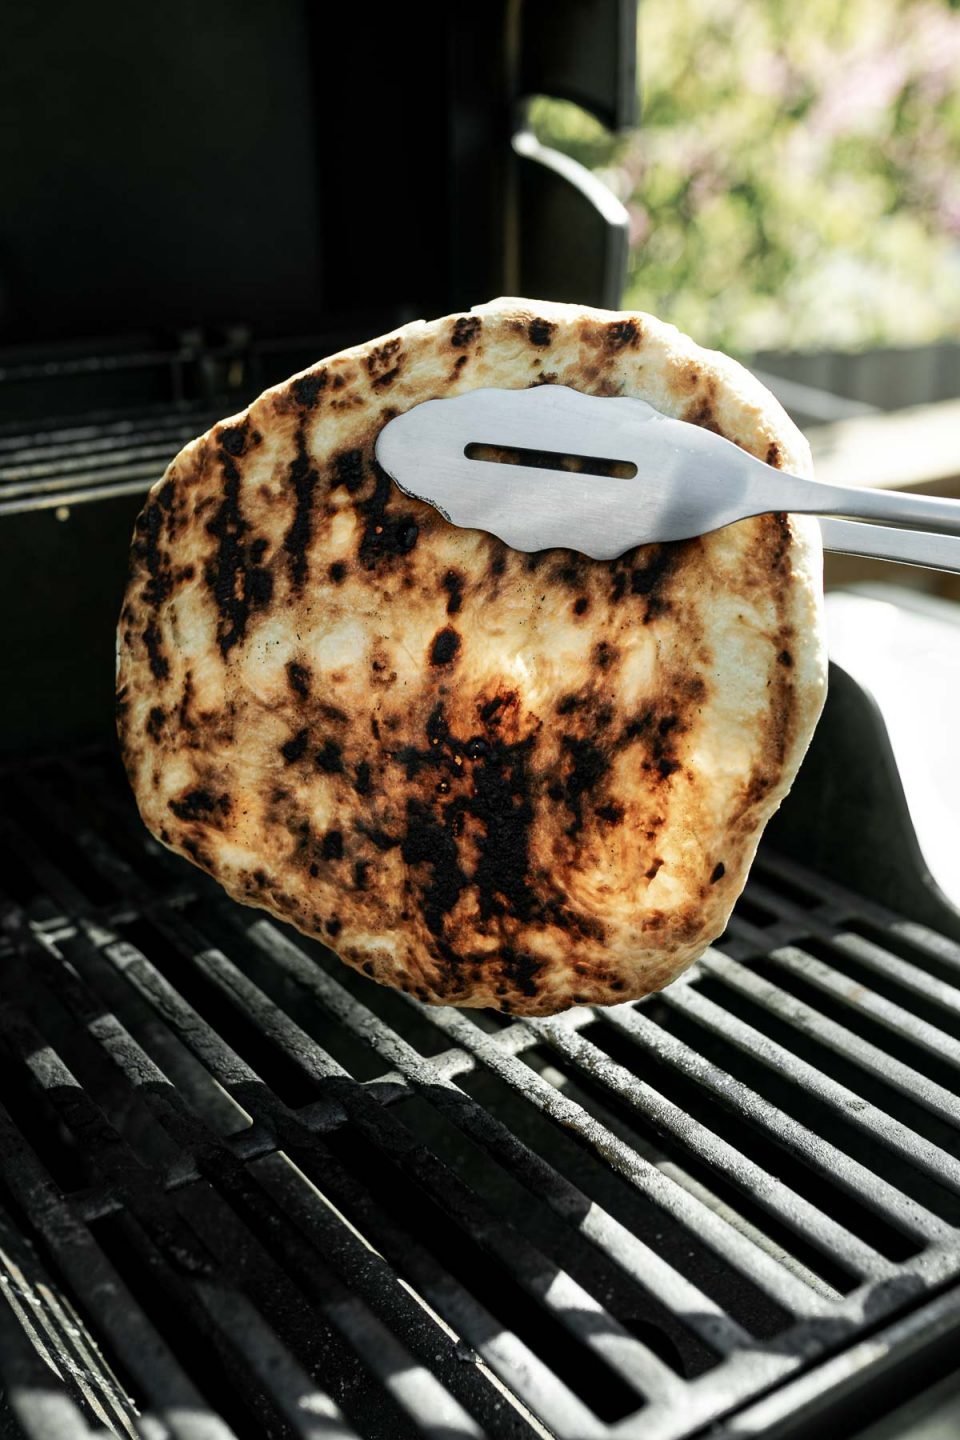
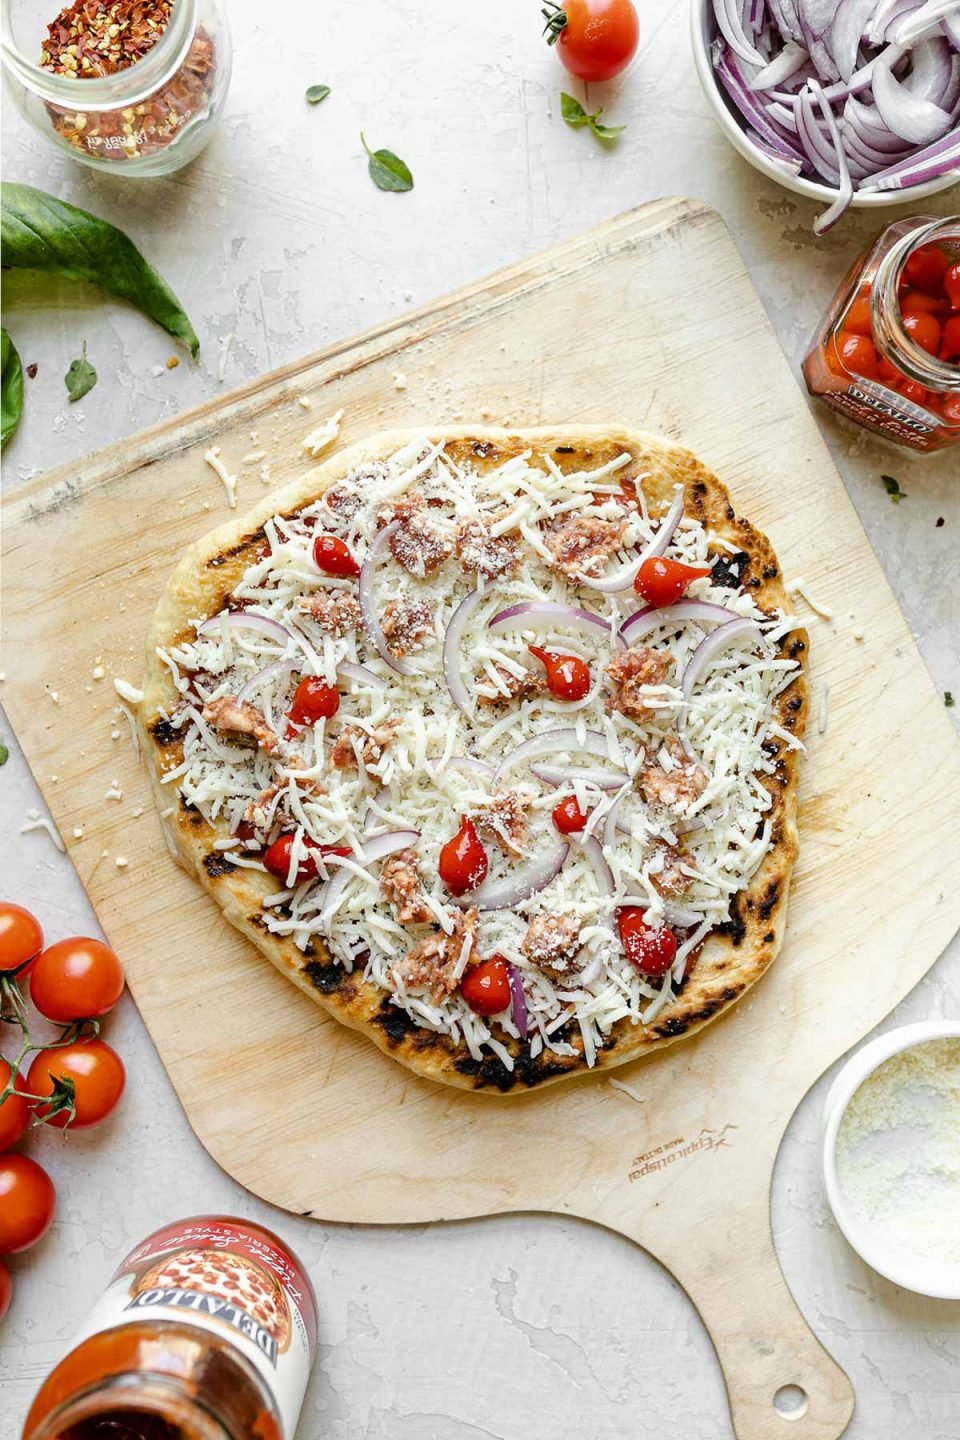
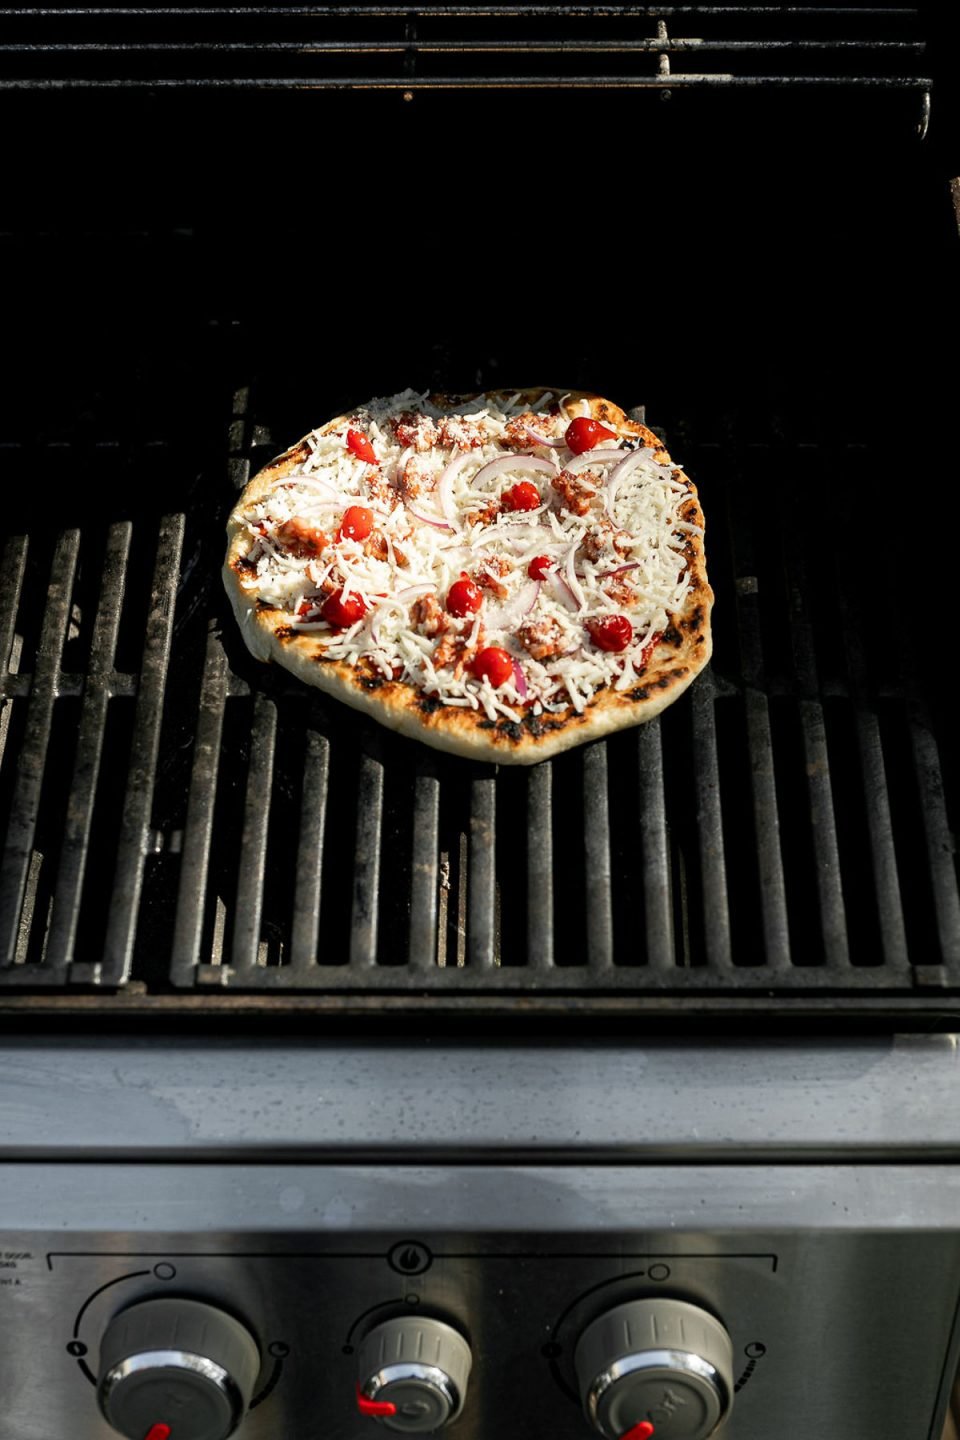
How to cook pizza on the grill:
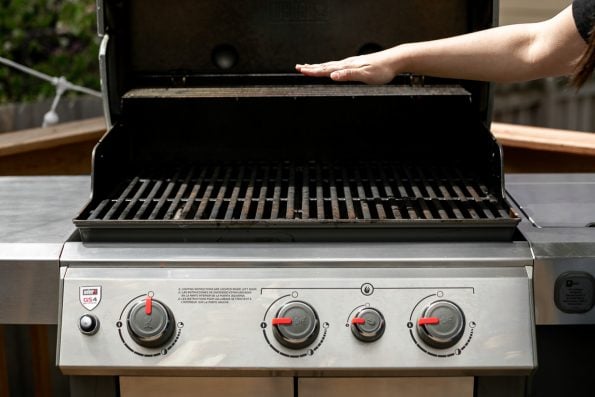
- Preheat your grill, creating 2 heat zones, one zone of direct, high heat (where the pizza crust will par-cook first) & one zone of indirect heat (where the pizza will gently finish cooking, avoiding a burnt crust).
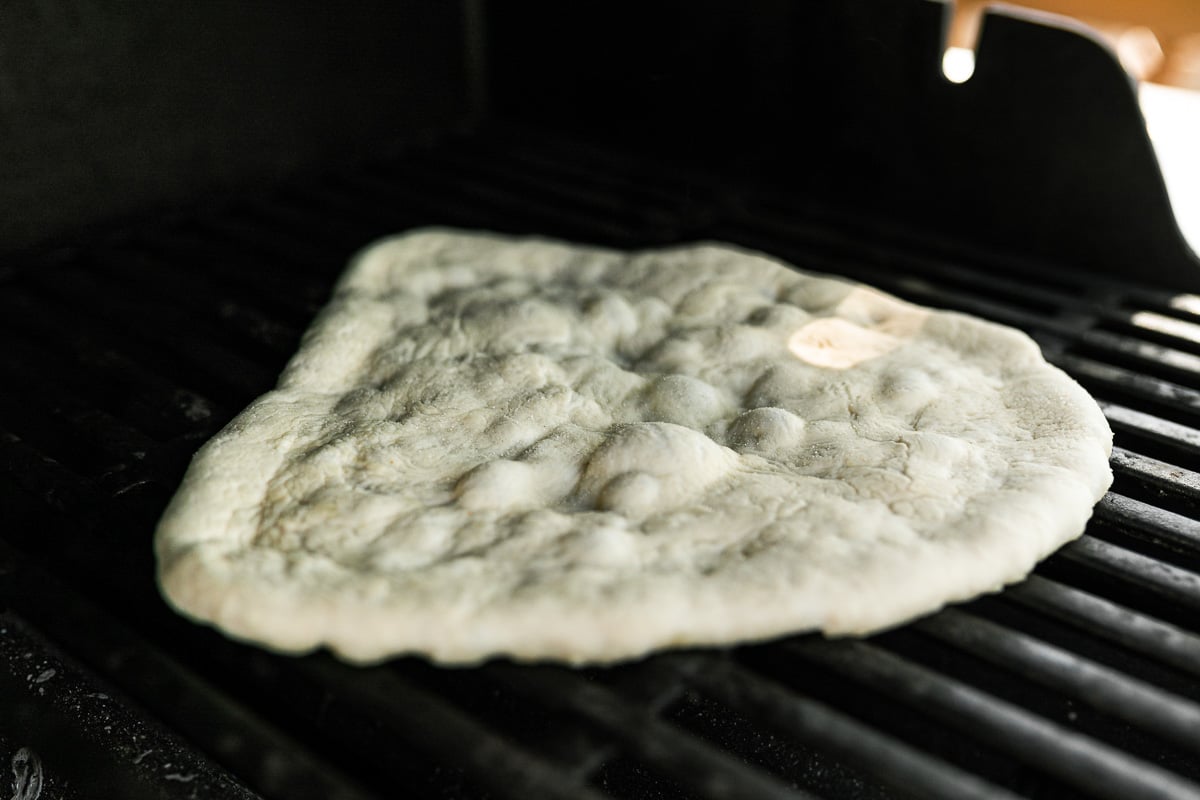
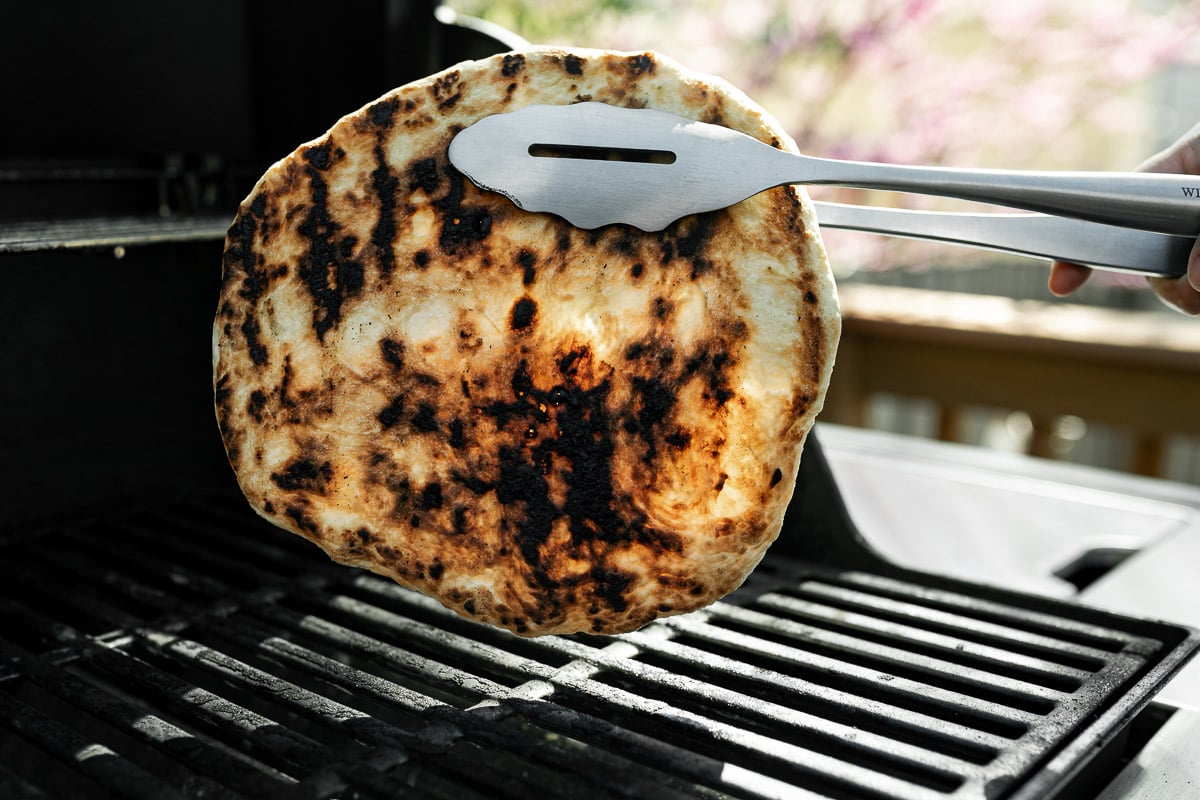
- Par-grill the crust – Lightly brush an 8-10 inch pizza dough round with olive oil. Place the crust, oiled side down, on the direct heat side of the grill. Close the lid & grill 2-3 minutes. Why ⇢ Because a grill has a less even distribution of heat than a conventional oven & because it doesn’t get quite as hot as a wood-fired oven, it’s important to work in steps to create a beautifully grilled crust. Par-grilling the pizza crust, before adding pizza toppings, allows the crust to get perfectly golden brown with beautiful grill marks. It’s the secret behind this best-ever grilled pizza recipe!
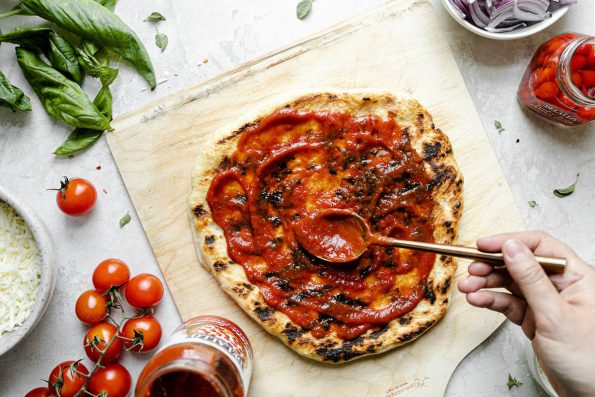
- Assemble your pizza – Remove the par-grilled crust from the grill & transfer to your work station to finish pizza assembly. Lightly oil the ungrilled side, then flip the crust & add toppings to the grilled side of the crust. Pizza assembly tips! ⇢ See below for tons of assembly tips & pizza toppings ideas!
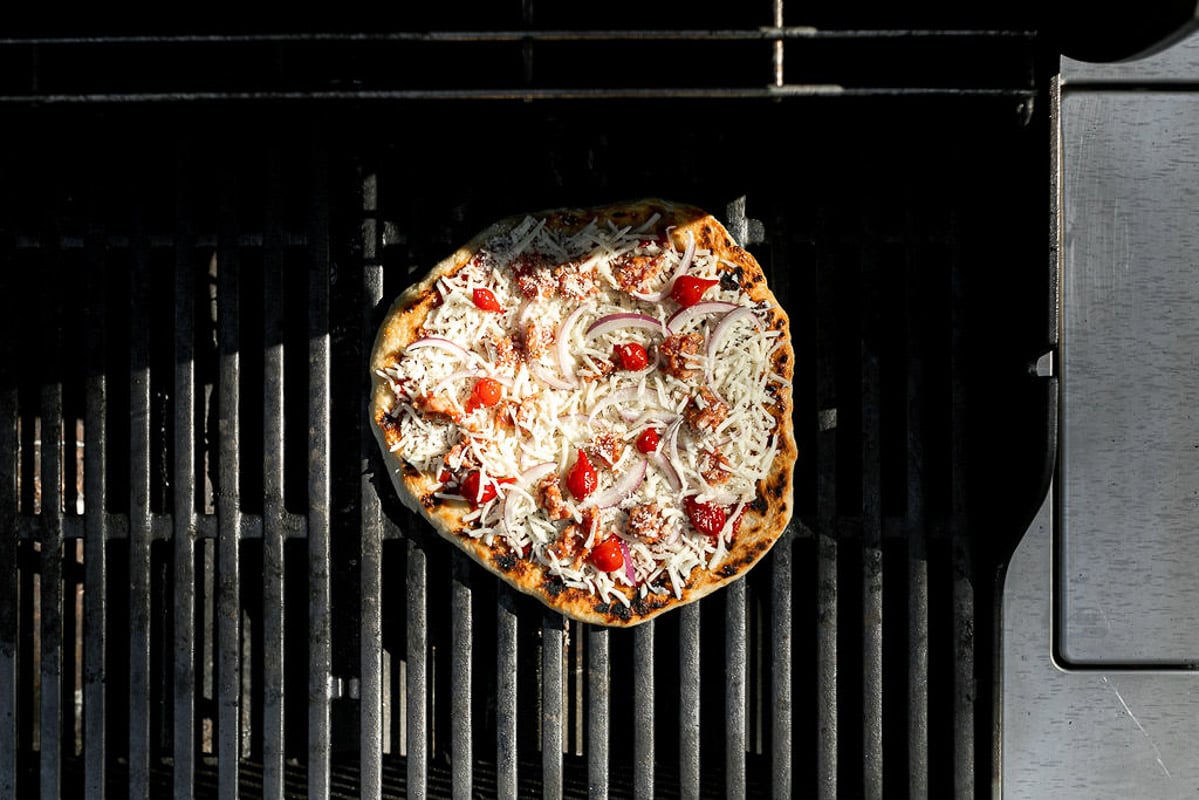
- Finish grilling! Place the pizza back on the the direct heat side of the grill, grilling for 2-3 minutes until the crust is golden brown. Then, push the pizza to the indirect heat side of the grill to finish cooking. Why ⇢ A grill’s direct heat zone is too hot to cook pizza entirely – the outside of the dough burns to a crisp while the center is still raw & doughy! Instead, with the 2-zone method used in this grilled pizza recipe, we can use a direct heat zone to give the crust gorgeous color & a gentler indirect heat zone to allow the dough to finish cooking without burning the pizza.
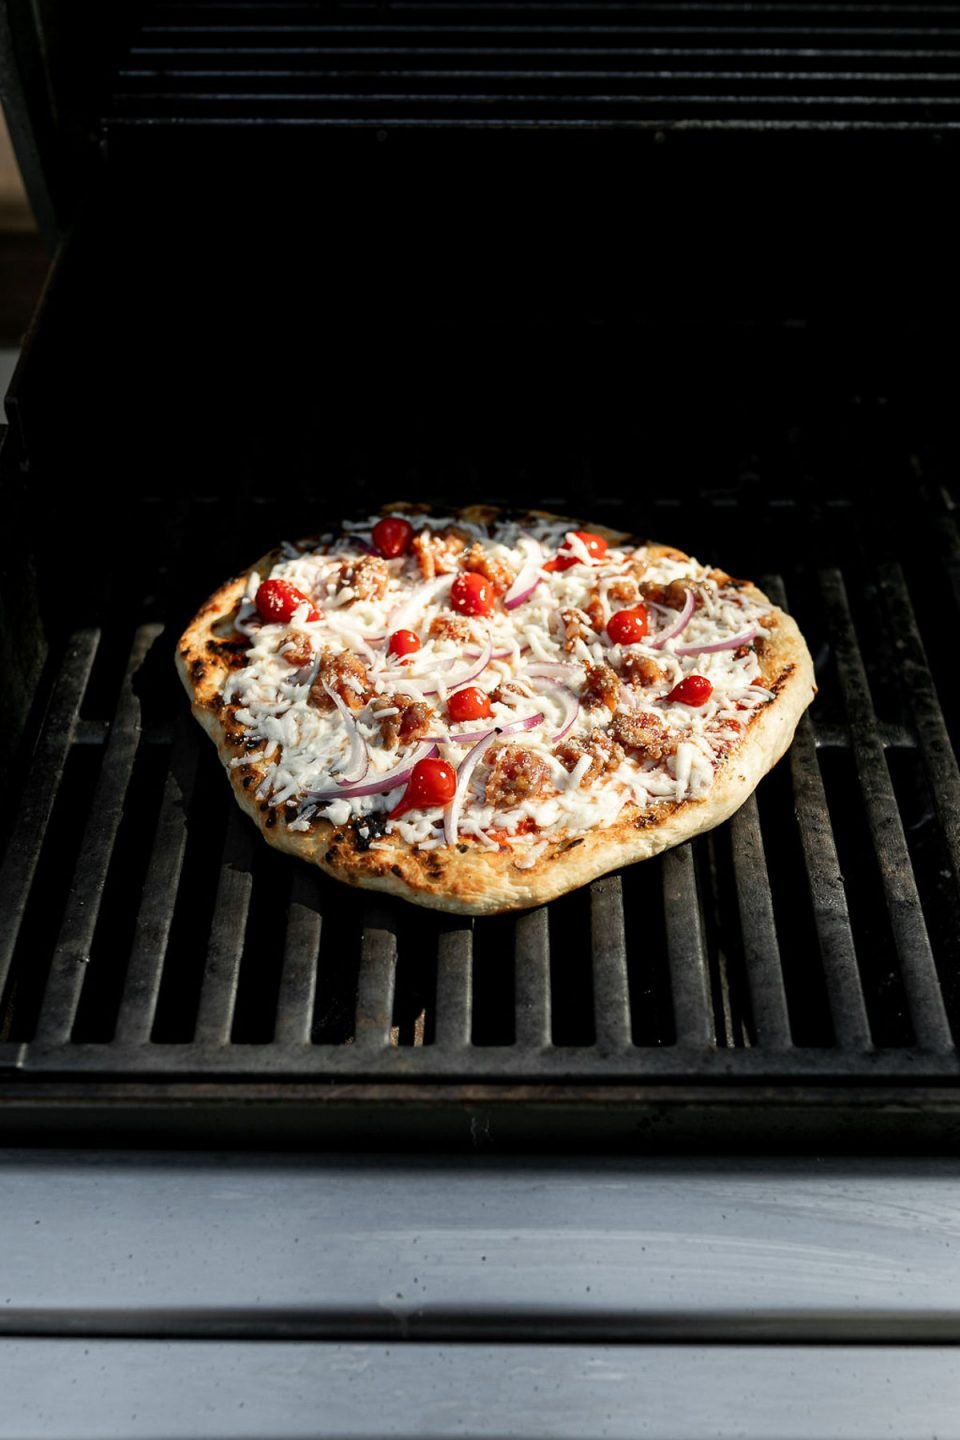
Other Helpful Tips & Tricks for Homemade Pizza on the Grill:
- Batch grilling pizzas: If grilling multiple pizzas per session, wait 2 minutes or so between grilling crusts over direct heat to allow the grill grates to heat back up between pizzas.
- Grilled pizza assembly: It’s helpful to assemble the pizza on a flour-dusted pizza peel (or cutting board, or a similar flat, portable surface) to transfer to the grill with ease.
- Top with caution! Avoid going overboard with grilled pizza toppings. Toppings weigh down on the crust, resulting in soggy crust or unevenly cooked pizzas. PWWB’s Grilled Pizza Golden Ratio ⇢ For an 8-10-inch grilled pizza, aim for 1/4 cup sauce, 1/3 cup cheese, & a limit of 2-3 toppings per pizza.
- And speaking of cheese…It’s incredibly important to use freshly grated cheese for this grilled pizza recipe! Store-bought shredded cheese is typically coated in anti-caking agents, which prevents the cheese from melting nicely on grilled pizzas. Freshly grated is really best in this case. I like to use part-skim mozzarella or provolone on pizza.
*More Grilling Tips and Tricks
Grilling doesn’t have to be complicated or intimidating, we’ll show you how!
We’ve created a completely FREE 5 Day Grilling Series dedicated to help you be your most confident self behind the grill this summer. We’ll guide you through Grilling 101 Tips and Tricks (and as a bonus, we’ll send you our BONUS 15 Grilling Marinades download right away!). Sign up now!
Let’s make this your best grilling season yet! 🙌🏼 🔥
The BEST Grilled Pizza Topping Ideas:
The very best part about this grilled pizza recipe is the fact that it’s incredibly versatile! You can make about a billion different varieties by simply changing up your grilled pizza sauce, cheese, & toppings.
Remember, less is more! While it’s so tempting to load a pizza up with toppings, you really want to avoid going overboard for grilled pizza. Excess sauce, cheese, & pizza toppings weigh down on the crust, which leads to all sorts of problems like soggy crust or unevenly cooked pizzas with burnt crust & uncooked toppings. No good!
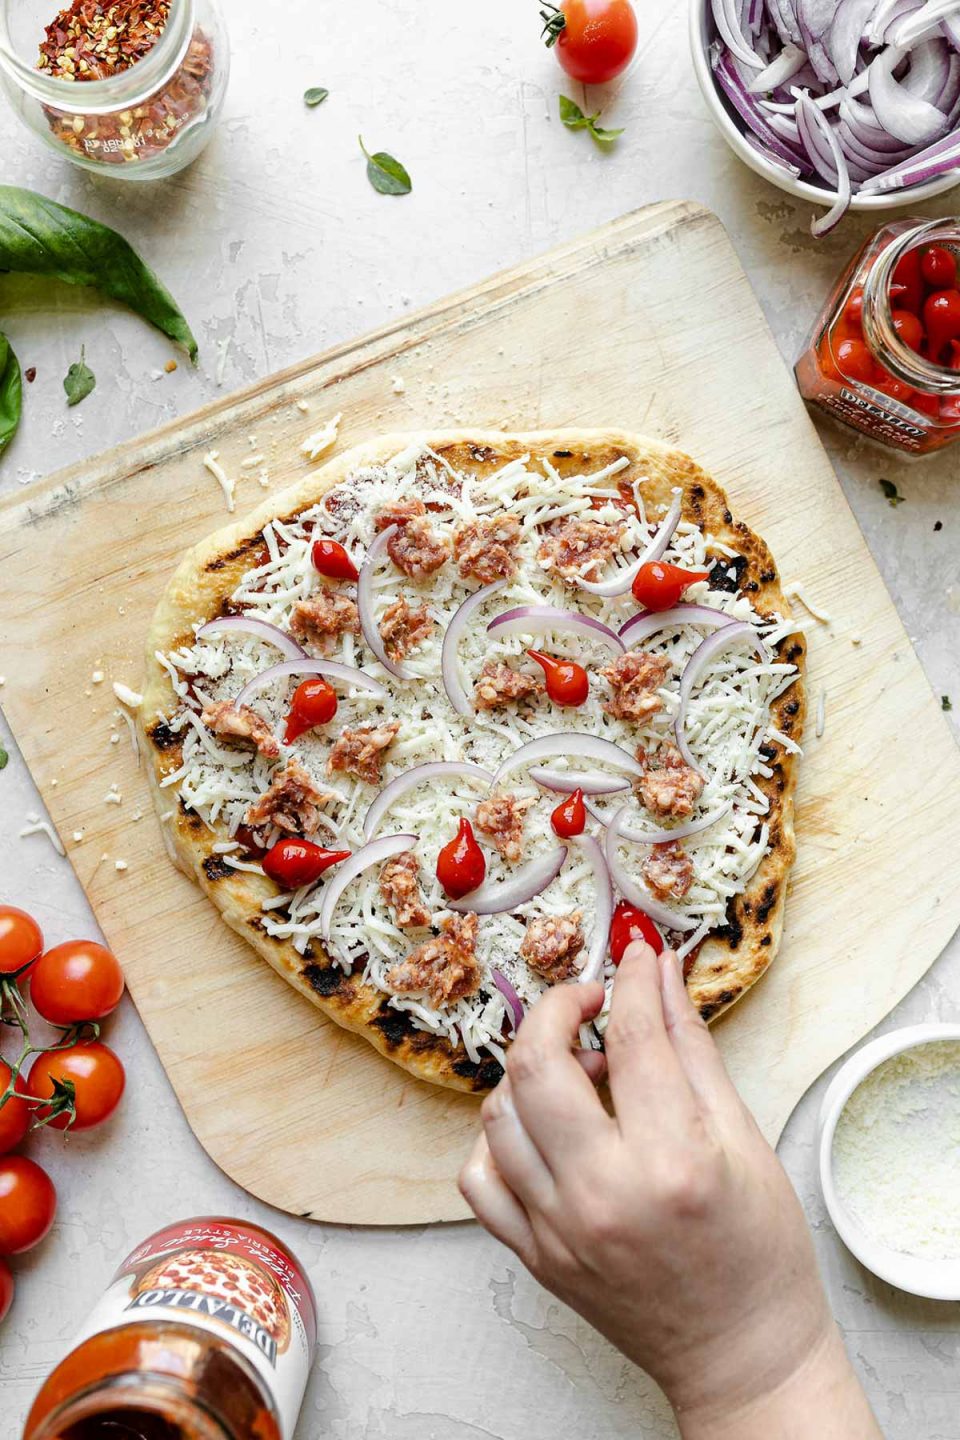
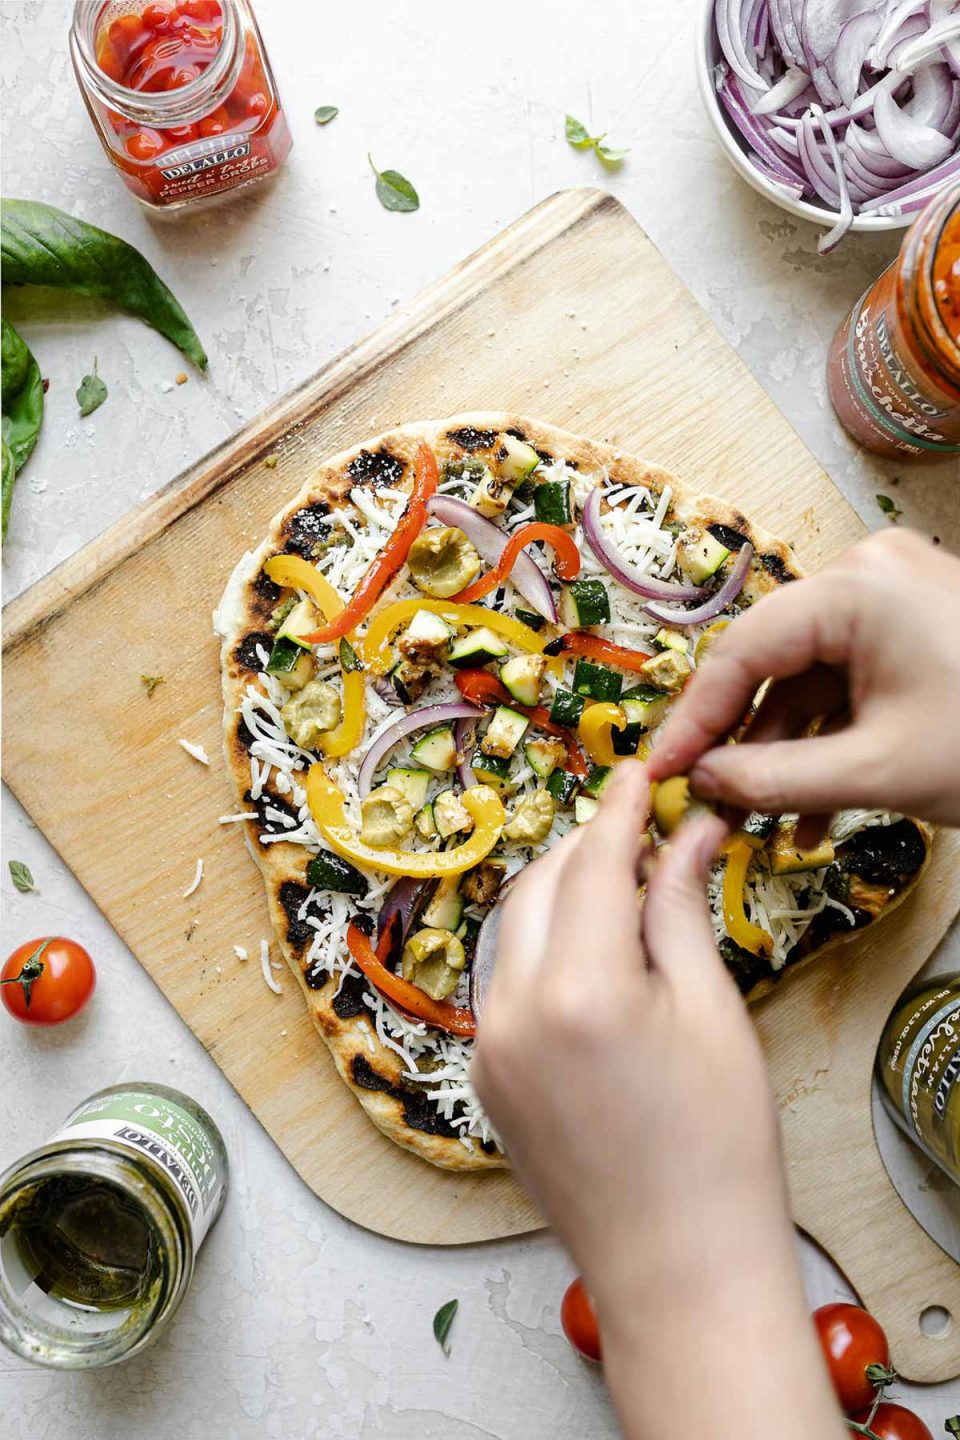
PWWB’s Grilled Pizza Golden Ratio
For an 8-10-inch grilled pizza, aim for 1/4 cup sauce, 1/3 cup cheese, & a limit of 2-3 toppings per pizza. This is the ratio I use at the PWWB House, & it results in perfectly grilled pizza every time!
Tons of grilled pizza ideas to get you started!
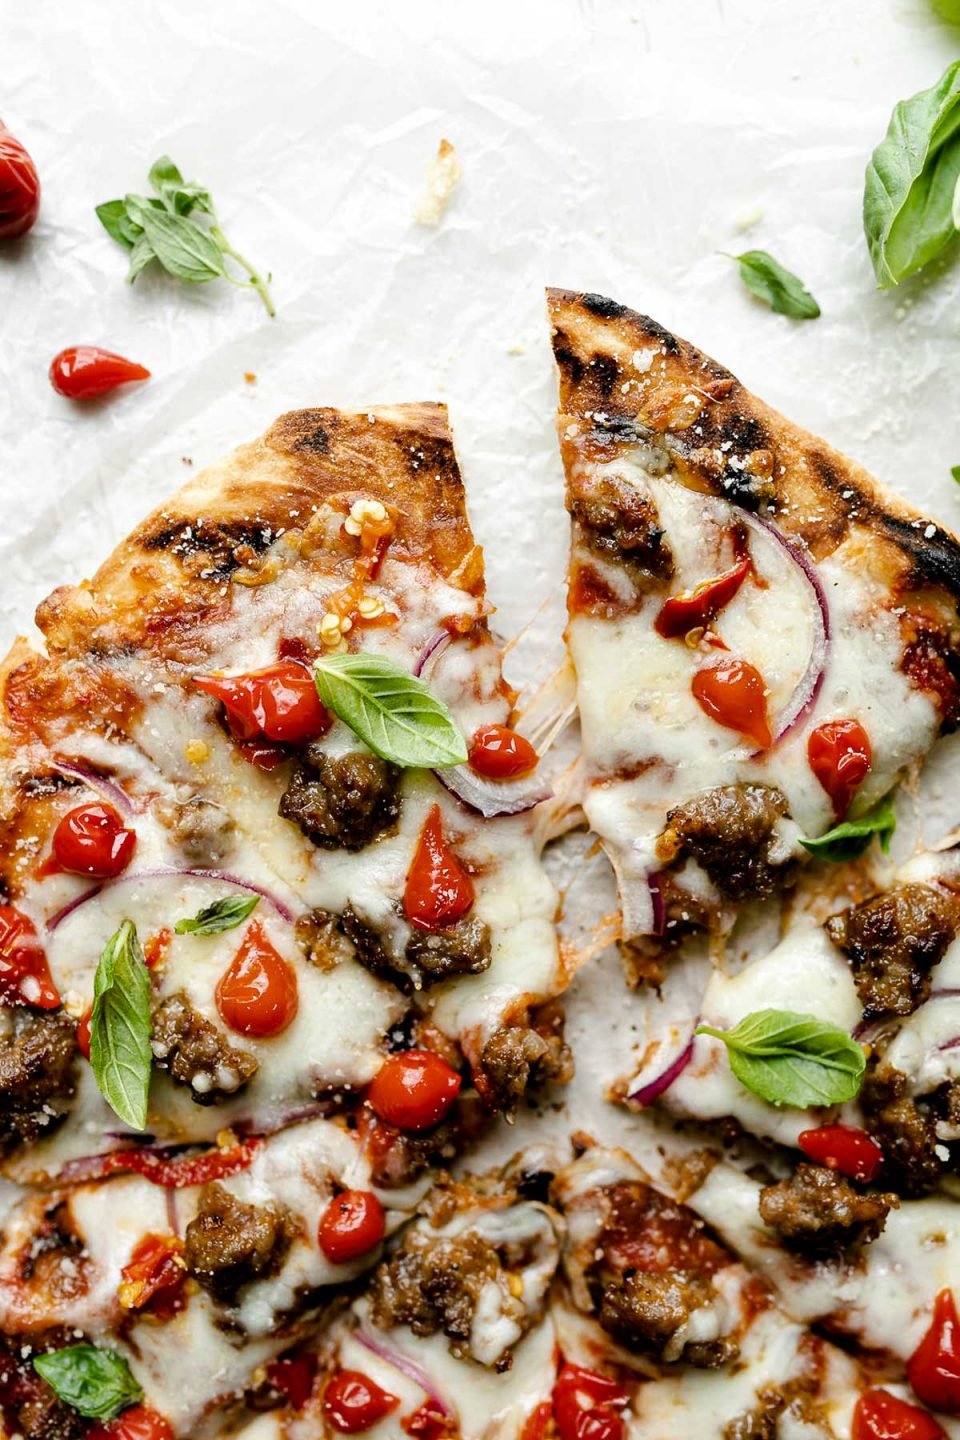
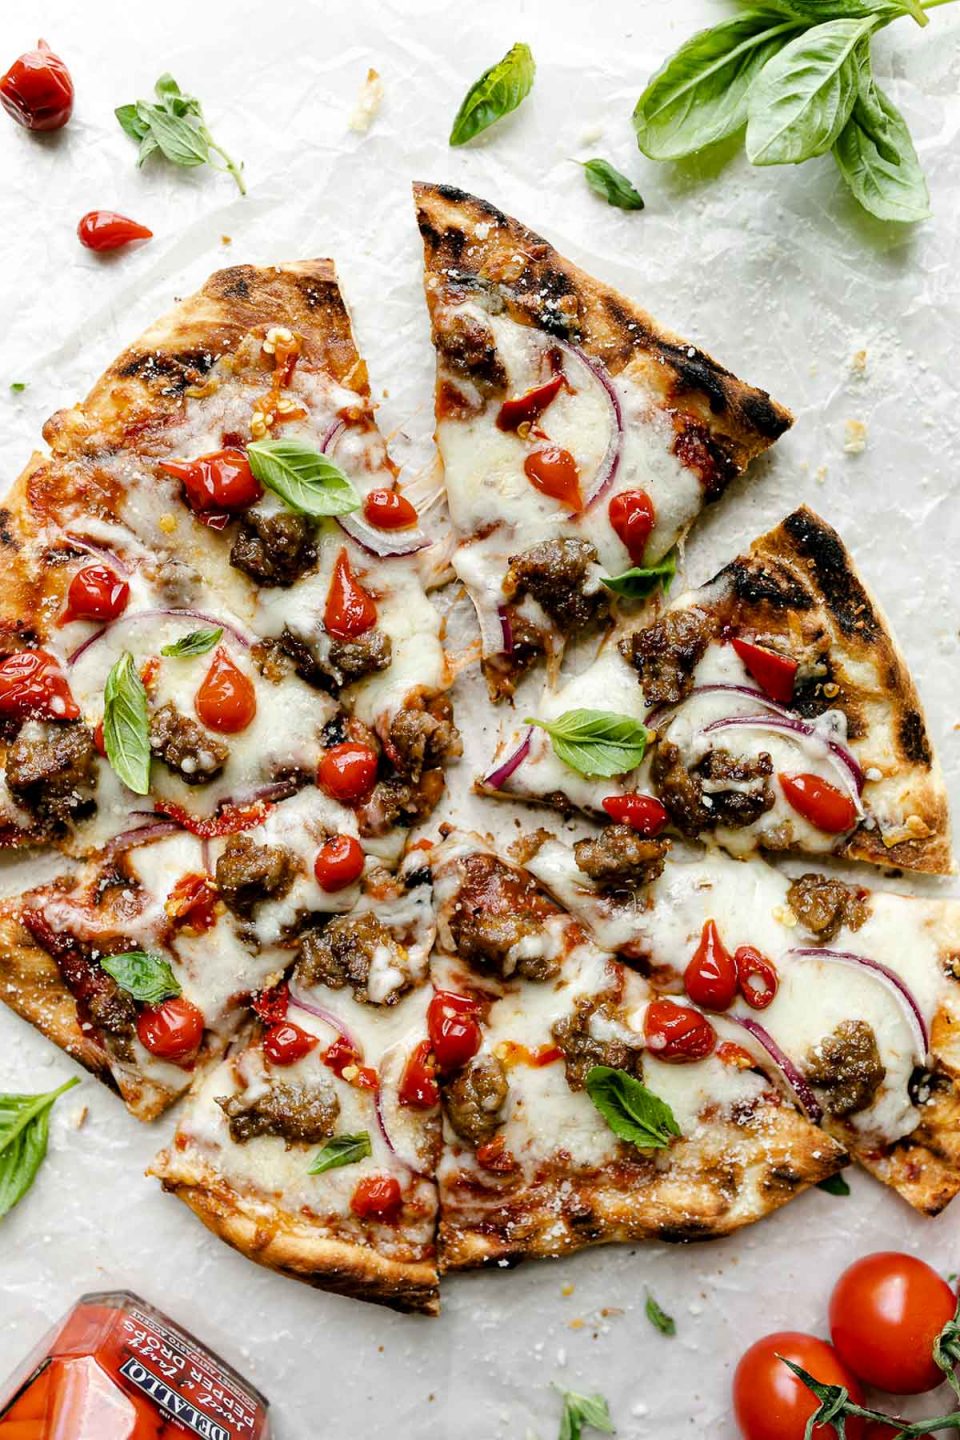
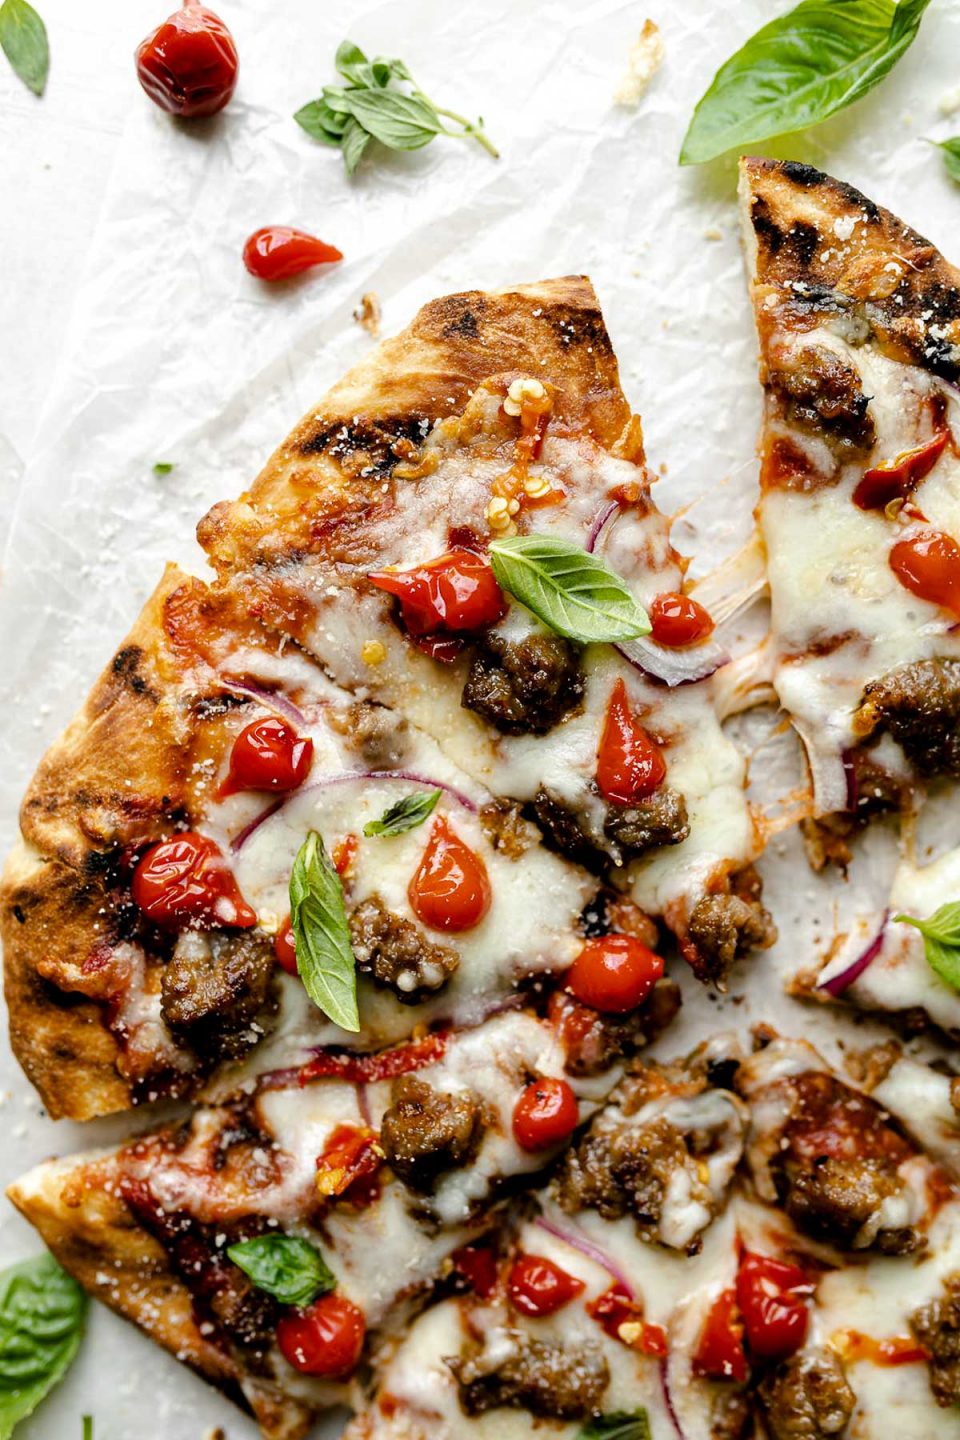
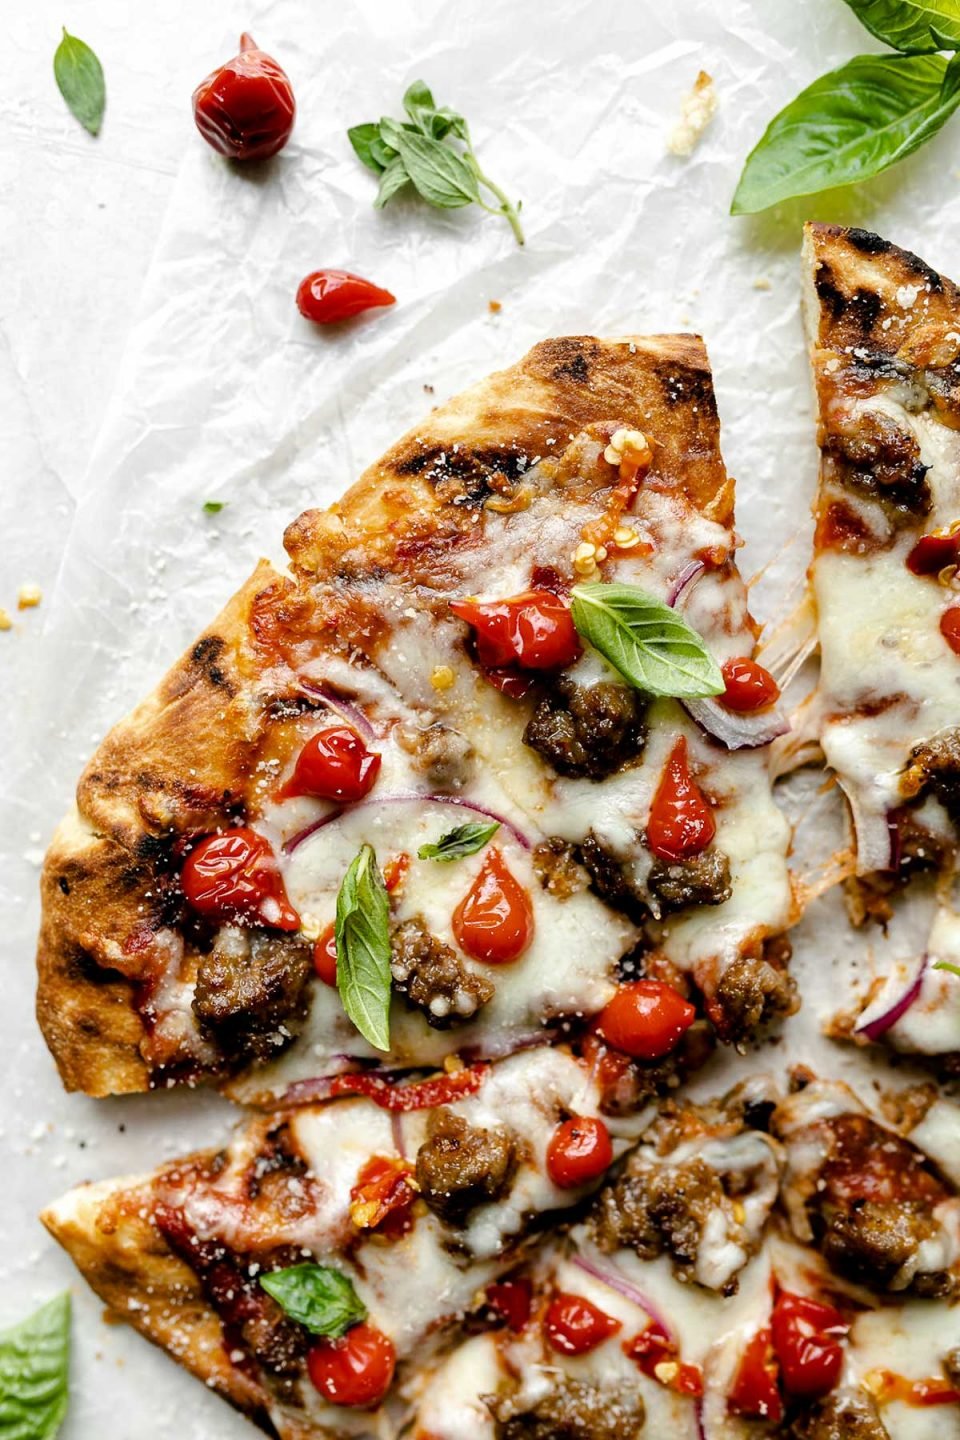
- Sweet Heat Sausage Pizza (pictured, my personal favorite!) – pizza sauce + pizza cheese + par-cooked Italian sausage + thinly sliced red onion + Sweet & Tangy Pepper Drops. Add Calabrian peppers for extra heat!
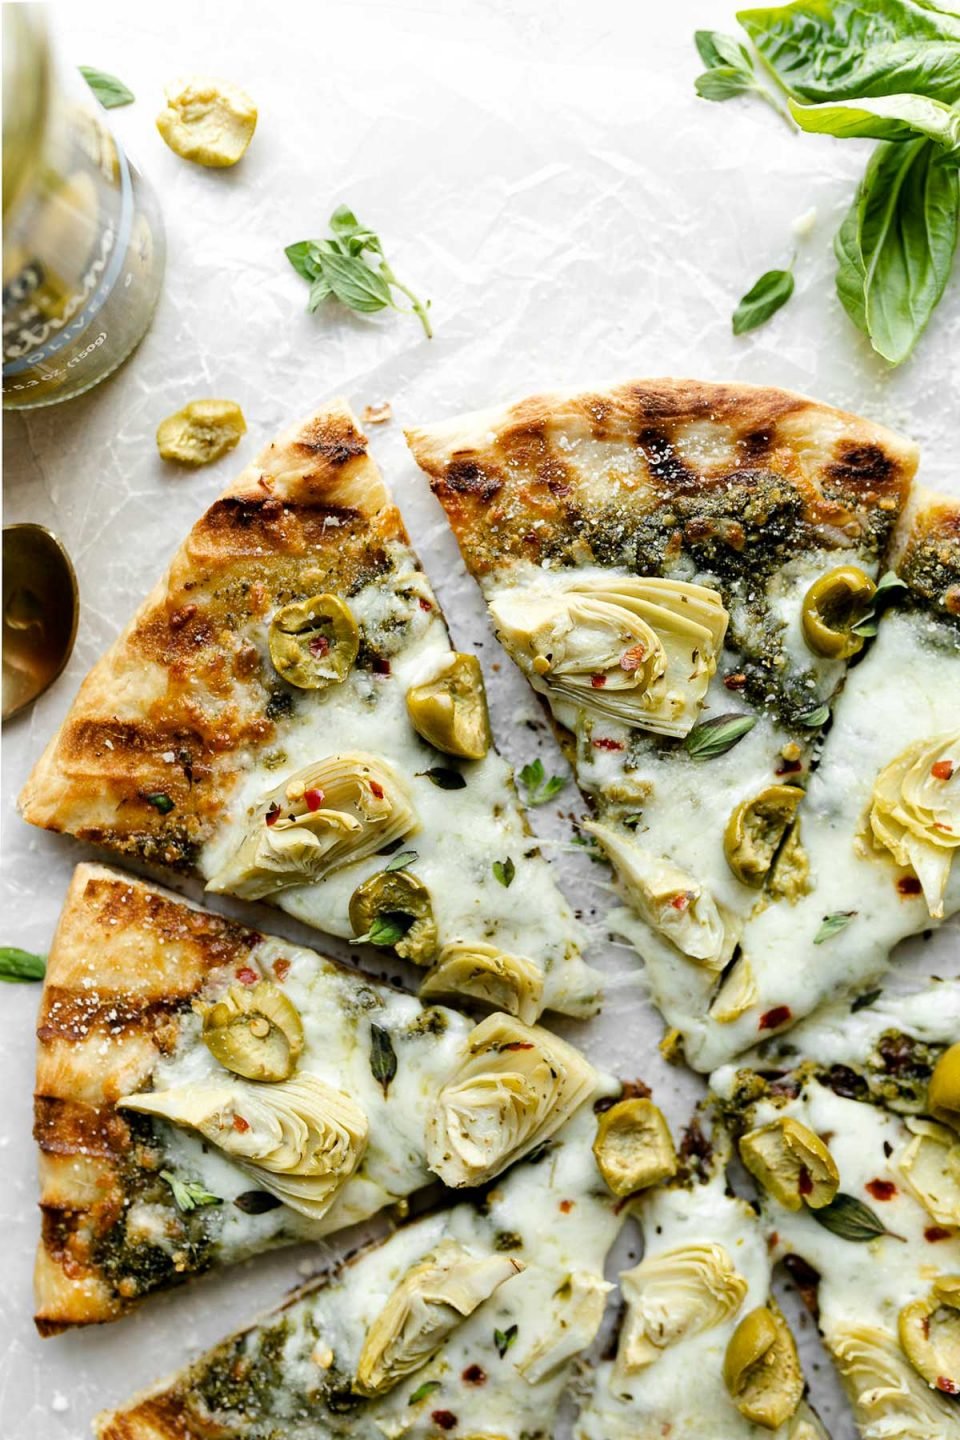
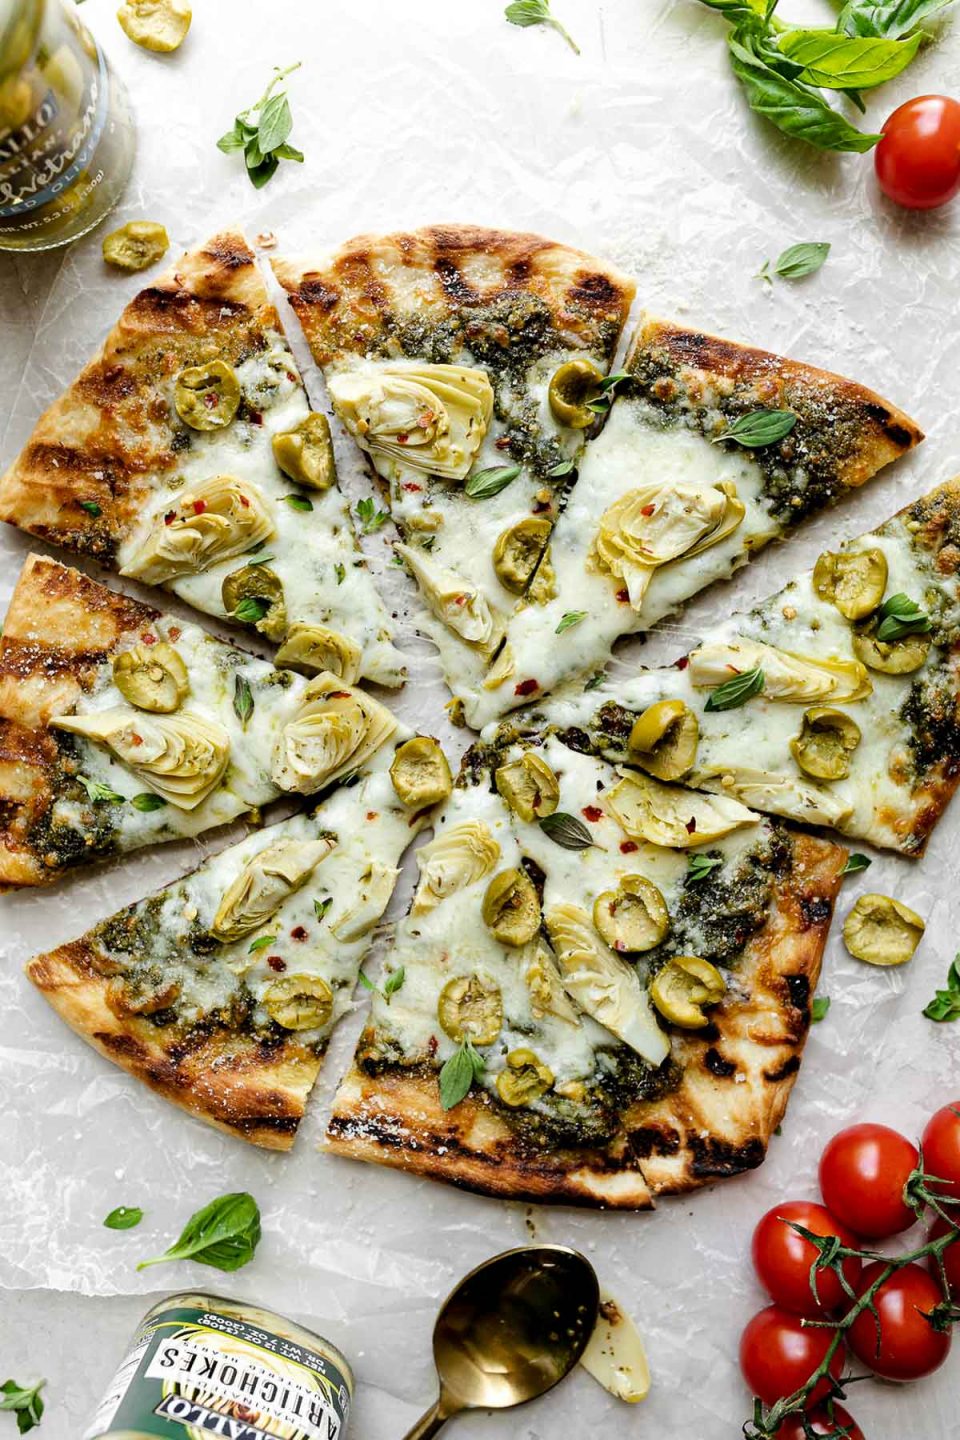
- Lean Green Pizza (pictured, another fave!) – pesto sauce + pizza cheese + castelvetrano olives + marinated artichokes. Fresh basil or oregano for garnish!
- Summer Veggie Pizza (also pictured!) – pesto sauce + pizza cheese + leftover grilled veggies (e.g. grilled onion, zucchini, bell peppers, etc.). Freshly squeezed lemon juice for garnish!
- Pepperoni 2.0 – pizza sauce + pizza cheese + pepperoni + thinly sliced jalapeño. Drizzle of hot honey for garnish.
- Grilled White Pizza – olive oil crust rubbed with a clove of garlic + pizza cheese + dolloped ricotta or goat cheese. Garnish with fresh herbs.
- BBQ Grilled Pizza – BBQ sauce + pizza cheese + leftover grilled BBQ chicken or pulled pork + red onion & sweet corn. Extra BBQ sauce & chopped cilantro for garnish!
- Grilled Hawaiian – olive oil crust rubbed with a clove of garlic + pizza cheese + cooked pancetta or bacon + grilled pineapple + thinly sliced jalapeño.
- Simple Margherita – pizza sauce + pizza cheese + thinly sliced summer tomato. Garnish with fresh basil.
- Prosciutto & Arugula – olive oil crust rubbed with a clove of garlic + pizza cheese. Serve with prosciutto & simple arugula salad.
- Salty Sweet Pizza – fig spread + pizza cheese + caramelized onions. Serve with fresh burrata & arugula.
Other Grilled Pizza FAQs:
- Do you need a pizza stone to grill pizza? Nope! Using this grilled pizza recipe, you’ll make the best grilled pizza directly on the grill grates – no special equipment required!
- How do you grill pizza without burning the bottom? The secret to perfectly cooking pizza on a grill is the 2-zone method. By creating 2 zones of heat on your grill, you can first grill the pizza with direct, high heat, then finish it off with steady indirect heat. The resulting grilled pizza is perfect every time – ooey-melty cheese, smoky flavor, & a crisp, golden brown crust that’s not burnt on the bottom.
- What temperature do you cook pizza on a grill? By grilling with the 2-zone method, you actually create 2 temperature zones on your grill. The direct heat zone, where you par-grill the pizza crust, is a high heat zone set to 550-600 degrees F. The indirect heat zone, where you finish grilling your pizza, is heated through the residual heat of the direct heat zone.
I can’t wait for you to make this grilled pizza recipe all summer long! If you do give it a try, be sure to let me know! Leave a comment with a star rating below. You can also snap a photo & tag @playswellwithbutter on Instagram. I LOVE hearing about & seeing your PWWB creations! Happy grilling! ♡
More Recipes Like This:
Go-To Grilling Season Recipes
- Best-Ever Grilled Chicken Burgers
- 30-Minute Juicy & Tender Grilled Chicken Wings
- Best-Ever Grilled Turkey Burgers
- BBQ Chicken Bowls with Grilled Veggies
- Caramelized Onion Burgers
- Bacon Cheddar Cheese Stuffed Burgers Recipe (Best Grilled Burgers!)
- Wisconsin Beer Brats Recipe (Grilled Beer Boiled Brats)
- Grilled Sausage – How to Grill Sausage Perfectly.


Best-Ever Grilled Pizza Recipe (How to Grill Pizza + Tons of Toppings Ideas!)
- Prep Time: 30 minutes
- Dough Rising: 1 hour
- Cook Time: 15 minutes
- Total Time: 45 minutes
- Yield: 3 10-inch pizzas, easily multiplied 1x
- Category: Pizza Recipes, Main Dishes
- Method: Grilling & Smoking
- Cuisine: Italian, American
Description
How to grill pizza without any special equipment or tools using the 2-Zone Method – the BEST grilled pizza recipe! Using both direct & indirect heat to creates homemade pizza on the grill that has gooey-melty cheese, smoky flavor, & a crisp, golden brown crust that’s not burnt on the bottom.
Refer to the blog post, above, for even more pizza night tips & inspiration for all kinds of grilled pizza toppings!
Ingredients
- 1 17.6-ounce DeLallo Pizza Dough Kit
- kosher salt
- 1 1/4 cups warm water
- 1/4 cup DeLallo Extra Virgin Olive Oil, divided
- toppings of choice: DeLallo Pizzeria-Style Pizza Sauce, freshly shredded cheese, sausage, pepperoni, veggies, etc.
- for serving, as desired: grated parmesan, crushed red pepper flakes, etc.
Instructions
- Prepare the pizza dough kit: At least 1 hour before you’d like to start grilling pizza, prepare the DeLallo Pizza Dough Kit according to package directions: combine the kit contents in a large bowl, seasoning with a pinch of salt. Add in the warm water, stirring until the dough begins to come together. The mixture will be very shaggy & wet. Turn it out on to a lightly floured surface. Knead until the dough comes together in a soft & smooth ball, 2-3 minutes. Transfer the dough to a lightly greased mixing bowl. Cover the bowl with a kitchen towel & set it in a warm place in your kitchen to rise until the dough has doubled in size, about 1 hour.
- Preheat the grill: Prepare your grill for indirect cooking, creating a zone of direct high heat & a second zone of indirect heat. If using a gas grill, begin preheating at least 15 minutes before grilling. If using charcoal, light the charcoal at least 30 minutes prior to grilling. (To learn more about zone grilling, be sure to check out this post.)
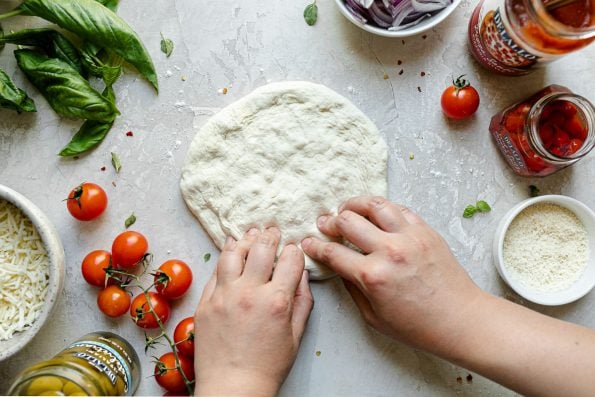
- Prepare the crust: Using a knife or a bench scraper, divide the dough into 3 equal pieces (each approx. 8-10 ounces). Form each piece of dough into a ball, tucking the edges back into the center of itself until a smooth ball forms. Set aside to proof for 5-10 minutes. Roll the dough balls into 10-inch rounds. Lightly brush one side of the prepared crusts with olive oil. See Recipe Notes, below, for tips for rolling out pizza dough & pizza dough storage.
- Par-grill the crust: Working 1 crust at a time, set the crust, oiled side down, on the direct heat side of the grill. Close the lid & grill 2-3 minutes. The side of the dough facing up should be slightly puffy with air bubbles, & the side of the dough on the grill grates should be golden brown with nice grill marks. Remove the dough from the grill. If desired, repeat with the remaining prepared crusts. It’s helpful to wait 2ish minutes between crusts to give the grill grates a chance to heat back up.
- Assemble the pizza: Transfer the par-grilled crust to a work station – it’s helpful to assemble the pizza on a pizza peel (or cutting board, or something similar) to transfer to the grill with ease. Lightly brush the ungrilled side of the par-grilled crust with olive oil, then flip the crust such that the grilled side is facing up. Assemble your pizza, placing sauce, cheese, & toppings of choice on the grilled side of the par-grilled crust. I typically do 1/4 cup sauce, 1/2 cup cheese, & 2-3 toppings per pizza. See blog post, above, for tons of toppings ideas! Remember, when it comes to pizza, it’s important not to go overboard with toppings because otherwise the pizza won’t cook properly.
- Grill the pizza: Working 1 pizza at a time, transfer the pizza, toppings facing up/oiled side facing down, to the direct heat side of the grill. Close the lid & grill 2-3 minutes. Once the bottom of the crust is golden brown with nice grill marks, carefully transfer the pizza to the indirect heat side of the grill to finish cooking. Close the lid & grill 5 minutes, rotating the pizza halfway through, until the cheese is melted & the toppings are warm. Carefully remove from the grill.
- Serve: Slice the grilled pizza & serve immediately. Enjoy!
Notes
- PWWB’s Grilled Pizza Golden Ratio: For an 8-10-inch grilled pizza, aim for 1/4 cup sauce, 1/3 cup freshly shredded cheese, & a limit of 2-3 toppings per pizza.
- Pizza dough tips & tricks for success:
- Rolling out pizza dough: Lightly dusting your work surface with flour to help prevent any sticking. Use your palm to press down the center of your dough ball, creating a disc. Using your fingers, work the dough at the center of the disc out towards the edge, making the disc larger & larger. Once your dough is about halfway there, pick it up. Holding the dough by its edge, rotate the dough as though you’re turning a steering wheel. Gravity will help stretch the dough into a larger round.
- Stubborn dough: If at any point your dough isn’t really working with you & it’s snapping back into the same shape/size despite working at it, the best thing you can do is give it a minute or two to breathe. The stubborn proteins holding the dough together just need a minute to relax – how high-maintenance of them, ha! Let the dough rest (ahem, pour yourself a glass of wine while you’re at it!) & try again in a couple of minutes – should be much easier!
- Holes in the crust: If a hole or two shows up when you’re rolling out your dough, that’s totally fine. Use your fingers to pinch it closed. Problem solved!
- Make-ahead pizza dough: You can prep fresh pizza dough up to 3 days in advance. Divide the dough into individual dough balls according to Step 3 of Recipe Directions, above. Rather than proofing & rolling out the dough, transfer to an airtight container. Store in the refrigerator for up to 3 days. To use, let the dough balls come up to room temperature & proof for about 30 minutes before rolling out the dough.
Recipe and Food Styling by Jess Larson, Plays Well With Butter | Photography by Rachel Cook, Half Acre House.
Follow along with Plays Well With Butter on Instagram, YouTube, Facebook, and Pinterest for more unfussy recipes that pack a big punch of flavor!
Ready to Hit the Grill?
If this all still feels new to you, I encourage you to head over to Grilling 101, a compilation of tips and tricks for all of the grilling basics – everything from how to light your grill to how to clean your grill.
All this talk about grilling have you feelin’ ready to hit the grill? Me too! Be sure to check out this post for my 15 go-to marinades you need this grilling season. At our house, a good marinade is at the heart of grilling season. I’m positive these marinades will be on repeat at your house this summer! For even more grilled goodness, be sure to check out all of our Grilling and Smoking recipes.
And lastly! Be sure to give @playswellwithbutter a follow on Instagram – I’ll be teaching you how to grill up some goodness all summer long, and we have so much fun on Instagram!
Want more grilling tips and recipes?
You’re in the right place! 🙌🏼 Subscribe to have PWWB Grilling Series updates sent straight to your inbox. We’re sharing exclusive grilling tips, tricks, and sneak peeks to our email friends. Plus, you’ll be the first to know about all of PWWB’s new grilling recipes all summer long. Subscribe below!
Thank you so much for reading & supporting Plays Well With Butter & the companies I partner with to keep bringing you great original content. I only feature brands & products I truly love & use on the reg in my own home. All opinions are always my own!






This is SO helpful!!! Thank you for such an awesome and detailed tutorial!
So glad you found it helfpul & hope you enjoy!! It’s one of our faves! 🙂
In a word – Delicious! I made my own dough, but I used the grilling technique. Not having a 2 zone grill, I let the pizza dough crisp on high, then turned off two burners and left one on high and moved the pizza over the 2 burners that were off. Pizza cooked beautifully! Don’t think we’ll be doing oven pizzas anymore!
So glad you enjoyed & that’s the perfect workaround for not having a 2 zone grill! Thank you so much for sharing your comment!
Thanks so much for this recipe, my family has made this twice so far and it was delicious and surprisingly simple! The crust is better than delivery and the grilling times are really helpful. I’m looking forward to trying more of your recipes!
Thank you, Wendy! We LOVE the crust too – it’s our favorite!! 🙂 Thanks so much for taking the time to leave a comment, it means so much!
What if your gas grill does not have a big enough cooking surface to have 2 zones?
Hey George! Great question – if the surface area of your grill isn’t large enough to create 2-zones of indirect & direct heat simultaneously we’d recommend turning off the burners & closing the lid for the indirect heat steps. This will help bring the temperature down while still allowing the retained heat inside the grill to cook the pizza & melt the cheese to your liking & turning the burners back on for any additional pizzas. It might take a bit more patience but definitely beats having to turn on the oven – let us know if you give it a try!
I have been so nervous to make pizza on the grill. You make it so approachable with all the tips. i have followed them a few times now and our pizza always comes out perfect. WE now love having grilled pizza and keep Dough on have for a fast meal during the week
This recipe worked so well and was really simple. I made these when a friend visited from out of town and she was so amazed at how easy and delicious the grilled pizza was. I will definitely will be making this again!
So good! This was such a fun new way to make pizza and will definitely be in heavy rotation at my house this summer!
thank you for a wonderful grilled pizza, a nice change of taste for me in pizzas!
Thank you for sharing, Sabrina! We are SO glad you were able to give this method a try – what kind of toppings did you use?!