If you’re anything like me, you’ve got a major crush on Greek flavors & dishes. My love for Greek food is a long-term affair, & it’s pretty safe to say that it’s not going anywhere anytime soon.
When I first moved to Milwaukee for college (over 10 years ago, OMG!), my mom & I stumbled into the most amazing authentic Greek cafe for dinner one night, & my life hasn’t been the same since. Hummus. Marinated olives. Stuffed grape leaves. Souvlaki. Gyros. Fluffy, warm pita bread. The list goes on & on, & it’s seriously delish.
I finally tackled one of the most traditional Greek dishes, Spanakopita, & I’m so excited to share my take on it with you!

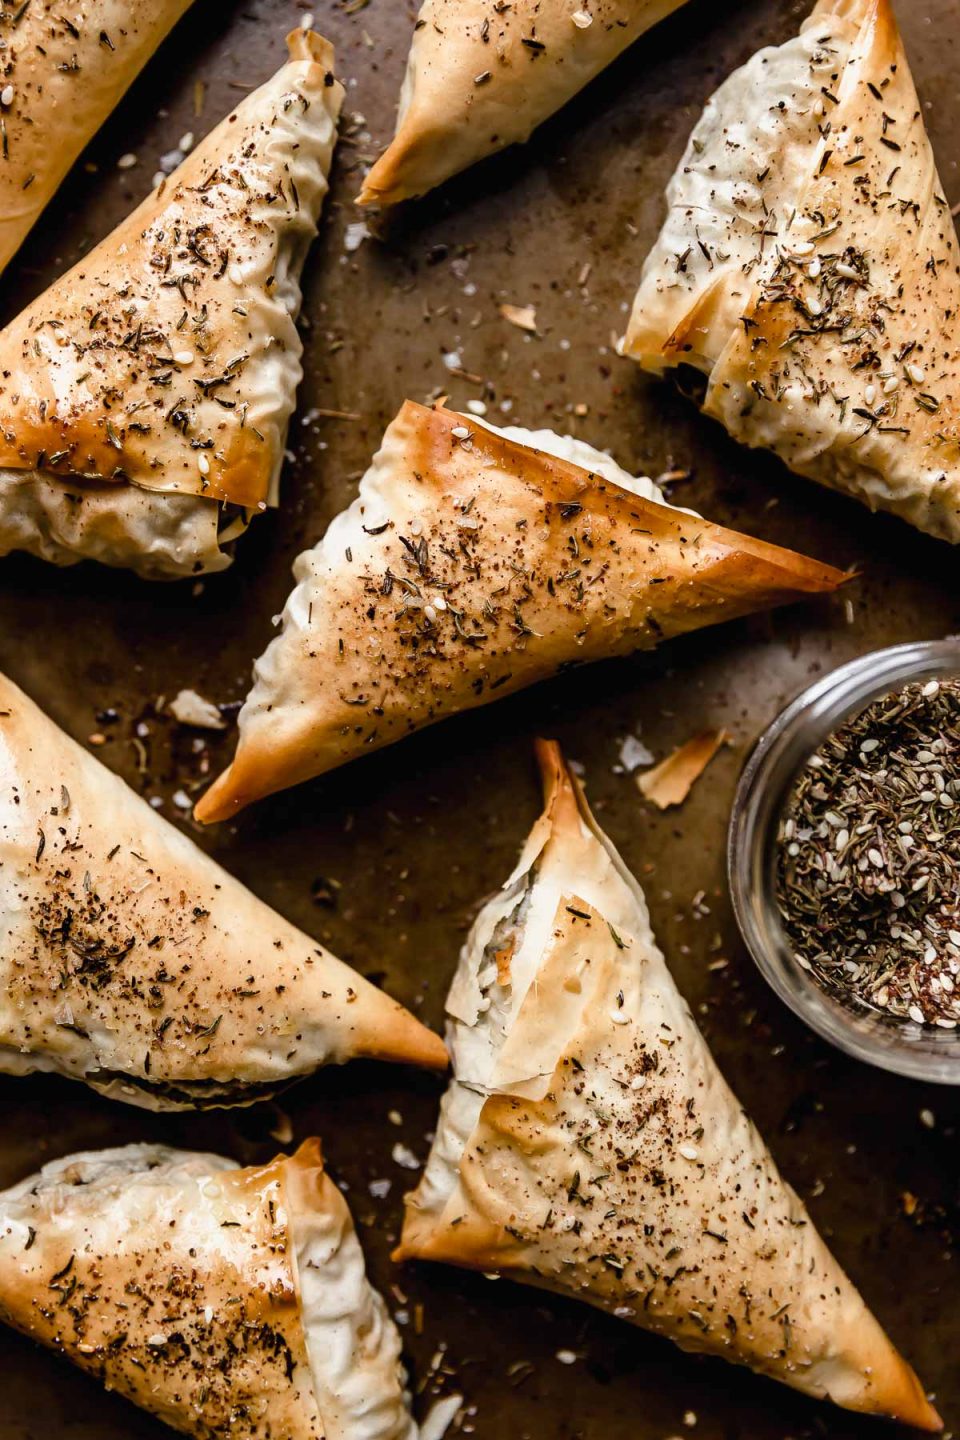
If you’re not familiar, Spanakopita is a savory Greek spinach pie. Flaky phyllo dough encases a filling made of spinach & feta. It’s naturally vegetarian, & totally delicious.
This spanakopita recipe is a nod to authentic spanakopita, with a few twists of my own to make it totally special. It’s…
- HEARTY & SATISFYING. Authentic spinach & feta spanakopita filling gets beefed up a bit with kale, pine nuts, DeLallo marinated artichokes & DeLallo jumbo pitted calamata olives. It’s still completely vegetarian, but the add-ins give the spanakopita so much more body. It’s so hearty, textural, & satisfying.
- PERFECTLY FLAKY. Rather than slathering it in butter, this spanakopita is brushed with DeLallo Extra Virgin Olive Oil, which creates the most perfect light & crisp golden-brown crust.
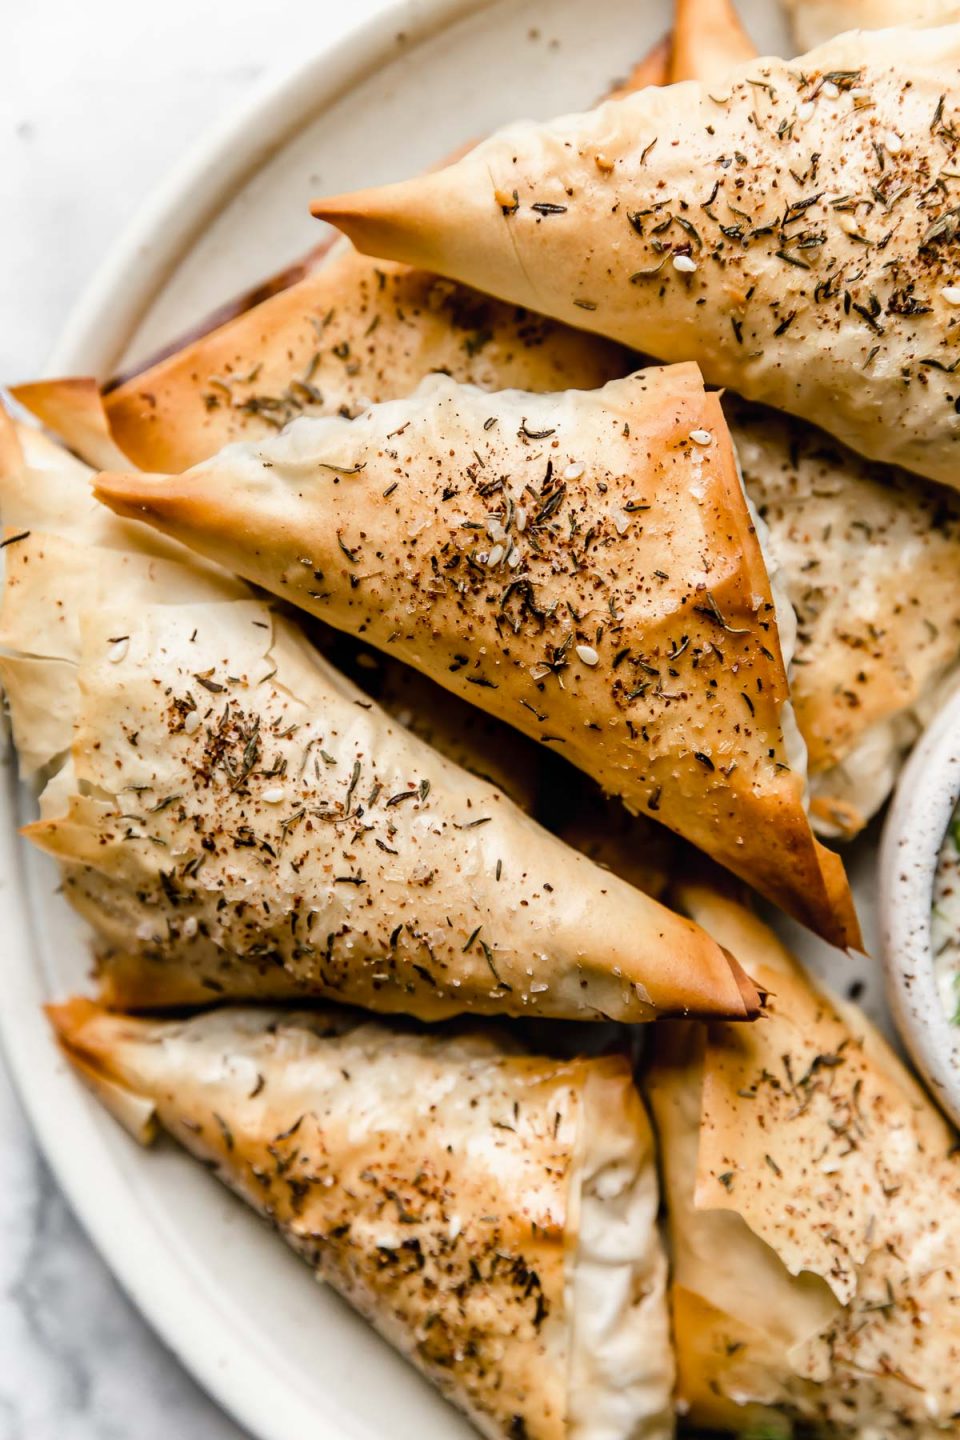
- & INDIVIDUALLY PORTIONED! This spanakopita recipe is folded into individual triangles. You can serve them as an appetizer at your next gathering, or create the perfect snacky dinner with some of your other favorite Greek foods.
Maximum Flavor, Minimal Effort
3 foolproof secrets to low-fuss, flavor-packed dinners, learned from years working in restaurants.
Making spanakopita together makes for the best date night at home OR if you’ve got little ones running around, they’ll have so much fun helping you fold these cuties up. Say hello to your next delicious weekend kitchen project! ♡ Read on to learn more about this individual spanakopita recipe, or jump straight to the recipe & get cookin’!
What is spanakopita?
Before we hop into the nitty-gritty of the recipe, let’s chat spanakopita for a sec. Spanakopita, a very traditional Greek dish, is essentially a delicious, savory spinach pie.
In authentic spanakopita recipes, a hearty filling made of spinach & feta cheese is encased by layers & layers of phyllo, a paper-thin pastry dough, & baked in a large pan, from which individual servings are cut. The phyllo gets deliciously flaky & golden brown, creating the perfect light & crisp crust for the spinach & cheese filling.
It’s pretty darn delicious.
This spanakopita recipe is a nod to the classic. The spinach & feta filling has a few additions, creating an especially hearty texture, & gets folded into smaller pastries, making individual spanakopita triangles that are perfect to serve as a party appetizer or as a special dinner. We absolutely love them; I think you will too!
Spanakopita Ingredients:
Wanting this spanakopita recipe to be especially hearty & textural, we use all of the traditional spanakopita ingredients with a few additions to create the perfectly meaty, satisfying texture.
(Note: full ingredients list & measurements are provided in the Recipe Card, below.)
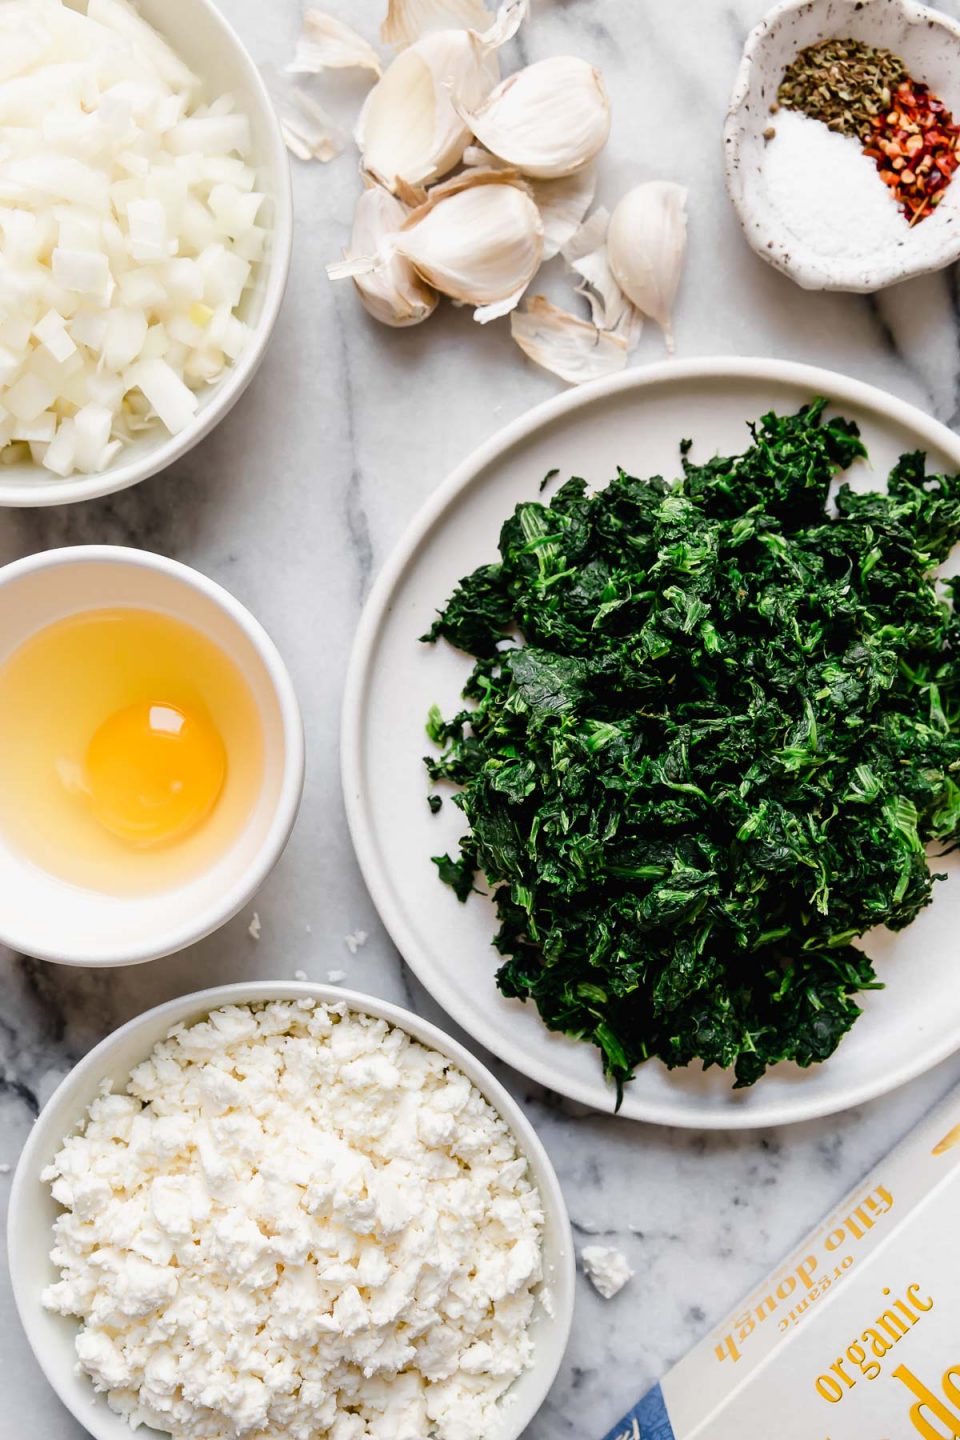
The Classics: Traditional spanakopita ingredients include…
- Phyllo dough, sometimes labeled “filo” or “fillo”, is a paper-thin pastry dough. You can find it in the freezer section of most conventional grocery stores. This is the kind I like best.
- Spinach – a bag of frozen, chopped works perfectly. Easy!
- Feta – you can use a container of store-bought pre-crumbled feta, though I love buying a whole brick of feta packed in brine as it has superior flavor & a creamier texture. Since feta is a primary ingredient in the spanakopita filling, it’s important to get the best stuff you can.
- Onion & garlic
- Egg
- Spices, including plenty of dried oregano, salt, & pepper, plus a pinch of crushed red pepper flakes for a little spicy bite & a sprinkling of lemon zest for bright flavor.
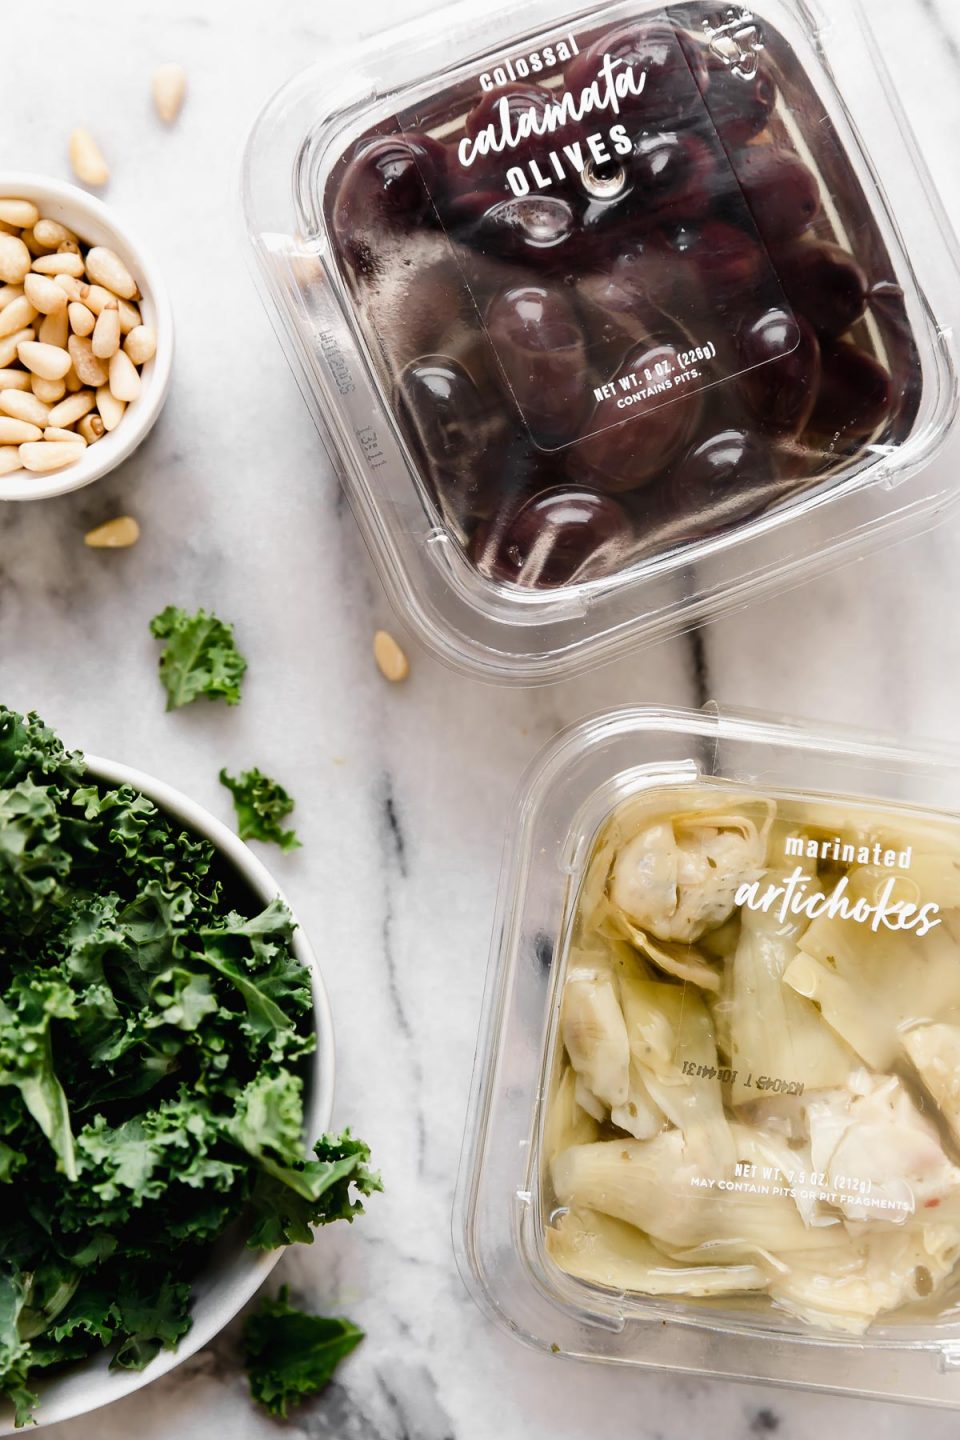
The Add-Ins: This is where things start to get really special. A few well-considered additions take these spanakopita triangles to the next level.
- Kale, which completely untraditional, but I love it. A few handfuls add wonderful body to the spanakopita filling, making it especially hearty.
- Pine nuts, AKA crunchy-tender bits of perfection, create the most satisfyingly meaty texture for this vegetarian recipe.
- DeLallo Marinated Artichoke Hearts, my favorite artichokes! Picked at the peak of ripeness, they’re perfectly light & tender. (They also create spinach artichoke vibes in these spanakopita triangles, which is never a bad idea!)
- & DeLallo Jumbo Pitted Calamata Olives, which are certified organic & are totally amazing. They add a briny, salty bite to the spanakopita filling, & they enhance the overall meaty texture that we’re after, making these individual spanakopita totally satisfying.
How to make individual spanakopita triangles:
While they require a little bit of time, a little bit of patience, & a little bit of technique, these spanakopita triangles are pretty easy to make. With some organization, the overall process is pretty straight-forward.
Below is an overview of the process. I’ve included step-by-step photos to make things even easier for you! (Note: full Recipe Directions are provided in the Recipe Card, below.)
First, make the spanakopita filling:
Prepping the spanakopita filling can be broken down into 3 simple steps: preparing the spinach, cooking the aromatics & wilting the kale, & mixing the filling.
- Spinach prep: Moisture is the natural enemy to creating a light & crisp golden brown phyllo crust, but if there’s one thing water looooves, it’s spinach. It’s SO important to remove as much excess water from the frozen spinach as possible. Thaw the spinach out & pop it on a kitchen towel. Wring it out over the sink to squeeze as much of the excess water out of the spinach as possible. You’ll need to give it a few good squeezes. A lot of water will come out – it’s a good thing!
- Aromatics & kale: Sweat the onion in a little bit of olive oil. Add the kale, along with the other aromatics (garlic! spices!), & allow the kale to soften for a few minutes. It’ll turn vibrantly green, & those aromatics will begin to smell heeeeeavenly.
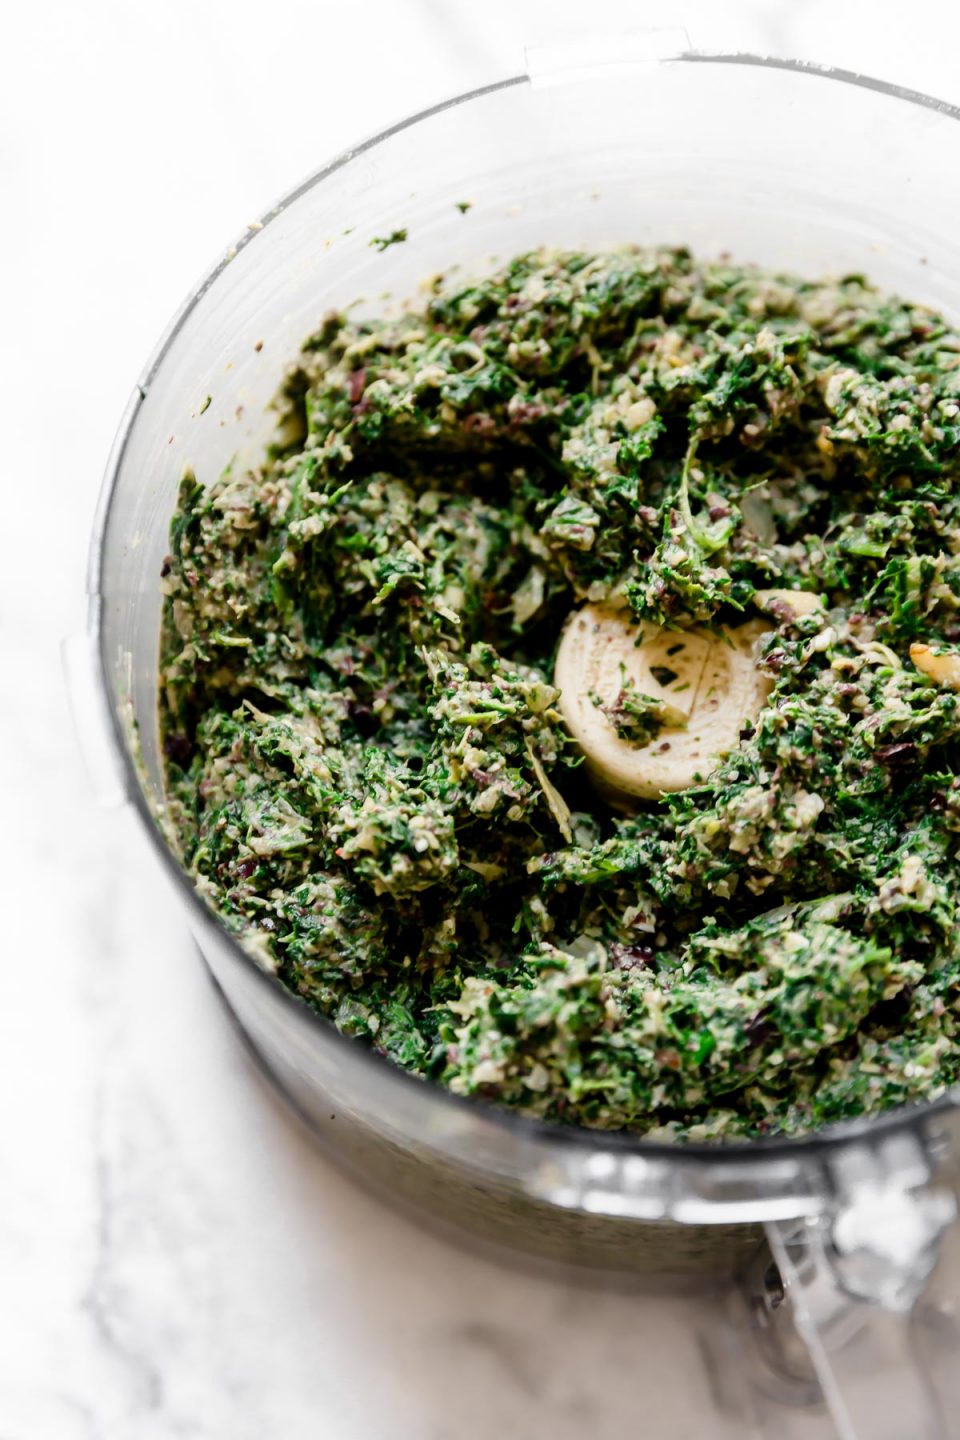
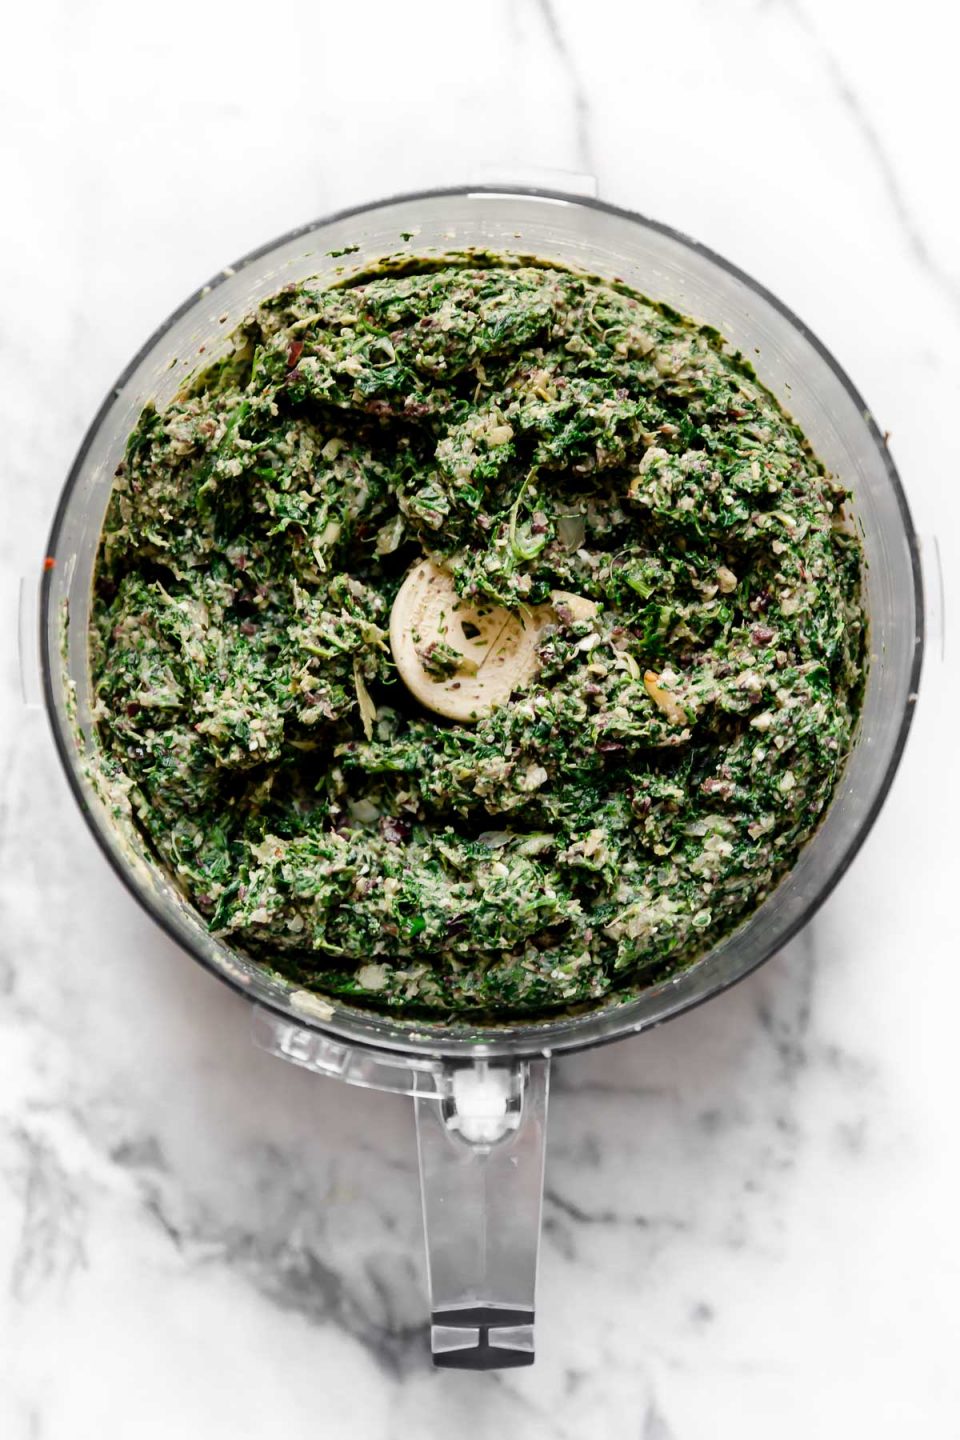
- Mix the filling: Transfer the spinach & the onion/kale mixture to the bowl of a food processor. Add in the rest of the spanakopita ingredients & pulse to combine. You can make it as smooth or chunky as you’d like. Personally, I love keeping it a bit chunkier – larger bits & pieces of olives, feta, artichokes, etc., help create a really satisfying, meaty texture. Delish!
With the spanakopita filling ready to go, all that’s left is assembling & baking!
Next comes folding the spanakopita triangles:
Figuring out how to fold spanakopita triangles was the trickiest part of developing this recipe! Lucky you, we figured out how to create the perfect light & crisp phyllo crust, & we captured the entire process in step-by-step photos to keep things as easy as possible for you!
A fair warning – phyllo is incredibly delicate. Since this spanakopita recipe is folded, small tears are no big deal, but still, be sure to take extra care as you work with it to avoid large tears.
- Phyllo prep: Create a large workspace on your counter. Carefully unfold the thawed phyllo dough, & set it atop a damp kitchen towel on your work station. Cover the stack with a second damp kitchen towel. Because phyllo is paper-thin, it dries out very quickly. Once dried-out, it’s impossible to work with. Keeping the phyllo layered between damp towels (or paper towels) helps you avoid this!
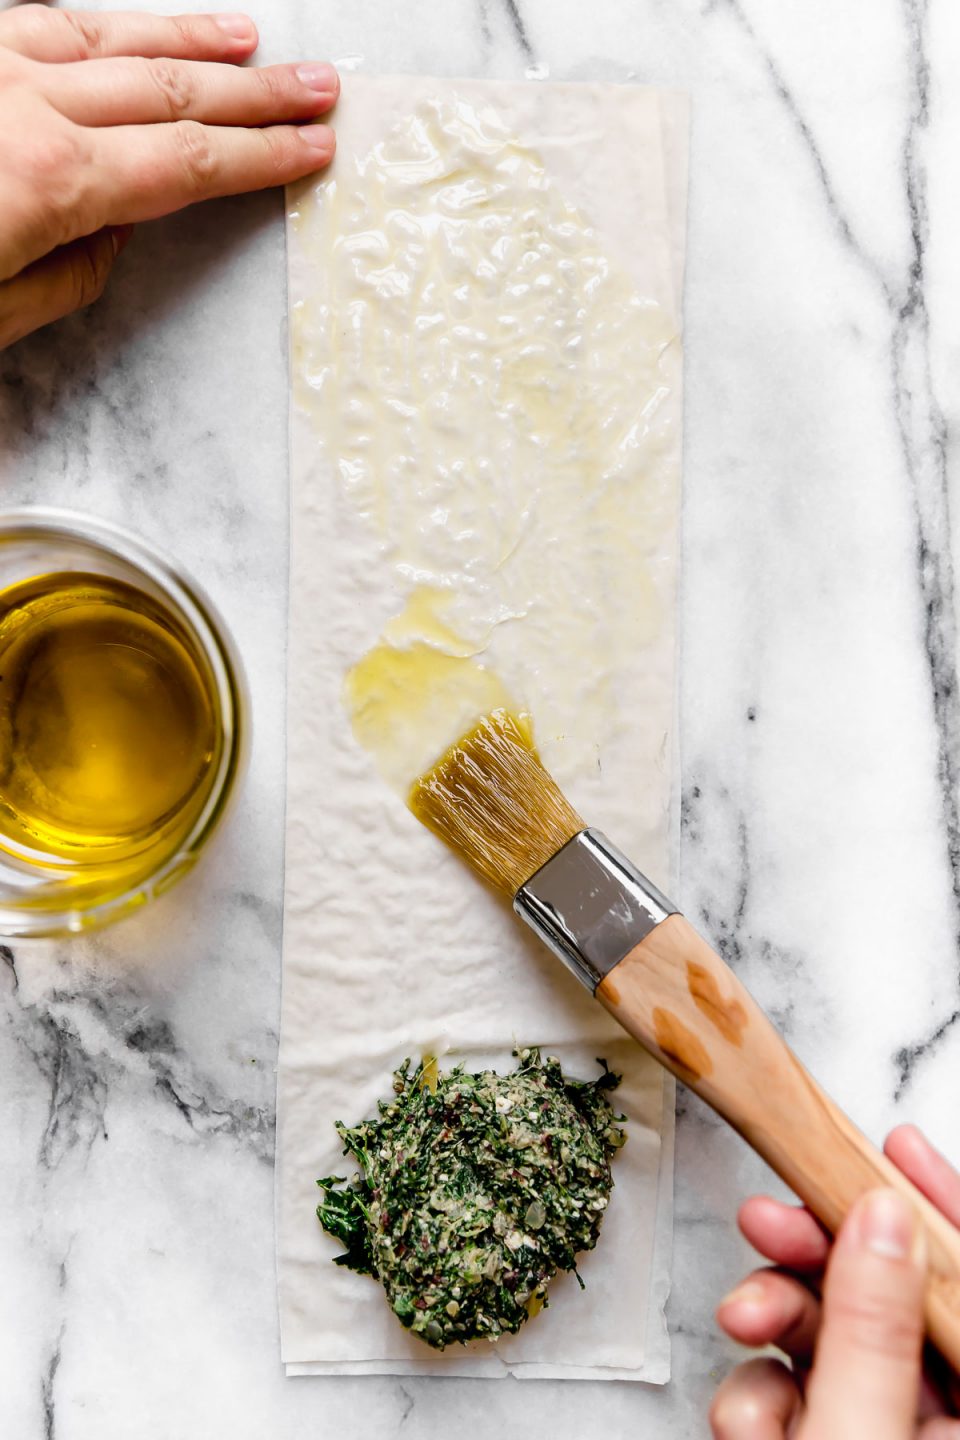
- Assemble…: Pull 2 sheets of phyllo dough from your stack & set them out on your workspace, creating a 2-ply surface of phyllo in front of you. Use a paring knife to cut the phyllo crosswise into 4 even strips (about 3-4 inches wide). Drop 1/4 cup of the spanakopita filling at one end of each strip, then use a pastry brush to lightly coat the rest of the phyllo in olive oil.
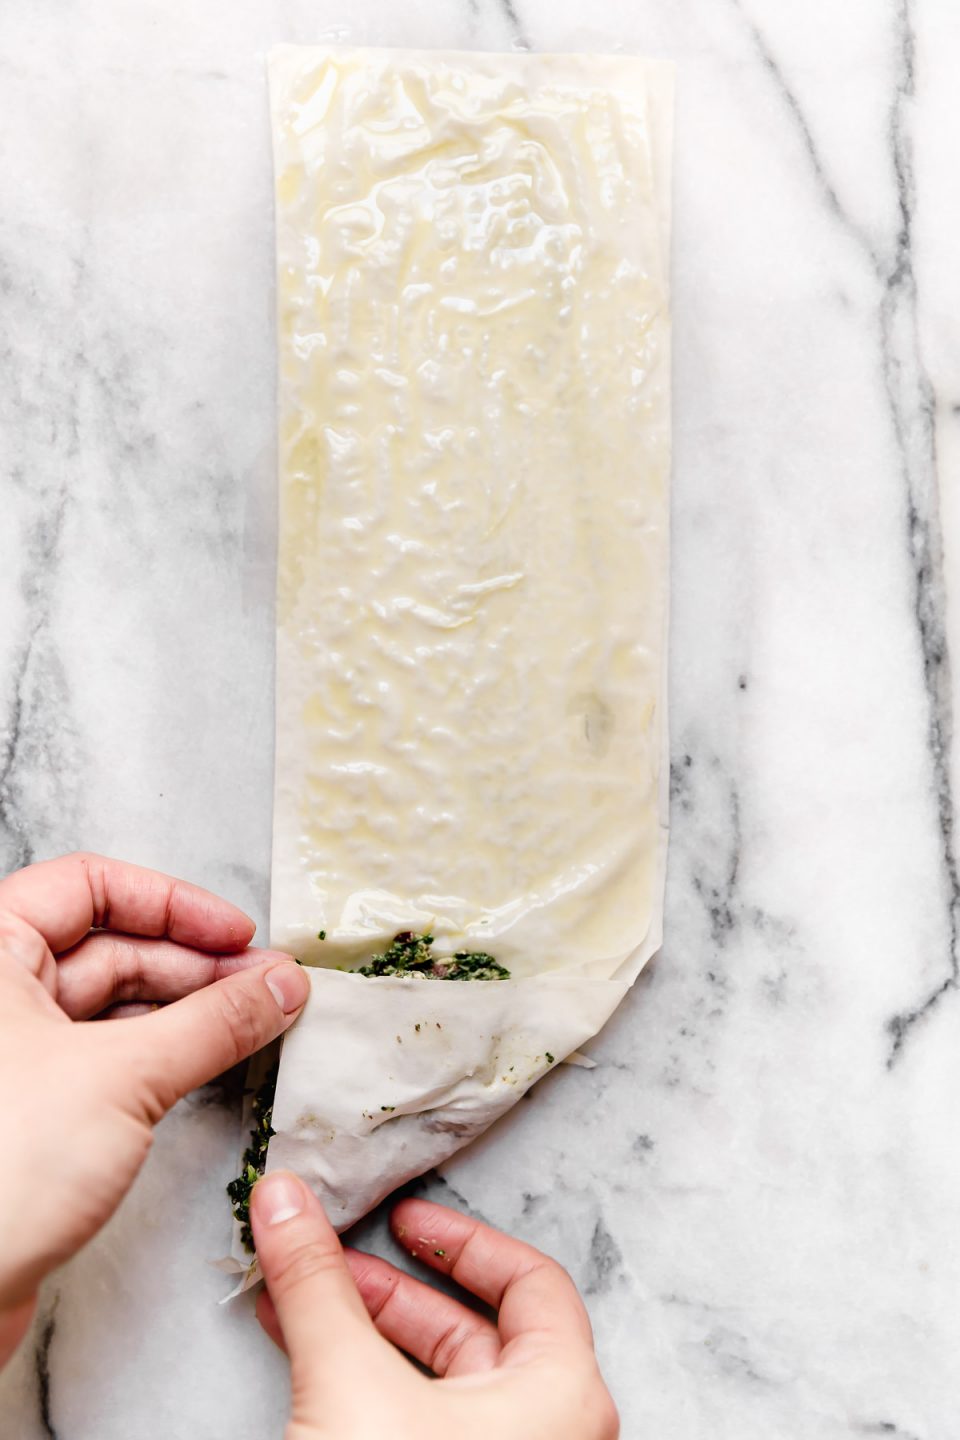
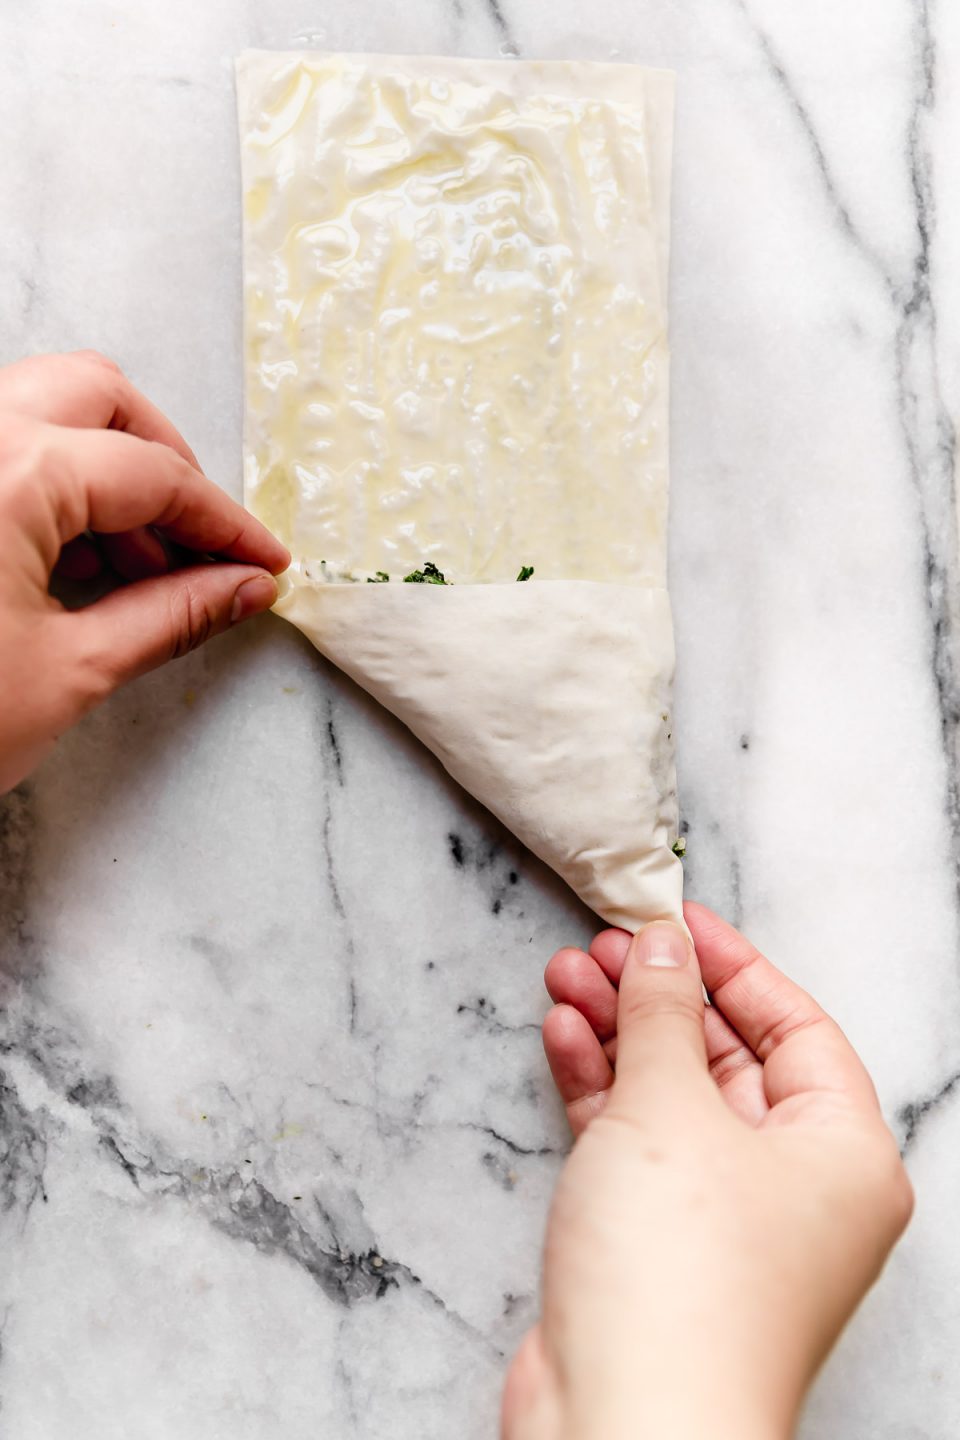
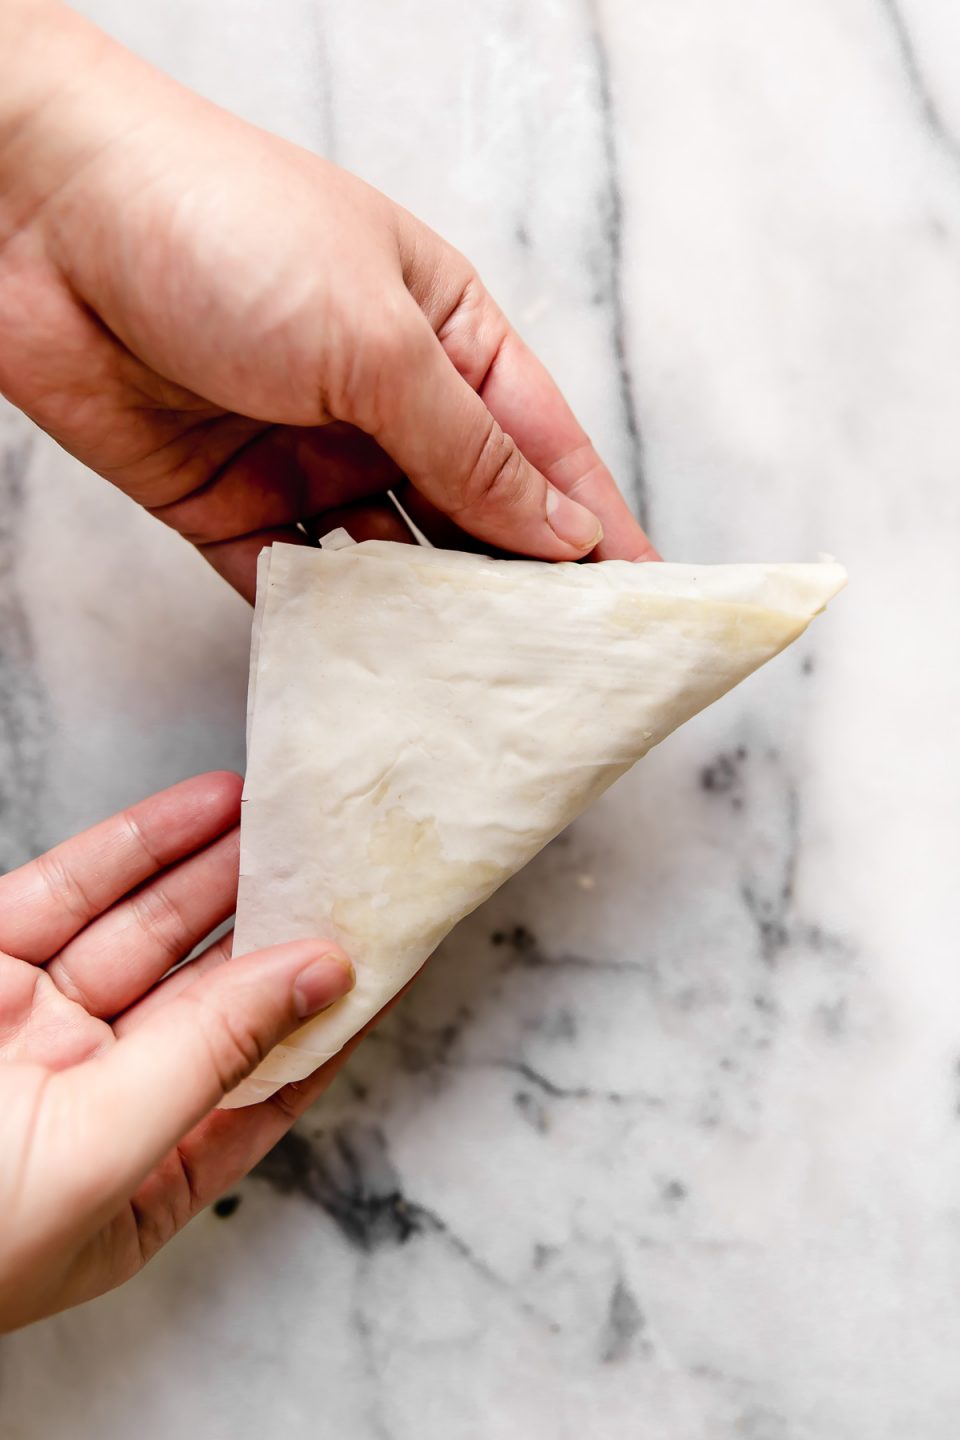
- …& lastly, folding spanakopita triangles!: Take one corner of the phyllo strip & diagonally fold it across the spanakopita filling. Gently pat down to disperse the filling throughout the fold. If the phyllo tears a little, it’s totally okay! Continue folding the filling on itself, creating an individual spanakopita triangle!
Repeat assembling & folding spanakopita triangles until you’ve used all the filling. You should end up with a glorious assortment of 12 or so individual spanakopita triangles.
Make-Ahead Spanakopita Triangles:
Spanakopita FAQ: “Can I make spanakopita ahead of time?”
YES. Freshly baked spanakopita is always better than pre-made, but there are a couple of make-ahead options for preparing these spanakopita triangles in advance without compromising flavor or texture.
- MAKE-AHEAD OPTION #1 (about 20 minutes of active work): Prepare the spanakopita filling & store it in an airtight container in the refrigerator. The filling will keep for about 3 days. When you’d like to bake your spanakopita, simply preheat the oven, assemble the spanakopita triangles, & bake.
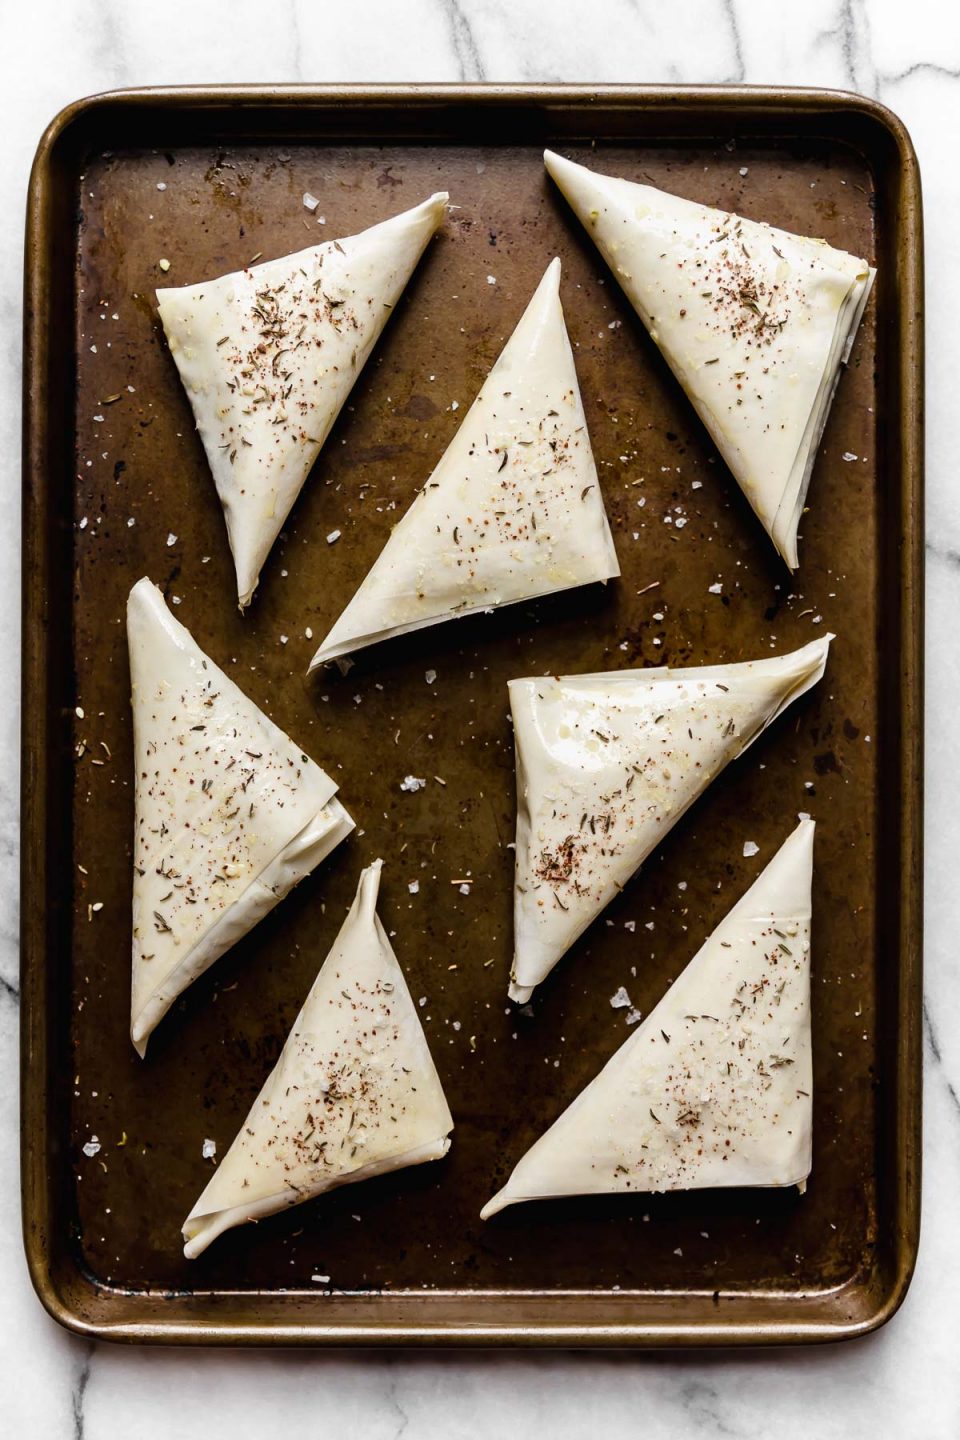
- MAKE-AHEAD OPTION #2 (about 45 minutes of active work): Prep the filling & assemble the spanakopita triangles. Arrange the prepped spanakopita in a single layer on a baking sheet or in an airtight container. Cover completely with a damp kitchen towel to ensure the phyllo doesn’t dry out in the refrigerator. Store in the fridge for up to 1 day. When you’d like to bake your spanakopita, simply preheat the oven & bake them off – easy!
What to serve with spanakopita:
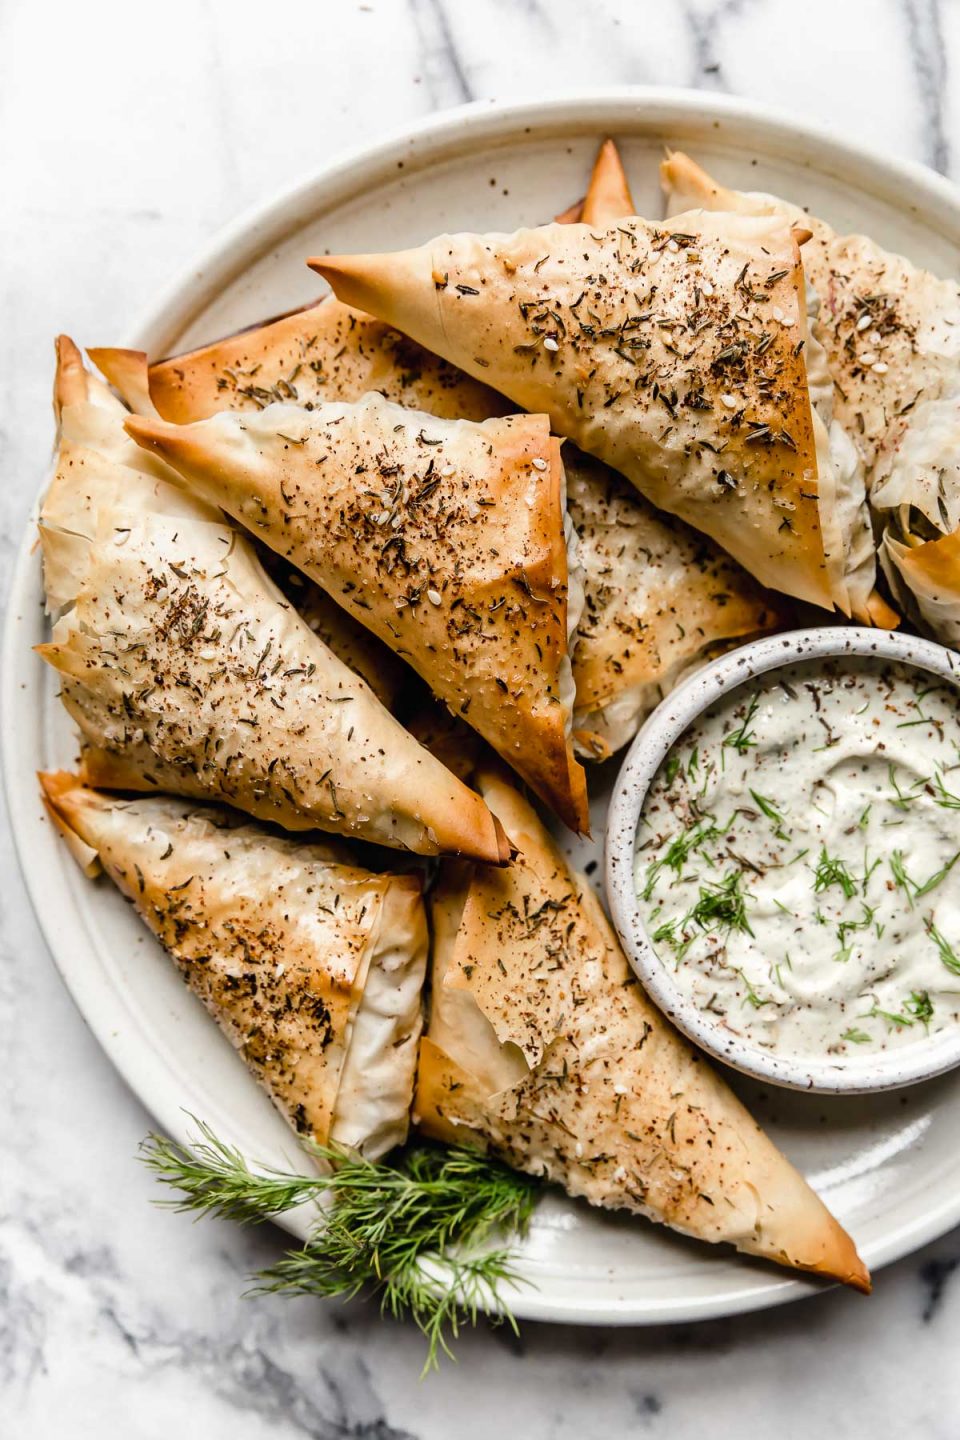
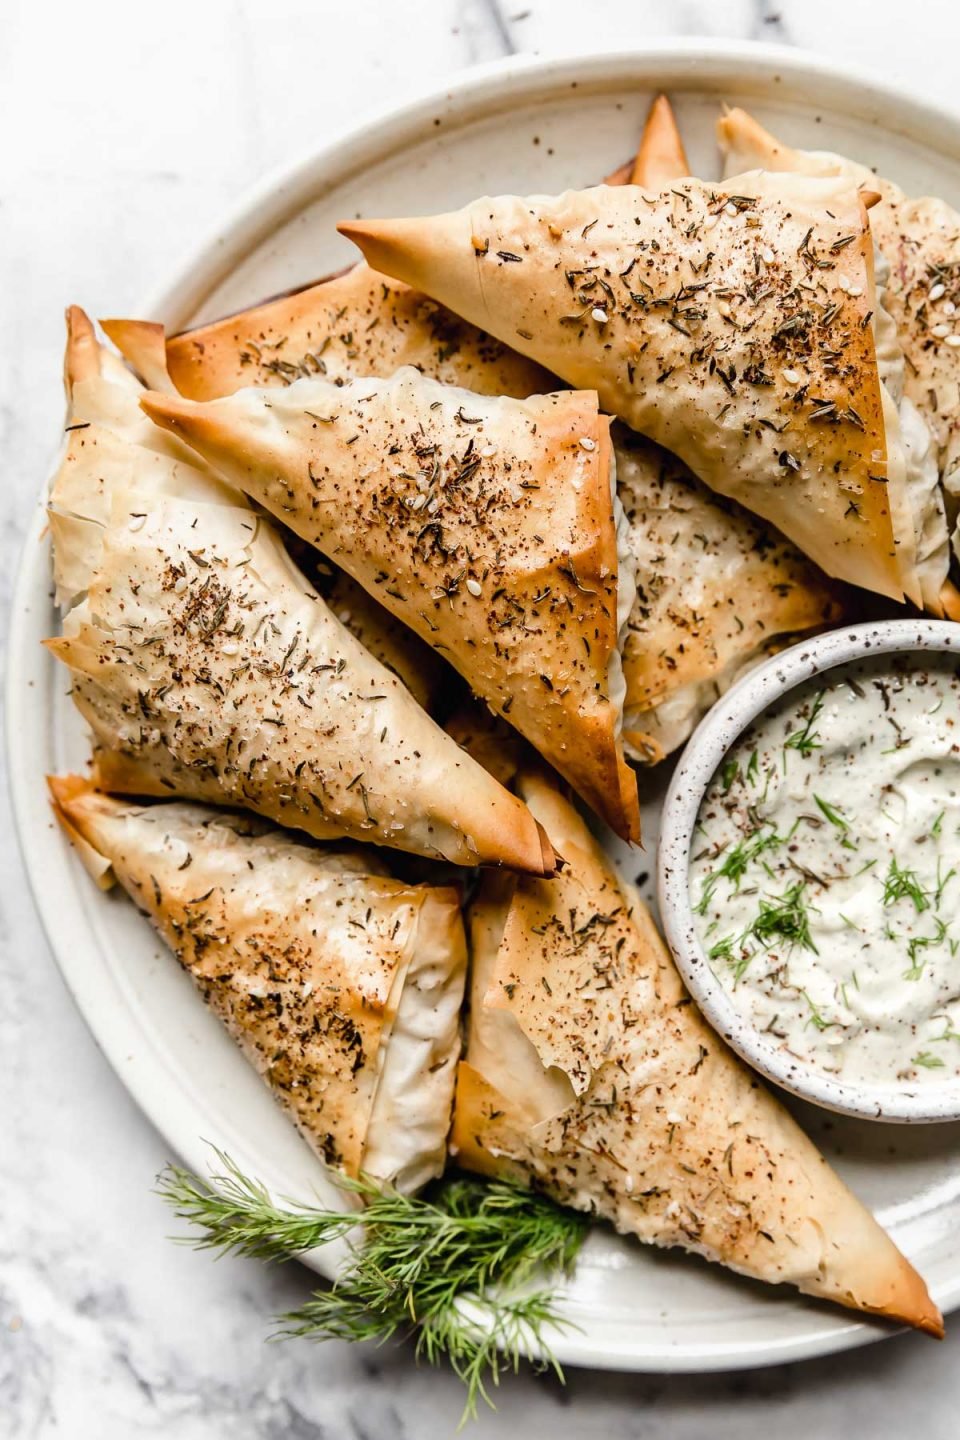
Perfectly portioned individual triangles make for a really fun spanakopita appetizer, but these individual spanakopita also make for an awesome vegetarian dinner!
Ideas for what to serve with spanakopita triangles:
- Tzatziki! Life’s better with sauce, & tzatziki couldn’t be simpler to whip up. Grate some cucumber & stir it into Greek yogurt with some garlic, oregano, & lemon juice. Easy & delish!
- Greek salad: Either dress some greens in an easy Greek Dressing, or make a traditional Greek salad by tossing some tomatoes, cucumber, bell peppers, red onions, & feta in olive oil & lemon juice. So fresh!
- Whip up quick Grated Zucchini Salad, one of my favorite no-cook summery dishes.
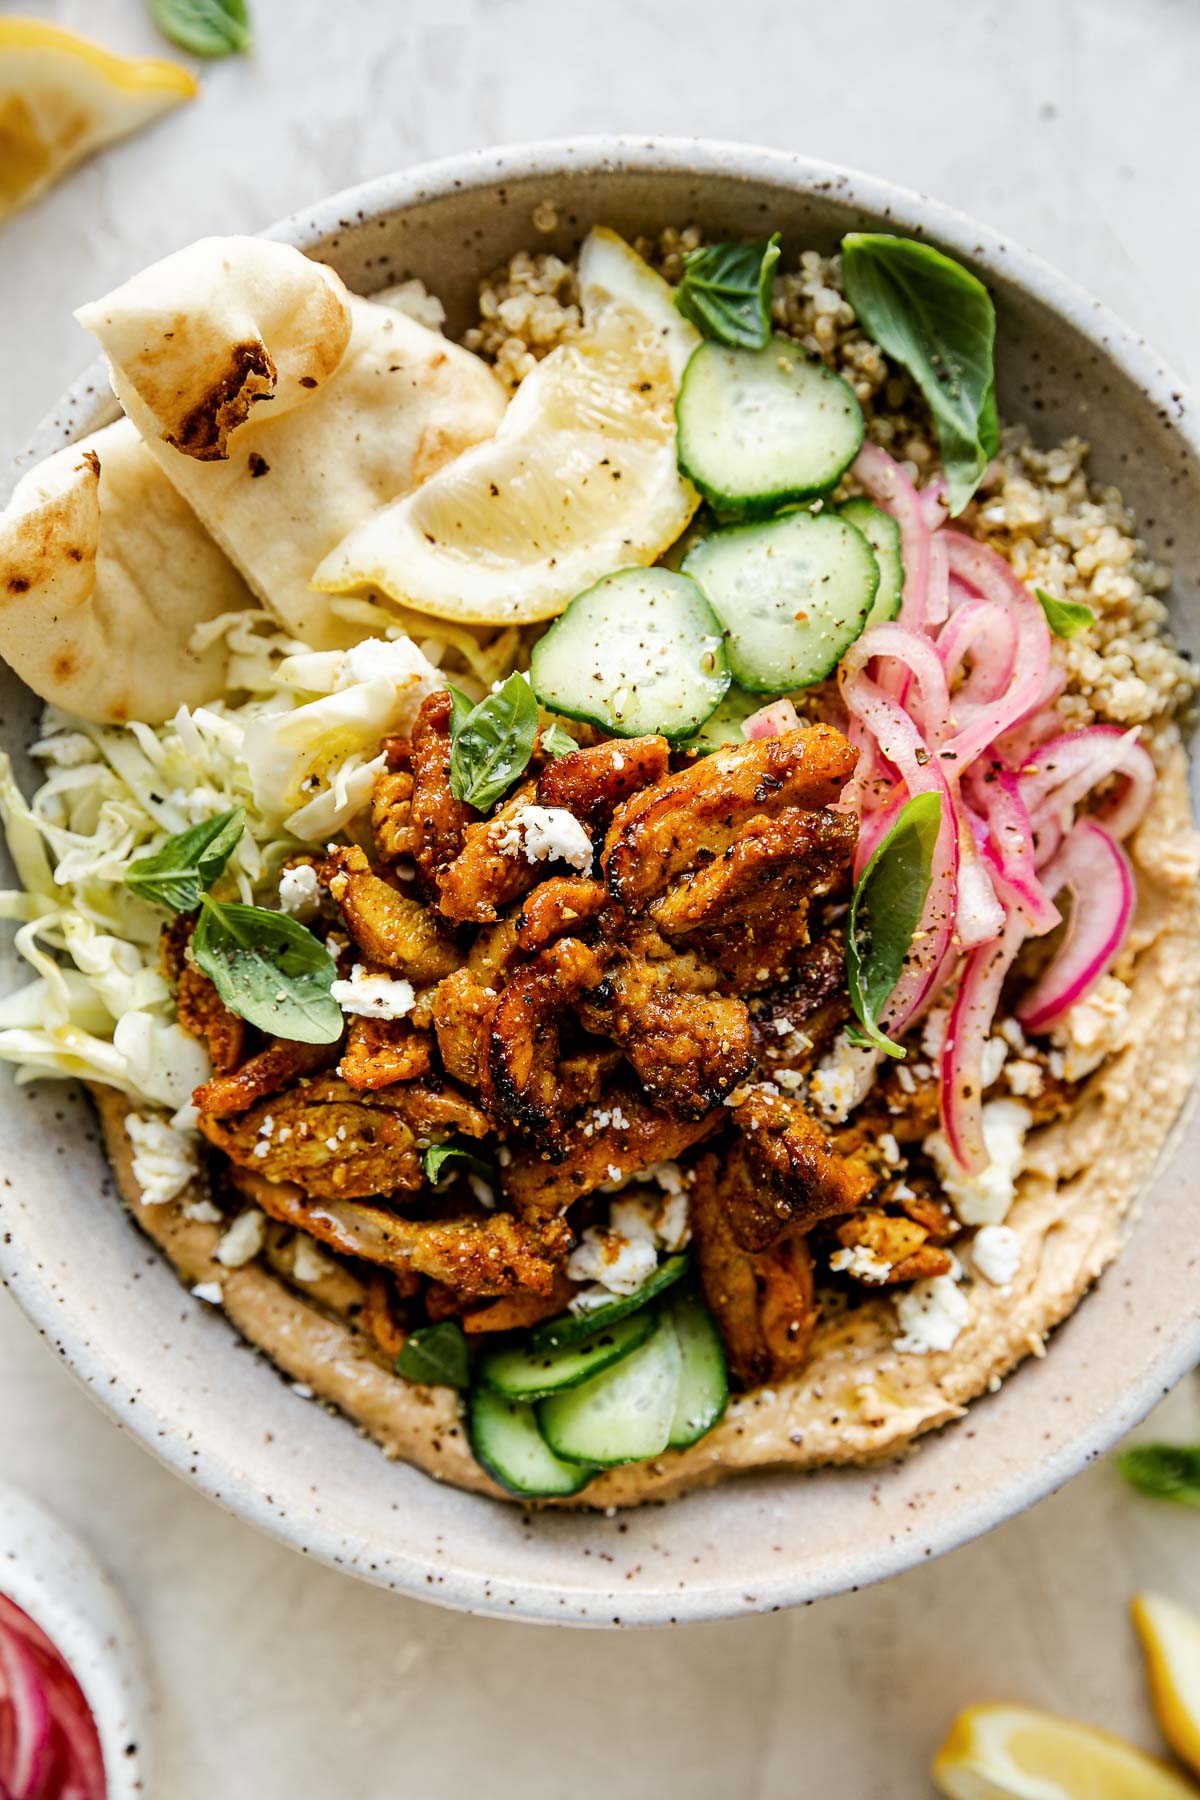
- or…make it a mezze!: Mezze boards are great for entertaining or the perfect snacky dinner. Set your spanakopita triangles out with whatever Greek-inspired foods you love best. A few of our faves?: warm pita, olives, sliced fresh veggies, hummus, marinated feta, Greek potatoes, lamb meatballs, grilled Greek chicken…the list goes on & on!
I cannot wait for you to have your hand at making individual spanakopita pockets at home! It’s such a fun kitchen project, & makes for the best hearty vegetarian dinner!!!
If you do give these Spanakopita Triangles a try, be sure to let me know!: Leave a comment with a star rating below. You can also snap a photo & tag @playswellwithbutter on Instagram. I LOVE hearing about & seeing your PWWB creations! Happy cooking! ♡
Print Spanakopita Triangles
- Prep Time: 50 minutes
- Cook Time: 20 minutes
- Total Time: 1 hour 15 minutes (includes inactive time)
- Yield: 12 triangles 1x
- Category: Appetizer, Main Dish
- Method: Baked, Stovetop
- Cuisine: Greek & Mediterranean
- Diet: Vegetarian
Description
Not your average Spanakopita recipe, these Individual Spanakopita Triangles are a hearty, satisfying, & modern twist on the traditional Greek dish we all know & love. Naturally vegetarian & totally delish, perfect as a party appetizer or light dinner!
Ingredients
- 8 sheets phyllo/fillo dough, thawed from frozen
- one (1) 16-ounce package frozen chopped spinach, thawed from frozen
- 1 tablespoon DeLallo Extra Virgin Olive Oil, plus 1/3 cup for brushing
- 1/2 medium yellow onion, diced
- 3 cups finely chopped kale
- 3 cloves garlic, finely chopped or grated
- 1 lemon, zested
- 1/2 teaspoon dried oregano
- 1 teaspoon kosher salt
- optional: up to 1/2 teaspoon crushed red pepper
- one (1) 7.5-ounce package DeLallo Quartered Marinated Artichokes, drained & rinsed
- one (1) 7-ounce package DeLallo Jumbo Pitted Calamata Olives, drained & rinsed
- 6 ounces feta, crumbled
- 1/2 cup pine nuts
- 1 large egg
Instructions
PREP:
- Preheat the oven to 425 degrees F. Line a large baking sheet with parchment paper for easy clean up. Set aside.
- Unfold the phyllo: Fair warning – phyllo is incredibly delicate; take extra care as you work with it. Carefully remove the thawed phyllo dough from its packaging & unfold it. Set it atop a damp kitchen towel or damp paper towels on your work station. Cover it with a second damp kitchen towel (or paper towels). Set aside.
- Squeeze excess moisture from the spinach: Placed the thawed chopped spinach on a kitchen towel (or a few sturdy paper towels). Wring the towel over the sink to squeeze excess water out of the spinach; there will be a lot! Set aside.
- Drain & rinse both the marinated artichoke hearts & the pitted calamata olives. Pat dry to remove excess water, & set aside.
SPANAKOPITA ASSEMBLY:
- Cook the onion, kale & aromatics: Add the olive oil to a medium skillet over medium heat. Season with 1 teaspoon kosher salt & cook, stirring occasionally, until the onions begin to soften, 2-3 minutes. Add the kale to the skillet. Continue to cook, stirring occasionally, until the kale is vibrantly green & wilts slightly. Add the garlic, lemon zest, dried oregano, & crushed red pepper (as desired) to the skillet. Stir to combine. Cook for 1-2 minutes more, until fragrant.
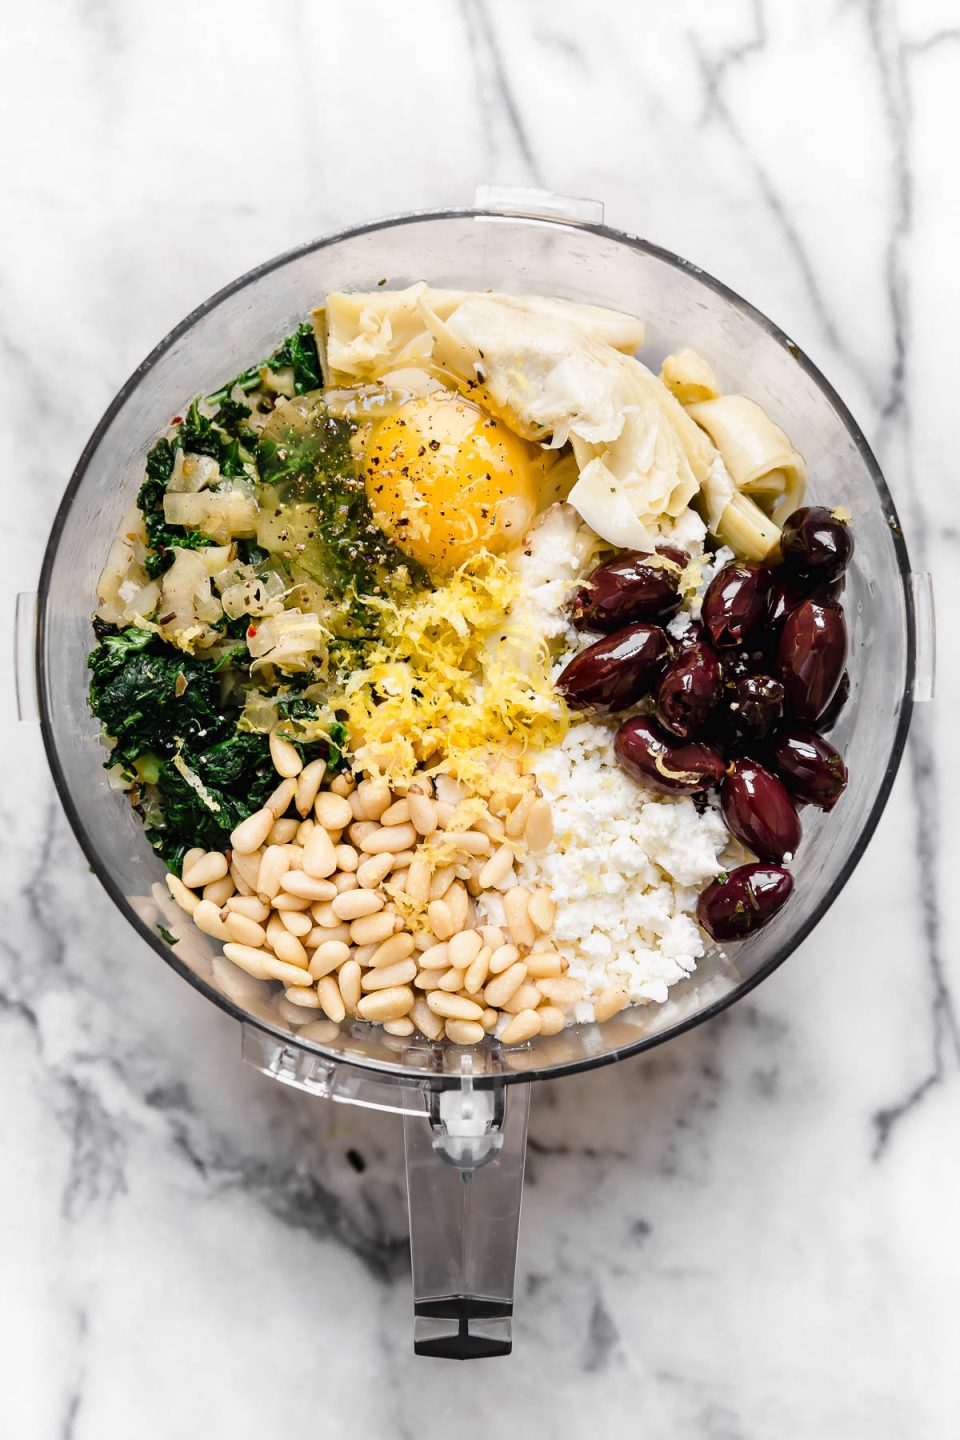
- Mix the spanakopita filling: Carefully transfer the onion & kale mixture to the bowl of a food processor, along with the squeezed spinach, rinsed artichoke hearts & olives, crumbled feta, pine nuts, & egg. Cover & pulse to combine; the mixture should come together in a homogenous mixture with visible pieces of olive, artichoke heart, pine nuts & cheese. Set aside.
- Assemble the spanakopita triangles (step-by-step photos in the blog post, above):
- Reminder: phyllo is incredibly delicate; take extra care as you work with it. Carefully place a sheet of phyllo dough on the counter. Set a second sheet directly atop the first, creating a 2-ply layer of phyllo. The phyllo may tear a little bit as you handle it, which is okay since it’ll be folded into multiple layers around the spanakopita, though you want to avoid large tears. Use a small paring knife to slice the phyllo into 4 even strips crosswise.
- Place 1/4 cup of the spanakopita filling at the bottom end of each phyllo strip. Use a pastry brush to brush olive oil across the length of the rest of each phyllo strip.
- Fold the bottom right corner of the phyllo diagonally over the filling to the left edge of the phyllo strip, ensuring that the edges of the dough line up & cover the filling. Gently pat down, as needed, to ensure that the spanakopita filling is evenly dispersed throughout the first fold.
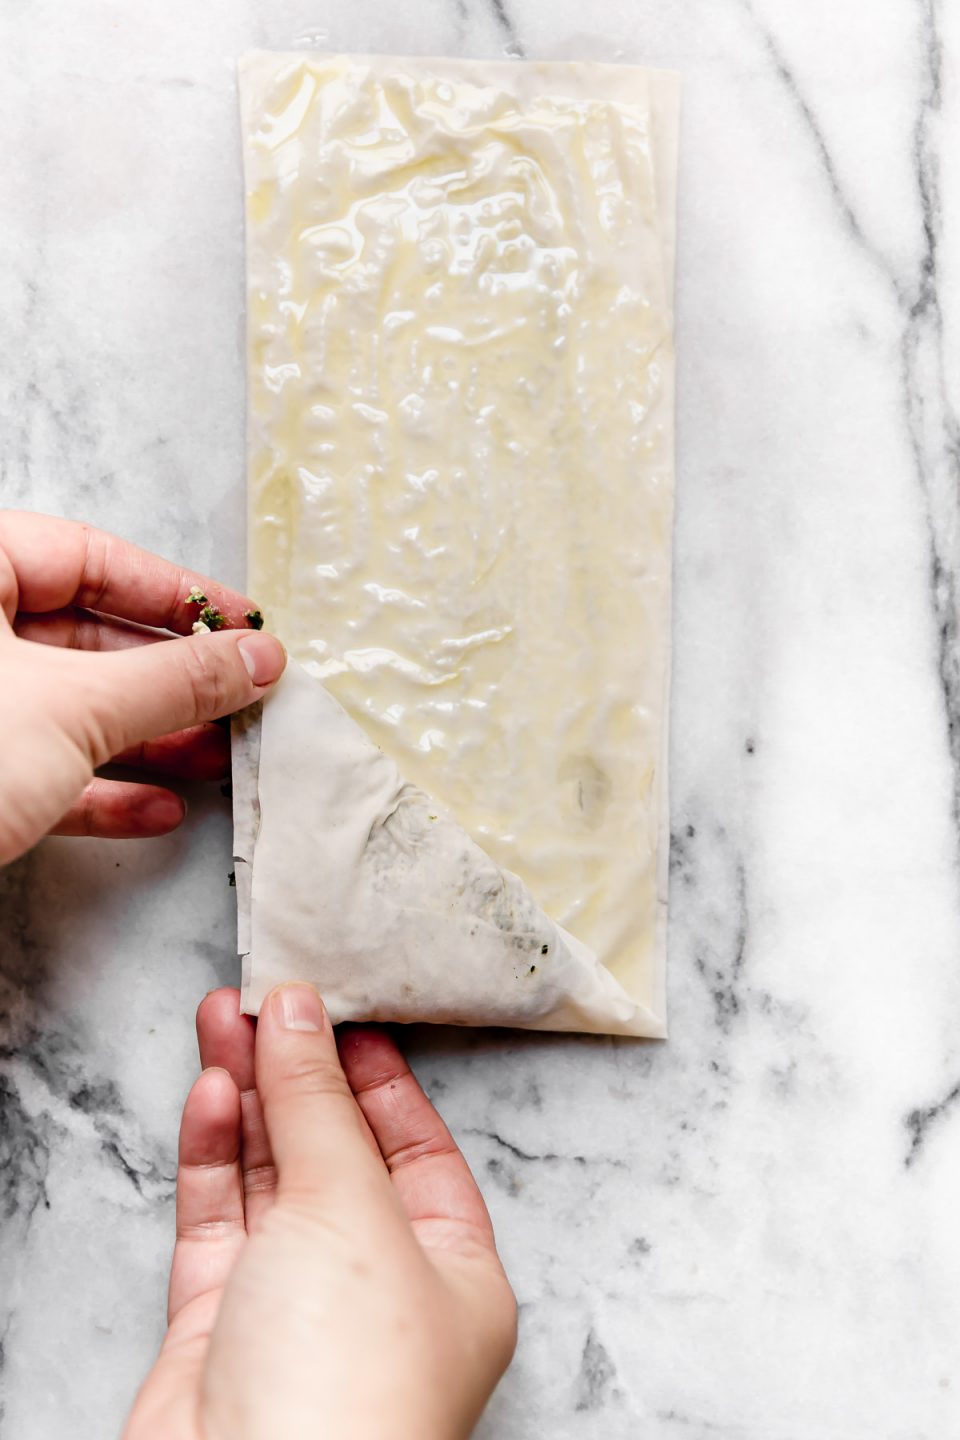
- Take the bottom left corner & fold it straight up the left edge, ensuring that the edges are aligned.
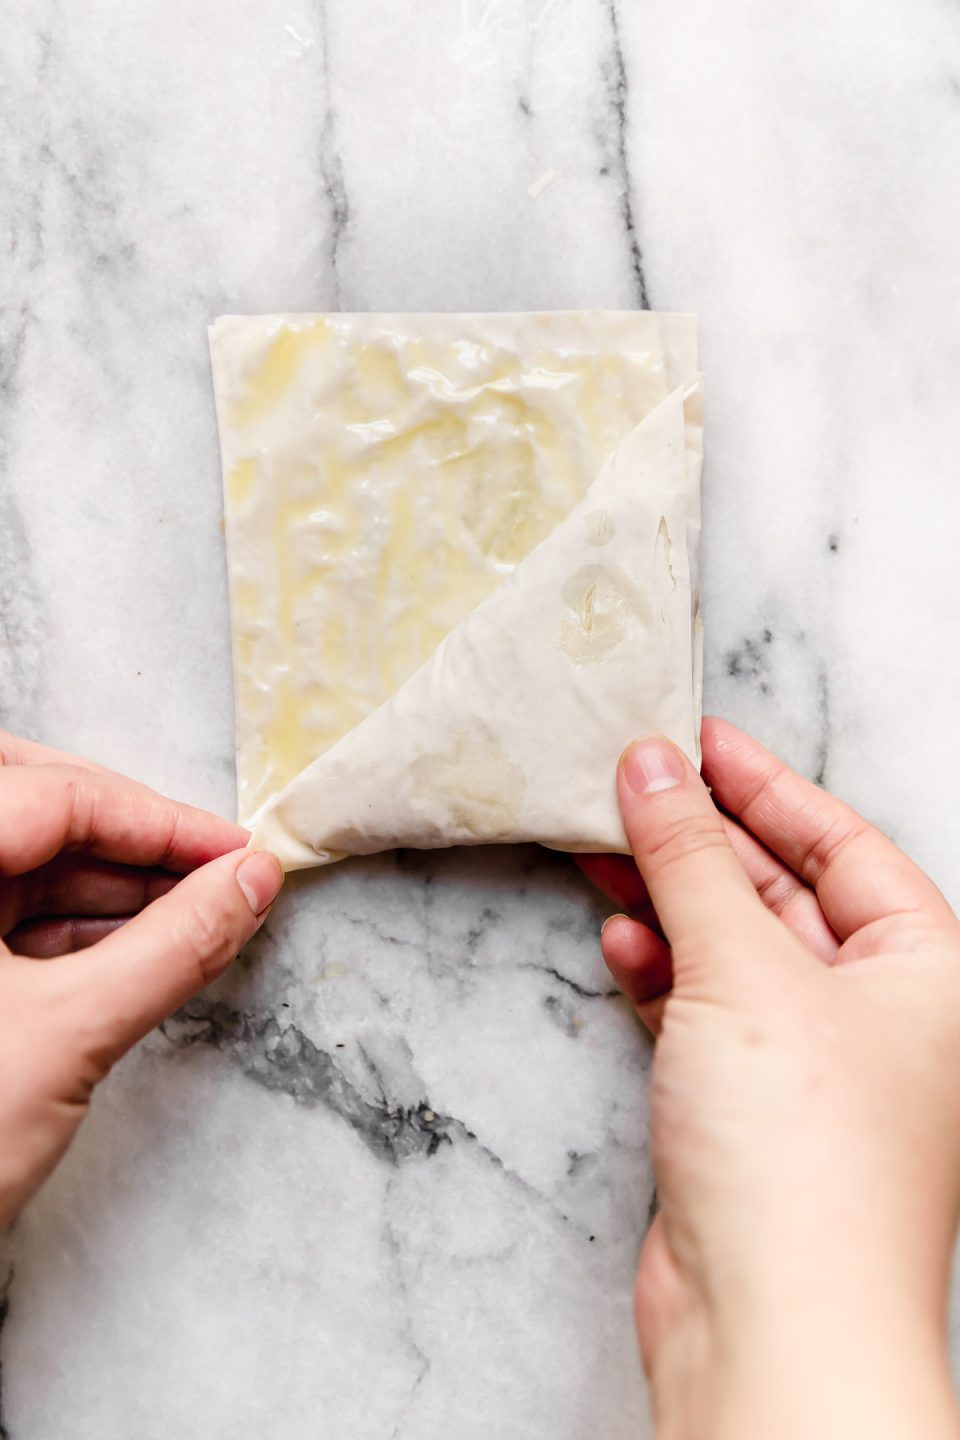
- Repeat Step 3.3 (starting at the bottom left corner) & Step 3.4 (starting at the bottom right corner), until the phyllo is completely folded around the spanakopita filling in a nice little triangle. If there is excess phyllo after the final fold, you can trim it off or tuck it around the spanakopita triangle. Set the folded spanakopita triangle atop the prepared baking sheet & set aside.
- Repeat Steps 3.3-3.5 with the remaining 3 spanakopita, then repeat Steps 3.1-3.5 until all of the filling has been used. You should yield about 12 spanakopita triangles.
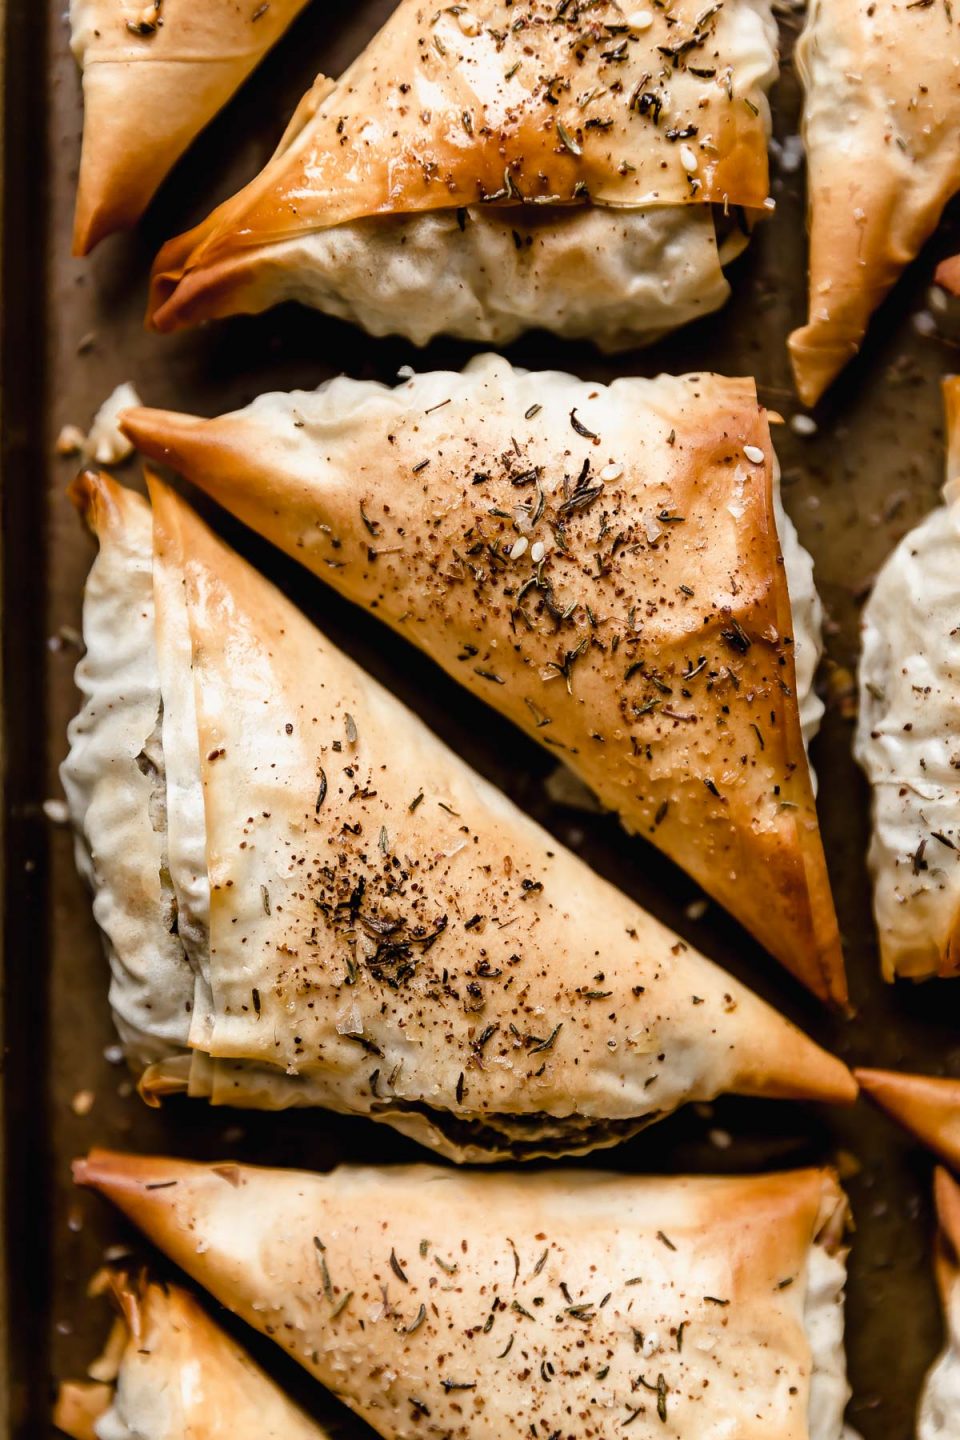
- Bake: Place the spanakopita triangles in the oven. Bake for 20 minutes, rotating the pan halfway through, until the spanakopita triangles are beautifully golden-brown.
- Serve: Remove the spanakopita triangles from the oven. Allow to cool for at least 5-10 minutes before serving. Serve warm or at room temperature, with your favorite Greek-ish dips & side dishes. Enjoy!
Notes
- Storage & freezing: Cooked spanakopita triangles will keep stored in an airtight container in the refrigerator for up to 3 days, or in the freezer for up to 3 months.
- How to reheat spanakopita: Spanakopita is best reheated in the oven or an air fryer. Reheat at 400 degrees for 5-7 minutes, until warmed through.
- Meal prep/Make-ahead: 2 options for prepping these spanakopita triangles in advance, depending on how much time you have to prep ahead:
- 20-minute meal prep: Follow Steps 1-2 of Recipe Directions to prep the spanakopita filling. Transfer to an airtight container & store in the refrigerator for up to 3 days. At dinnertime, simply assemble & bake the spanakopita according to Steps 3-5 of Recipe Directions.
- 45-minute meal prep: Follow Steps 1-3 of Recipe Directions to prep the spanakopita filling & assemble the spanakopita triangles. Arrange the prepared spanakopita triangles in a single layer on a baking sheet or in an airtight container. Cover completely with damp paper towels. Store in the refrigerator for up to 1 day before baking them off according to Steps 4-5 of Recipe Directions.
Follow along with Plays Well With Butter on Instagram, YouTube, Facebook, and Pinterest for more unfussy recipes that pack a big punch of flavor!


Such a great recipe! Super tasty. It was rather easy too, after I won the fight with the phyllo that is! I’ll be making this recipe again.
Hi Sandra! So glad to hear that you enjoyed – phyllo can be tricky to handle but nothing beats flaky phyllo in the finished product! =)