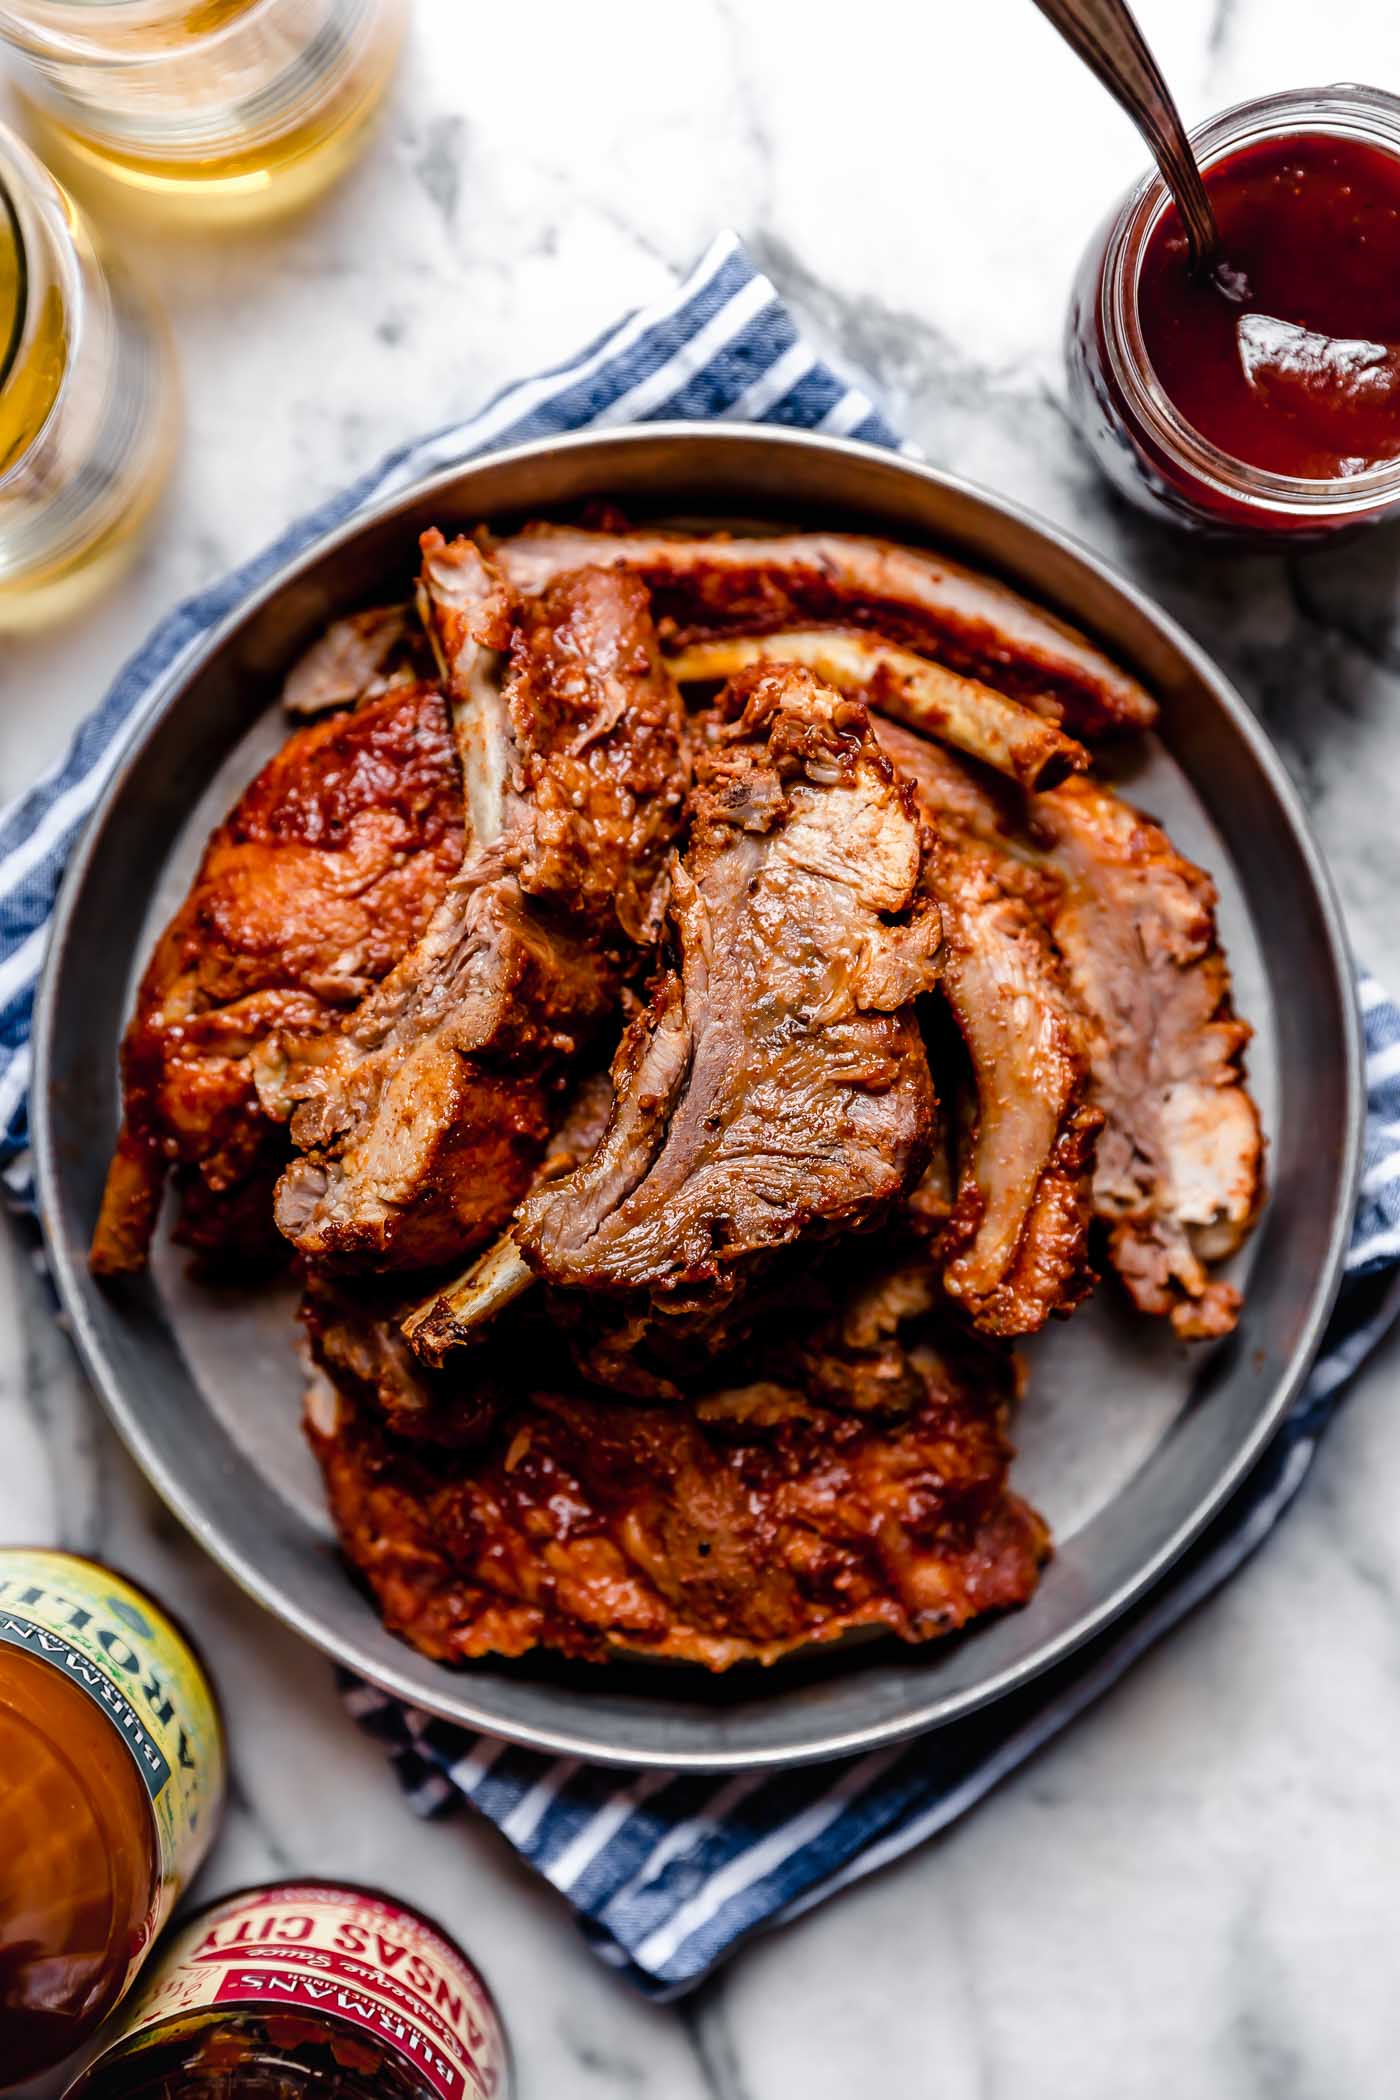
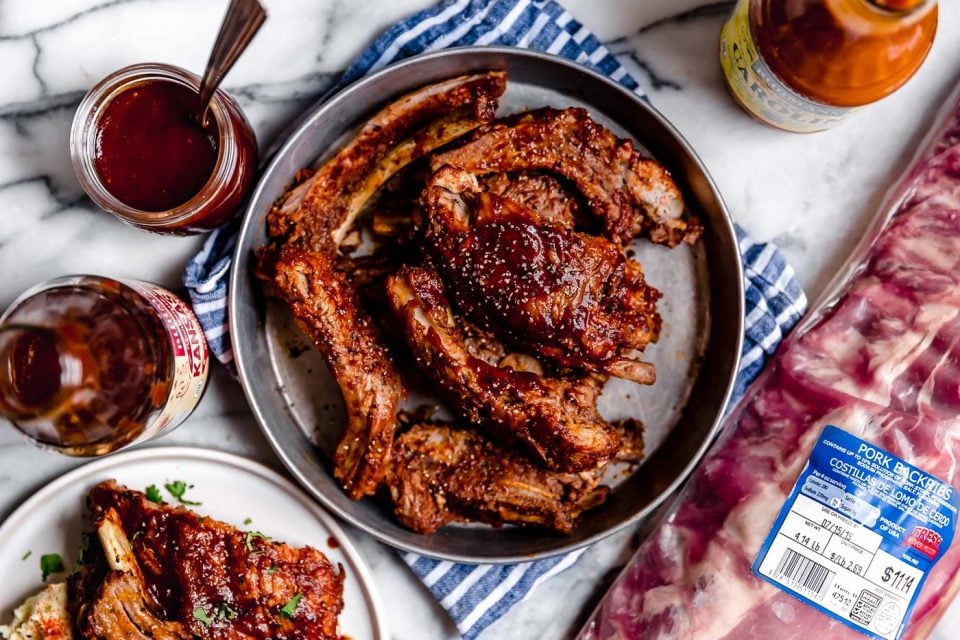
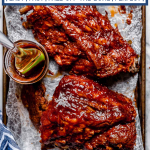
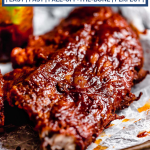
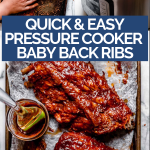
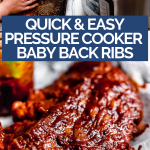
Nothing beats homemade ribs – when prepared properly, they’re fall-off-the-bone tender, flavorful, juicy, perfect for serving to a crowd at a game day party or tailgate this fall.
Up until recently, ribs seemed like one of those things that just had to be SO complicated and difficult to make. But then I started playing around with making them in a pressure cooker and it was a total game-changer.

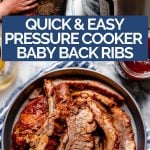
So that’s exactly what we’re doing today! We’re making the best recipe for pork ribs ever. They are seriously perfect. Because they take less than 60 minutes to make in a pressure cooker, we’ve been making them all summer long as an easy weeknight dinner, and you better believe we’ll be making pressure cooker ribs all football season long.
They’re…
- super fast: you make them in 60 minutes or less with some pressure cooker magic! ✨
- super delish: thanks to a super flavorful dry rub and a smoky pressure cooker secret.
- super easy: if I can do it, you can do it – I promise!
Baby Back Ribs Start with the Best BBQ Dry Rub
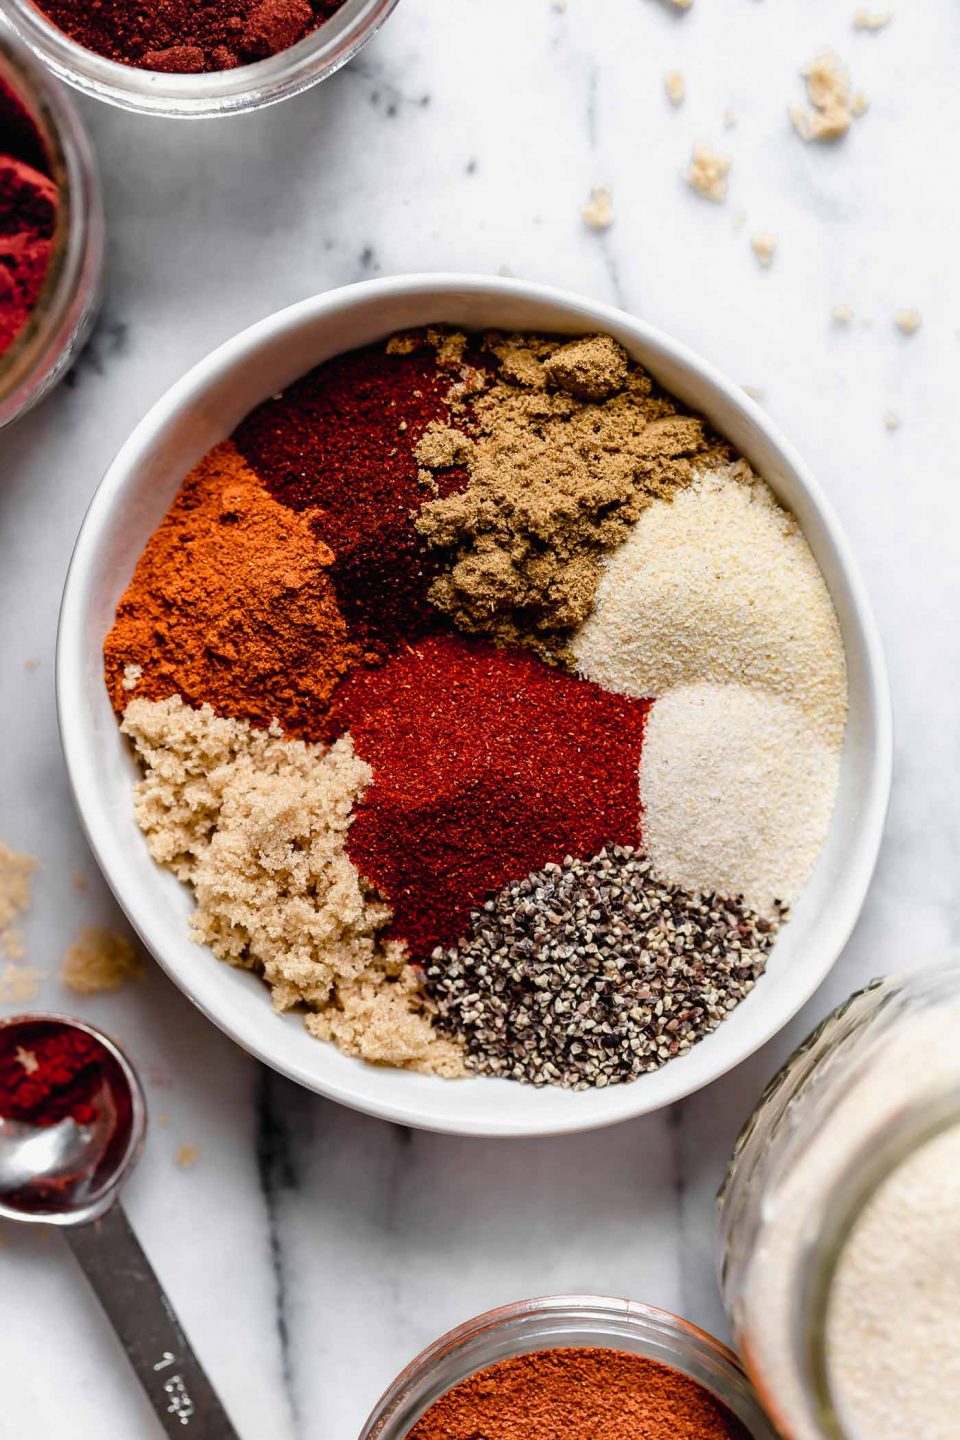
The first step to pressure cooker pork ribs is making a dry rub.
Using a dry rub for pork ribs is so important! It helps to impart flavor all throughout the cooking process. Unlike a marinade, the dry rub stays in contact with the meat, giving off tons of flavor. If you’re wondering how to season pork ribs…this is it!
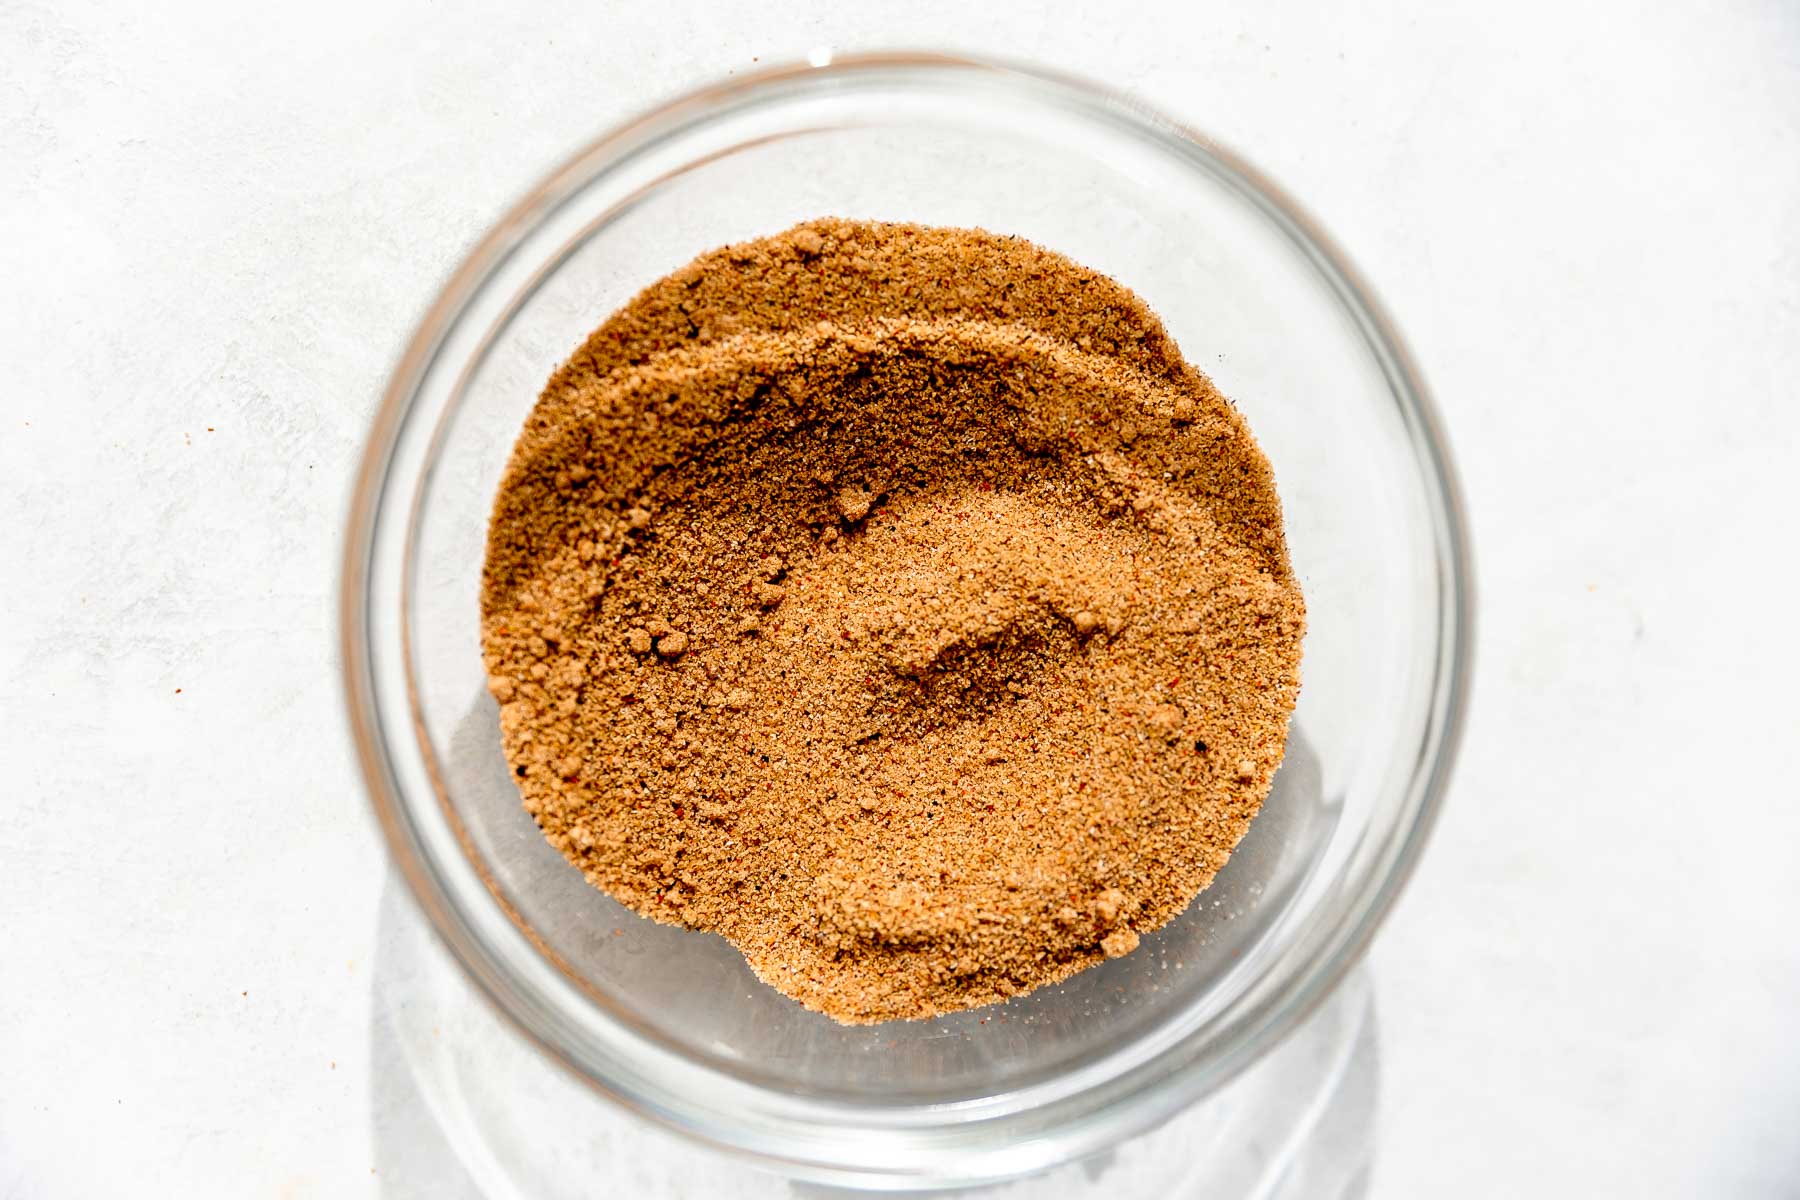
My go-to BBQ dry rub recipe is filled with brown sugar and spices that, when combined, give off tons of amazing sweet heat. To make my dry rub, you’ll need:
- brown sugar
- chili powder
- cumin
- garlic powder
- onion
- smoked paprika
- black pepper
- & optional: some cayenne pepper for an extra kick of spiciness
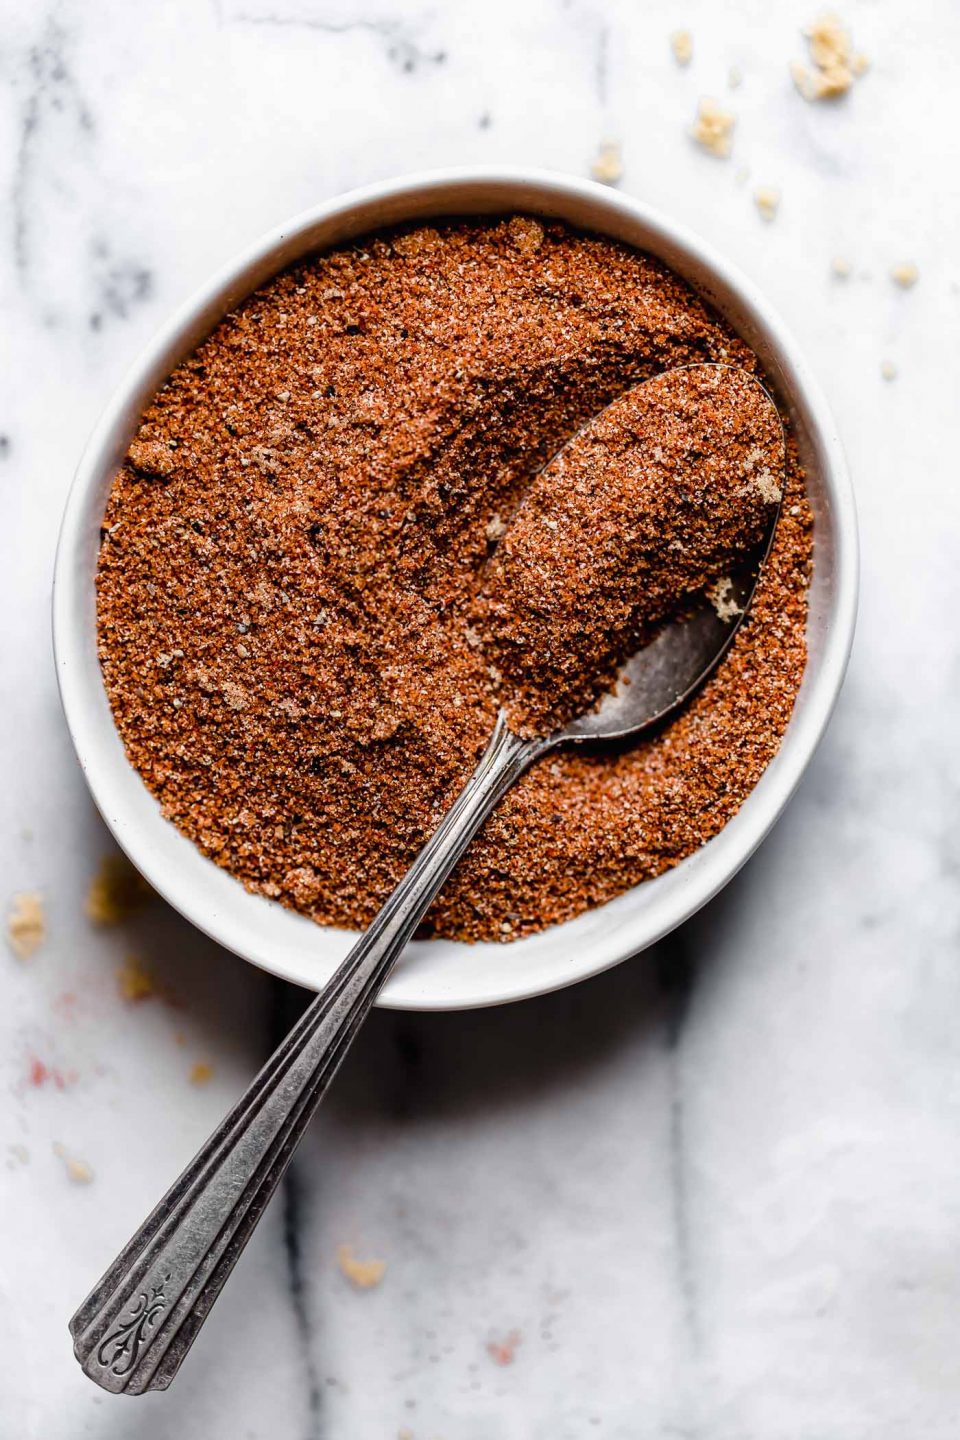
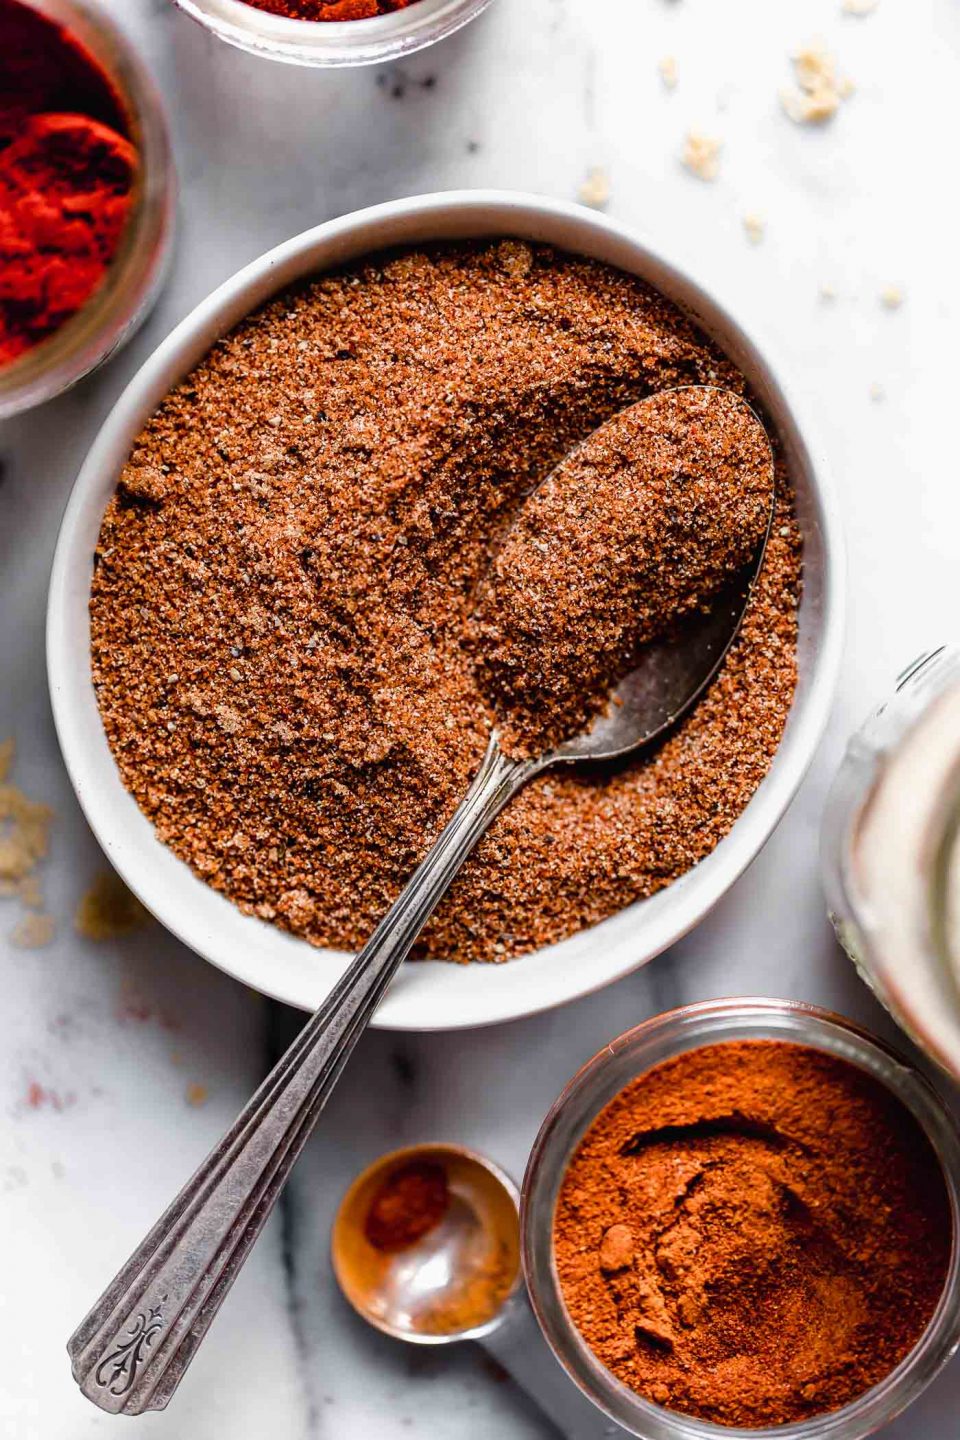
Simply mix the sugar and spices together in a bowl and it’s ready to go! You can use the dry rub right away, or pop it in a jar to keep on your spice rack. It’ll stay fresh for up to 1 month.
How to Cook Ribs in 60 Minutes in a Pressure Cooker
I’ll be the first to admit: this pressure cooker ribs recipe took some major testing to get it right. The first few tries ended with tough ribs…not acceptable!
After many many MANY batches of ribs, I’m happy to say I finally got cooking ribs in the pressure cooker down to a T.
The best method for pressure cooker baby back ribs is all about the pressure and the cooking time (more details on the cooking times below!) First, a quick overview on the process for this recipe for pork ribs. (Note: full directions provided in the Recipe Card, below.)
- Mix the dry rub. With brown sugar and tons of delish spices, my dry rub is sweet, savory, and smoky all at the same time.
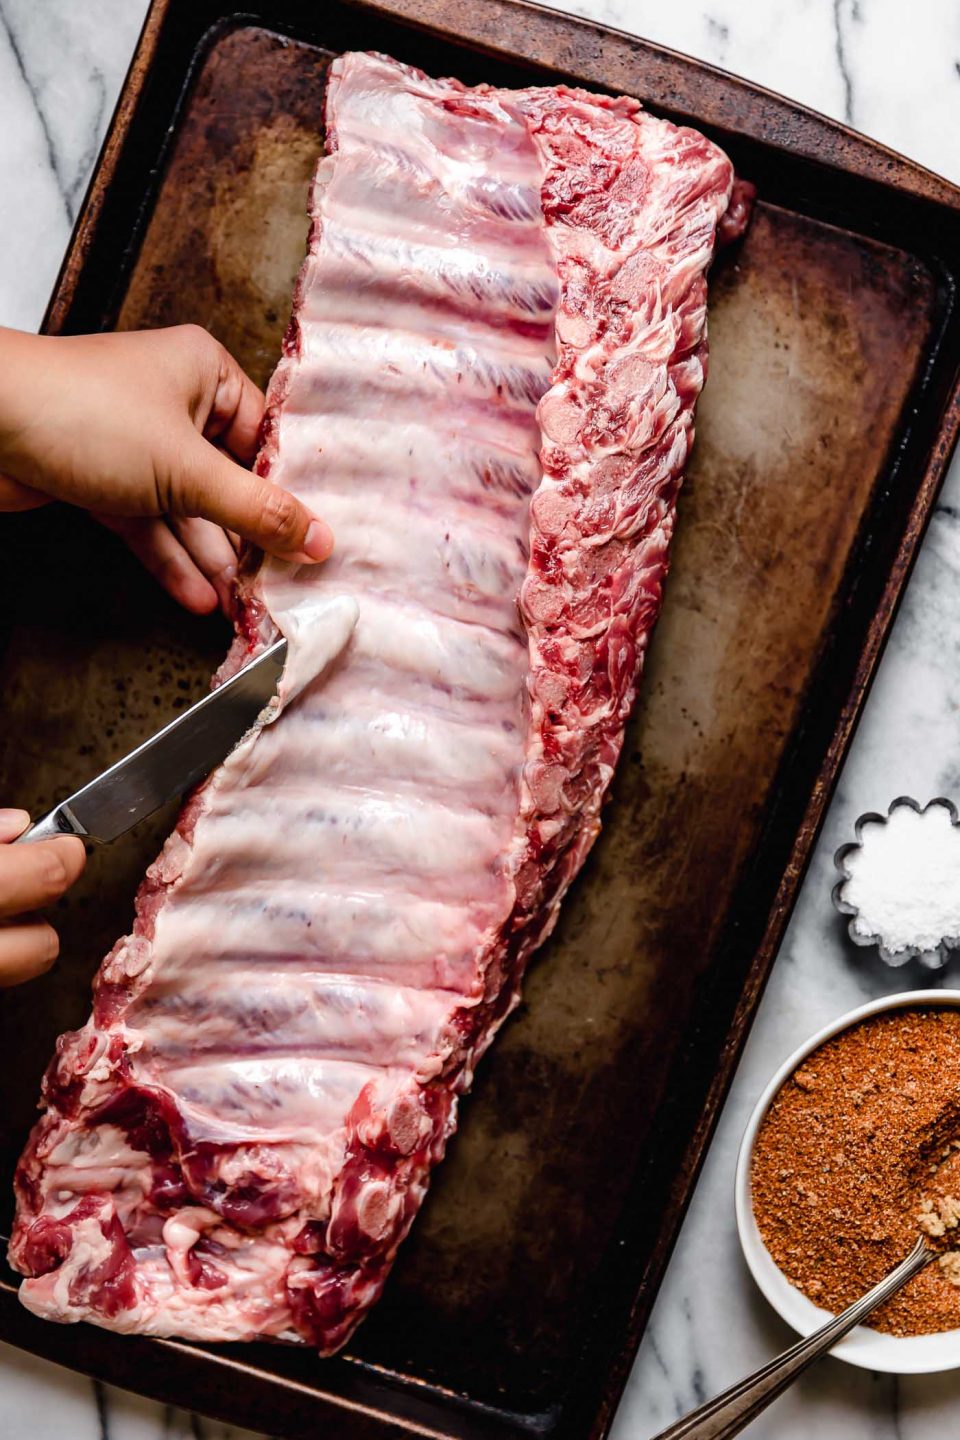
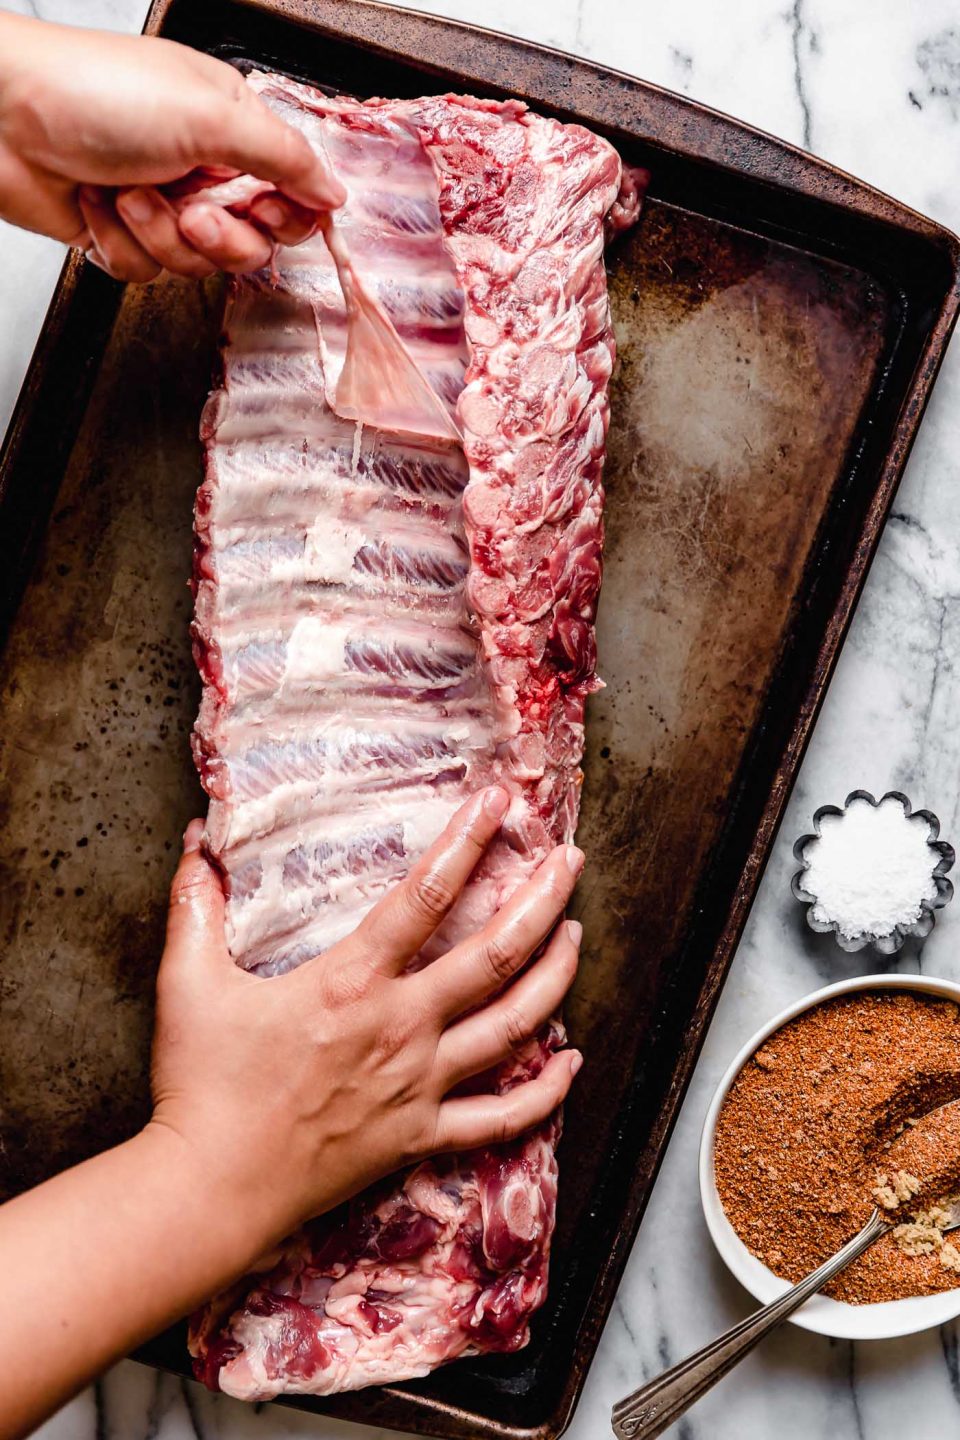
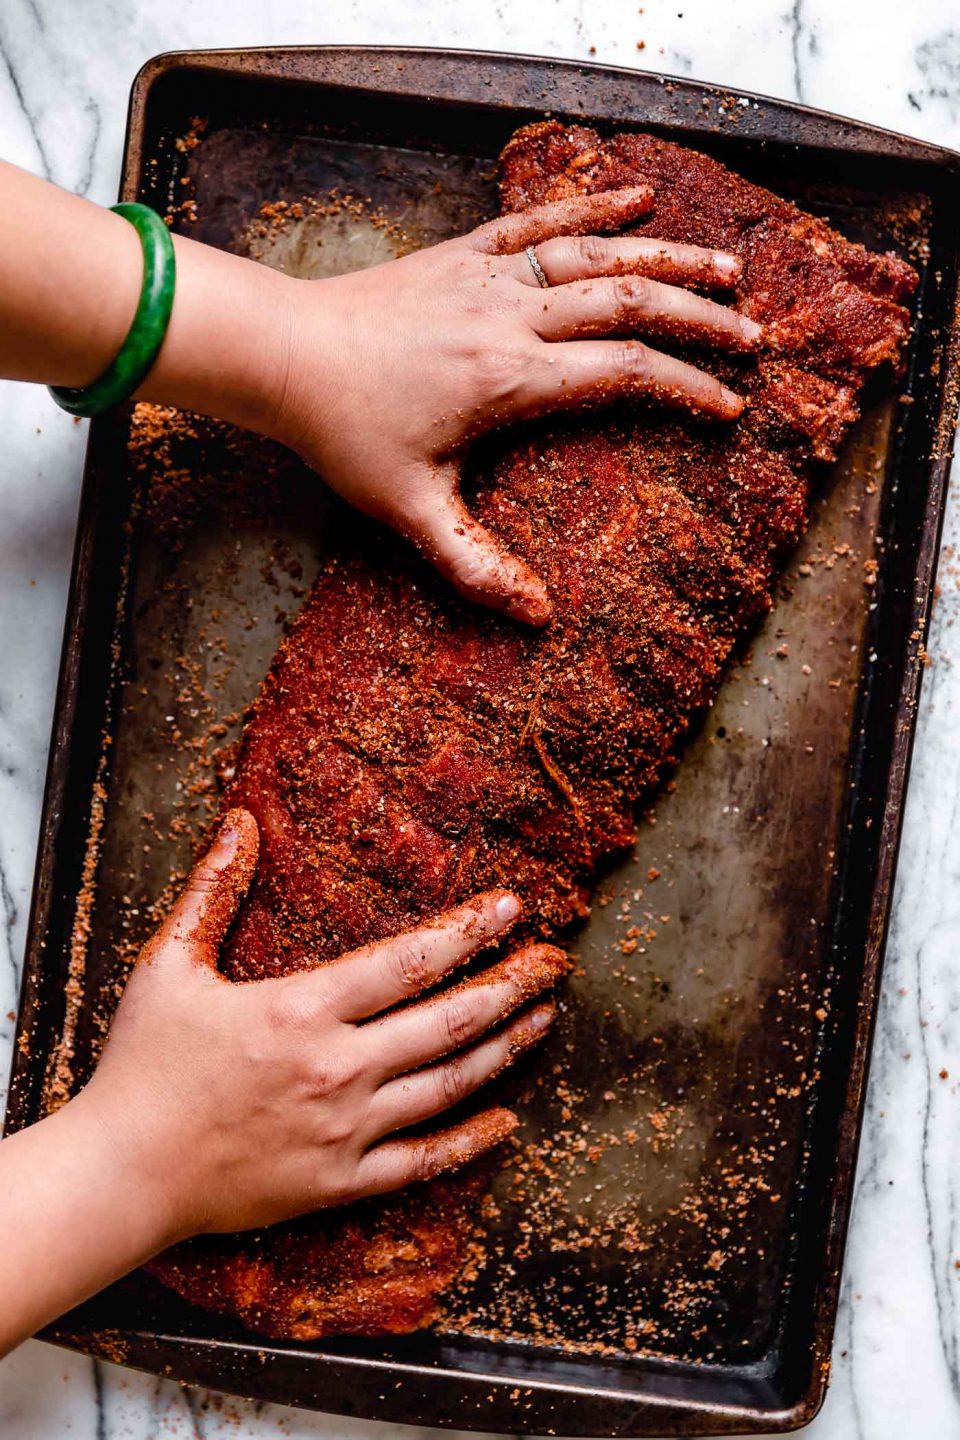
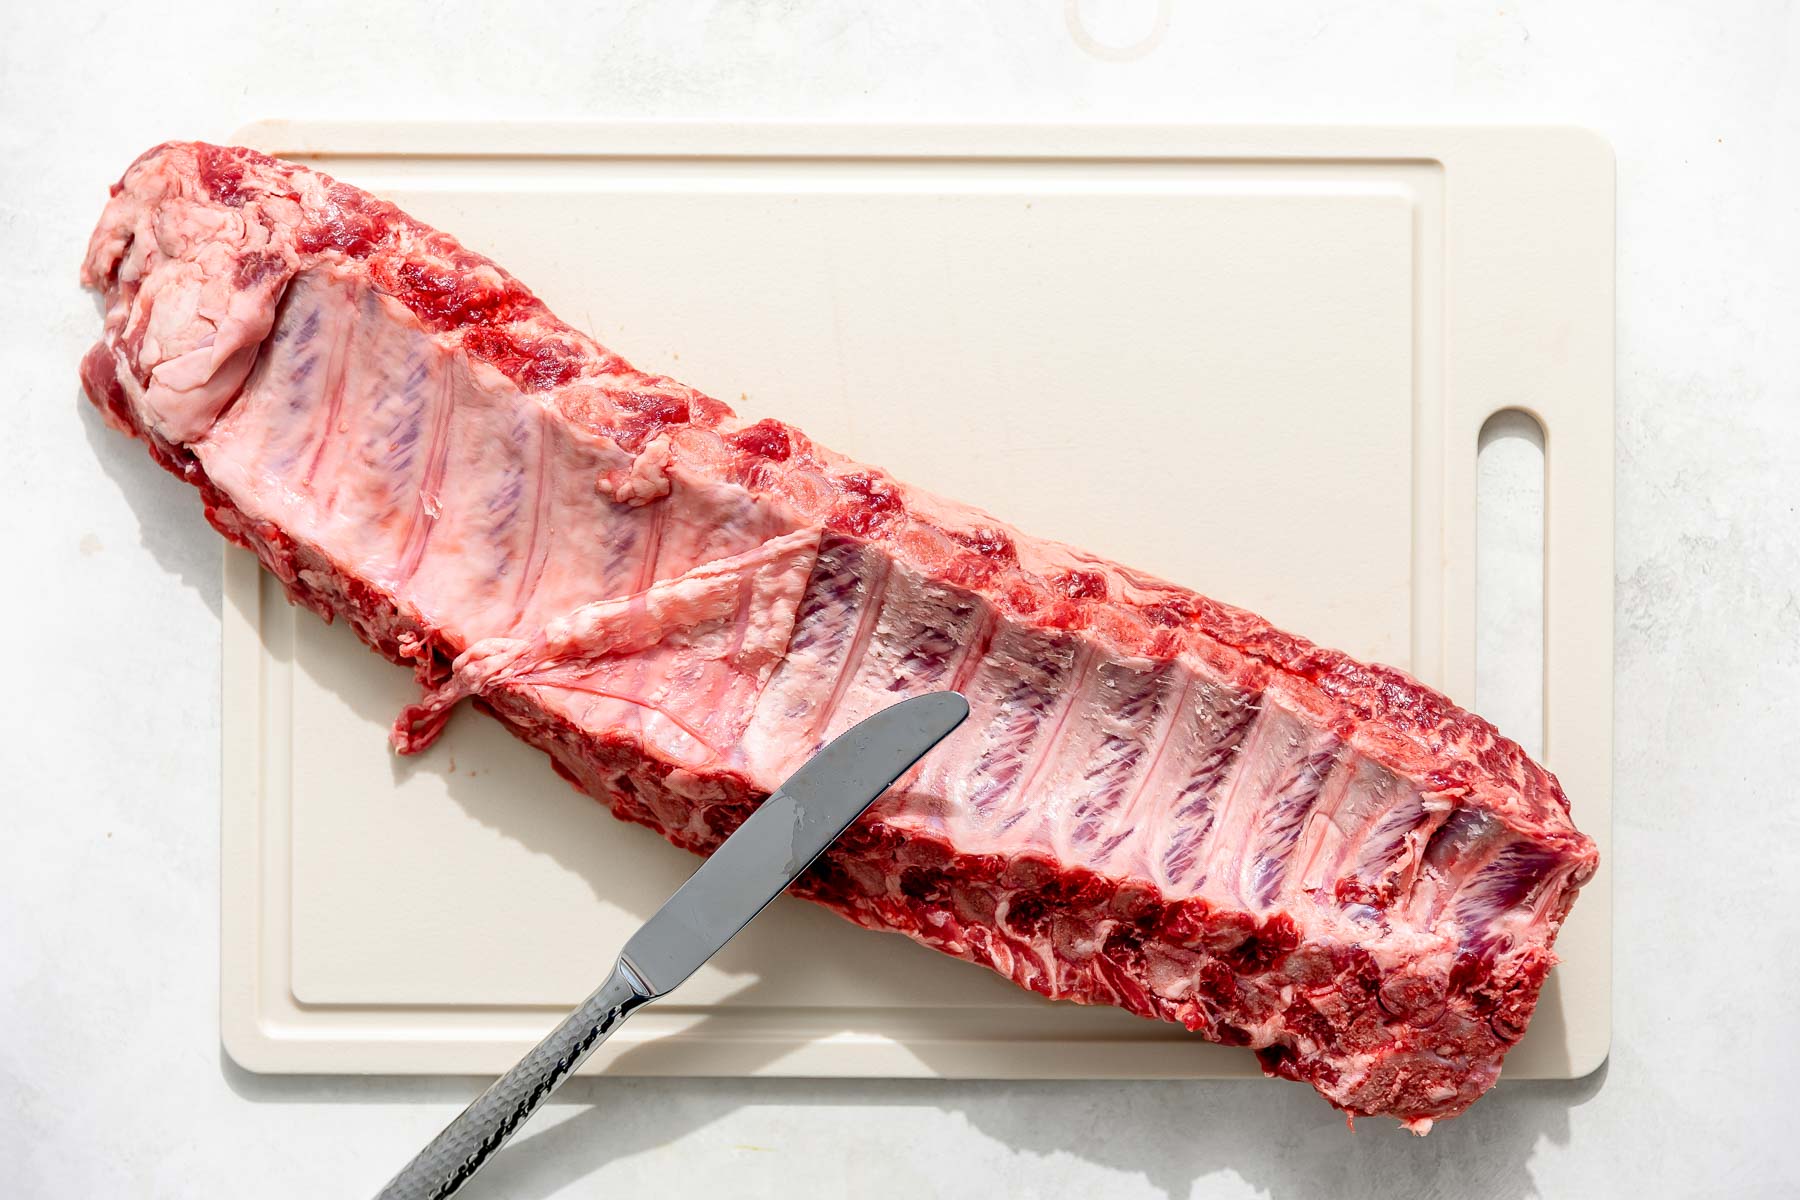
- Prep the ribs. This step is vital: you need to remove the thin membrane (“silverskin”) from the back of the ribs. If you skip this step, the dry rub won’t penetrate the meat, resulting in ribs that are both tough and lacking in flavor. Sad, right?! Removing the silverskin from baby back ribs can seem a little intimidating at first, but it’s honestly super easy. I like to loosen it with the blunt end of a butter knife, and from there it peels right off. I have full instructions in the Recipe Card, below.
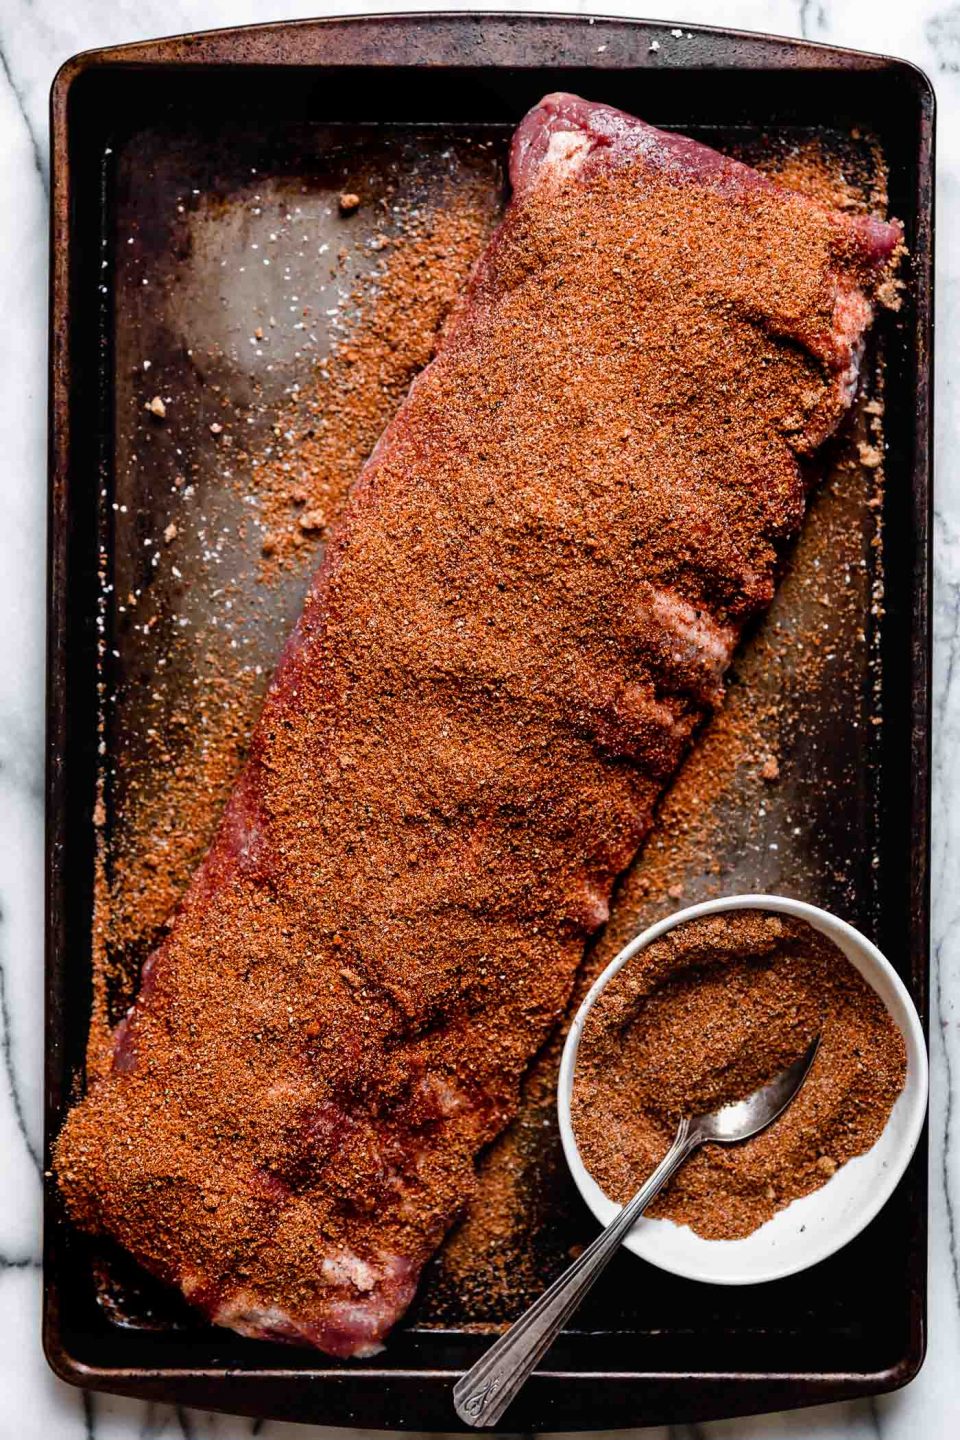
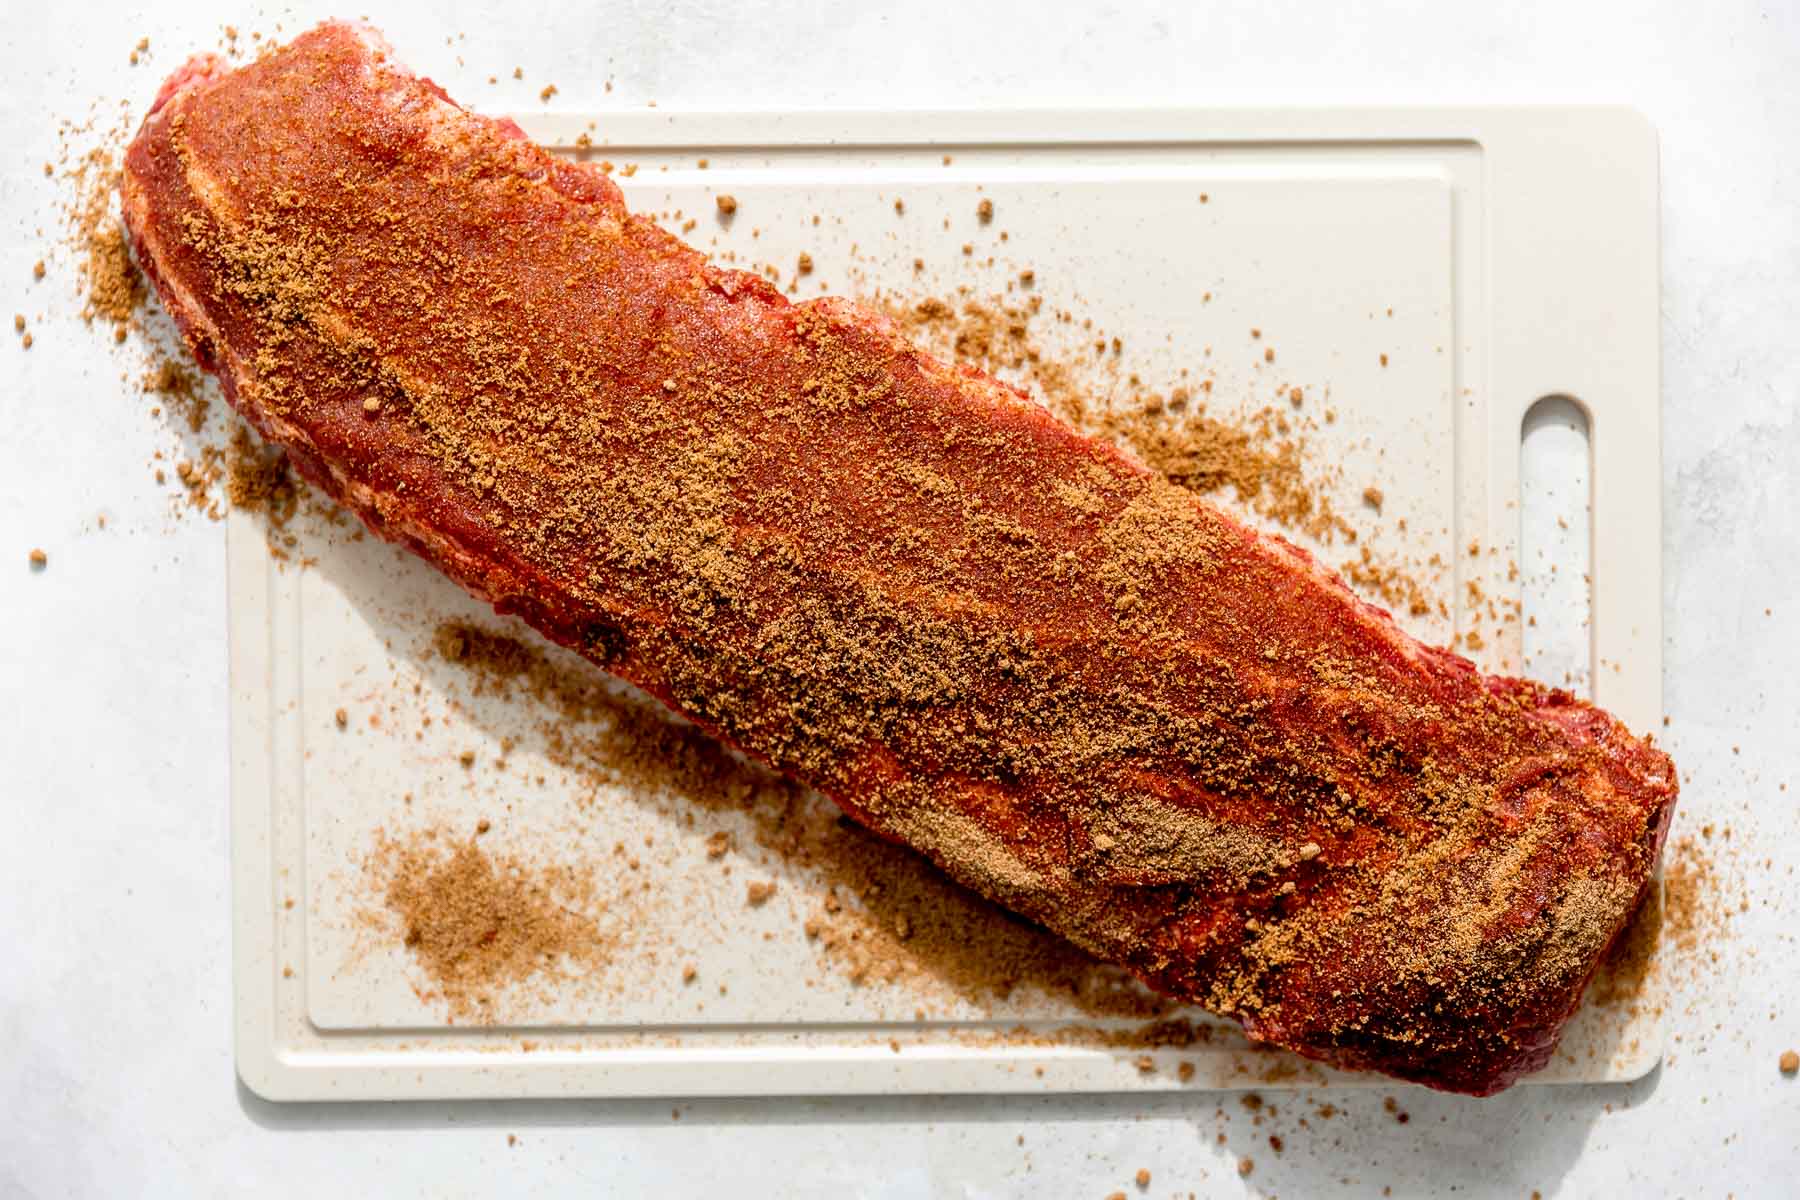
- Season the ribs. Once the silverskin has been removed, generously season the ribs with salt (lots of it!) and my dry rub for baby back ribs.
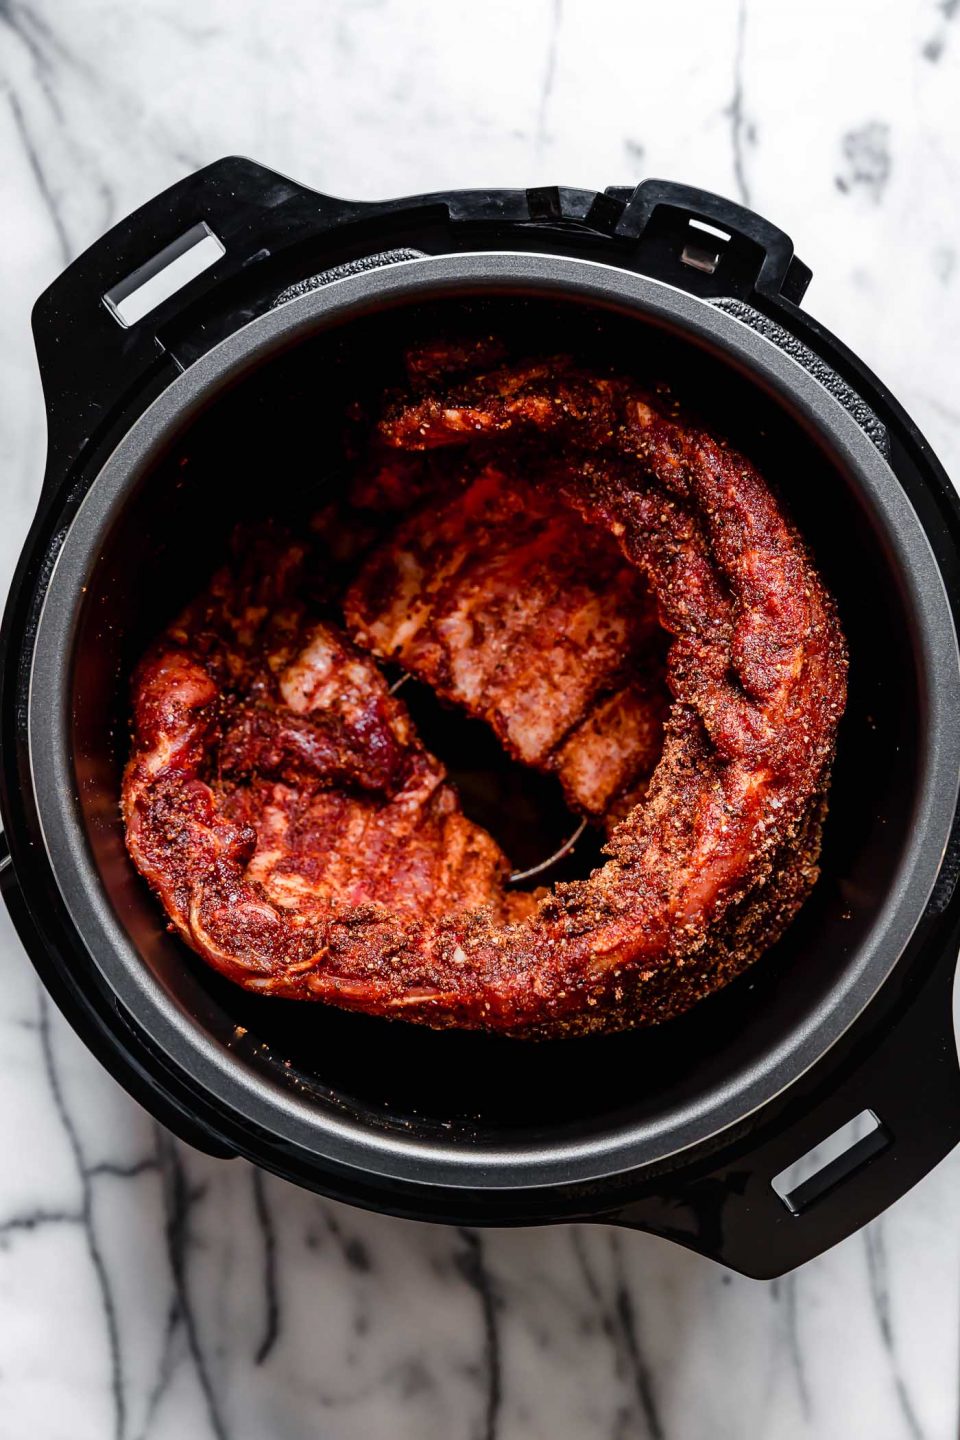
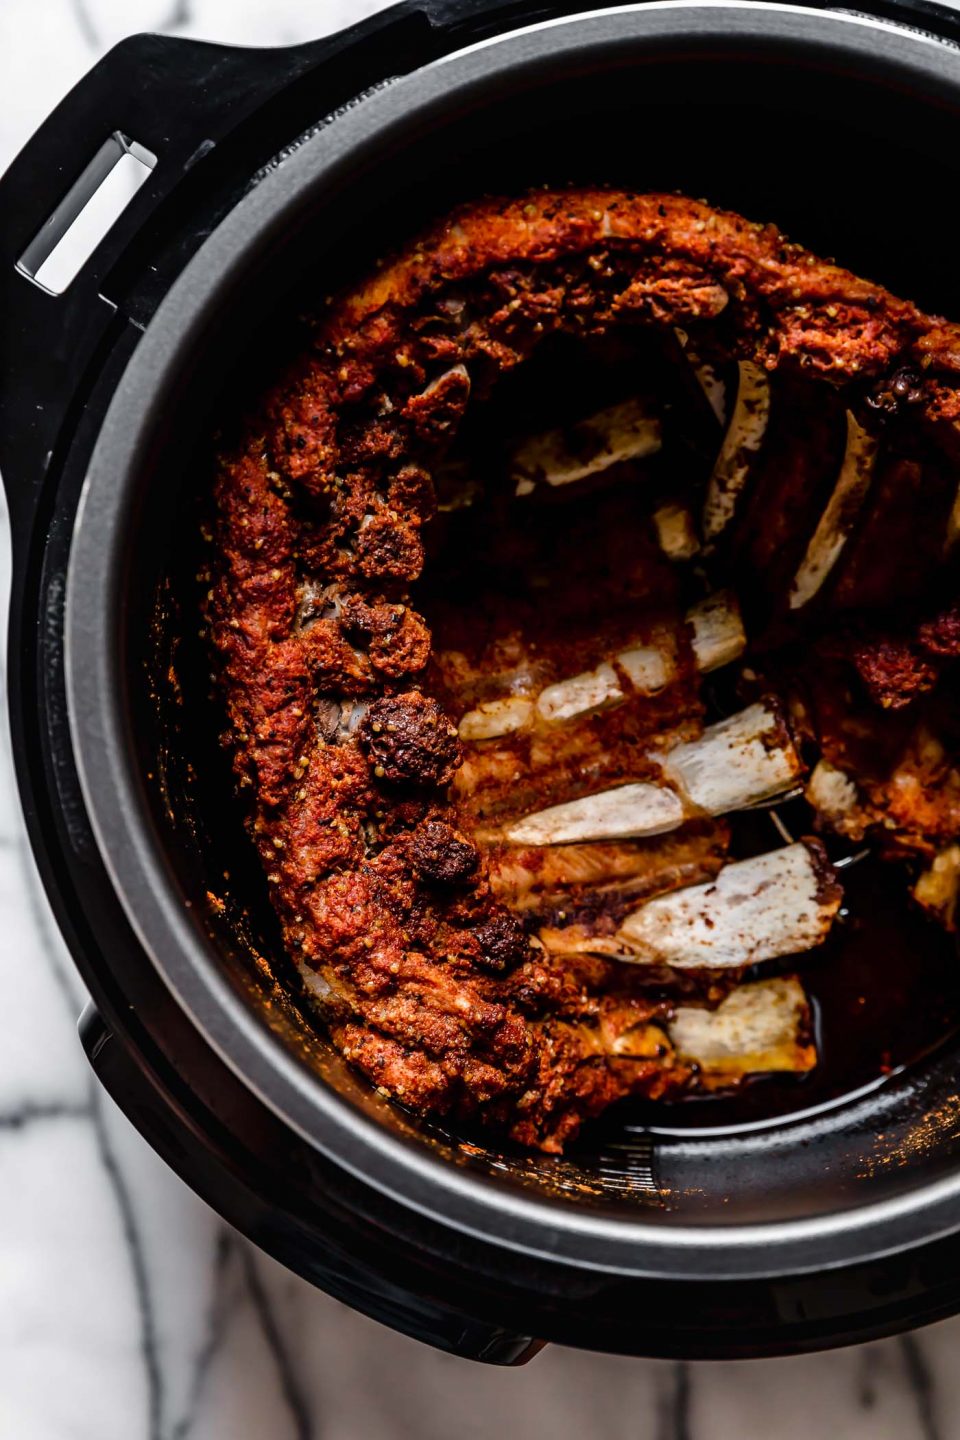
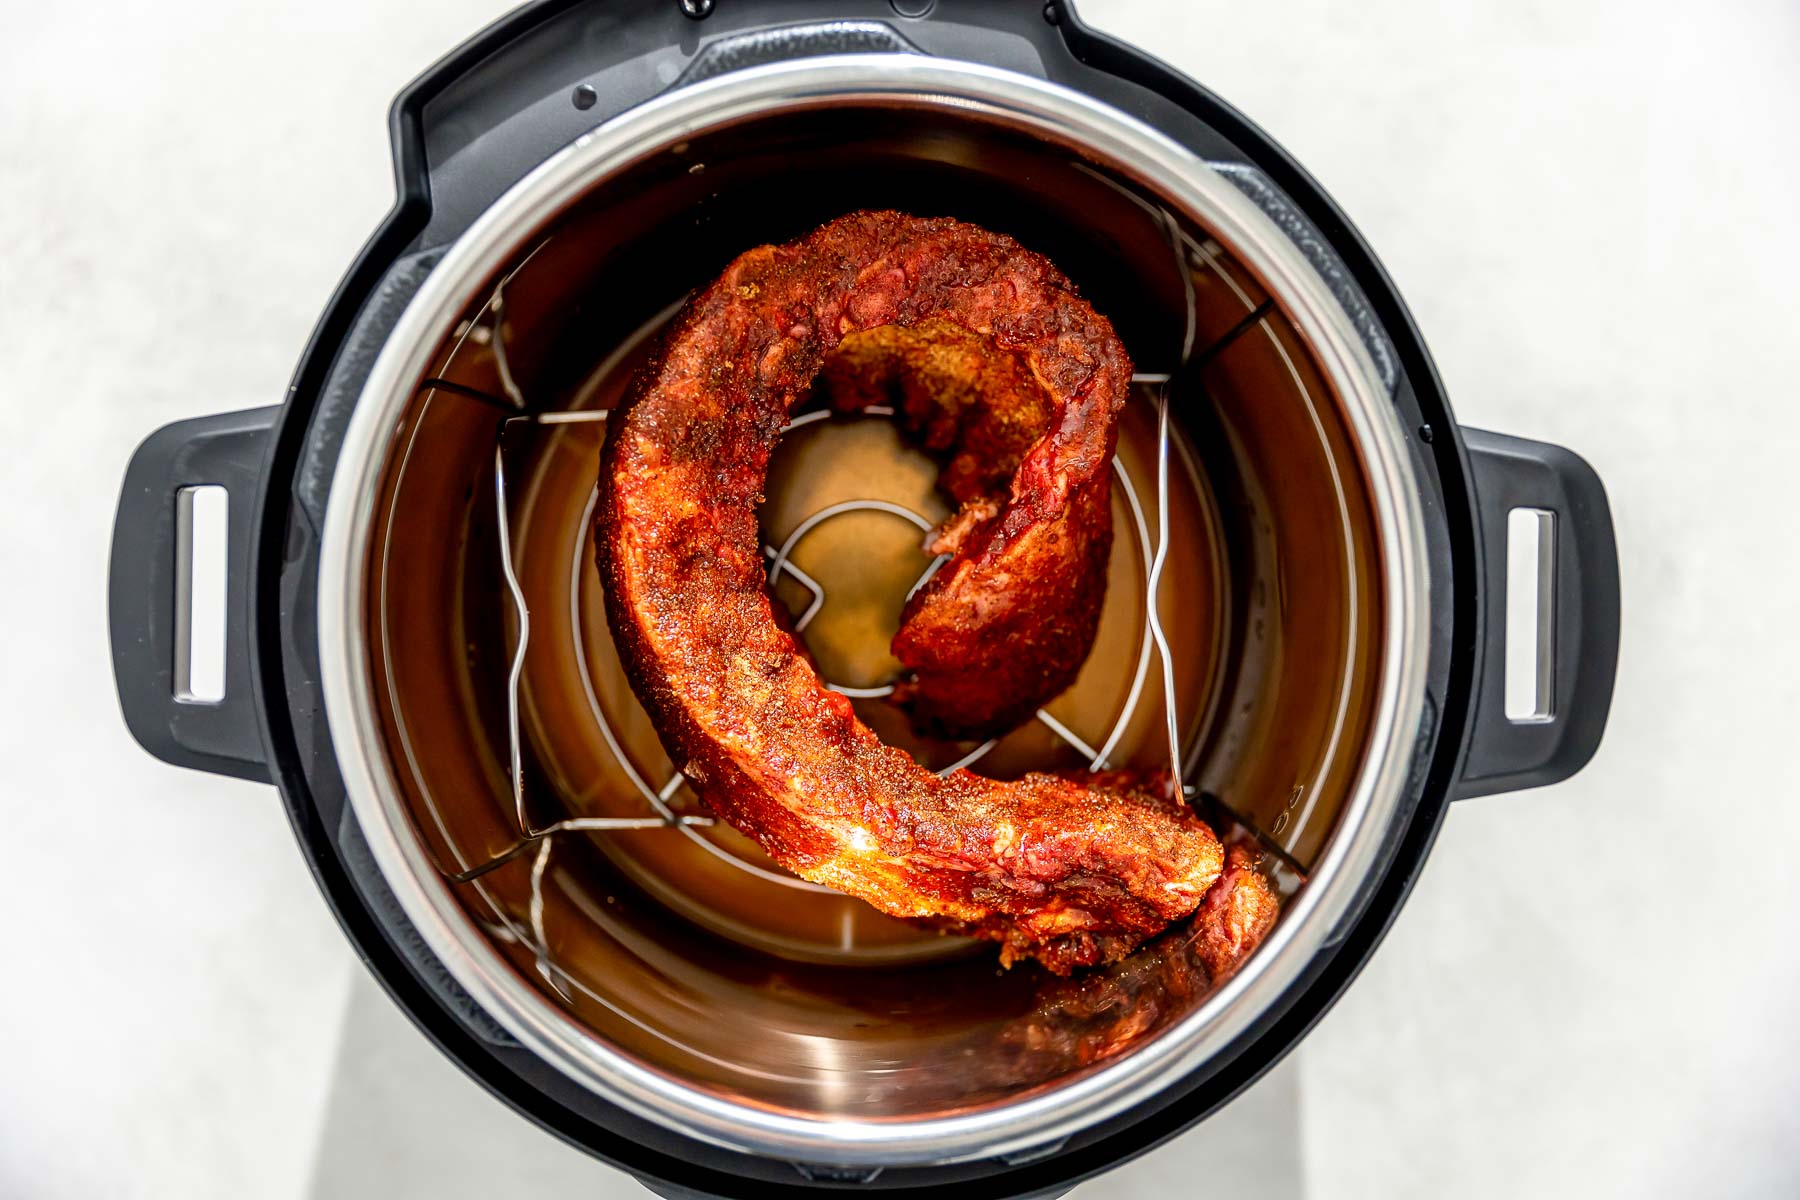
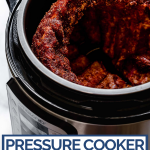
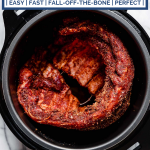
- Pressure cook the ribs. Time to get cooking! Fit your pressure cooker with the trivet/rack it came with, then set the rack of ribs right on top of it. You’ll add some water (and a secret ingredient!) to the bottom of the pressure cooker, and you’re ready to cook.
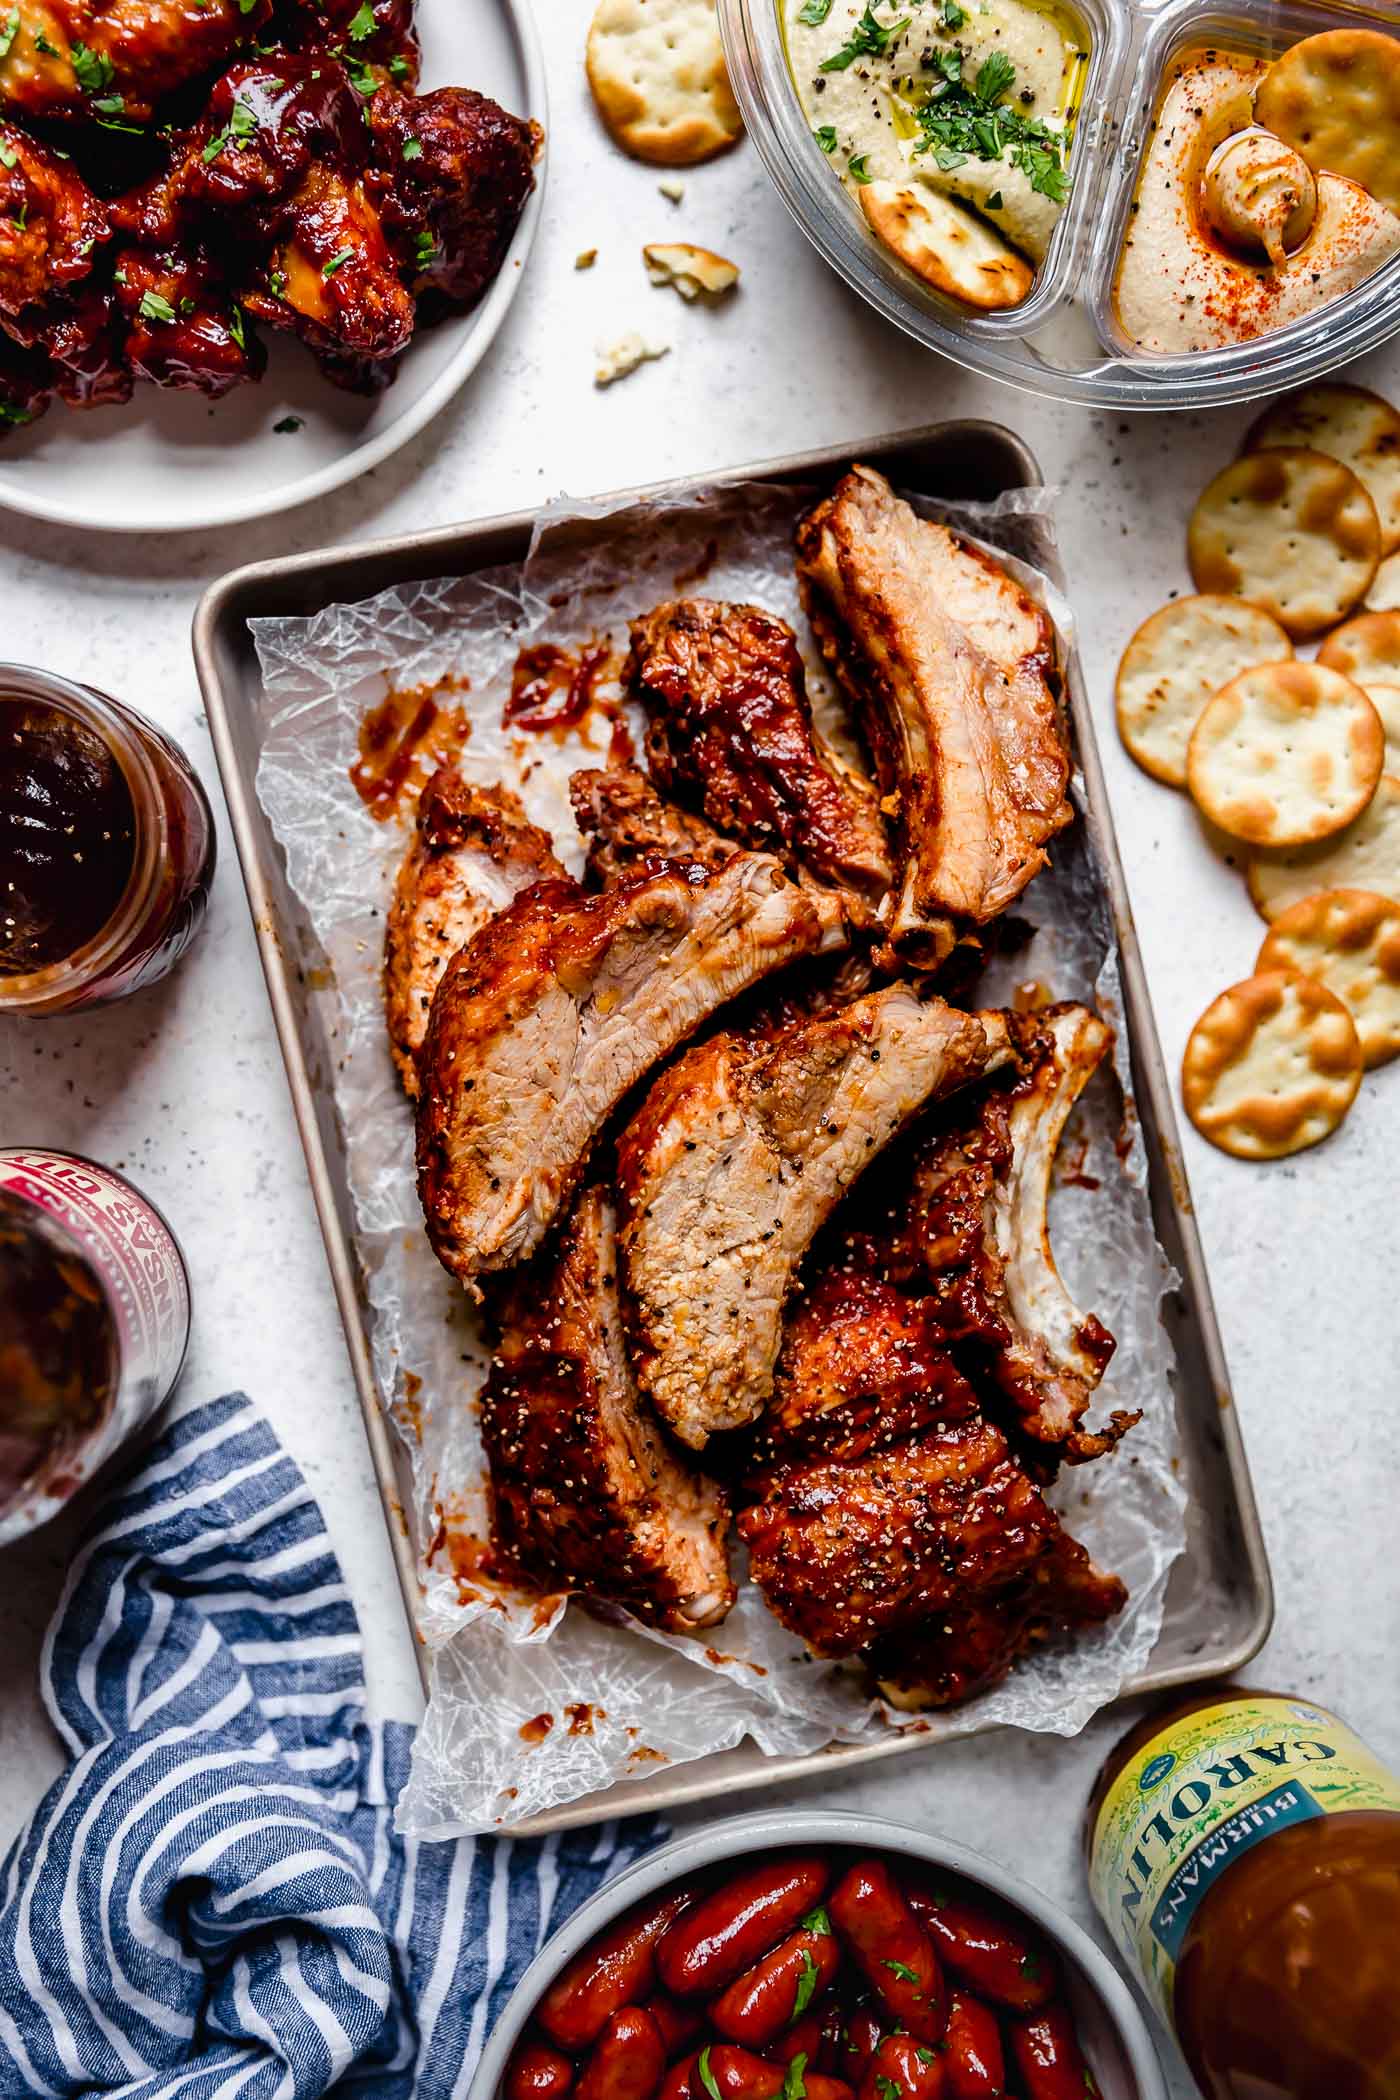
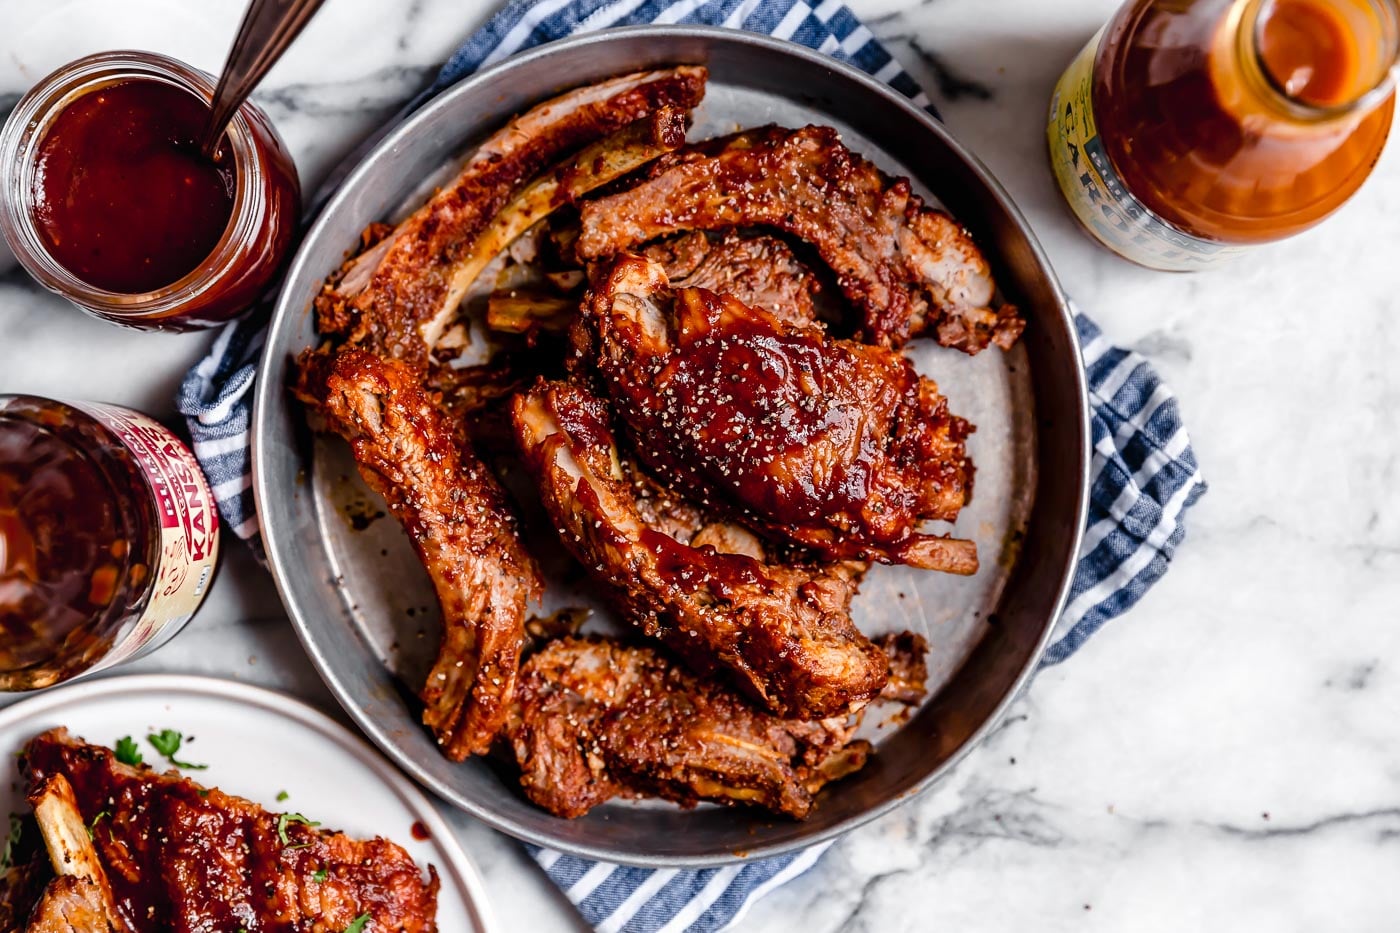
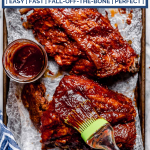
- Finish the ribs on the grill. Rather than cooking the ribs entirely on the grill (which can take a while) or entirely in the pressure cooker (which is great, but lacking in those addictively crispy, charred edges), this recipe combines the two for the best of both worlds. First, you pressure cook so the get nice and tender, then you toss them on the grill for some quick smoky char. While they’re grilling, brush them with your favorite BBQ sauce.
Breaking out Steps 4 & 5 is my secret for making these ribs make-ahead friendly. Ribs might not be the first thing that comes to mind when you think of “make-ahead” food, but this is one of my favorite parts of this recipe. Check out the Recipe Notes, below, for the exact how-to!
The Secret Ingredient to the Best Baby Back Ribs
When it comes to cooking ribs, using a pressure cooker is a great way to cut cooking time and difficulty out of the equation. But making ribs the easy way doesn’t mean that you need to end up with ribs that are lacking in the flavor you develop when you cook them low and slow on a grill or smoker.
So that’s the big secret to this easy recipe for pork ribs: the ribs are “faux-smoked”!
I add a little bit of liquid smoke to the pressure cooking liquid. The pressure cooker will seal up and impart all that smoky flavor right into the ribs.
I swear, it’s the easiest way to “smoke” your meat, and I promise, it can be our secret.
After testing countless times, I found the combination of short cook times and high pressure to yield ribs that were somehow fall-off-the-bone and tough and dry at the same time! Weird, right? So not ideal.
Using low pressure and a longer cook time (30 minutes) is truly the secret to keeping baby back ribs from drying out or getting tough in the pressure cooker.
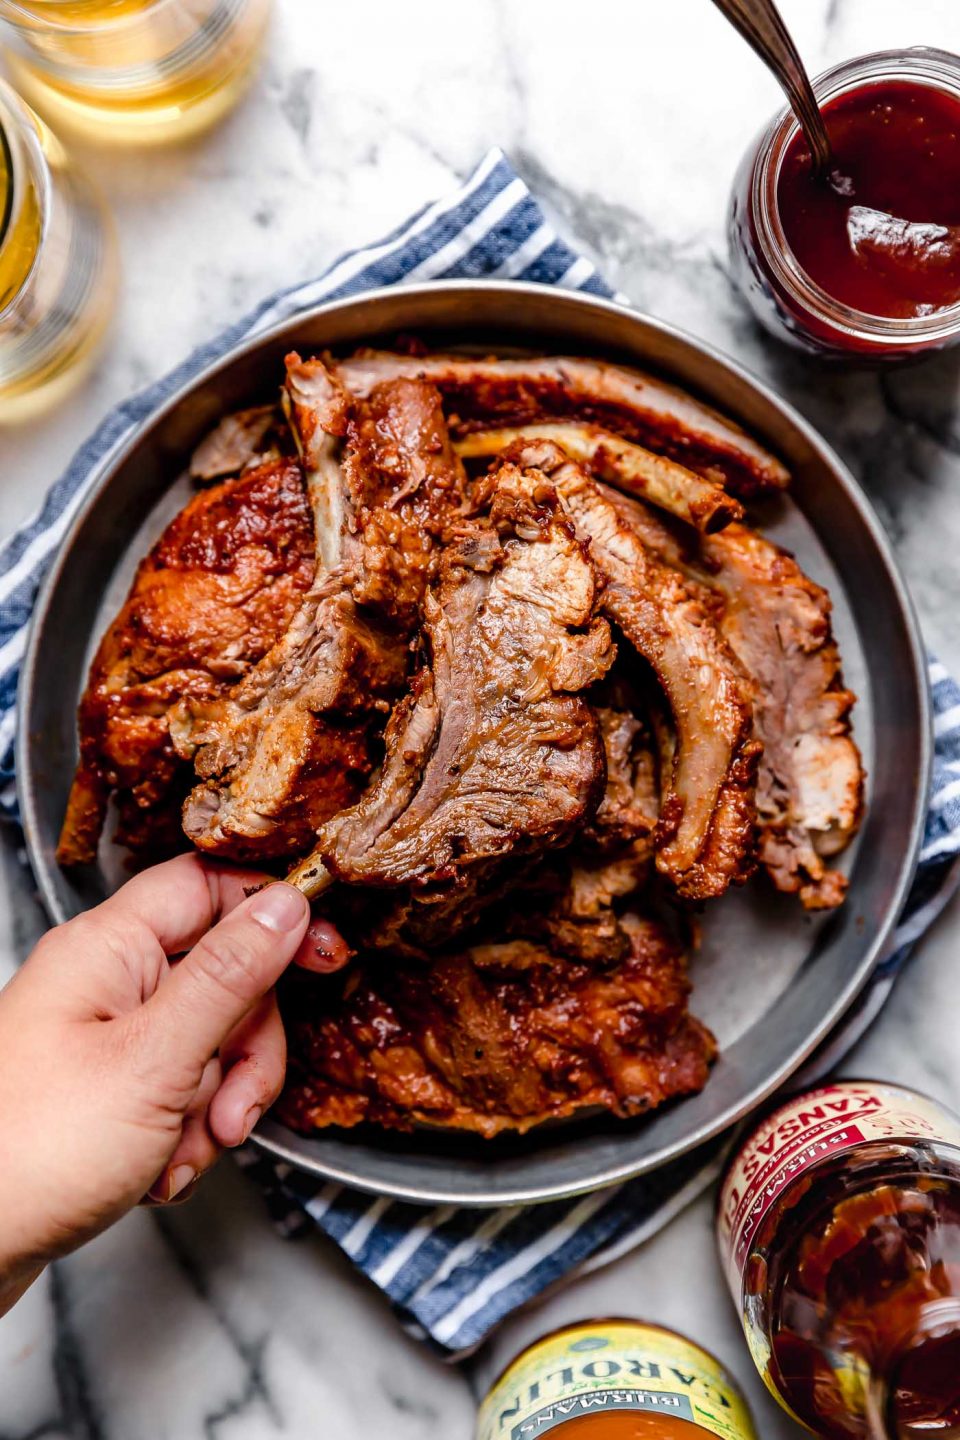
And from there, all you have to do is serve them up on a platter at your next game day party and get ready for the compliments to pour on in. Best. Ribs. Ever!
I hope you give this Baby Back Ribs recipe a try! If you do, be sure to let me know!: Leave a comment with a star rating below. You can also snap a photo & tag @playswellwithbutter on Instagram. I LOVE hearing about and seeing your PWWB creations! Happy cooking! ♡
Print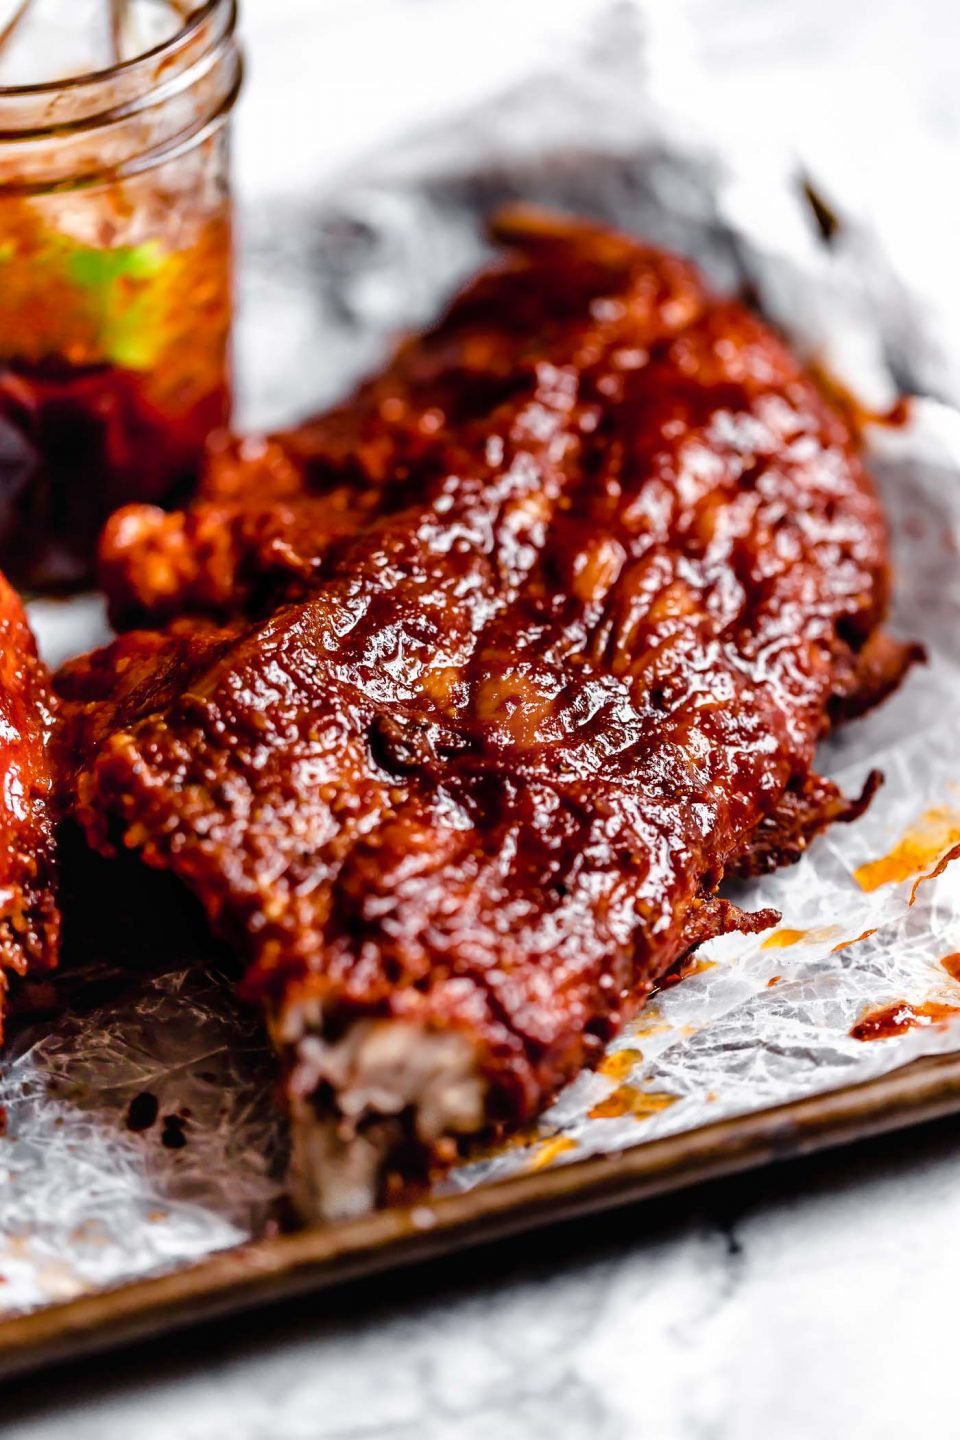
Pressure Cooker Baby Back Ribs Recipe
- Prep Time: 5 minutes
- Cook Time: 30 minutes
- Total Time: 1 hour
- Yield: Serves 4-6 1x
- Category: Main Dishes
- Method: Instant Pot & Pressure Cooker
- Cuisine: American
Description
The BEST pressure cooker baby back ribs recipe! My dry rub for baby back ribs + a secret ingredient + perfected cooking time = the perfect juicy & tender ribs. You will love this recipe for pork ribs!
Ingredients
- 1 3-4-pound rack baby back pork ribs
- 1 tablespoon kosher salt
- 1 cup water + 1 tablespoon liquid smoke
- for serving: Your favorite BBQ sauce of choice, potato salad, coleslaw, cornbread, etc.
for the dry rub:
- ¼ cup firmly packed brown sugar
- 1 teaspoon chili powder
- 1 teaspoon ground cumin
- 1 teaspoon garlic powder
- 1 teaspoon onion powder
- 1 teaspoon smoked paprika
- 1 teaspoon ground black pepper
- optional: ⅛ – ¼ teaspoon cayenne pepper
Instructions
- Mix the dry rub: Add all listed dry rub ingredients to a small bowl. Stir to combine. Set aside, or store in an airtight container on your spice rack for up to 1 month.

- Prep the baby back ribs: There will be a thin membrane on the back of the ribs (“silverskin”) that needs to be removed – otherwise the dry rub won’t penetrate the meat all around the ribs & your ribs will be difficult to chew! I find it’s easiest to use a butter knife (something with a blunt edge that is not sharp) to work the silverskin off the ribs in 1 spot. From there, slide your finger under the membrane and the silverskin should pull off very easily. Reference the photos provided in the blog post above if you need a visual. I also found this simple video tutorial to be very helpful!
- Season the ribs: Generously season the ribs all over with kosher salt, then sprinkle the dry rub all over the ribs, using your hands to lightly work the rub into the meat.
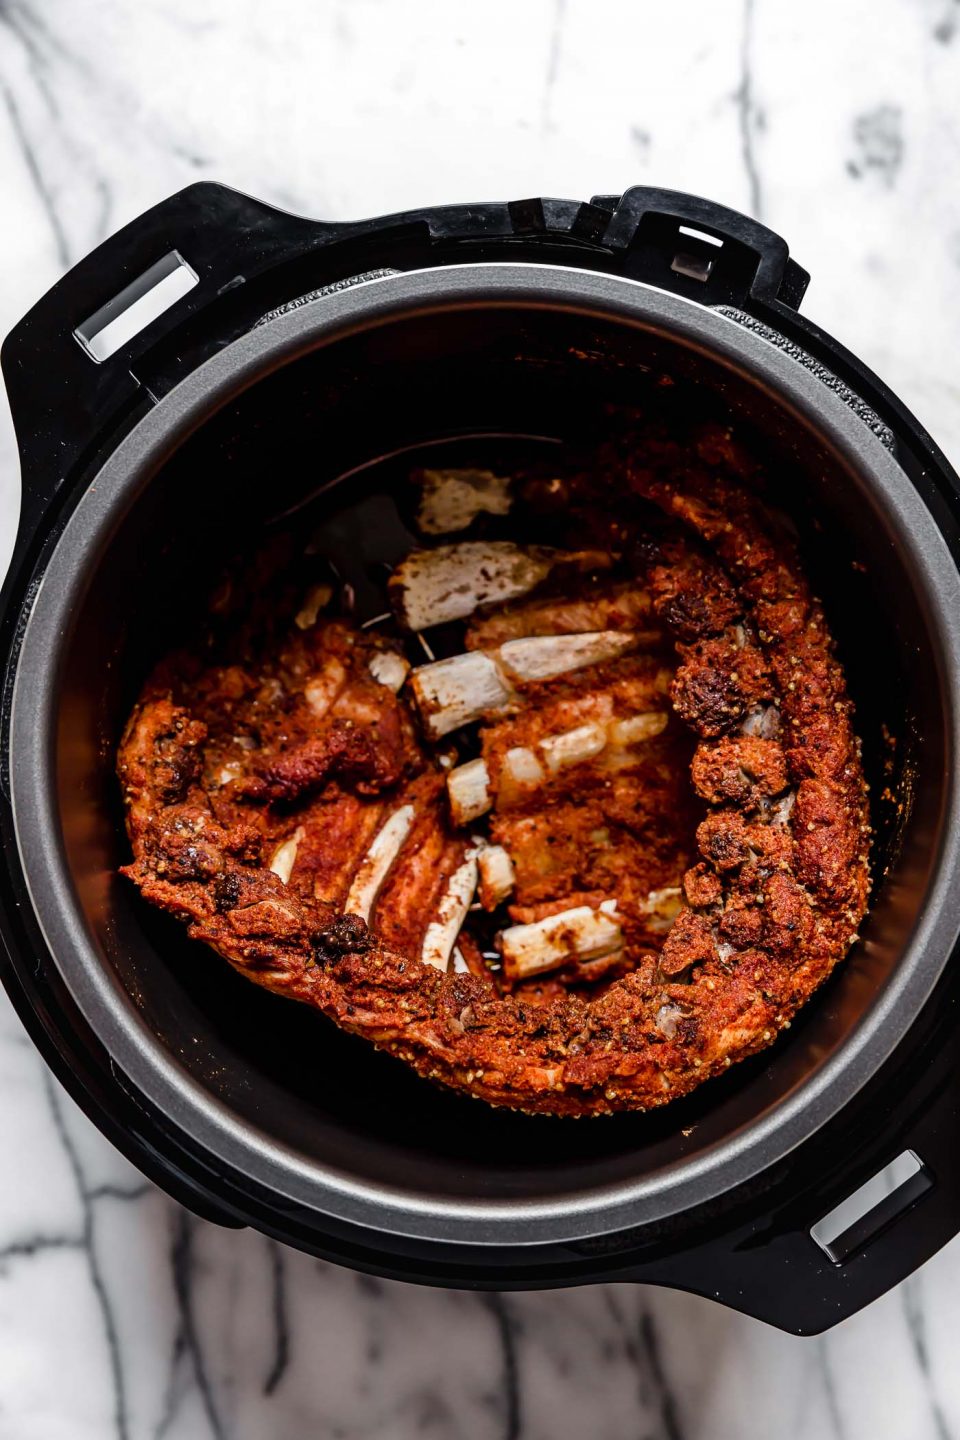
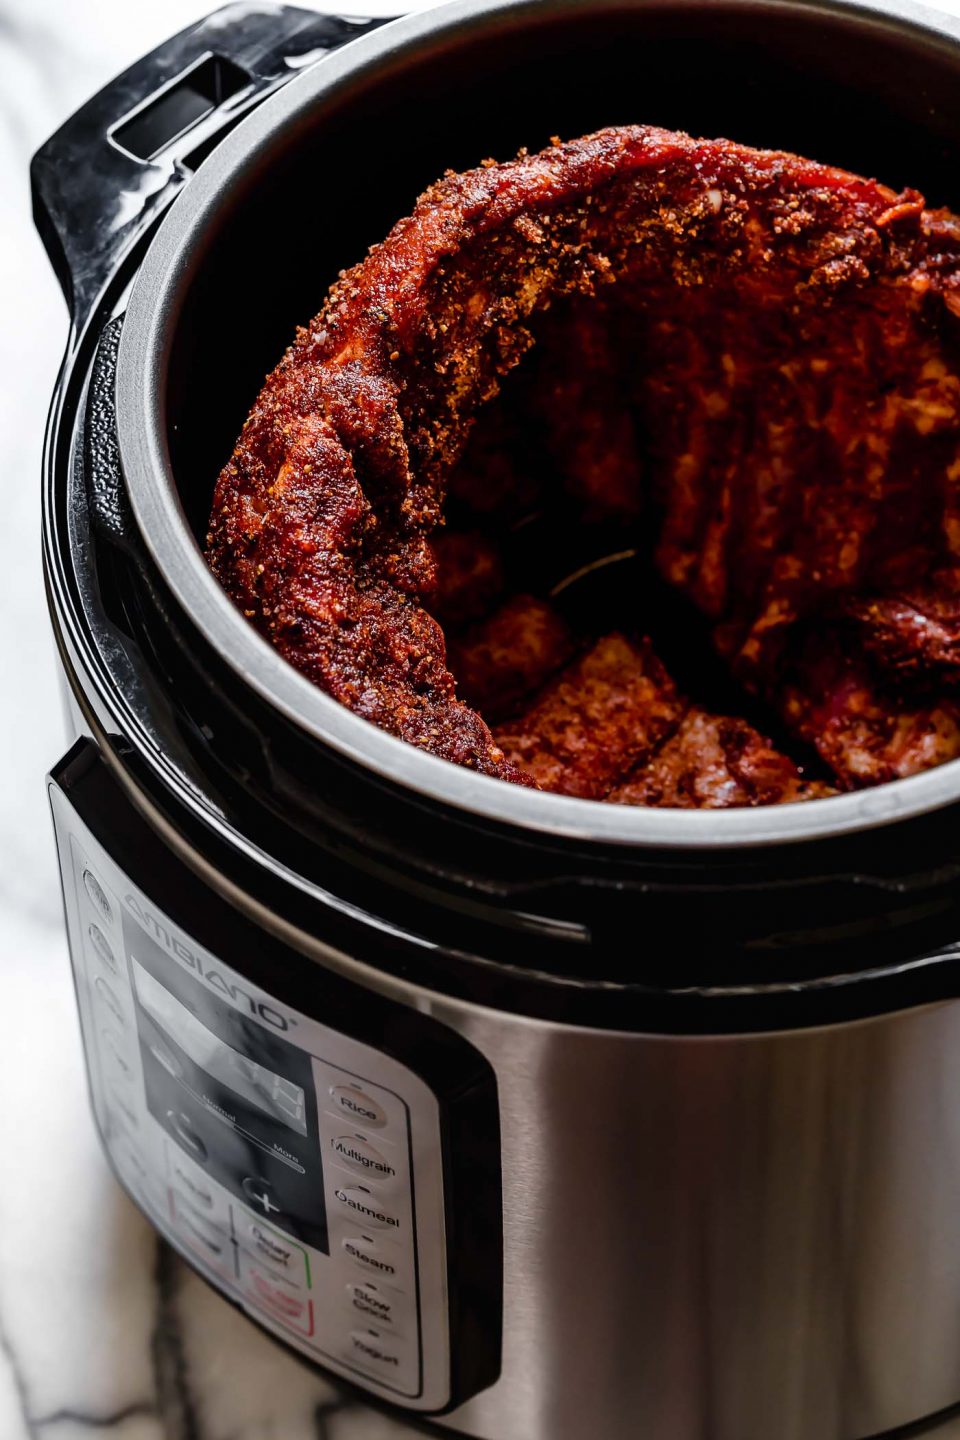
- Pressure cook the ribs: Add the water and liquid smoke mixture to the bowl of your electric pressure cooker. Fit the bowl with its trivet/rack. Place the prepared rack of ribs on the trivet/rack, bending as needed to fit into the bowl. Cover the pressure cooker, securely locking its lid into place and ensuring the vent is turned to its “sealing” position. Cook on low pressure for 30 minutes. Once the timer goes off, allow the pressure to release naturally for about 10 minutes (literally just leave the pot for 10 minutes!) before carefully flicking the vent to its “venting” position to allow any residual pressure to release. The ribs will hold to the bone but will have a great fall-apart tender texture – perfect! Carefully transfer the ribs to a baking sheet or serving platter.
- Optional: Grill the ribs: While the pressure cooker releases, preheat the grill to medium-high (approx. 600 degrees F). Grill the ribs over direct heat for 3-4 minutes per side, brushing them with your favorite BBQ sauce the whole time. You don’t need to grill them very long, just enough to get some nice grill marks and smoky char.
- Serve the ribs with your favorite BBQ sauce and BBQ sides. In our house, that’s cornbread, potato salad and coleslaw – YUM. Enjoy!

Notes
- Make ahead baby back ribs: Ribs might not be the first thing that comes to mind when you think of “make-ahead” food, but this is one of my favorite parts of this recipe. You can make the ribs in advance, then finish them on the grill just before you’re ready to serve. To make ahead, prep the ribs through Step 4 of Recipe Directions. Allow to cool slightly before wrapping in foil & transferring to the refrigerator. Store in the refrigerator for up to 3 days. When you’re ready to serve, resume with Steps 5-6 of Recipe Directions. You may need to grill slightly longer, just to ensure the ribs are warmed all the way through.
- No grill? No worries! Rather than grilling ribs as described in Step 5, you can achieve the same effect with your broiler. Position the ribs on a rack about 6 inches under the broiler & broil on high for 3-4 minutes. Brush with sauce, flip & repeat. As always – when working with your broiler, keep a close eye on things to avoid flare ups!
Follow along with Plays Well With Butter on Instagram, YouTube, Facebook, and Pinterest for more unfussy recipes that pack a big punch of flavor!


Made these tonight and your recipe was spot on, would not change a thing!de
DELICIOUS 😋
Thanks so much, Mary! 🙂
Hands down best baby back recipe I’ve come across. Exactly as described, absolutely delicious
We love to hear that, Matt. Enjoy your ribs!
Amazing how easy this is to make incredibly award worthy ribs. Kiddos on your recipe.
Love to hear that you think our ribs are award-winning, Brent. Enjoy!
Absolutely amazing! Delicious Success 😋
Thanks for leaving a review, Angela!
These turned out perfectly! 3 pounds of ribs. I have an air fryer top to my Ambiano pressure cooker and I just poured out the liquid, brushed BBQ sauce on both sides and air fried at 400 for 5 minutes. DELISH!!
Love the idea of using the air fryer for the final step! Happy to hear it turned out great for you, Jennifer!
Ribs. 2: full,rack coiled around in two circles on instant pot rack
FAIL.
ribs cooked too well,and very tough. Hard to even separate in most ribs. Not tender, save for very small,areas,where it was tender,, but not succulent savory whatsoever, Or for the latter altogether.
Hi G, we’re so sorry to hear this recipe didn’t turn out well for you!
The problems you’re describing sound like be a result of the ribs actually being undercooked, rather than overcooked. Well-cooked ribs should fall off the bone but still have texture, while overcooked ribs will shred in a manner similar to pot roast but they might taste dry.
Am I understanding correctly that you cooked 2 racks of ribs instead of 1? Our recipe calls for just 1 rack of ribs and over-crowding the Instant Pot with 2 racks definitely requires an adjustment to increase the cook time. It’s possible that by cooking 2 racks at the same time, the ribs didn’t cook long enough, causing them to be tough. It’s also very important when cooking with an Instant Pot to allow the pressure to release naturally for the full 10 minutes at the end of the cook time – this additional cook time is very important in making sure the ribs are well cooked!
Please let us know if you have any other questions, and we hope you’ll give these ribs another try!
The dry rub came together quickly from items I already had in the pantry. I left off the cayenne and still just loved this dry rub. I made a 4xs recipe for the rub and this yielded about 1 1/2 cups of dry rub. And it was enough for 4 racks of ribs. The instructions were very easy to understand and follow. I recommend using a BBQ sauce that doesn’t overwhelm the already great flavor from this dry rub. BONUS: the broth at the bottom of the pot is super delicious. I’m not creative enough to know what to do with it, but hopefully you will. I thought maybe Frijoles Charros (Mexican Cowboy Beans), or make a roux to make a gravy (over pasta???), or is there such a thing as “smoked-pork stroganoff”???
Thanks so much for the kind review, Tatiemily!! All of those options sound soooo good!!
Finally made the ribs. SUPER DELICIOUS!!! FYI: I bought a 3 pack of ribs from Costco and decided to make them all at the same time. Didn’t change, quantity of water, liquid smoke, or cooking time. They were tight but it worked perfect. I also made a 3 pack of St. Louis style ribs (I thought they were baby backs -oops). Baby backs were SLIGHTLY better. I was happy with both. MY QUESTION: Have you ever tasted the broth from these ribs. OMGOODNESS!!! Delicious!!! BUT, what can I make with that broth??? ANY IDEAS? I was thinking Frijoles Charros (Mexican Cowboy Beans) but, is there something you do?
Hi Tatiemily!! I think the options are endless for what to make with the broth!! The beans sound like they would be absolutely incredible! Make sure to let us know if you make them, and how they turn out!! 🙂
I have already made my dry rub and have bought my ribs. My question is, how long in advance can I do the dry rub? I want to prep the ribs as far as possible for some parents whoes time is very limited due to having a disabled infant. I was thinking that I could prep the ribs up to having the dry rub. So when they got home from work, all they would have to do is to pop it into the IP and then pop them in the broiler.
Hi!! You can definitely dry-rub the ribs ahead of time, and store the ribs in the fridge until it’s time to pressure-cook them 🙂
Thanks for sharing! These are just damn good! I was skeptical about cooking on LOW pressure. They were PERFECT! The meat was tender and easily came off the bone, without being overdone. The dry rub was excellent flavor too. I don’t know how anyone could tell the difference between slow-smoked ribs and this pressure recipe. Enjoy!
Hi, James!! So glad to hear you loved the ribs!! Thank you so much for the comment & review!!
Family loved it. Super easy for a newbie at a pressure cooker.
So glad to hear it, Lauren! Check out our other recipes that can be made in the Instant Pot/ Pressure Cooker HERE (directions in the recipe card under Recipe Notes if not the primary cooking method). Thanks so much for dropping a comment!
Best recipe after 2 dry results from other IP sites. why did you go low pressure, it is a game changer. my fail is pot roast, falling apart dry too chewy. I saw your suggested IP version, but that was similar to a fail. How would I use low pressure for a pot roast? Thanks
Hi Michelle – so glad you loved these ribs as much as we do! When this recipe was developed, Jess found that the combination of a longer cook time of 30 minutes + low pressure was the secret to helping the ribs become juicy & fall off the bone tender while a shorter cook time & high-pressure cook ended up tough & dry. As far as the pot roast, we really prefer the oven braise for flavor & the most tender end result.
Our Instant Pot pot roast directions were tested & written for readers that are short on time & want to avoid the 3-3.5 hour oven braise in our preferred method. You could certainly test an Instant Pot version with lower pressure but would likely need to cook it longer than the advised 70 minutes for manual high-pressure in which case we think the oven braise is totally worth it! Keep us posted if you try any low pressure & longer times for a pot roast. 🙂
I have only ONE word for your baby back ribs.
AMAZING. Tons of napkin’s and finger-licking good. But most of all, thank you for the all of your descriptions…how to cook etc. so no mistake could be made. I am soo glad, I found your site.
Ah, Heidi, I’m SO glad you loved these ribs. Such a fun meal! If you love pork & BBQ flavors, try my Must-Have BBQ Pulled Pork next. It’s seriously one of my faves. Thanks for dropping in to leave a comment! Jess
Fall off the bone DELICIOUS and soooo easy to make! We’ll be having them again for sure!
So glad you were able to try these, Shelly! We love that everything just gets added to the Instant Pot – so hands off! Thank you for sharing your experience with us!
Superb and thanks for the recipe!
I made these as directed in my 6 qt. Instant Pot except I used a store-bought rub I love.
They came out so perfect that after I cut them into single-bone pieces, after one bite I had to hold them meaty-side up so they wouldn’t fall off the bones by gravity alone!
Hi Mickey! So glad to hear they were fall apart tender – just as expected!! Thanks for the review!
Your dry rub is a sure thing on EVERYTHING! I have had a dry rub recipes from America’s Test Kitchen Family Cookbook for 15 yrs on ribs. I am ONLY using your rub now + forever more💙
Kate!! This TOTALLY makes my day. I’m so glad you love it as much as we do – & I swear, making a BIG batch of it is the only way to go. It makes just about anything (chicken! steak! burgers!) taste better! xx
What pressure rating do you use for “low pressure”?
Thanks.
This worked perfectly! I am really picky but these were cooked to perfection and the spices were also perfect. The whole family raved. 🙂
So glad to hear it, Mary! These are definitely a crowd pleaser! 🙂
I just have a question: how do I cook at low pressure when I have a stove-top pressure cooker (not an electric “instant pot”)? I don’t believe it’s designed for low pressure cooking.
Thank you!
These ribs are amazing! The dry rub is absolutely perfect.
So, so glad you love them, Kathleen! Thanks for popping in to comment! xx
These ribs are SOOOO good! Made them for my in-laws and we all LOVED them. (I also loved how easy they were!)
yessss!!! i’m so glad to hear that, emily!!!