Spatchcock Turkey: The Secret to Prepping & Roasting a Whole Turkey in Only 90 Minutes!
This is going to be the year that you break up with your turkey roasting fear. You know what I’m talking about…it’s the little voice in the back of your head saying that roasting a whole turkey is so difficult you should avoid hosting Friendsgiving or Thanksgiving dinner. The voice that tells you that your turkey is going to be overcooked & dreadfully dried out no matter how hard you try.
I’m VERY familiar with this Thanksgiving fear. We’ve all been there, trust me.
But this year, I’m giving you the inside scoop on my secret for prepping & perfectly roasting a whole turkey in 90 minutes. The secret? A spatchcock turkey.
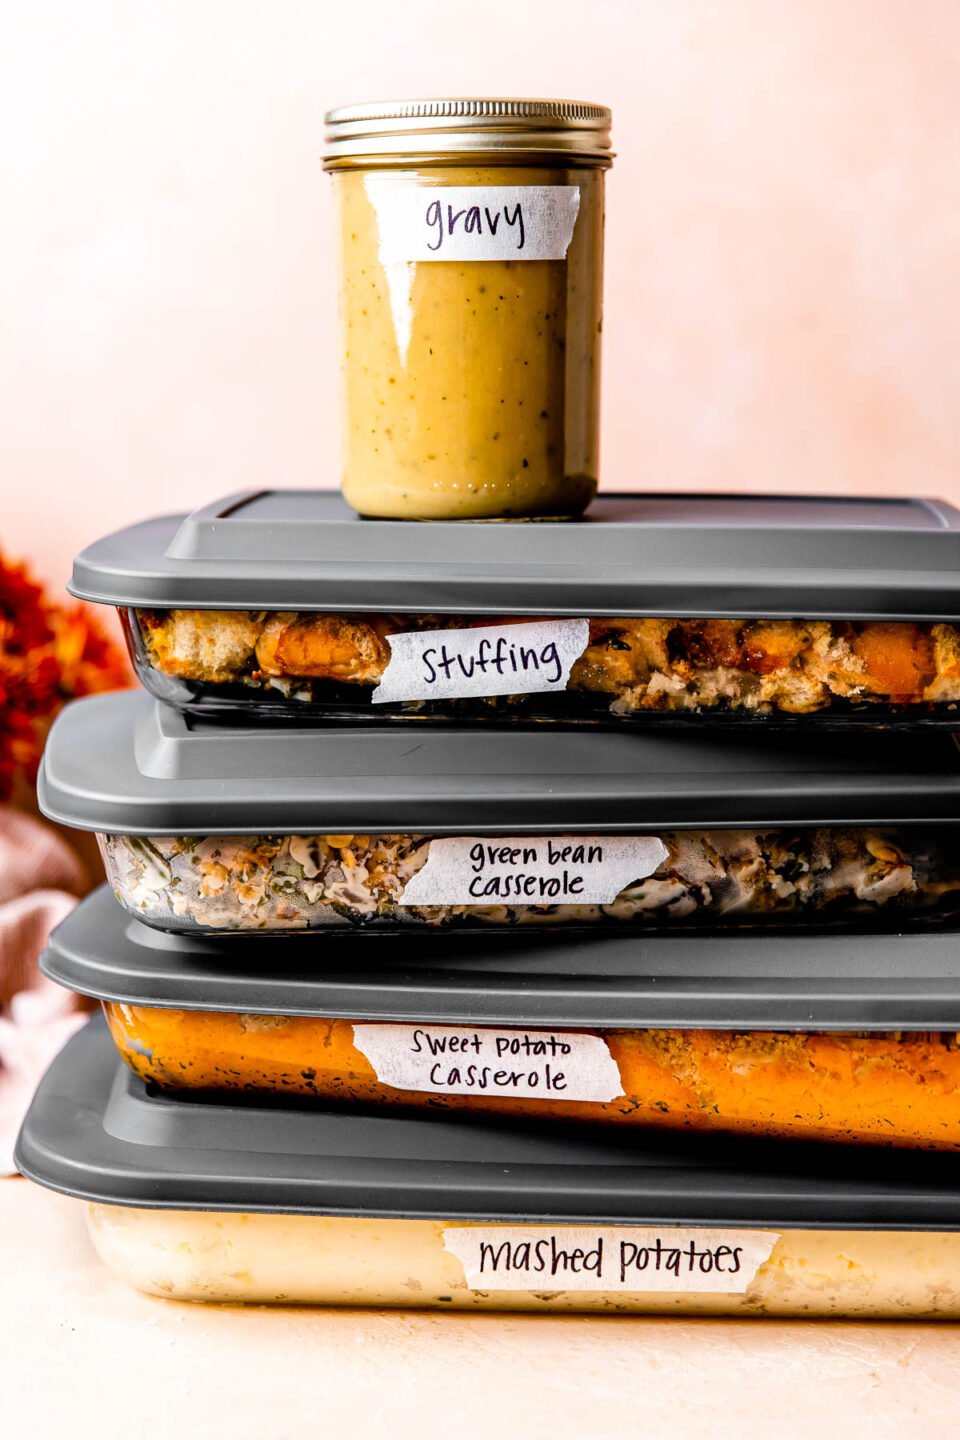
FREE Download! Make Ahead Guide and Printable Thanksgiving Menu
Get organized for a stress-free Thanksgiving! 5+ make-ahead-friendly recipes and a 3-week timeline. Print and consult all month for your easiest holiday meal yet!
If you’ve never heard of a spatchcock turkey, have no fear. I’m here to show you that learning how to spatchcock a turkey is a complete Thanksgiving day game-changer! Let’s learn a little more about why…
What is Spatchcock Turkey?
Spatchcocking is a super simple & super effective technique of breaking down your turkey. Basically, to spatchcock a turkey simply means that you remove its backbone, which helps the turkey sit flat as it roasts. As a result, spatchcocking speeds up the roasting process (like…A TON) & results in a more evenly cooked turkey every time. In other words, this roast spatchcock turkey will change your Thanksgiving turkey game for good.
I’m sure you’re probably feeling skeptical. After all, pretty much every magazine article & cooking show is talking about how daunting it is to perfectly roast a turkey this time of year…
But when you envision a spatchcock turkey, it starts to make sense. Because spatchcock (or butterflied) poultry lies completely flat as it roasts, spatchcocking our Thanksgiving turkey accomplishes 3 important things. A spatchcock turkey…
- cooks faster.
- cooks much more evenly & therefore doesn’t dry out.
- creates space in your oven for extra Thanksgiving side dishes & treats!
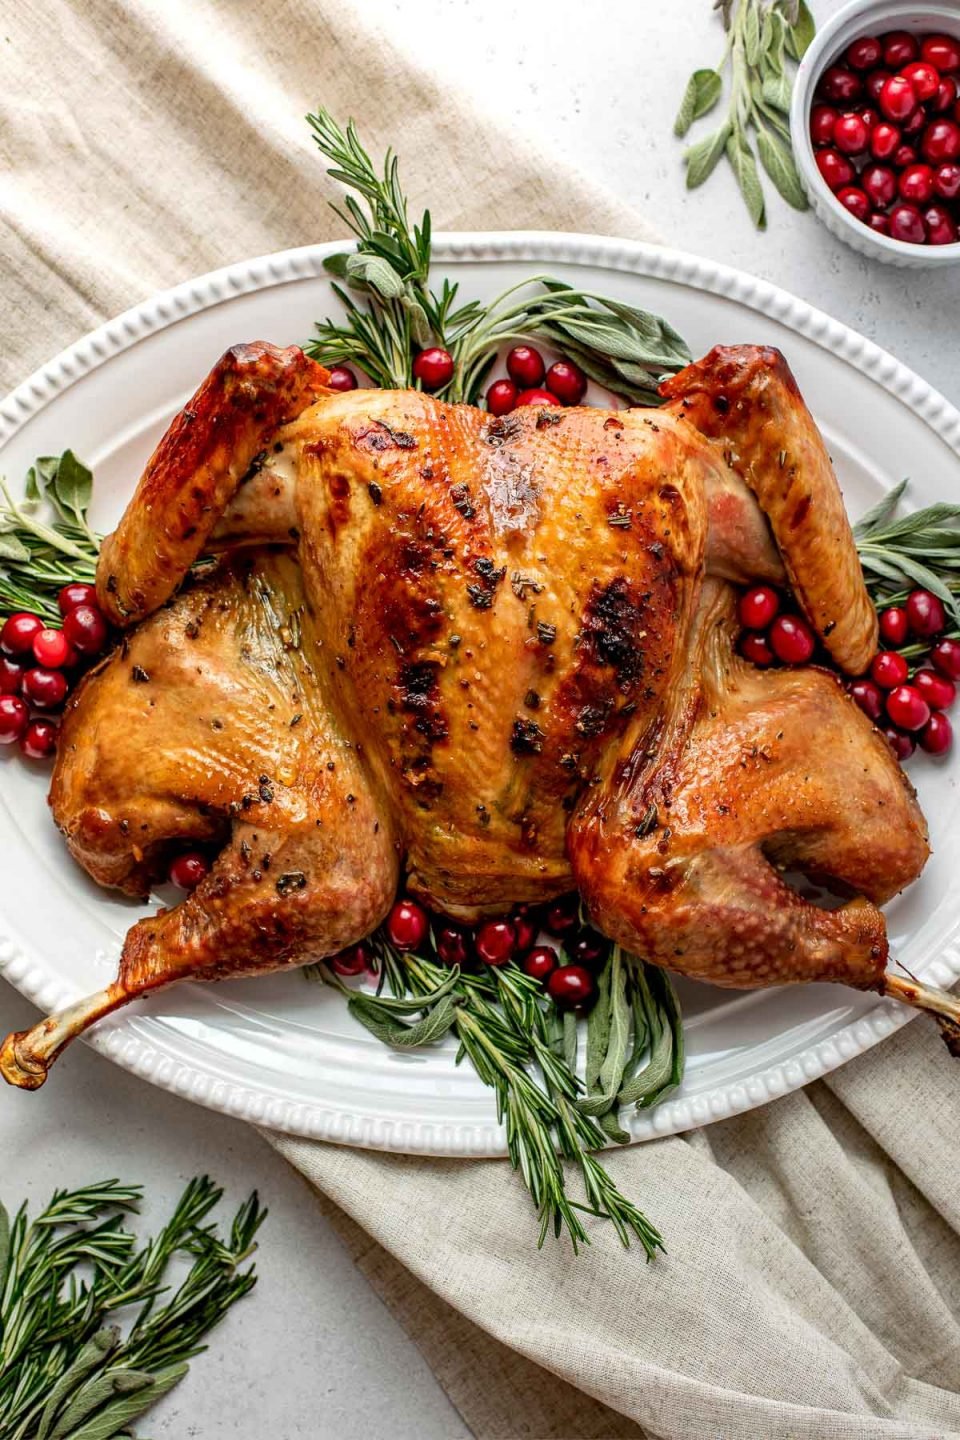
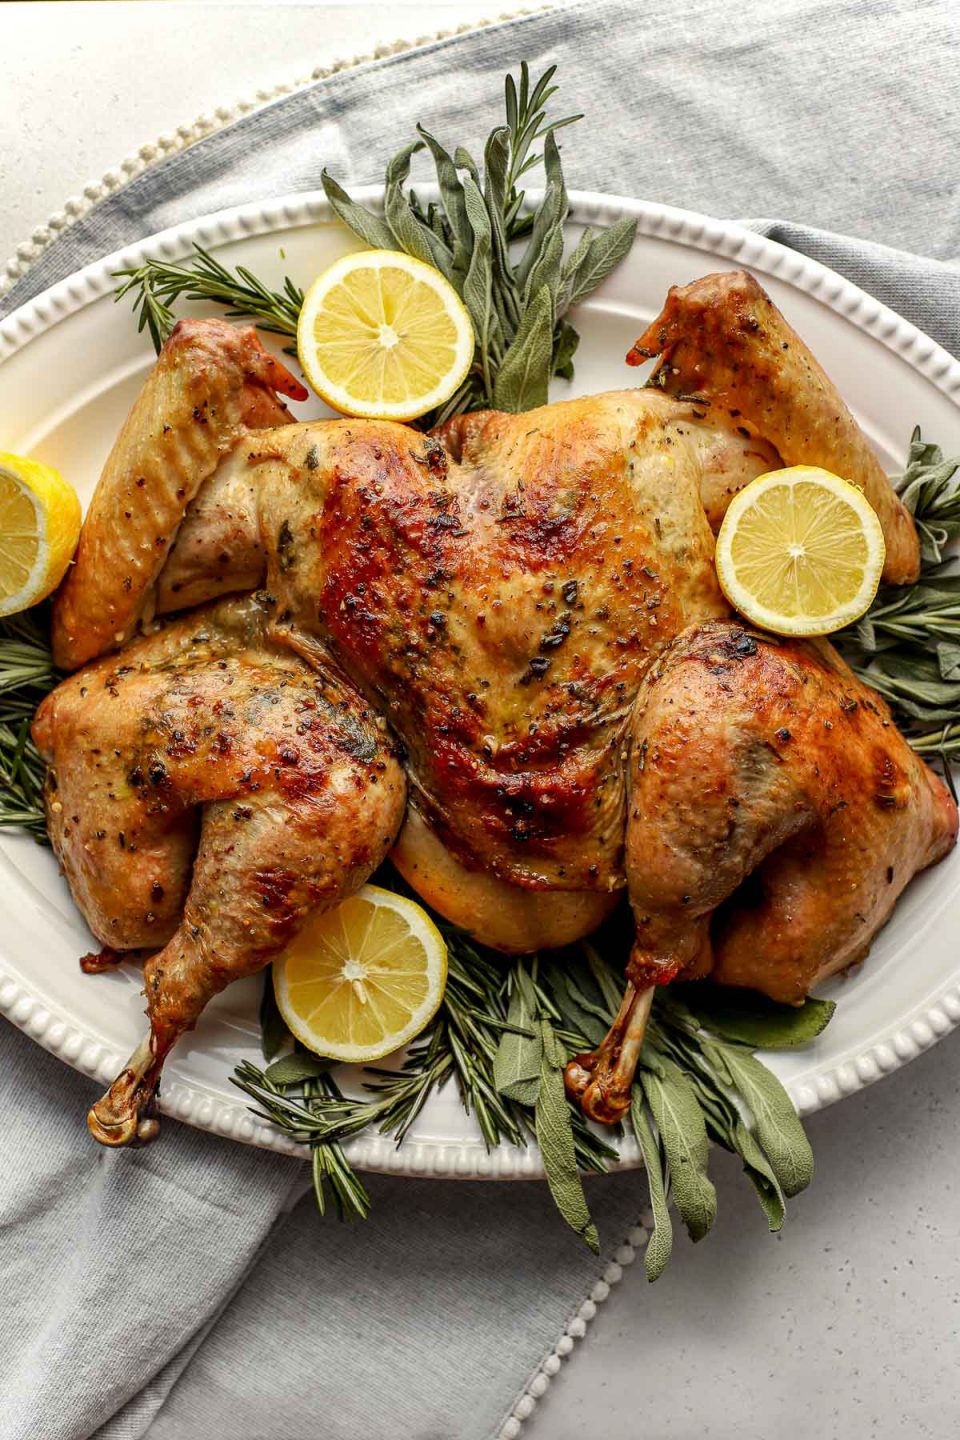
I first experienced the perks of a spatchcock turkey when Chris & I hosted our first Friendsgiving dinner together. As the then girlfriend-slash-roommate, I was cooking to impress…but I quickly found myself overwhelmed by the amount of time it was taking me to prepare all of the dishes on our Thanksgiving menu.
In the end, the spatchcock turkey ended up saving our inaugural Friendsgiving! Even though I was behind on the rest of the meal prep, our spatchcock turkey came together quickly and dinner was right on time. The best part was the roast spatchcock turkey was super juicy, flavorful, & perfectly golden brown. I officially fell in love with a spatchcock Thanksgiving turkey, & I’ve never looked back!
I’m here to convert you to Team Spatchcock Turkey this year. ♡ Read on to learn more about How to Spatchcock a Turkey (with step-by-step photos to help guide you along the way!), or jump straight to the recipe & get roasting!
Why Spatchcock Your Thanksgiving Turkey?
Remember: a spatchcock turkey has its backbone removed so it sits flatter as it roasts – & a flat turkey is a really, really excellent thing when you’re roasting because:
- Larger surface area = (much!) faster roasting time: By spatchcocking (or butterflying) the turkey, we create a much larger surface area with uniform thickness throughout. This reduces roasting time by over 50% – a 14-pound spatchcocked turkey roasts up in just about 90 minutes versus the traditional turkey roasting rule of thumb of about 13 minutes per pound (totaling to just over 3 hours!!).
- It cooks way, way more evenly & doesn’t dry out: Think about it – when you roast a traditional Thanksgiving, its breasts are disproportionately exposed to the heat source. Despite this, you have to continue to roast it until its legs (which are hiding under its body!) are fully cooked. This is exactly why Thanksgiving turkey is always dry: it roasts unevenly! As you wait for the dark meat to reach a safe temperature, the breast meat completely overcooks & dries out. A spatchcock turkey sits in the roasting pan with its breasts & legs with uniform thickness. This uniformity facilitates much more even cooking that results in a perfectly juicy bird – every single time!
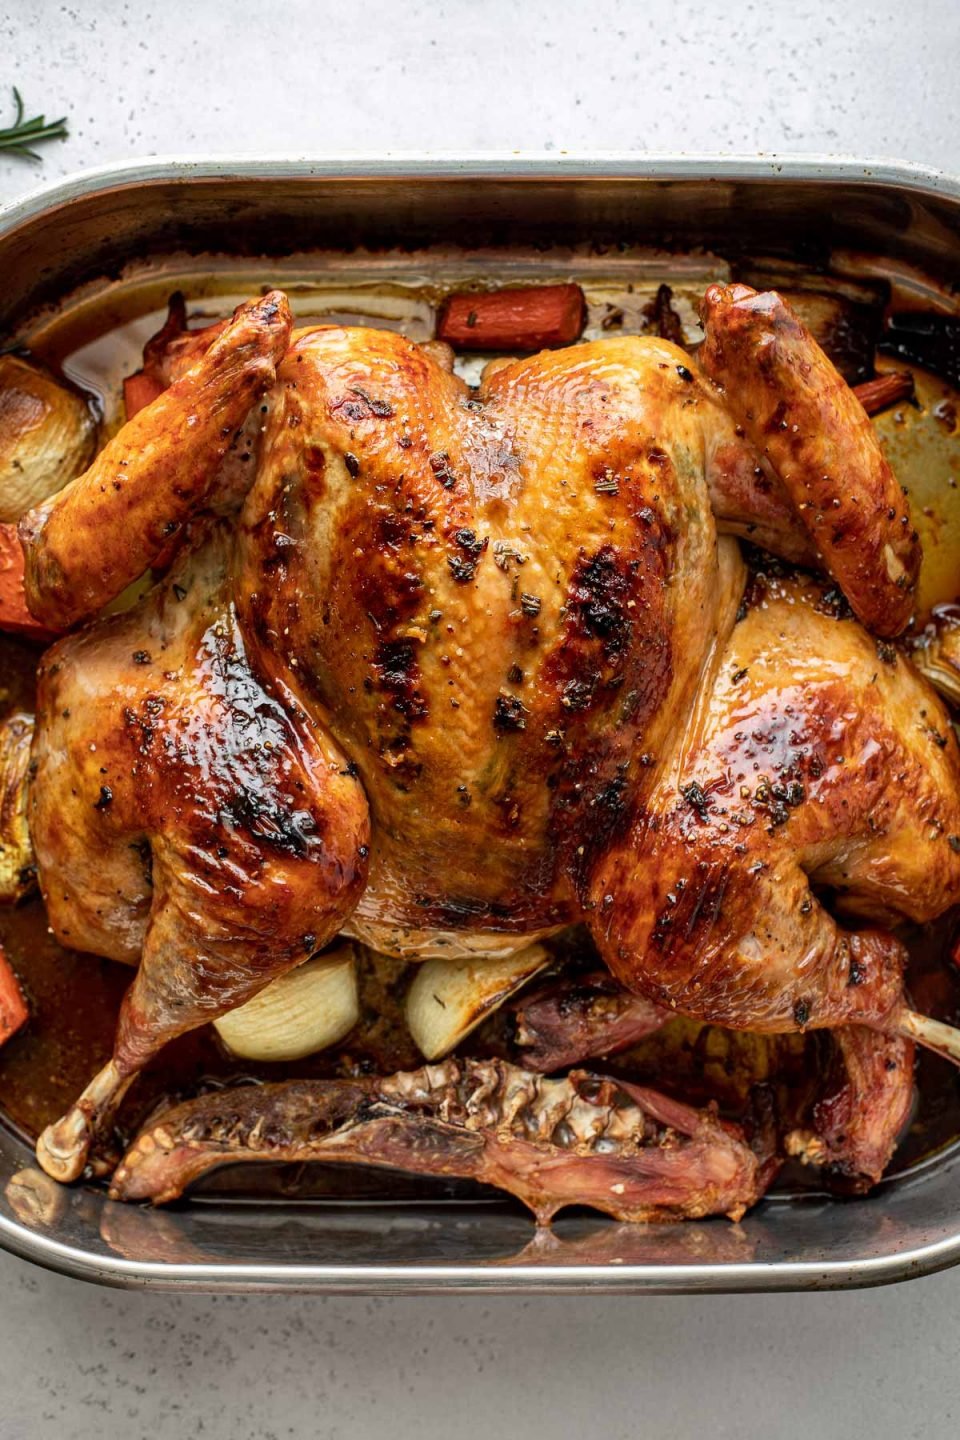
Now that you’re on board with making a roast spatchcock turkey, let’s walk through the 4 easy steps to make it happen.
How to Spatchcock a Turkey (with Step-by-Step Photos!)
Can you spatchcock a turkey? Of course you can! Here’s exactly how to spatchcock a turkey for your Thanksgiving dinner.
First thing’s first, this spatchcock turkey recipe requires just a few handy tools & ingredients. You will need…
- Very sharp kitchen shears. These are the kitchen shears I use – I absolutely swear by them!
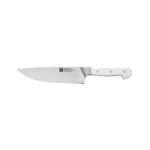
- Large knife. This one is my favorite!
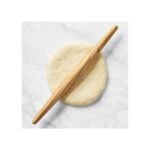
- Rolling pin. The secret to spatchcocking large poultry – like turkey! – easily.
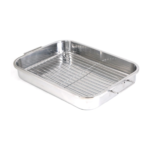
- Large, shallow roasting pan. You don’t need anything fancy, but the size and depth of the pan is especially important for spatchcock turkey. The butterflied turkey needs to be able to lay completely flat in the roasting pan and the sides shouldn’t be so deep that they inhibit airflow around the turkey as it roasts. I use a simple 16×13-inch roasting pan with a 2 ½ inch depth, similar to this one. If you do not have a large, shallow roasting pan, you can also roast a spatchcock turkey on a full baking sheet (rimmed) fitted with a wire baking rack.
- A whole turkey, of course! Your turkey should be ready for roasting at this point, so make sure it’s thawed, its neck & giblets are removed, & (if desired) brined for extra flavor.
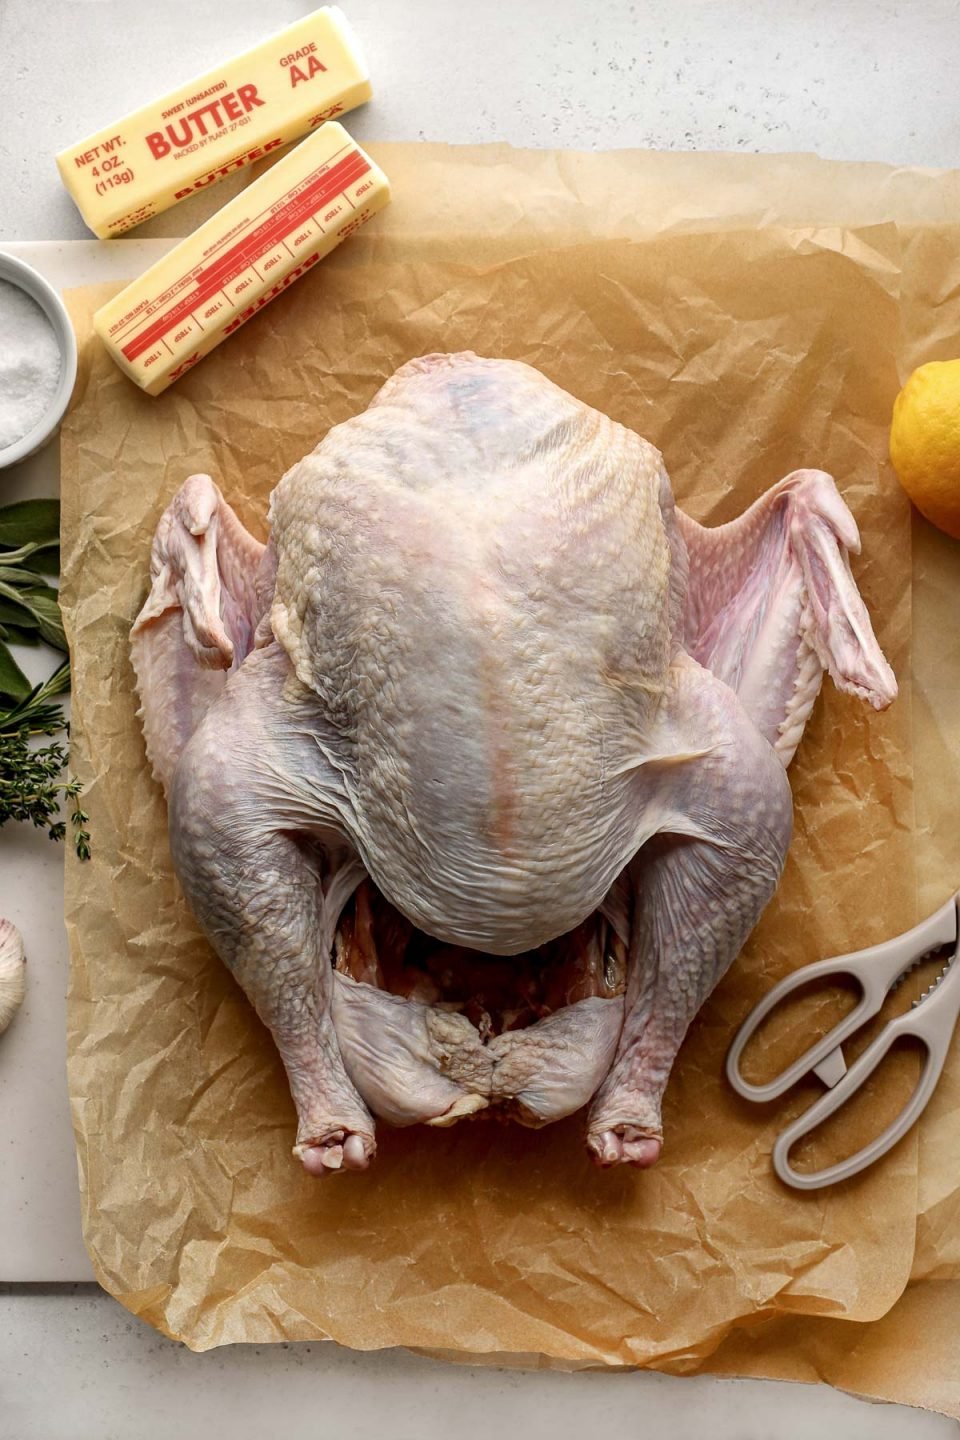
Spatchcock Turkey FAQ: What size Thanksgiving turkey should I use? ⇢ For this spatchcock turkey recipe, I recommend using a turkey between 12-14 pounds. Because it lies flat as it roasts, a turkey larger than 14 pounds likely won’t fit in a conventional roasting pan. If you need more turkey to feed your guests, then try preparing two smaller spatchcock turkeys rather than one large bird. This will also help your turkey meat stay extra-juicy! Not sure how much turkey you’ll need to feed your dinner crowd? ⇢ The general rule of thumb is to aim for one pound of turkey per person.
Reminder! ⇢ If you’re using a frozen turkey, don’t forget to thaw it completely before you attempt to spatchcock it. Be sure to plan ahead, as a frozen turkey takes several days to thaw safely. The safest way to thaw a turkey is to place it in the coolest section of your refrigerator. The consistent, cool environment of your refrigerator slowly & safely brings the turkey up to temperature. Plan for 24 hours of refrigerated thawing for every 4 pounds of turkey – so a 12-14-pound turkey will take 3-4 days to thaw!
Once your Thanksgiving turkey is thawed & ready to go, we can get started on our spatchcock turkey recipe…
Step-by-Step Instructions for a Spatchcock Turkey:
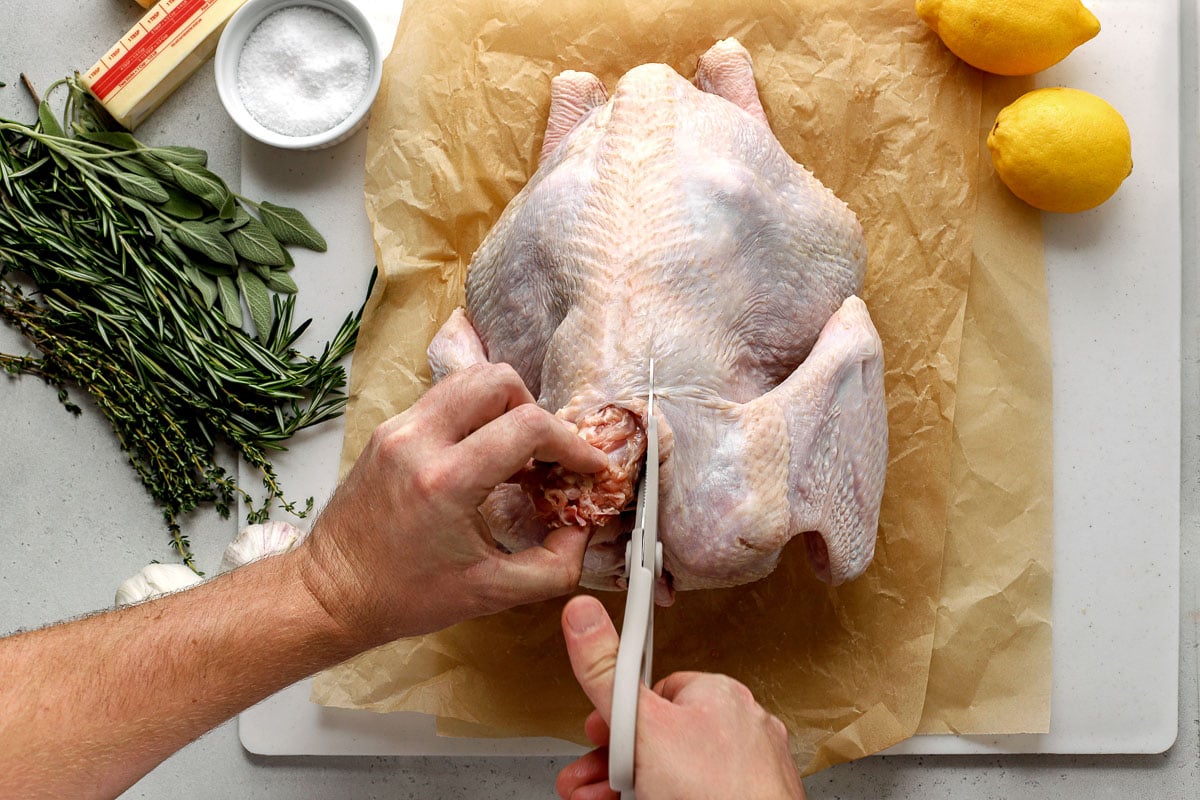
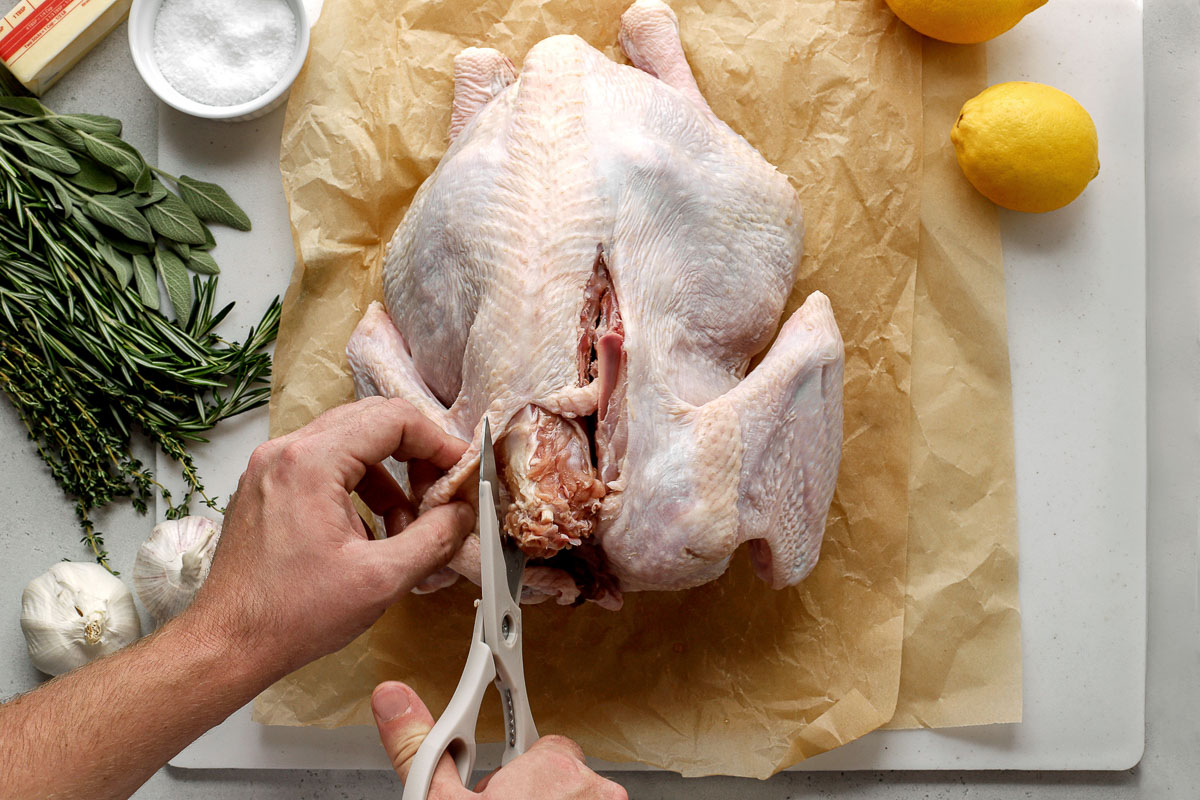
#1: Start spatchcocking by snipping out the backbone.
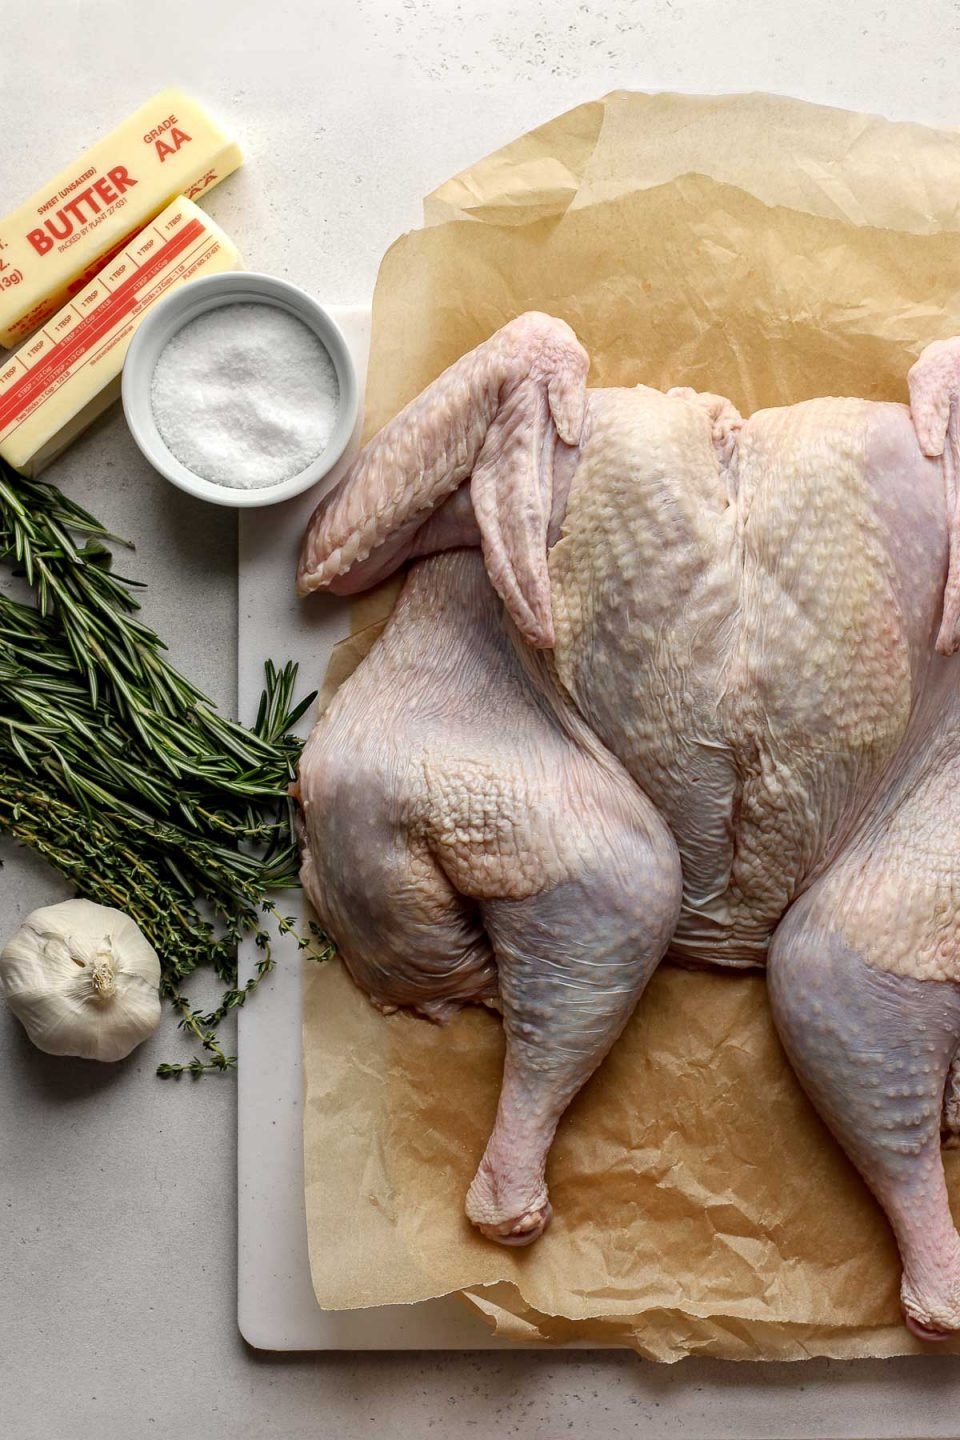
To begin, set your defrosted turkey breast side down on a large plastic cutting board (or any sturdy & non-slip surface). The backbone should be facing up towards you. Find it with your fingers & then use your kitchen shears to carefully snip all along each side of the backbone.
Hold onto that backbone for later. You’re definitely going to want it for your turkey gravy!
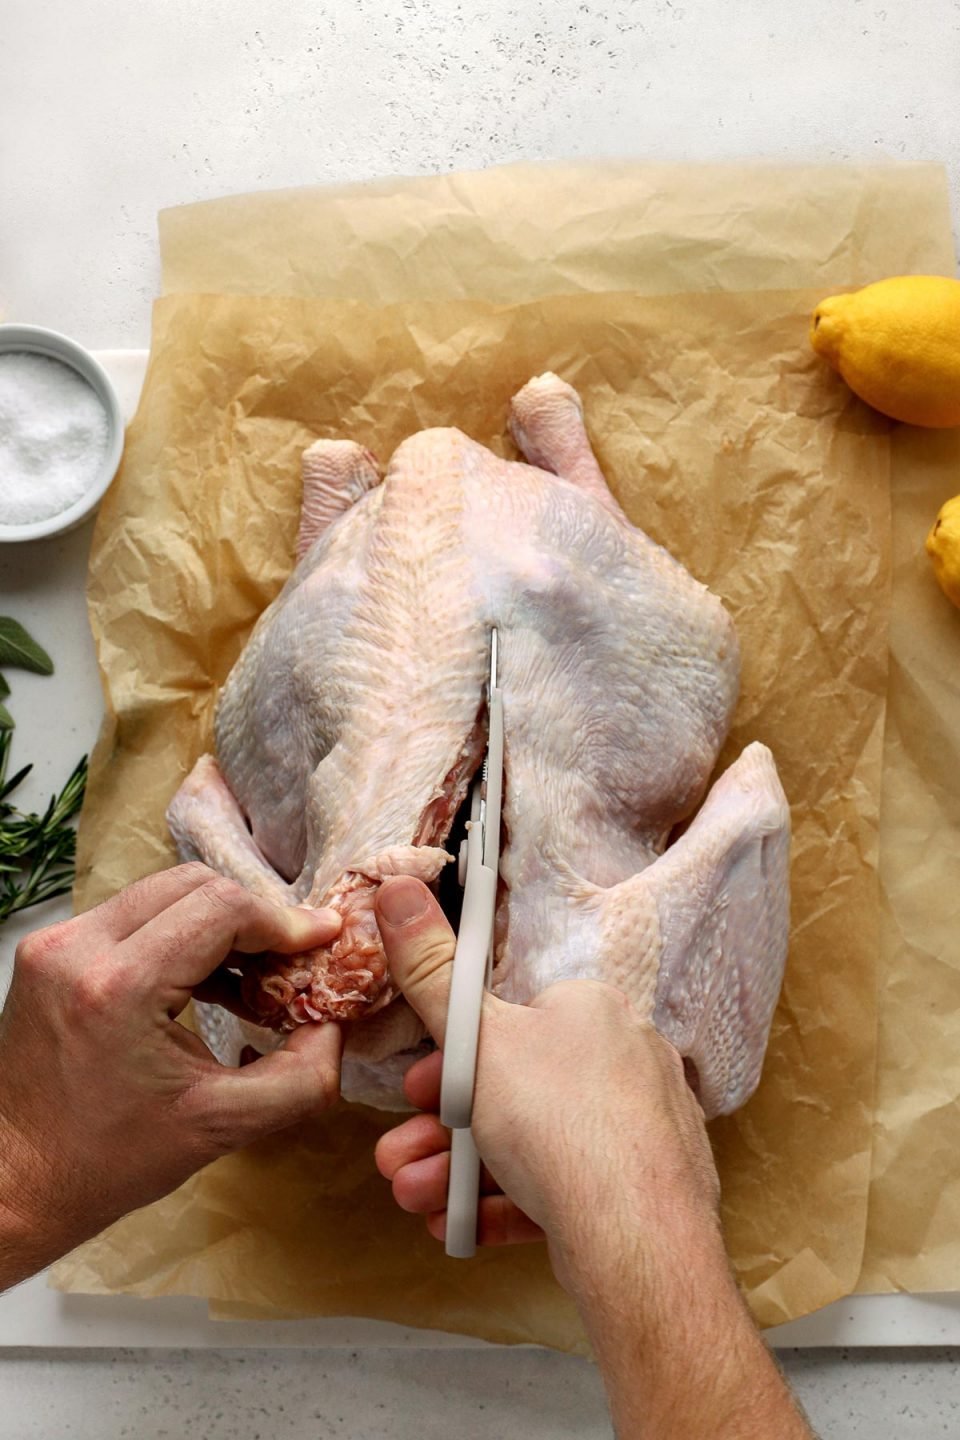
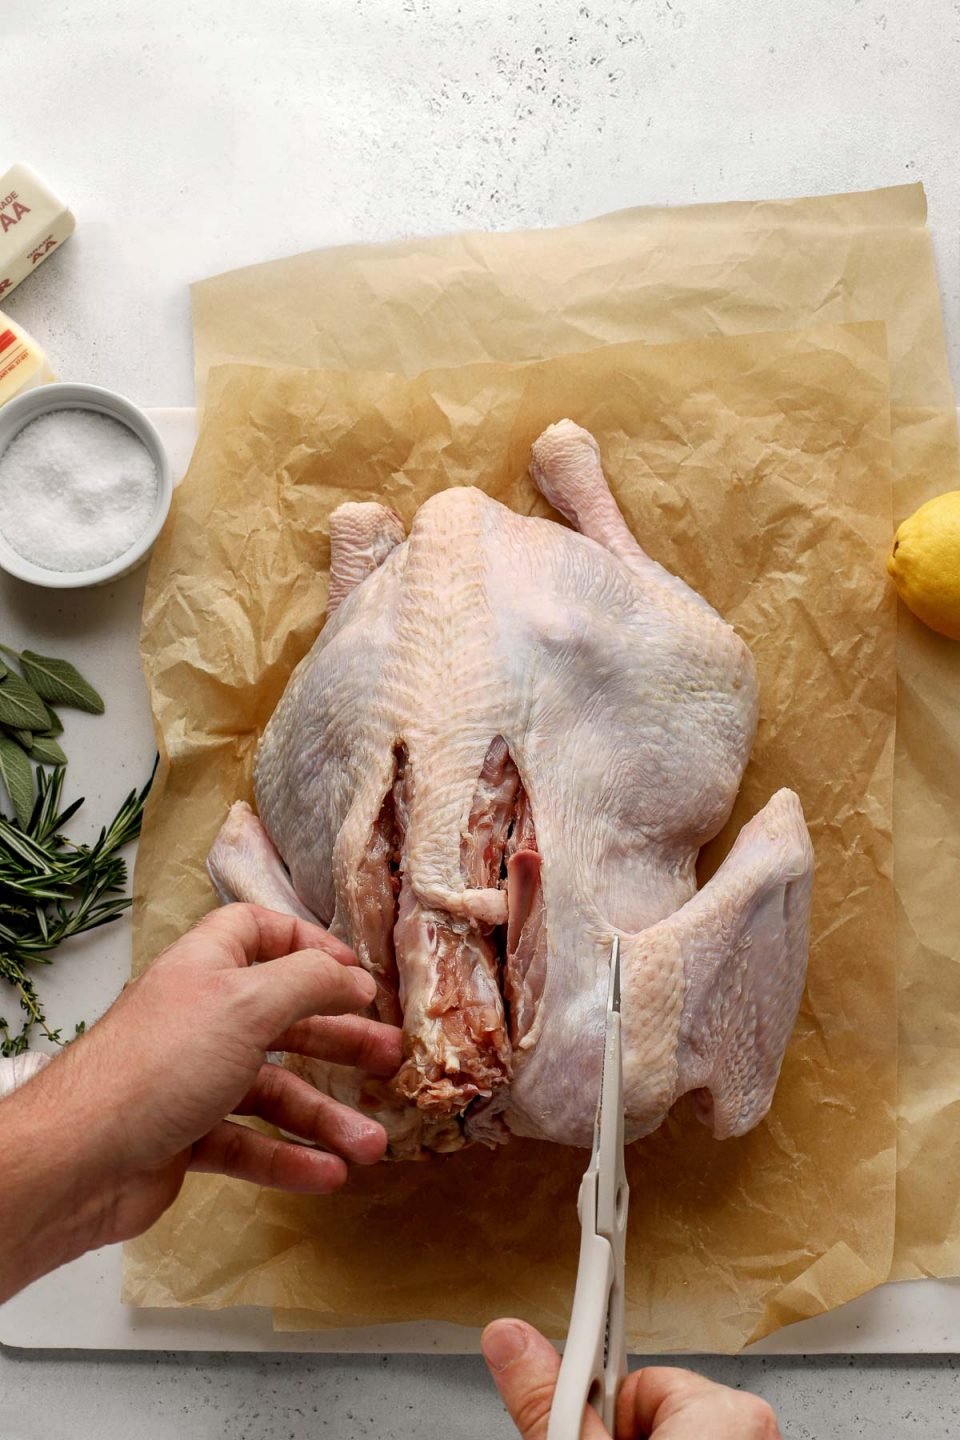
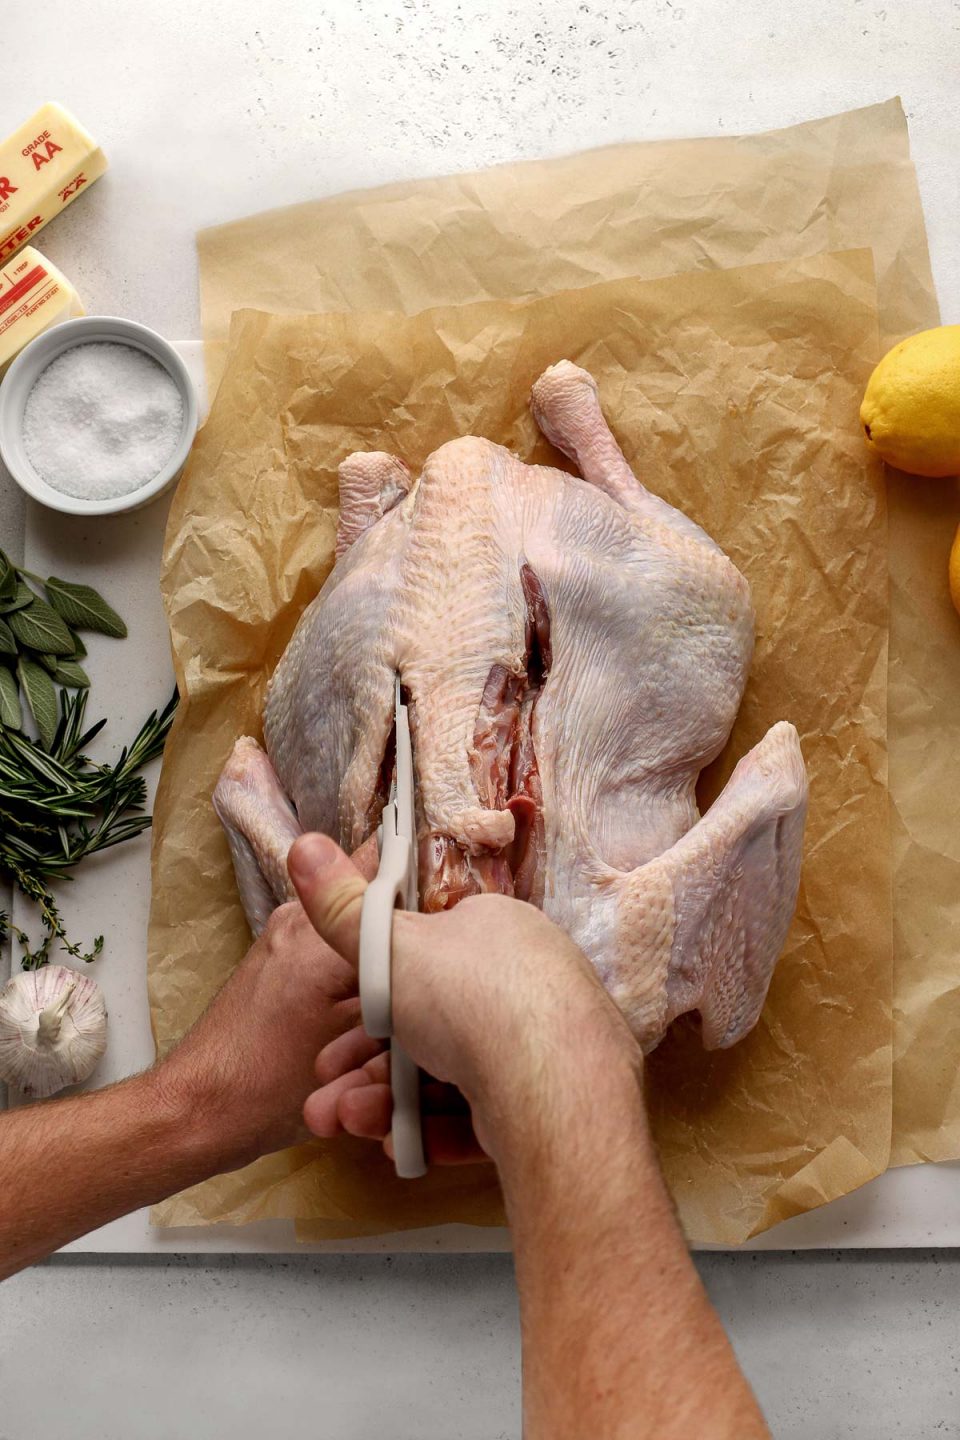
Full Recipe Directions, including step-by-step photos, are included in the Recipe Card, below.
#2: Crack the turkey’s chest bone.
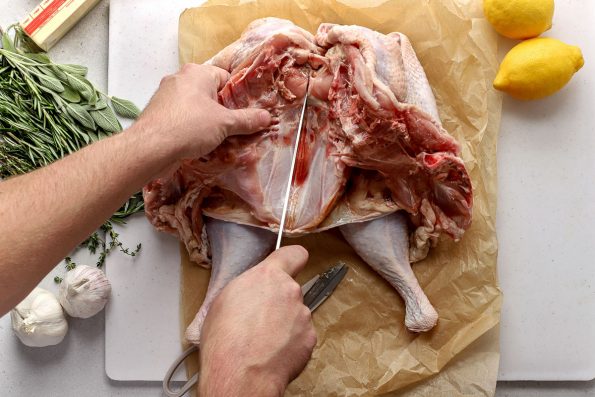
Now that its backbone is removed, you should be able to gently stretch open the cavity of your turkey (where you just removed the backbone).
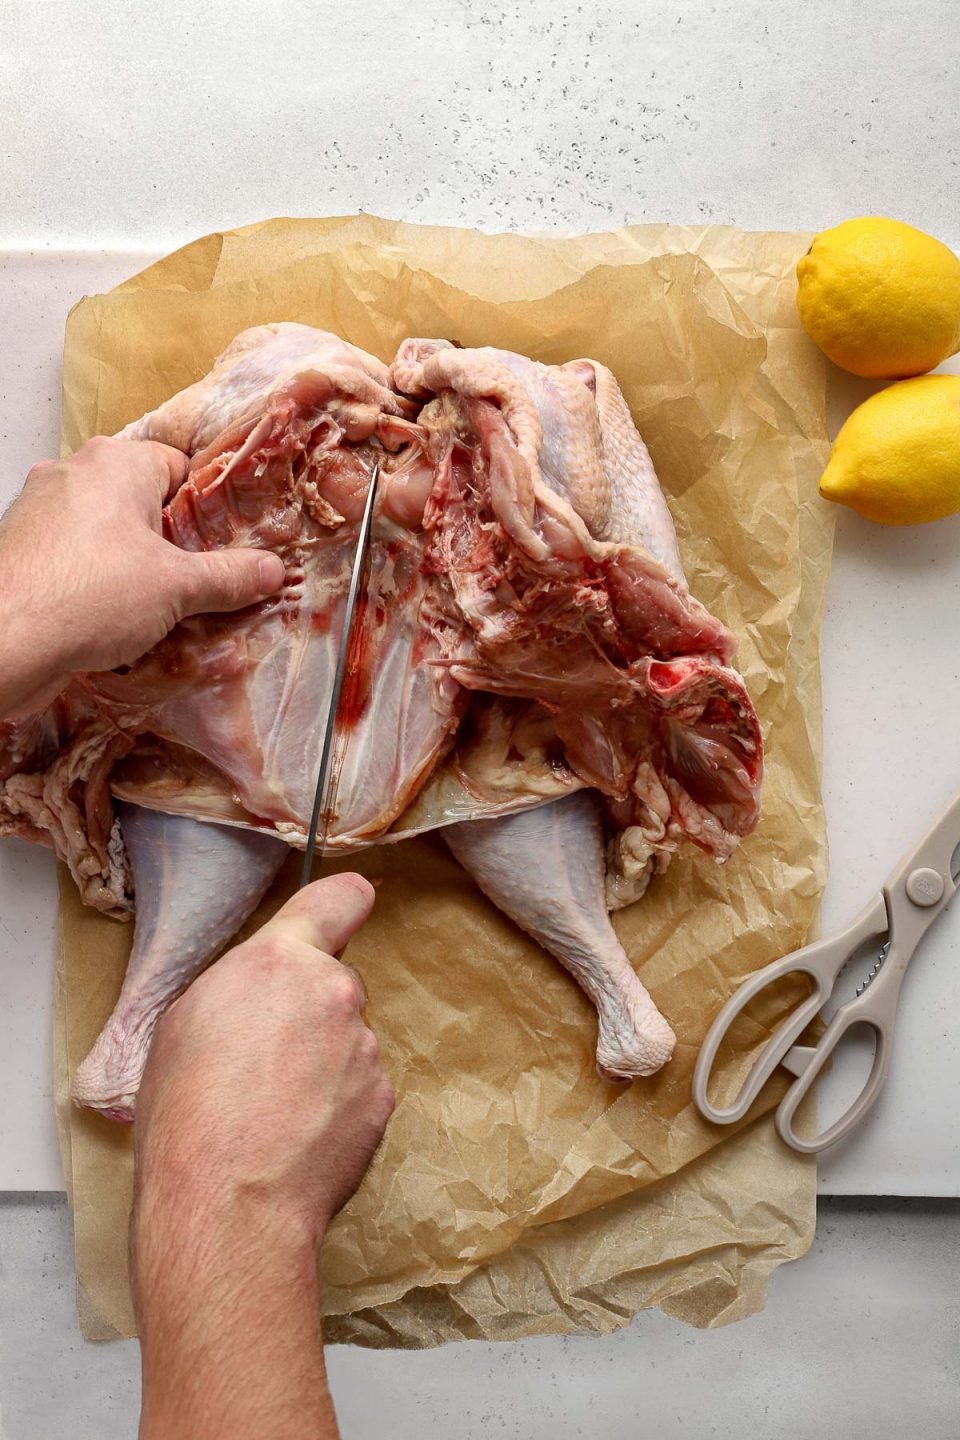
Locate the top of the turkey’s breast plate directly behind the turkey breasts. Place the heel of a sharp chef’s knife in the center of the top of the breast plate. Use a rolling pin to carefully yet forcefully tap the spine of the knife, wedging the heel of the knife into the bone. Continue tapping until you hear the breast plate crack.
Full Recipe Directions, including step-by-step photos, are included in the Recipe Card, below.
#3: Spatchcock (butterfly) the turkey!
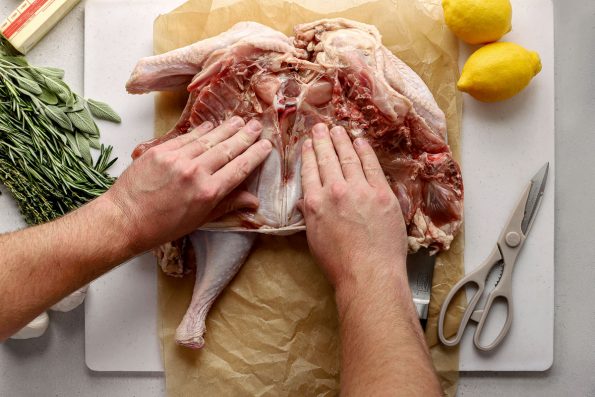
At this point, you should be able to stretch the cavity of the turkey completely open. If the cavity of your turkey has sharp pieces sticking out, you can use a kitchen towel to cover them & protect your hands.
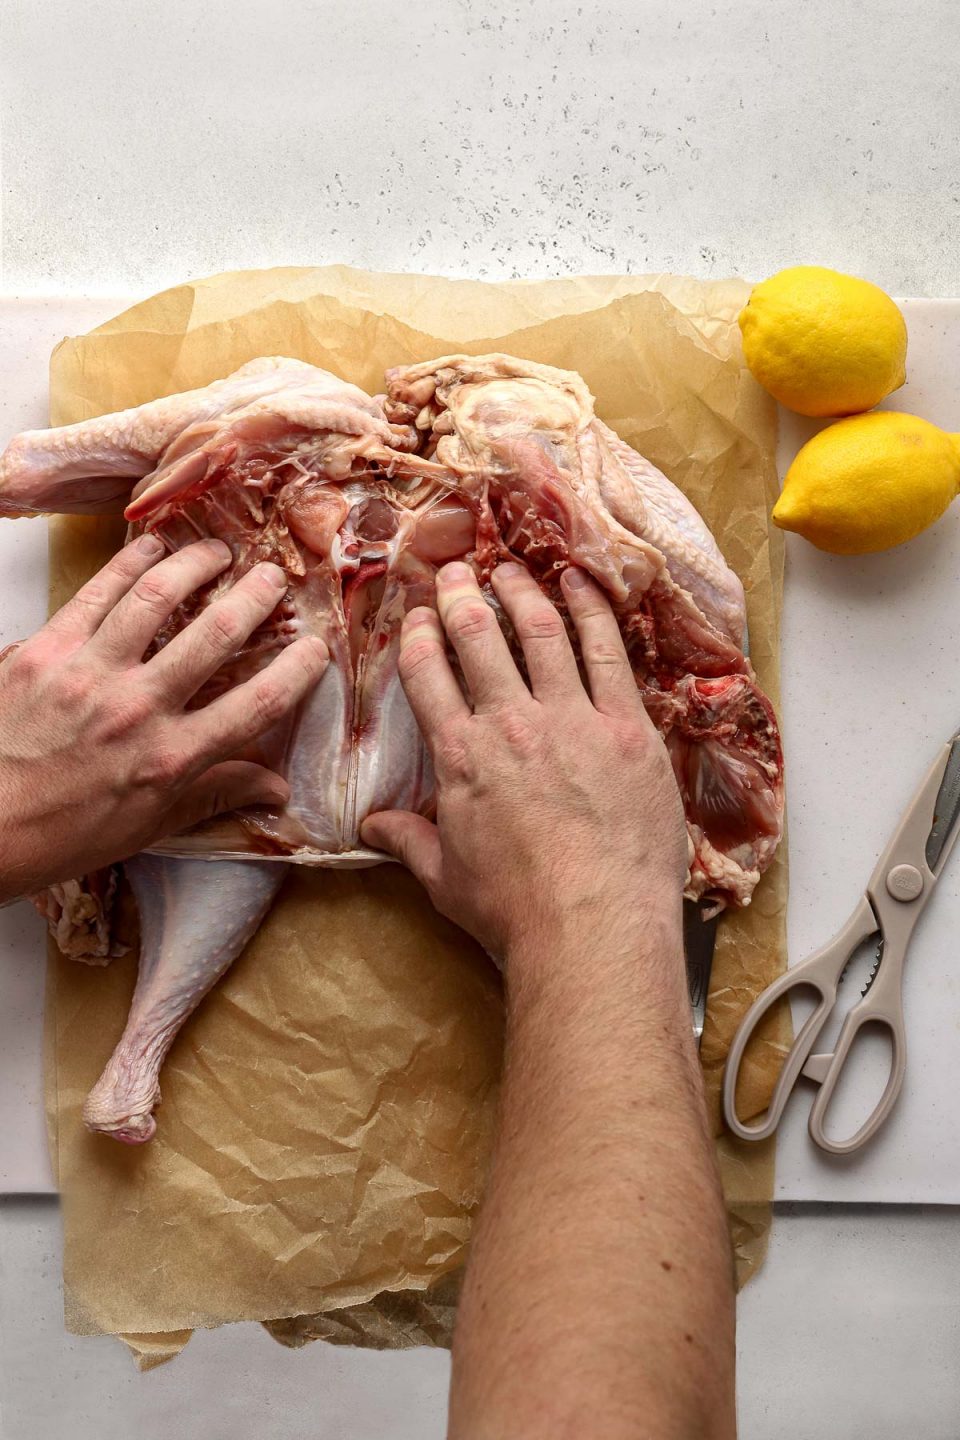
Flip the turkey such that its breast side is facing up. Place your hands on the center of its breasts, on the breast bone. Use your body weight to apply pressure to the chest plate, cracking the bone all the way through. This takes a little bit of effort, so just put some weight behind it!
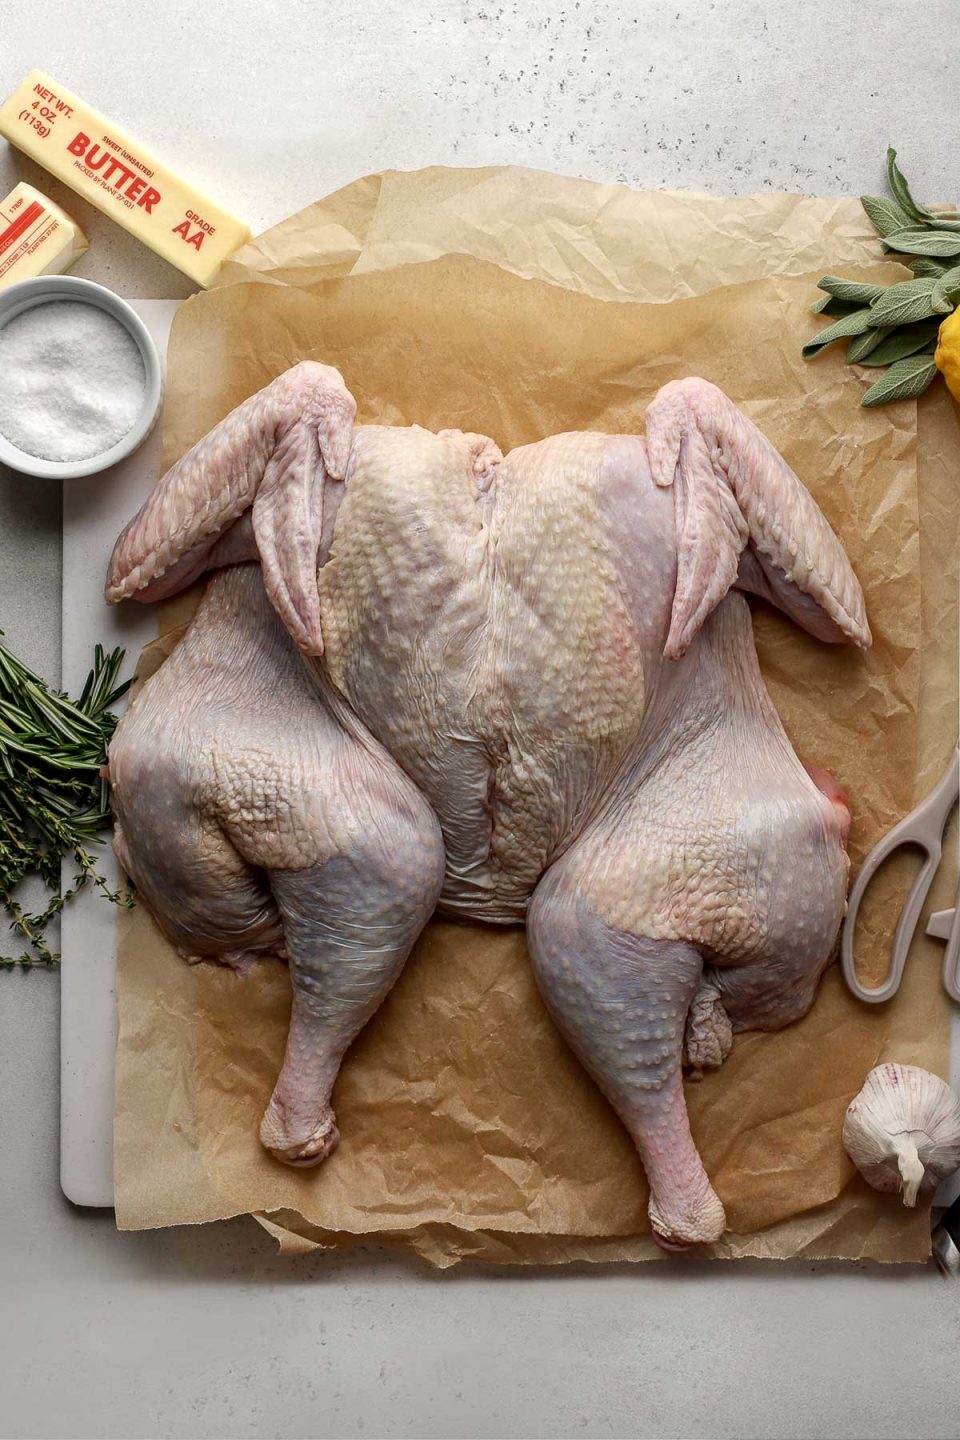
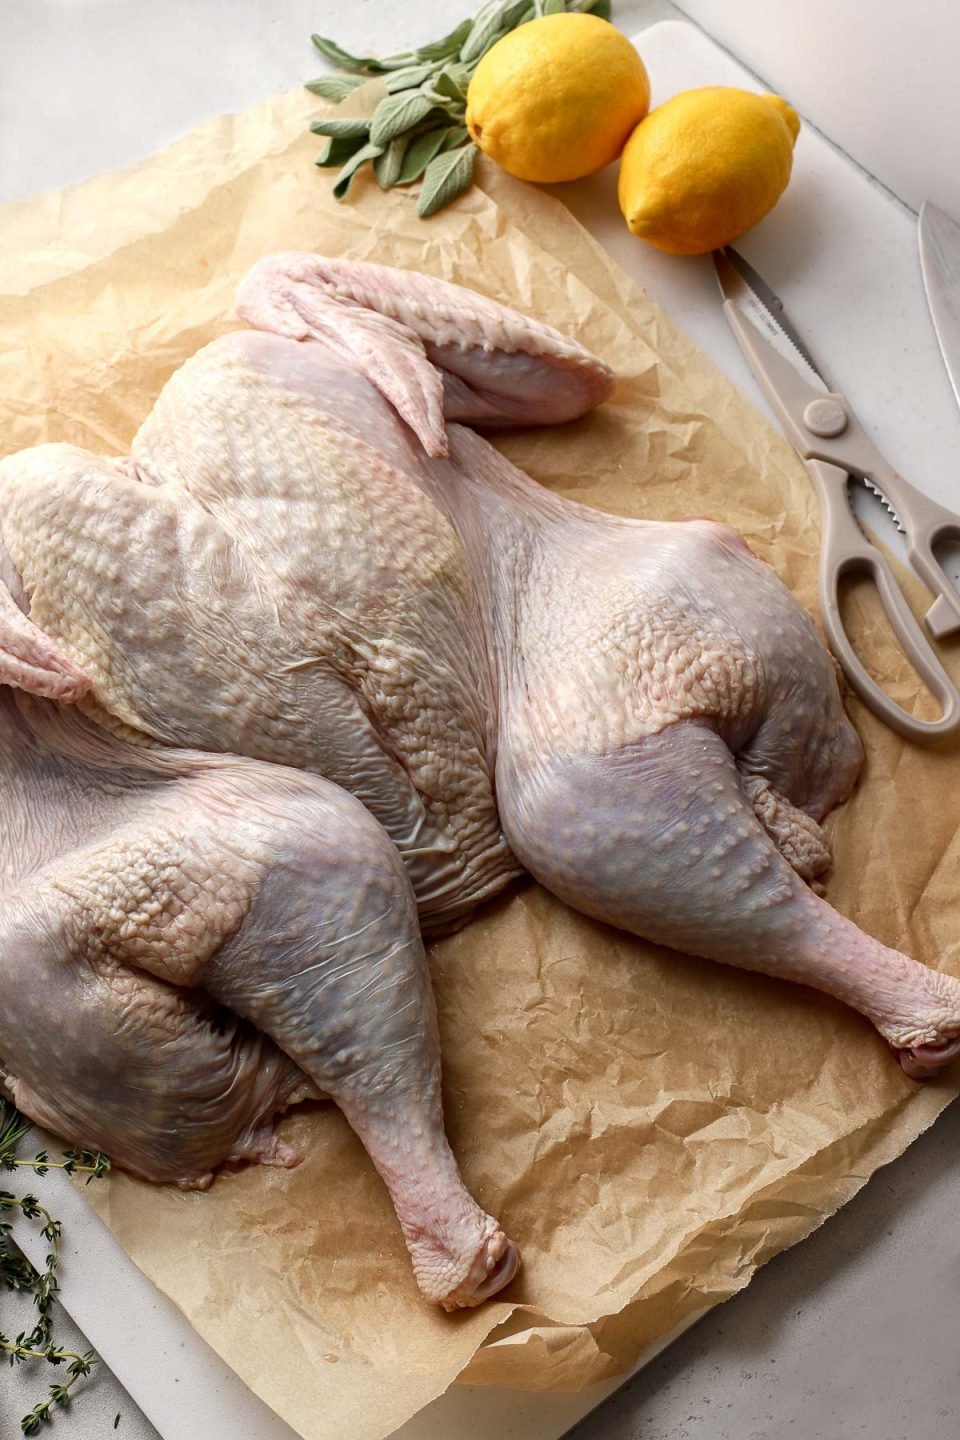
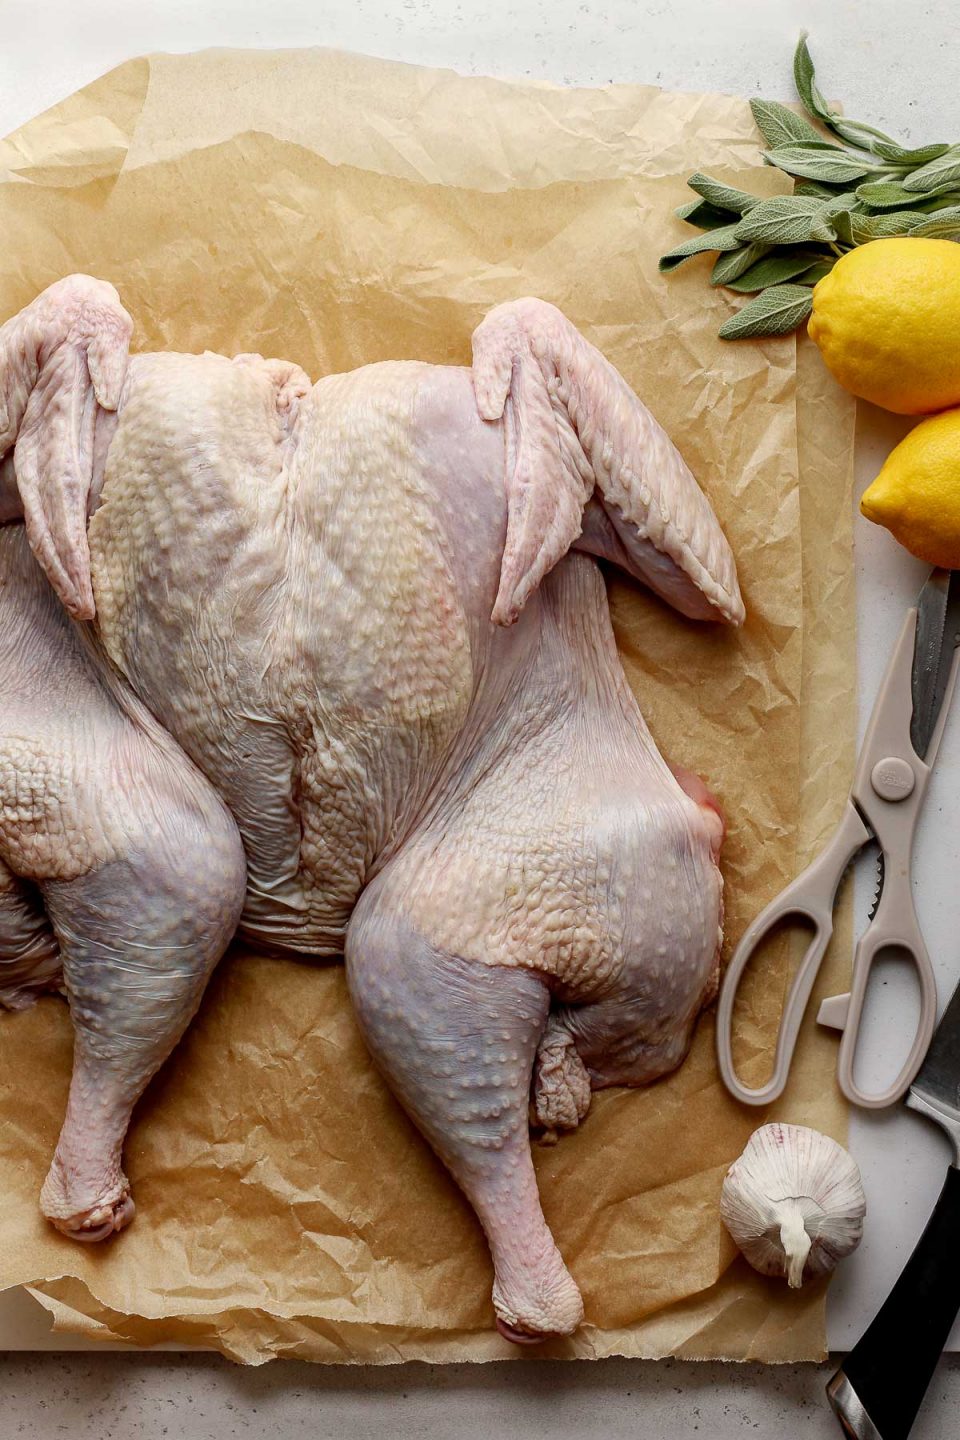
The turkey should be laying pretty flat at this point. Congratulations, you just spatchcocked a turkey!!!
Full Recipe Directions, including step-by-step photos, are included in the Recipe Card, below.
#4: Butter, butter, butter.
It’s time to butter it up! For an extra-flavorful Thanksgiving turkey, you’re gonna get butter all up in every nook & cranny of your spatchcock turkey. Check out my Lemon Herb Butter Roast Spatchcock Turkey & Spatchcock Maple Glazed Turkey recipes for some delicious butter seasoning ideas! My Lemon Herb Butter Roast Spatchcock Turkey is perfect if you love the flavor of garlic, rosemary, sage, & thyme. My Spatchcock Maple Glazed Turkey is a little cozier with a beautiful easy maple glaze.
Whatever butter you use, the goal here is to keep your turkey nice & juicy & full of flavor!
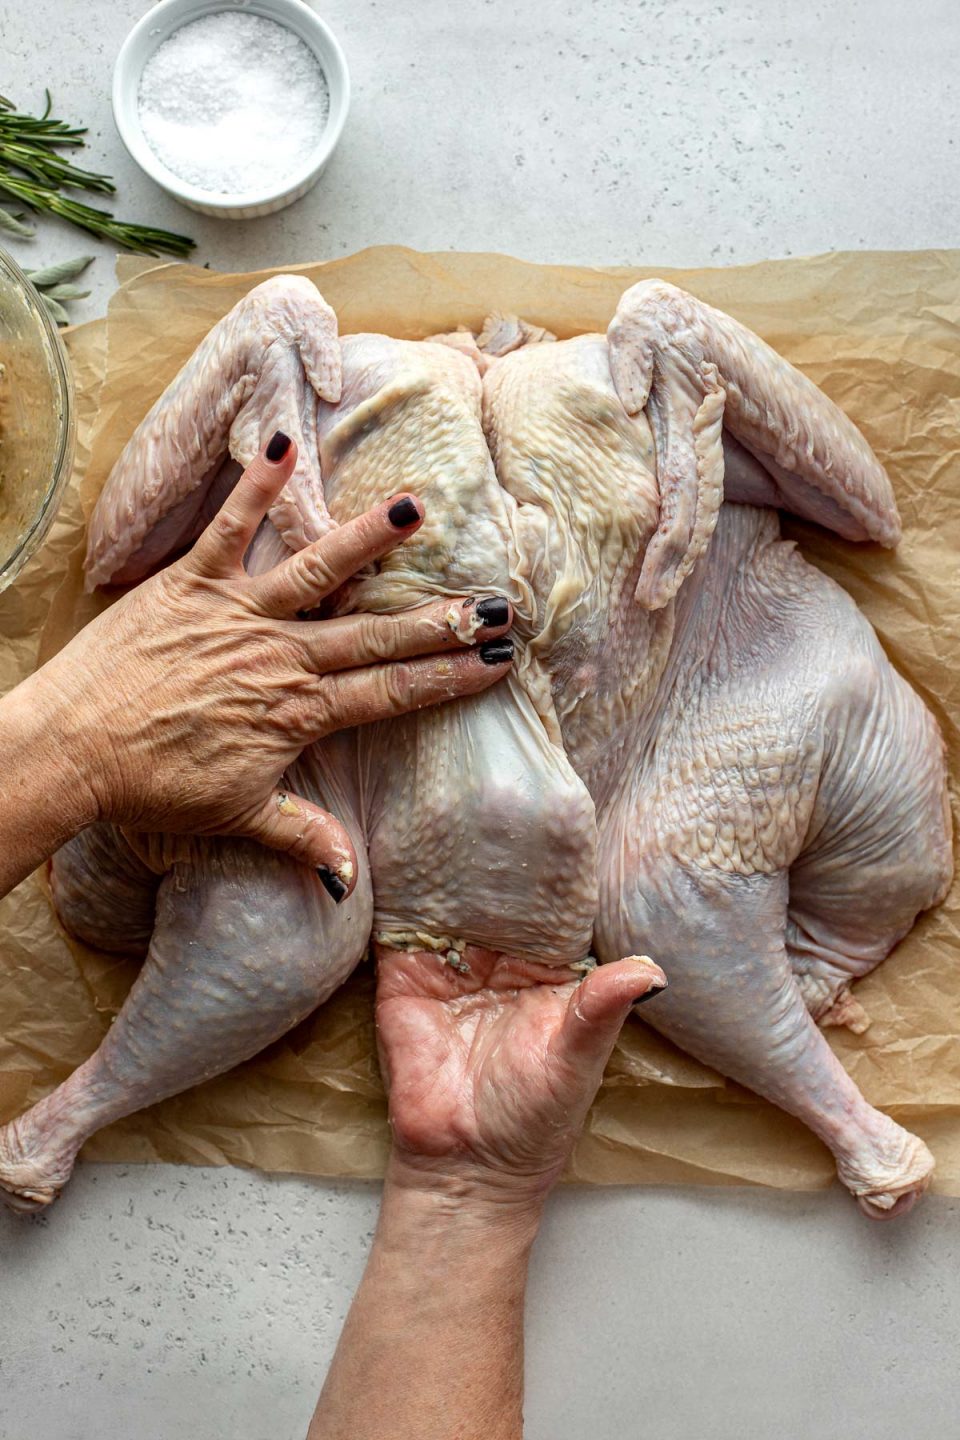
Chris & I have kind of perfected our technique of buttering a spatchcock turkey. We like to grab a few tablespoons of softened butter with our fingers, insert it under the skin (right on top of the meat!), & use our free hand to push the butter onto the meat, spreading it across the turkey. Give it a try – super easy!
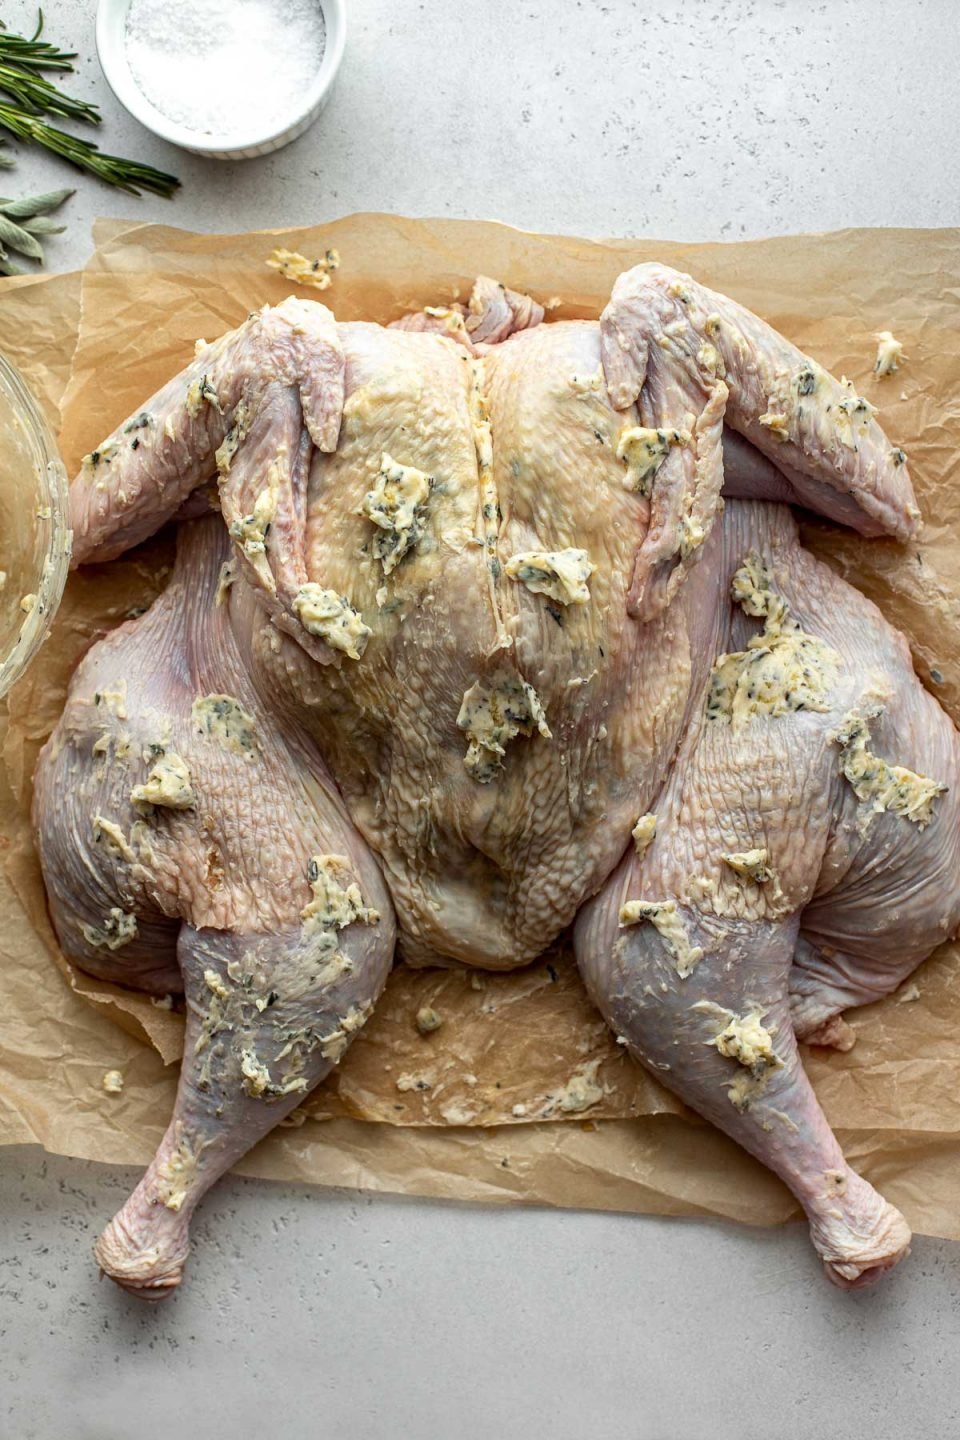
Full Recipe Directions, including step-by-step photos, are included in the Recipe Card, below.
Step-by-Step Video
How to Roast Spatchcock Turkey
With your spatchcock turkey prepared & ready for roasting, it’s time to let the oven do the rest of the work…
Again, a spatchcock turkey is going to take way less time to cook than a full turkey. But exactly how long does it take to cook a 14lb spatchcocked turkey? Plan for a cooking time of about 2 hours.
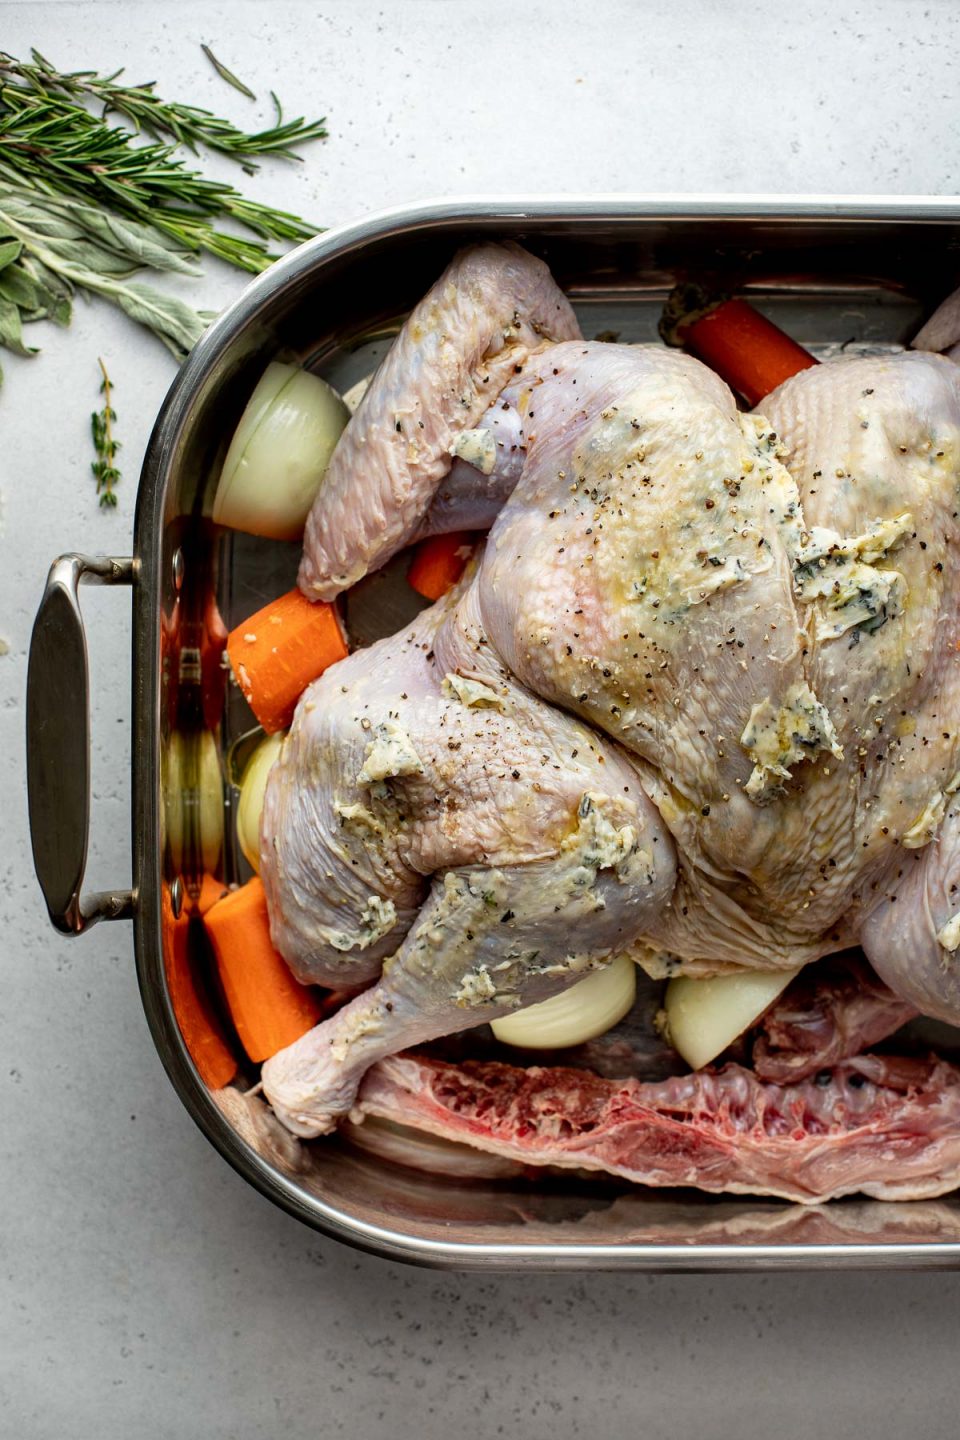
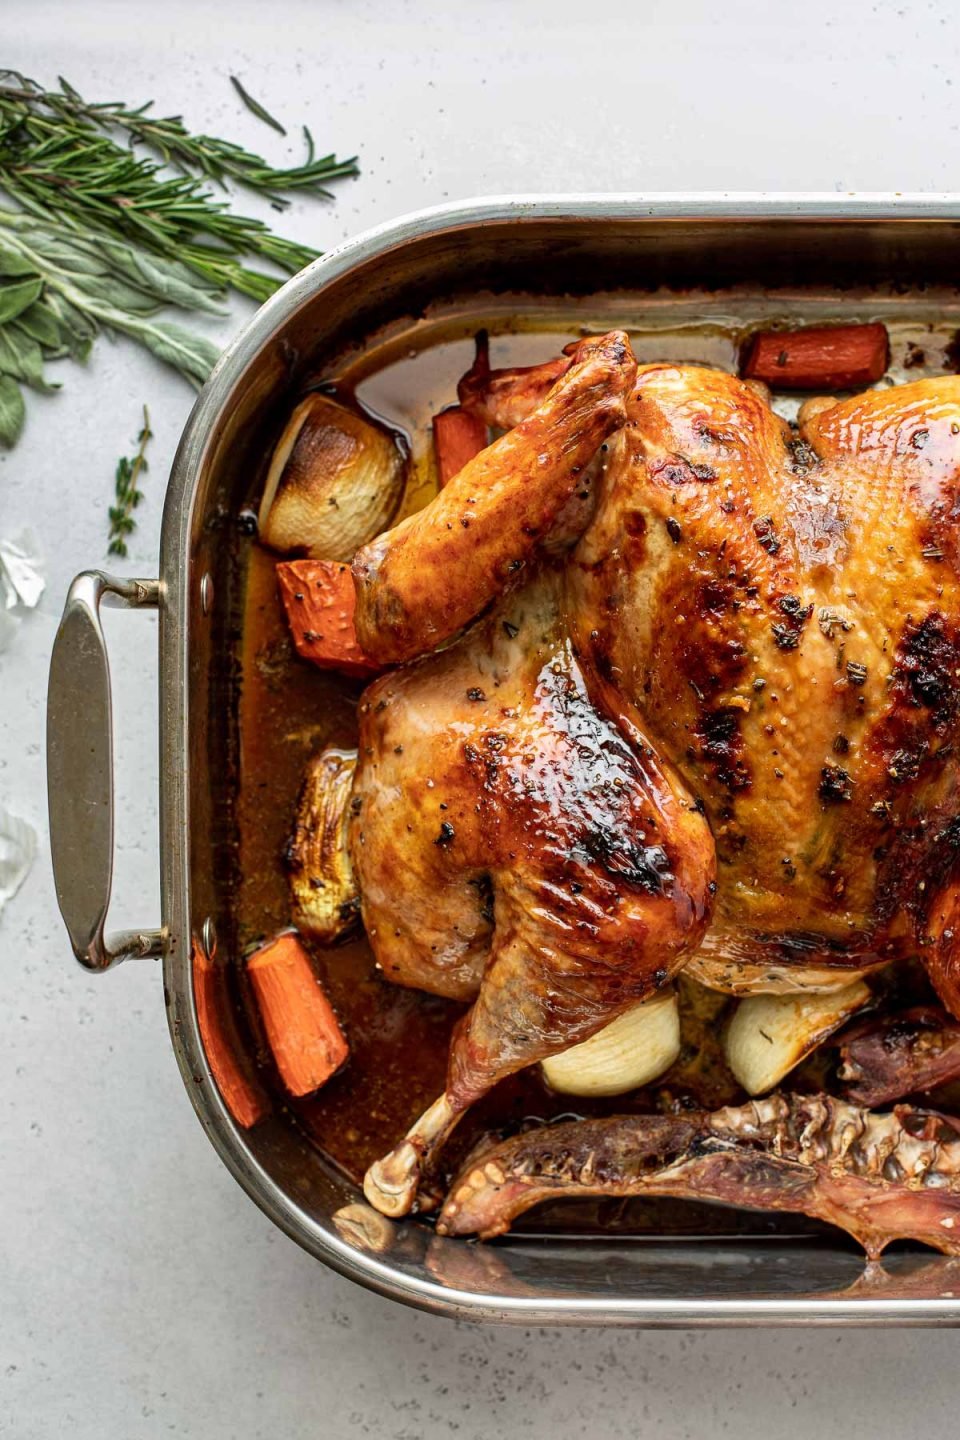
Full Recipe Directions, including step-by-step photos, are included in the Recipe Card, below.
Here’s how you perfectly time your roasted spatchcock turkey:
- Start with high heat: About an hour before your guests arrive, pop your spatchcocked turkey in a 450 degree F oven & roast, undisturbed, for about 30 minutes. Why? ⇢ Beginning with high heat helps the turkey get super golden & crispy skin – yum!
- Baste, baste, baste: Drop the heat of the oven to 400 degrees. Then continue to roast the turkey for another 60 minutes, taking the drippings from the turkey & basting it every 20 minutes until the thickest part of the thigh registers a temperature of 155 degrees F with an instant-read thermometer. Don’t have a turkey baster? ⇢ Buy one here – it’s less than $15 & makes life a lot easier on Thanksgiving day! You can also use a large spoon to baste the turkey, just be careful as you tip the roasting pan to gather & spoon the drippings over the turkey.
- Rest the turkey: After pulling the turkey from the oven, it’s important to give it time to rest. You may be tempted to try your new spatchcock turkey recipe or your guests may be getting hungry….but don’t rush it. Let the roast spatchcock turkey rest at room temperature for 20-30 minutes, covered under aluminum foil, until the temperature reaches a safe 165 degrees F. Why? ⇢ Resting lets all those delicious juices in the turkey redistribute throughout the meat for maximum flavor & texture. The internal temperature will continue to rise as it rests & this helps prevent the turkey from overcooking & drying out. It’s absolutely essential for achieving a perfectly juicy turkey. & while the turkey rests to a safe internal temperature, you can take the time to make the turkey gravy.
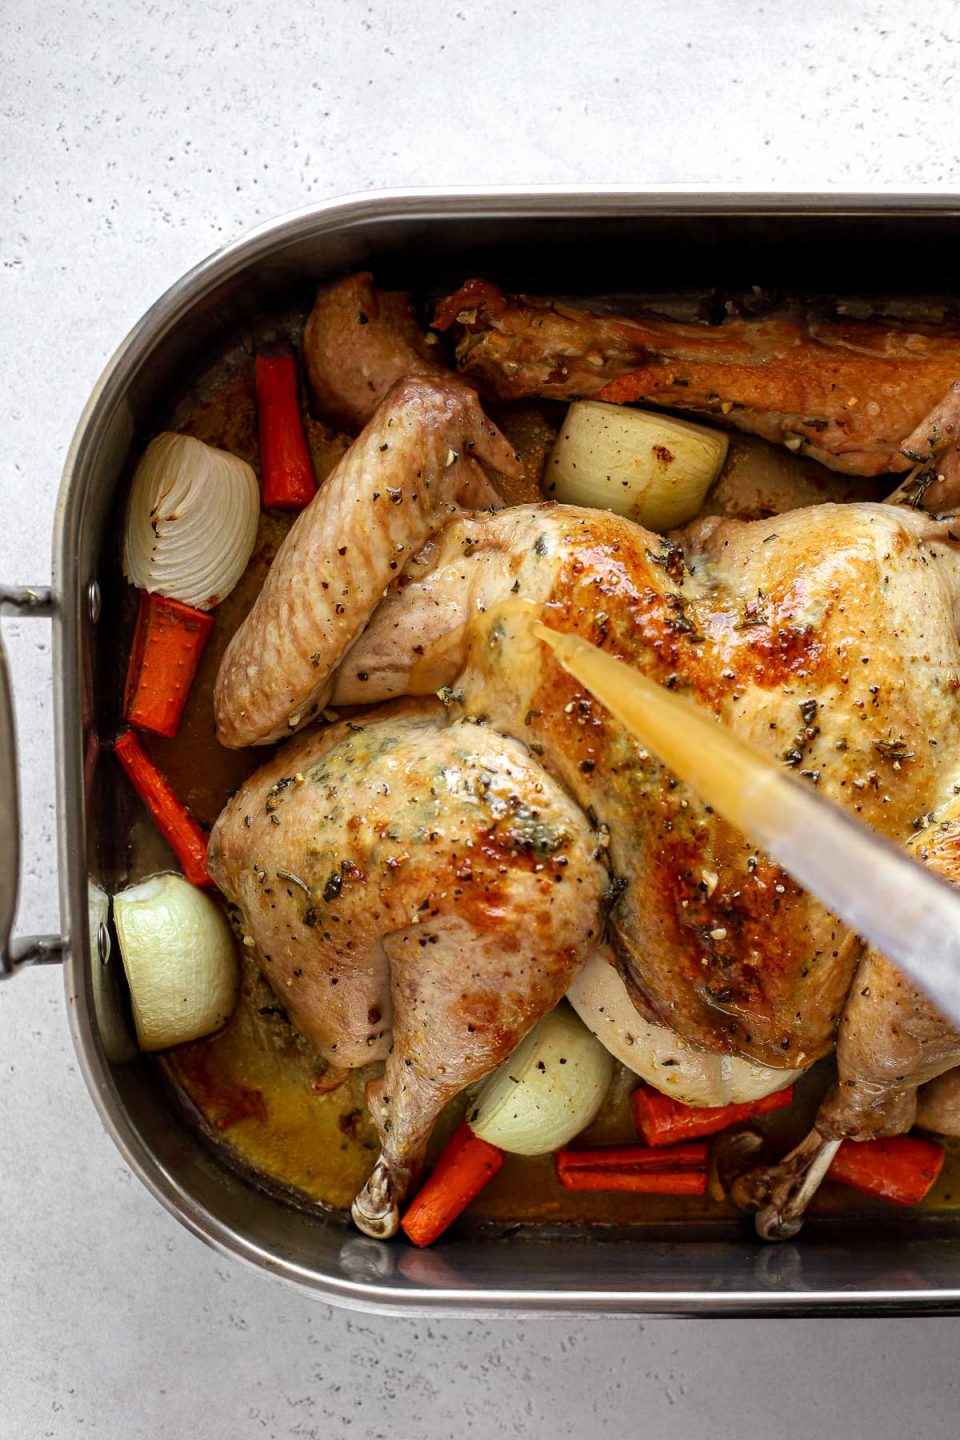
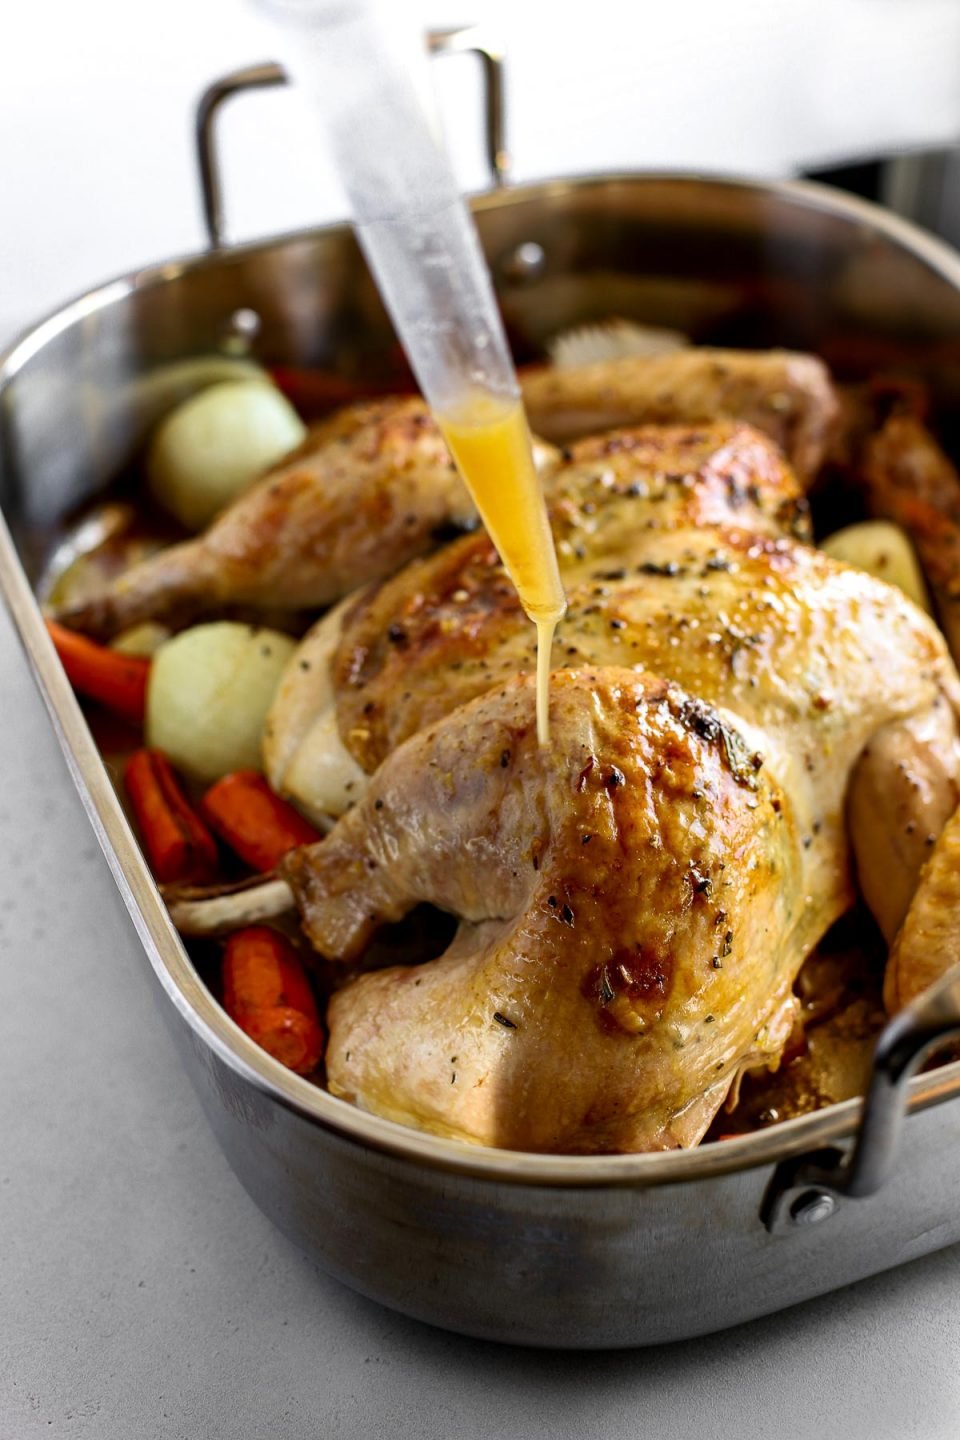
Full Recipe Directions, including step-by-step photos, are included in the Recipe Card, below.
Eat, Drink, & Be Merry! Carving & Serving Your Spatchcock Turkey.
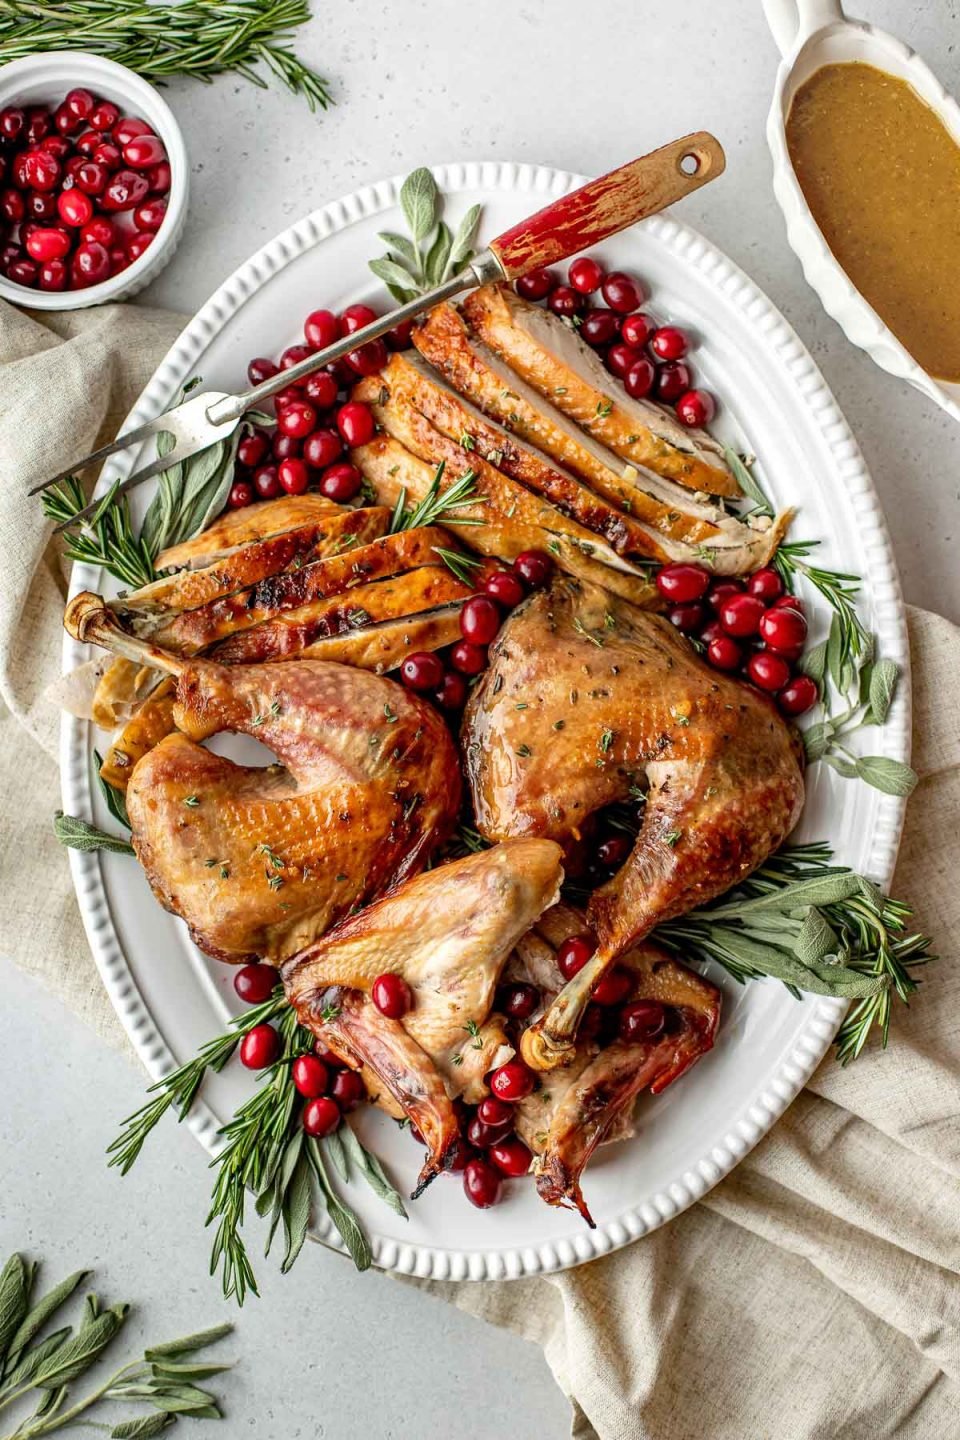
Carving a roast spatchcock turkey is similar to carving any other poultry. Start by removing the legs, drumsticks, & wings by cutting at the joints. Then hold the breast firmly in place with one hand & use the knife to help cut the meat away from the breast bone. This roast spatchcock turkey is tender & juicy, so it should fall away from the bone pretty easily! Then slice the light & dark meat into serving-sized pieces.
To serve your roast spatchcock turkey, arrange all of your beautiful roasted turkey meat on a serving platter. Everyone will be fighting for this plate as it’s passed around the table! If you want to get fancy, garnish your turkey platter with fresh herbs, lemons, or other greens to make your spatchcock turkey look even more like a superstar!
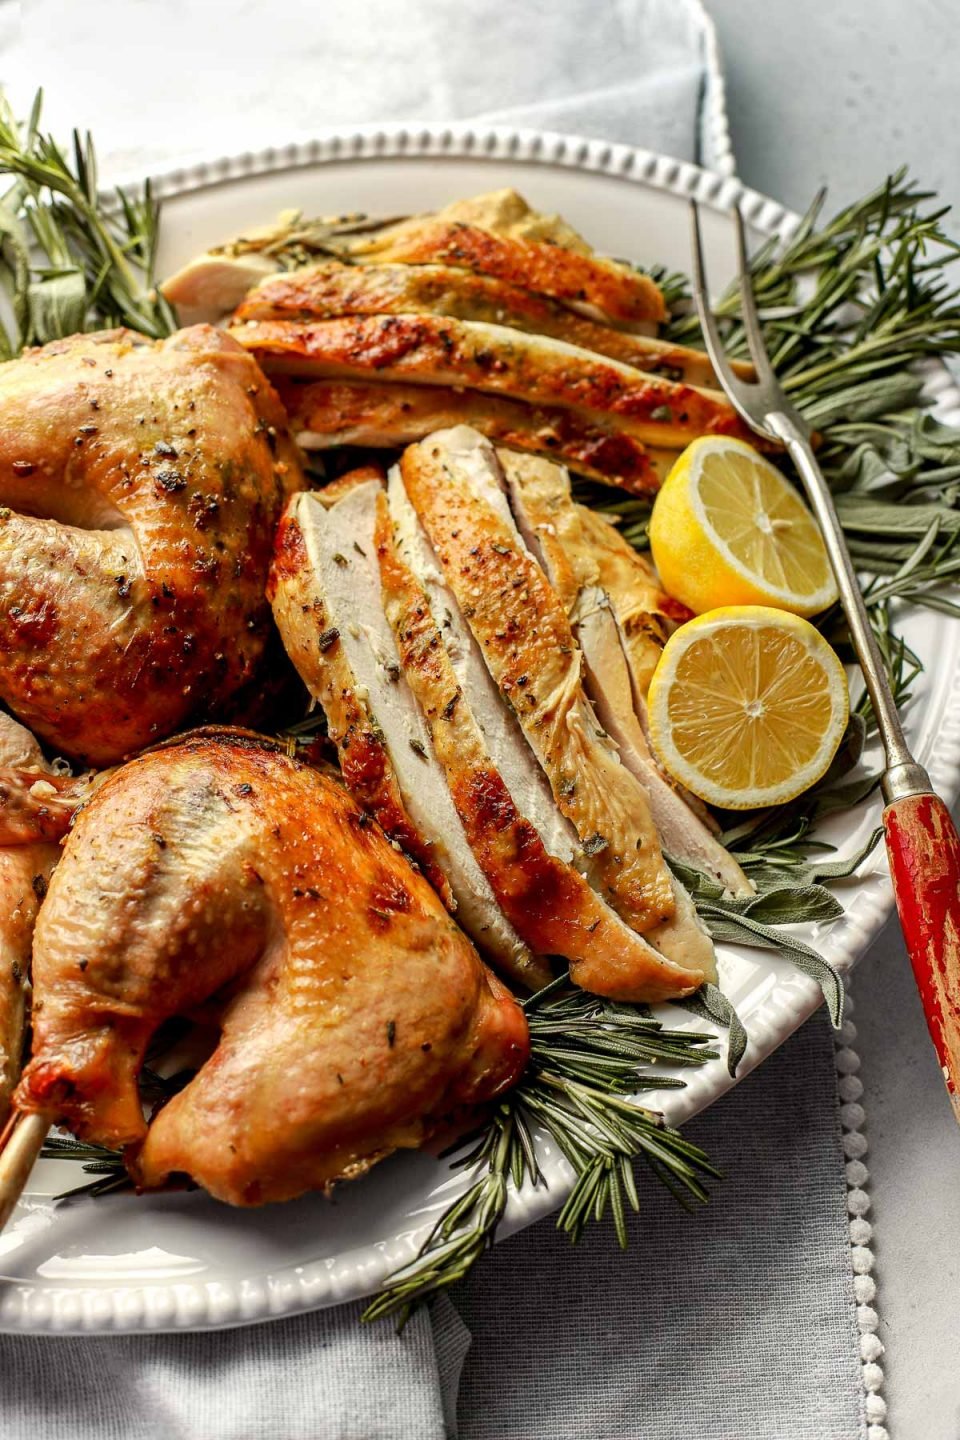
There you go…was that not an easy Thanksgiving turkey? Once you know how to spatchcock a turkey, it’ll be hard not to make a spatchcock turkey recipe during the holiday. I know I can’t turn back!
I can’t wait for you to try this Spatchcock Turkey Technique! If you do give it a try, be sure to let me know! Leave a comment with a star rating below. You can also snap a photo & tag @playswellwithbutter on Instagram. I LOVE hearing about & seeing your PWWB creations!
Love Easy Thanksgiving Recipes? We’ve got you covered! Be sure to try my Roasted Garlic Buttermilk Mashed Potatoes, Maple Mustard Roasted Brussels Sprouts, or (Cheater!) Easy Sweet Potato Casserole next. ♡ Happy cooking!
Print
How to Spatchcock a Turkey (Miracle Method with Step-by-Step Photos!)
- Prep Time: 20 minutes
- Cook Time: 0 minutes
- Total Time: 20 minutes
- Yield: serves 8–12 1x
- Category: Main Dishes, Poultry & Turkey Recipes
- Method: Spatchcock, Butterflied
- Cuisine: American
- Diet: Gluten Free
Description
A Spatchcock Turkey is the miracle Thanksgiving recipe recipe you never knew you needed! Don’t be intimidated – learning how to spatchcock a turkey is much easier than it sounds & results in a perfectly juicy, evenly cooked, super flavorful Thanksgiving turkey that’s ready in less than 2 hours – freeing up your oven to make delicious Thanksgiving side dishes & pies!
Ingredients
- one 12–14 pound whole turkey, defrosted if frozen
Useful Equipment:
- large plastic cutting board
- sharp kitchen shears
- sharp chef’s knife
- rolling pin
- shallow roasting pan or full baking sheet (rimmed) fitted with a wire baking rack (see Recipe Notes)
Instructions
*REMINDER: If frozen, do not forget to begin thaw your turkey well before the day you plan on roasting it! If it is still frozen day-of, your turkey will not safely defrost & cook in time for dinner – it’s just not possible. The safest way to thaw a frozen turkey is by placing it in the coolest section of your refrigerator. The cool, controlled temperature will slowly thaw without any areas of the turkey being in the ‘danger’ temperature zone in which bacteria grow & multiply (between 40-140 degrees F). As a general rule of thumb, plan for 24 hours refrigerated thawing for every 4 pounds – so, a 12-14 pound turkey will require 3-4 days refrigerated thawing before it’s ready to be spatchcocked & roasted.
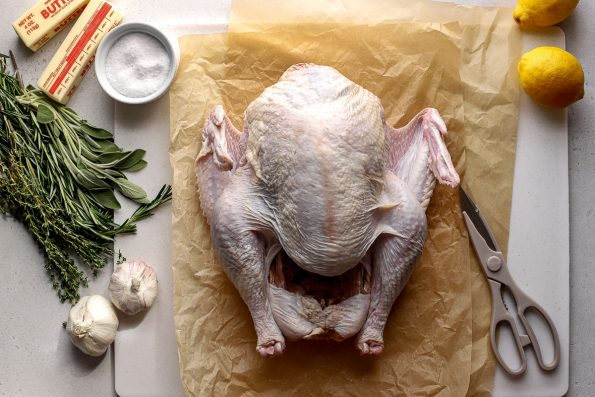
- Turkey prep: Remove the turkey from its packaging. There is no need to rinse your turkey (rinsing promotes cross-contamination). Instead, use paper towel to pat the surface of the turkey as dry as possible. If present, remove the neck & giblets from the cavity of the turkey. Discard or set aside for easy turkey gravy. Transfer the turkey to a large plastic cutting board atop a stable, sturdy surface. Place the turkey breast side facing down.
- Remove the back bone: Using very sharp kitchen shears or a sharp knife, carefully snip along each side of the turkey’s backbone until it’s completely detached. Discard or set aside for easy turkey gravy.
- Split the breast plate: With the turkey still facing breast side down, carefully use your hands to stretch open the ribs of the turkey, revealing its inner cavity. Locate the top of the turkey’s breast plate directly behind the turkey breasts. Place the heel of a sharp chef’s knife in the center of the top of the breast plate. Use a rolling pin to carefully yet forcefully tap the spine of the knife, wedging the heel of the knife into the bone. Continue tapping until the bone cracks.
- Finish spatchcocking: Use your hands to stretch the inner cavity of the turkey as wide open as possible, then flip the turkey such that its breast side is facing up. Place your hands on the center of its breasts, on the breast bone. Use your body weight to apply pressure to the chest plate, cracking the bone all the way through such that the turkey lays flat – your turkey is spatchcocked & ready for roasting. Great job!!! (Note: If you have difficulty cracking the chest plate of the turkey, flip the turkey back over, running the tip of a sharp knife over the bone from within the open cavity – these score marks help ease up any resistance. Flip the bird back over & press down on it again.)
Notes
- Easy Roasted Spatchcock Turkey Recipes: With your turkey spatchcocked, it’s ready to roast or smoke! Use your recipe of choice to season & cook. We have 2 wonderful roasted spatchcock turkey recipes that you can check out here on PWWB – our readers have raved about them over the years, making them with great success!
- This Lemon Herb Butter Roast Spatchcock Turkey is perfect you love the flavor of garlic, rosemary, sage, & thyme.
- This Spatchcock Maple Glazed Turkey is a little cozier with a beautiful easy maple glaze.
- It’s not a turkey dinner without gravy! My Easy Turkey Gravy recipe makes use of your roast spatchcock turkey’s gloriously flavorful drippings to create the easiest, best turkey gravy you’ll ever make!
- Other Important Notes:
- Roasting Pan: You don’t need anything fancy, but it’s especially important to use a large, shallow roasting pan. The butterflied turkey needs to be able to lay completely flat in the roasting pan and the sides shouldn’t be so deep that they inhibit airflow around the turkey as it roasts. I use a simple 16×13-inch roasting pan with a 2 ½ inch depth, similar to this one. If you do not have a large, shallow roasting pan, you can also roast a spatchcock turkey on a full baking sheet (rimmed) fitted with a wire baking rack.
- Spatchcock Turkey FAQ: What size Thanksgiving turkey should I use? ⇢ For this spatchcock turkey recipe, I recommend using a turkey between 12-14 pounds. Because it lies flat as it roasts, a turkey larger than 14 pounds likely won’t fit in a conventional roasting pan. If you need more turkey to feed your guests, then try preparing two smaller spatchcock turkeys rather than one large bird. This will also help your turkey meat stay extra-juicy! Not sure how much turkey you’ll need to feed your dinner crowd? ⇢ The general rule of thumb is to aim for one pound of turkey per person.
Recipe by Jess Larson, Plays Well With Butter | Photography by Megan McKeehan
Planning Your Thanksgiving Menu?
You’re in the right place! 🙌🏼 Here at PWWB, Thanksgiving is our absolute favorite holiday meal! Head over to our Thanksgiving Recipes archive for tons of incredible Thanksgiving dishes, ideas, & inspiration.
We also welcome you to sign up to join the PWWB email list – you’ll get immediate access to the PWWB Best of Thanksgiving Email Series! This brand new, completely free email series will walk you through everything you need to know as you begin to prep for your Thanksgiving or Friendsgiving celebrations this year, including…
- Make Ahead Thanksgiving – 5+ make-ahead recipes and our 3-week timeline to help you make hosting Thanksgiving totally no-fuss! Take back your time & focus on spending time with those you love.
- Turkey 101 – A fool-proof method for juicy & flavorful turkey, plus tons of turkey tips & tricks!
- The BEST Thanksgiving Side Dishes – Classic old favorites & creative new ideas to round out your Thanksgiving menu this year!
- Bonus: The 3-Hour Thanksgiving Guide – The ultimate plan for hosting Thanksgiving without the stress! This FREE download is complete with a full menu, shopping list, detailed timeline, & of course delicious recipes.
- & NEW Thanksgiving Recipes – All of our newest Thanksgiving recipes & ideas delivered straight to your inbox.
Let’s make this your BEST Thanksgiving yet!
Follow along with Plays Well With Butter on Instagram, YouTube, Facebook, and Pinterest for more unfussy recipes that pack a big punch of flavor!






i believe you’ll like my comment on youtube.
thanks a lot
Sure did, Bill! Hope your turkey is fantastic!
thank you. now i have to bake the cake just in time for good friday.
Hope it turns out great for you! 🙂
Thank you for the step by step instructions! We used your recipe for an almost 19lb bird and cooked it in an electric roaster. Although it was nice to have the oven available for other dishes, the roaster did not finish with golden skin. I’m not sure what I did wrong with the gravy, but it was incredibly unsuccessful. Way too much liquid (even only using 3 cups of liquid), regardless of the cornstarch slurry I added. I will definitely spatchcock our turkey from now on and will pick up the WS turkey base to keep from any last minute stressors. My only complaint… there were so many ads and videos running on the web page that my computer kept reloading due to using “significant memory”. Thankfully I had printed out the recipe prior to prepping the turkey. Thank you for providing a delicious recipe!
Hi Heather, glad to hear that the spatchcocking worked well for you this year! We definitely recommend using the printer view for recipes if you’re having an issue with videos and ads! As far as the gravy goes, we’d recommend simmering it for longer – it reduces as you continue to cook it. Hope that helps!
I’ve used this method/recipe multiple times and it makes day of cooking for a gathering so much easier, and the turkey always comes out consistently for me (one I learned my oven’s nuances :))
Hi Chris, we totally agree, this method is the KEY to a smooth day of cooking!
You need to do a better job of explaining the removing of the backbone. It’s easy when you first start at the neck, but as you approach the tail, you run into some fairly large bones/cartilege, etc. Just saying “snip along until it is removed” doesn’t really tell you that this is somewhat difficult and that you need to cut through/find some joints where you can separate it, etc.
Hi Robbie, so sorry to hear that this part of the process proved to be a bit more difficult for you – removing the backbone definitely may require a bit of elbow grease, especially depending on the size of the bird, etc.
We plan to share a video in the near future that will be added to the post & we hope it will visually capture this process even better than words can describe. Hope your spatchcock turkey turned out beautifully!
Worked out wonderfully! Hands down the best turkey I’ve ever made or eaten. But next year, will have the butcher do the hard work! I’ve never had white meat dripping with juices while carving it. I used a ton of butter and didn’t have much pan drippings but that’s because the turkey held all the juices in. Just seasoned with Thyme, Rosemary and some veggies underneath. I did find a rack from my old turkey pan that I used with the throw away pan I used this year..
Hi Annabel! So glad you loved this recipe & thanks so much for dropping a comment – spatchcocking makes all the difference!! 🙂
Great recipe! But you cannot reduce anything by more than 100%! So, going from 3 hours to 90 minutes is reducing the cooking time by 50%, you could just say you are cutting the cooking time in half. If you reduce something by 100% you will have nothing, therefore you can’t reduce by more than 100%, because you can’t reduce further from nothing!
Hi Wade! Thanks so much for dropping a comment, we’re so glad you enjoyed the recipe!
Thank you for the great detailed instructions. This year’s Thanksgiving turkey was the 3rd turkey that I spatchcocked, but my 1st ever for Thanksgiving. Wow! What a huge time saver on a big cooking day that normally gets stressful as you try to time oven availability for other dishes. Plus, it makes THE BEST tasting, moist turkey imaginable. NEVER going back to the traditional roasting method.
Hi Jen! So glad you loved the recipe, thanks so much for including it in your Thanksgiving dinner menu! Spatchcocking turkey is truly a gamechanger & we’re so glad it was a hit!
HELP…do you ou cover with foil or not??
Hi Michelle – No, this recipe doesn’t require foil (unless the turkey begins to brown more quickly than you’d like, which I’ve never experienced personally). Happy Thanksgiving!
I’ve spatchcocked all my turkeys in the past, but for some reason when I used this recipe my turkey is taking 3 hours. Extremely disappointed. Now I’m looking at other recipes and seeing I should’ve never lowered my oven. They all kept theirs over 400° 😓
Hi Rebecca! Sorry to hear of this experience – we’ve thoroughly tested this recipe & made it throughout the years with a 12-14 lb turkey at these settings with success so it’s really hard to determine what might’ve happened in your case. Were there any other dishes crowding the oven or changes made to the recipe ingredients, directions, etc. We’d be happy to help troubleshoot with a bit more information to see why things took longer than expected!
Help!!! I can’t find anywhere if you are to use the roasting pan rack or lay the turkey right down in the roasting pan??
Thanks in advance!
Hi Clover – I do not use a rack; I simply rest the turkey atop the veggies I roast it with (e.g. carrots, onion, celery) to help fortify the drippings. You can learn more about how I prep the spatchcock turkey for roasting in either of our Roasted Spatchcock Turkey recipes (Lemon Butter, Maple Glaze), which are linked directly in the recipe card above. Hope this helps!
Your roasting pan link no longer works! What size roasting pan do you recommend for this? I’m excited to try.
Hi Angie! Sorry about that – we used a 16″ Roasting Pan – here is a link to a similar size pan with a rack included like the one we use but any 16″ pan should work!
Hope you are able to try soon & let us know how it goes 🙂
Great directions. I plan to spatchcock my turkey this year.
Thanks, Carol! We’re so glad you find it helpful. Let us know if you have any questions leading up to Thanksgiving or join our email list HERE to download our Thanksgiving guide with tons of recipes for easy holiday meal planning & prep! 🙂
I can’t believe you answered my question so fast Jess! Bless you! Well my bird is in the oven. Of course I got a 14.9 lb bird so it had to go in my Dad’s huge roaster. He was a turkey lover and used to order a 28-30 lb fresh bird every year. The turkey would barely fit in the roaster! Looking forward to enjoying turkey tonight- I’ll let you know how it comes out. Many thanks!
I’ve spatchcocked chickens before and got an after Christmas on sale turkey just to try your recipe. The only thing that I don’t quite understand is the rolling pin thing…it isn’t shown in your pics. Can you explain it more? I’m easily confused! Lol
Hey Shelley – Totally. Since a turkey is much larger than a standard chicken, its breast bone doesn’t split quite as easily as when you spatchcock a chicken. Rather than applying a ton of pressure on a knife, I’ve found it’s easier to place the heel of the blade of the knife on the breast bone, then use a rolling pin to tap against the spine of the knife, driving the blade through the bone. This is a personal preference of mine after spatchcocking countless turkeys – if it doesn’t work for you, feel free to spatchcock as you would a chicken. Let me know if this helps.
A safe temperature for poultry is 165F. The recipe calls for resting at room temperatire until turkey is 165F. This implies cooling it from a higher temperature. This makes no sense.
Hi Bob! Apologies if this step was a bit confusing. We recommend pulling the turkey from the oven once an instant-read thermometer inserted in the thickest part of the thigh registers an internal temperature of 155 degrees F. Next, the turkey should be tented with aluminum foil & allowed to rest until it reaches a safe 165 degrees.
While the ambient temperature in the room may be cooler, a covered turkey will continue to cook to a safe 165 degree F internal temperature. Resting also allows the juices in the turkey to redistribute to yield a perfectly juicy turkey. Thanks for the feedback, we’ve updated the post to help make this clearer for other readers too!
While the tapping the knife with a rolling pin didn’t do the trick for me (scoring and flexing was my trick), this recipe was easy to follow and resulted in a delicious bird and very good gravy. I did struggle to spread the butter and wound up having big globs under the skin. My 18.75lb bird did indeed fit in my roasting pan, I’ve got a fairly large one. I did not baste as it baked. The juices are REALLY fatty due to that cup of butter smeared under the skin; the fat separated easily in a 4 cup measuring cup and I was able to use what I needed for the gravy and poured the rest off in a disposable thing (DON’T PUT FAT DOWN YOUR DRAINS!).
Hi Sarah! So glad you were able to make the method work for you & that you were able to enjoy a delicious turkey! Thanks so much for dropping a comment & for sharing your experience!
Perfect! This was the best turkey I’ve ever had or made. It was a little hard to remove the spine because I need stronger hands but the directions were great. I also need a cleaver next time. Will definitely make this again. I used your lemon herb butter recipe except substituted fresh chives for the garlic for a milder flavor. Thank you for sharing you fabulous recipes!
Hi Cat! Thank you for your review – the spatchcock method makes such a difference! 💜
Thank you for explaining all of this! I’ve done it with chicken before but this will be my first with Turkey – It’ll save so much time. Photos to follow.
Can’t wait to hear how it goes, Judith! Please keep me posted!
2020 Thanksgiving brought a new technique to my kitchen with this easy-to-follow recipe. The aroma of roasting turkey in our house piqued our appetites. The Lemon-Herb Butter was simple to make (I’ll never buy the store version again, now that I know how quick and easy I can make it) and kept the turkey moist and tender throughout roasting process… and these were the most delicious carrots and onion quarters I’ve ever oven-roasted. Spatchcock Turkey has become our newest Family Tradition…Thank you, Thank you, Thank you!!!
Hi Mary-Ellen! So glad to hear that you gave spatchcocking a try & that it has become a new tradition – it seriously makes prepping Thanksgiving dinner SO much easier! Thank you for sharing!!
This is THE recipe to use when spatchcocking a turkey. I’ve come back to this recipe time and time again. My family was blown away when I followed this recipe and it was my first time cooking a whole turkey! Jess KNOWS what she’s doing.
Couldn’t agree more!! =) So glad to hear it was a hit with your family, too! xx
Was wondering, what would the cook time be on a 22lb turkey? Great directions, thank you.
Hey Vickie – The general rule of thumb is 5-6 minutes per pound, so a 22-lb bird would take between 1 hour 50 minutes & 2 hours 12 minutes. You’d want to check for doneness at the 5 minute/pound mark, then roast additionally up to the 6 minute/pound mark as needed.
All that said, I don’t necessarily recommend spatchcocking such a large turkey for a couple of reasons. First, once such a large turkey is spatchcocked, it can be very difficult to fit it in a standard roasting pan. Not the first thing you’d think of, but an important logistical detail! Second, because the turkey is so large, it can definitely dry out despite being spatchcocked. You may be more pleased with the results of cooking 2 smaller turkeys. All depends on your preference & equipment.
Hope this is helpful – feel free to drop any more questions!!! xx
What temperature do you cook the Turkey? I can’t find it anywhere in the recipe. I have a 14lb Turkey I’m attempting to make.
Hi Joyce! This blog post is just our tutorial for spatchcocking or butterflying the turkey. If you’d like to see roasting temperatures please visit one of our turkey recipes: our Lemon Herb Butter Spatchcock Turkey or our Maple Glazed Spatchcock Turkey.
Hope that helps!
I wish I had a friendsgiving to host this year to make this, it looks amazing! I made my first turkey 2 years ago and it wasn’t the best. We cut it and then had to put it back in the oven since it wasn’t completely done haha. I’m gonna send this to my friend whose house we are going to!
it’s not too late to start planning a holiday dinner with friends 🙂 #justsaying
Girl, you just killed this post. AMAZING tutorial. I have never cooked a turkey before (always too scared). Love the step by step photos!
thank you so much, chrissa! no reason to fear the turkey…this method is seriously so easy.
This looks AMAZING! Loved your easy step-by-step guide. I’ve never roasted my own turkey but you are making me really want to try. Also… let’s talk about how gorgeous your turkey turned out! Magazine worthy!
thank you so much aya! this method seriously could not be easier – i hope you give it a try!
This is the most comprehensive, most amazing tutorial ever! Girl you have major skillz!
thank you so much, girl!
You are fantastic!!! Man, now I really wish i was hosting Thanksgiving!!! And yes, I am dying at your wit nad humor. Killing it GF.
thank you allie! it’s not too late to pull together a holiday dinner with friends 😉 #justsayin
JESS! This is a total gamechanger. Like I feel like I could go buy a turkey today and invite people over this weekend and totally knock Friendsgiving out of the park! Your bird looks epic.
And I absolutely love the description of the bird – “the turkey kind of lays about a bit seductively” – ha!
ellie, it IS a total game-changer. i’ve made turkey 3 times so far this year & there will be 2 more in the next week. it. is. so. damn. easy. lemme know if you try girl!
Would you be able to do this with a bigger Turkey? We have a 20 lb Turkey for a large dinner, how much longer would you suggest cooking it?
Hey Samantha! You can totally spatchcock a larger turkey, though you’ll want to make sure your roasting pan can fit a turkey of that size. That’s the trouble most people run into – you need a BIG roasting pan! In terms of roasting time, figure about 6 minutes/pound, so 2 hours total for a 20-pound bird. I suggest continuing to baste the turkey every 20 minutes, & using a meat thermometer to ensure the thickest part of the thigh registers at 165 degrees F before pulling the turkey from the oven.