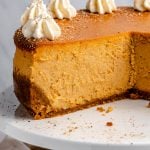
Seriously, the Best Pumpkin Cheesecake with Gingersnap Crust
If there’s one recipe I make every year without fail, it’s this Pumpkin Cheesecake with Gingersnap Crust. After 10+ years of perfecting it, I can confidently say it’s the best pumpkin cheesecake you’ll ever try.
2 things make it truly exceptional: flavor and texture.
The cheesecake filling is made with both cream cheese and sour cream for a balanced, tangy flavor. Pumpkin purée and a blend of warm pumpkin pie spices—cinnamon, ginger, nutmeg, and more—infuses each bite with cozy, autumnal warmth.
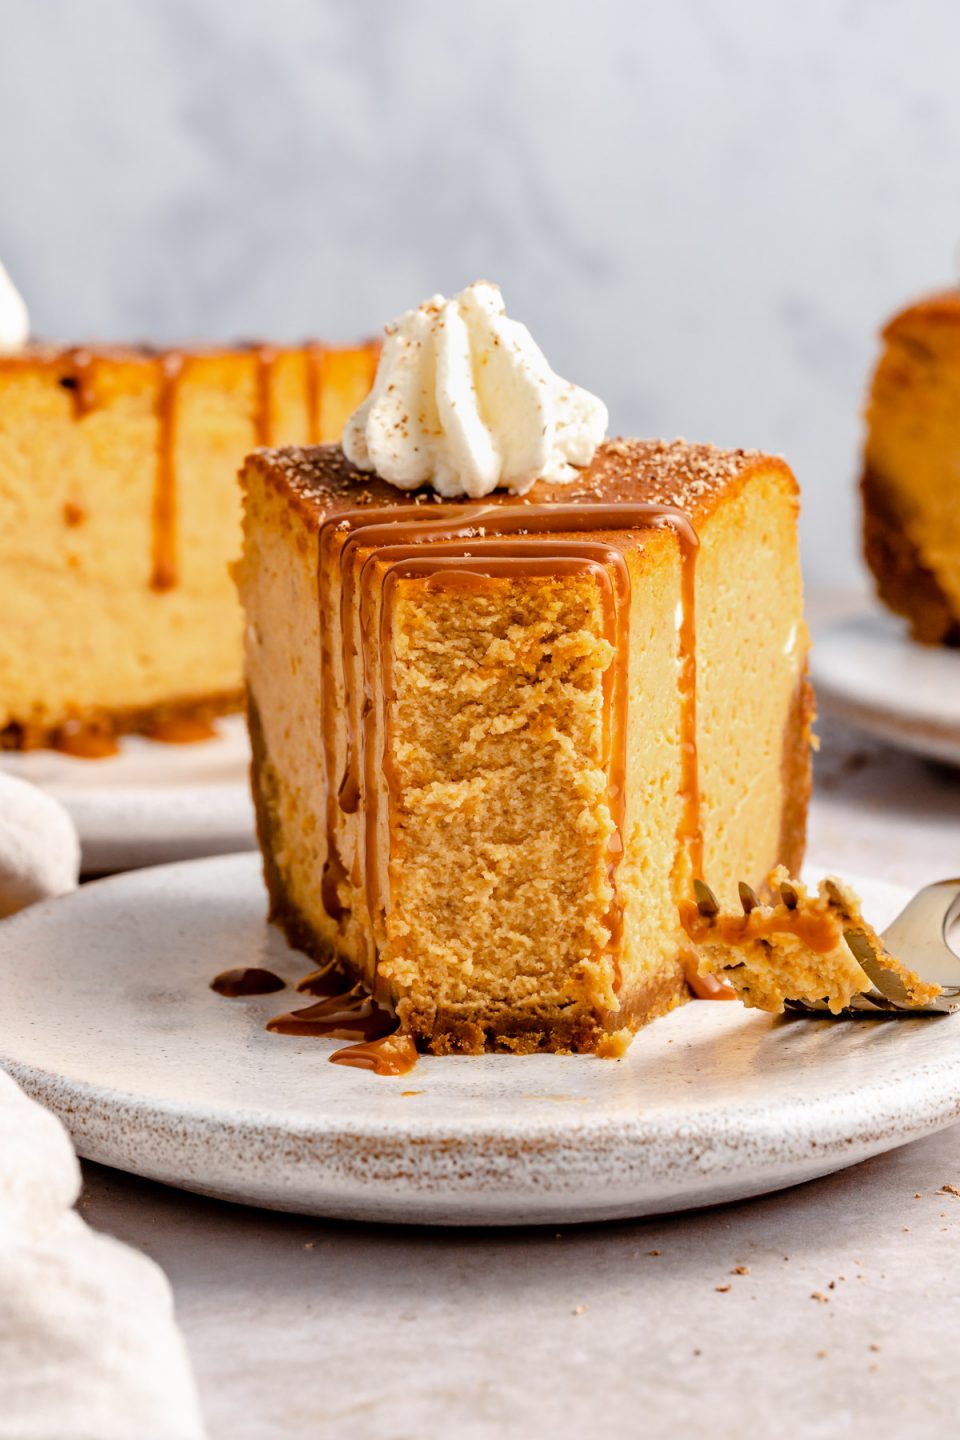
As it bakes, the cheesecake takes on the most heavenly texture—creamy and decadent, yet light and airy all at once.

But what really sets this cheesecake apart is the intensely zippy gingersnap crust. The bold, spicy ginger flavor offers so much more than a typical graham cracker crust, cutting through the creaminess of the filling and adding an extra layer of flavor.
When all’s said and done, this pumpkin cheesecake is the ultimate fall dessert, especially for holidays like Friendsgiving and Thanksgiving.
This recipe is so beloved that it was one of the very first I ever shared here on PWWB, all the way back in 2017. Since then, thousands of readers have made it and fallen in love with it too, and I’m so excited for you to give it a try!
After all, who needs pie anyway?! 😘
Maximum Flavor, Minimal Effort
3 foolproof secrets to low-fuss, flavor-packed dinners, learned from years working in restaurants.
Before You Start, Plan Ahead!
This cheesecake bakes for almost 2 hours and needs to set for up to 13 hours. To ensure success:
- The night before, pull the cream cheese, sour cream, and eggs out of the fridge so the ingredients are room temperature when you start baking.
- Bake your cheesecake at least one day before you plan to serve, if not more. Check the Recipe Notes, below, for guidance on make-ahead directions, storage, and freezing.

The Best Crust Starts with The Best Gingersnaps
A key factor in what makes this recipe the best pumpkin cheesecake is the gingersnap cookie crust.
For best results, the gingersnaps should be very crispy with bold, zingy ginger flavor.
Best gingersnaps for cheesecake crust? My absolute favorite gingersnap cookies for this recipe are Trader Joe’s Triple Ginger Gingersnaps, made with 3 kinds of ginger– fresh, ground dried, and crystallized–for the best spicy flavor. Find them in the cookie section, above the freezer coolers; you need one 14-ounce tub for this recipe.
Don’t live near a Trader Joe’s? ⇢ No problem! Use a different gingersnap cookie for the crust. Be sure to look for crispy gingersnaps (vs soft-baked), such as Stauffer’s. PWWB readers have also successfully used these gluten-free gingersnaps for a gluten-free pumpkin cheesecake.
Can’t find crispy gingersnaps? ⇢ Make a classic graham cracker crust, but zhuzh it up with some cinnamon and ginger to emulate the spicy-sweet flavor of gingersnaps. Check the Recipe Notes, below, for step-by-step guidance.
3 Key Tips and Tricks For the Best Pumpkin Cheesecake
Baking cheesecake can feel intimidating, but it doesn’t need to! In addition to planning ahead, there are a few simple tips to ensure your pumpkin cheesecake turns out beautifully, without falling or cracking.
A quick note on cracking: While I’ve made this pumpkin cheesecake many times without experiencing cracks, it can happen. While it’s a disappointing outcome, it doesn’t affect the texture or flavor. Your cheesecake will still be creamy and delicious!
That said, there are 3 things you can do to help prevent cracking…

#1 – Use Room Temperature Ingredients
Your cream cheese, sour cream, and eggs should be at room temperature before you start.
Why? ⇢ Room temperature ingredients blend more easily, ensuring a smooth cheesecake batter without lumps or bumps. It’s also a crucial step in preventing over-mixing, which adds too much air to the batter and can cause it to crack as it bakes.
#2 – Bake the Cheesecake in a Water Bath
A water bath is key to baking the perfect cheesecake! Why? ⇢ The water absorbs the oven’s heat, allowing the cheesecake to bake gently and evenly. Plus, it adds moisture to the oven, which helps prevent cracking and creates the perfect creamy, dreamy texture.
How to Create a Water Bath for Cheesecake. ⇢ This technique sounds intimidating, but it’s honestly pretty easy! Simply wrap your cheesecake pan in foil, place it in a roasting pan, and pour boiling water around the pan before baking. I suggest setting up your water bath right on the oven rack to prevent spills.

#3 – Allow Time to Let the Cheesecake Set Properly
Between prepping, baking, and setting, cheesecake is a time-intensive project, but it’s worth it. This pumpkin cheesecake bakes for almost 2 hours and sets for up to 13 hours. Allowing enough time to set ensures your cheesecake has the perfect light and fluffy texture.
Pumpkin Cheesecake Essentials
 Buy Now →
  Buy Now →
 Serving Suggestions
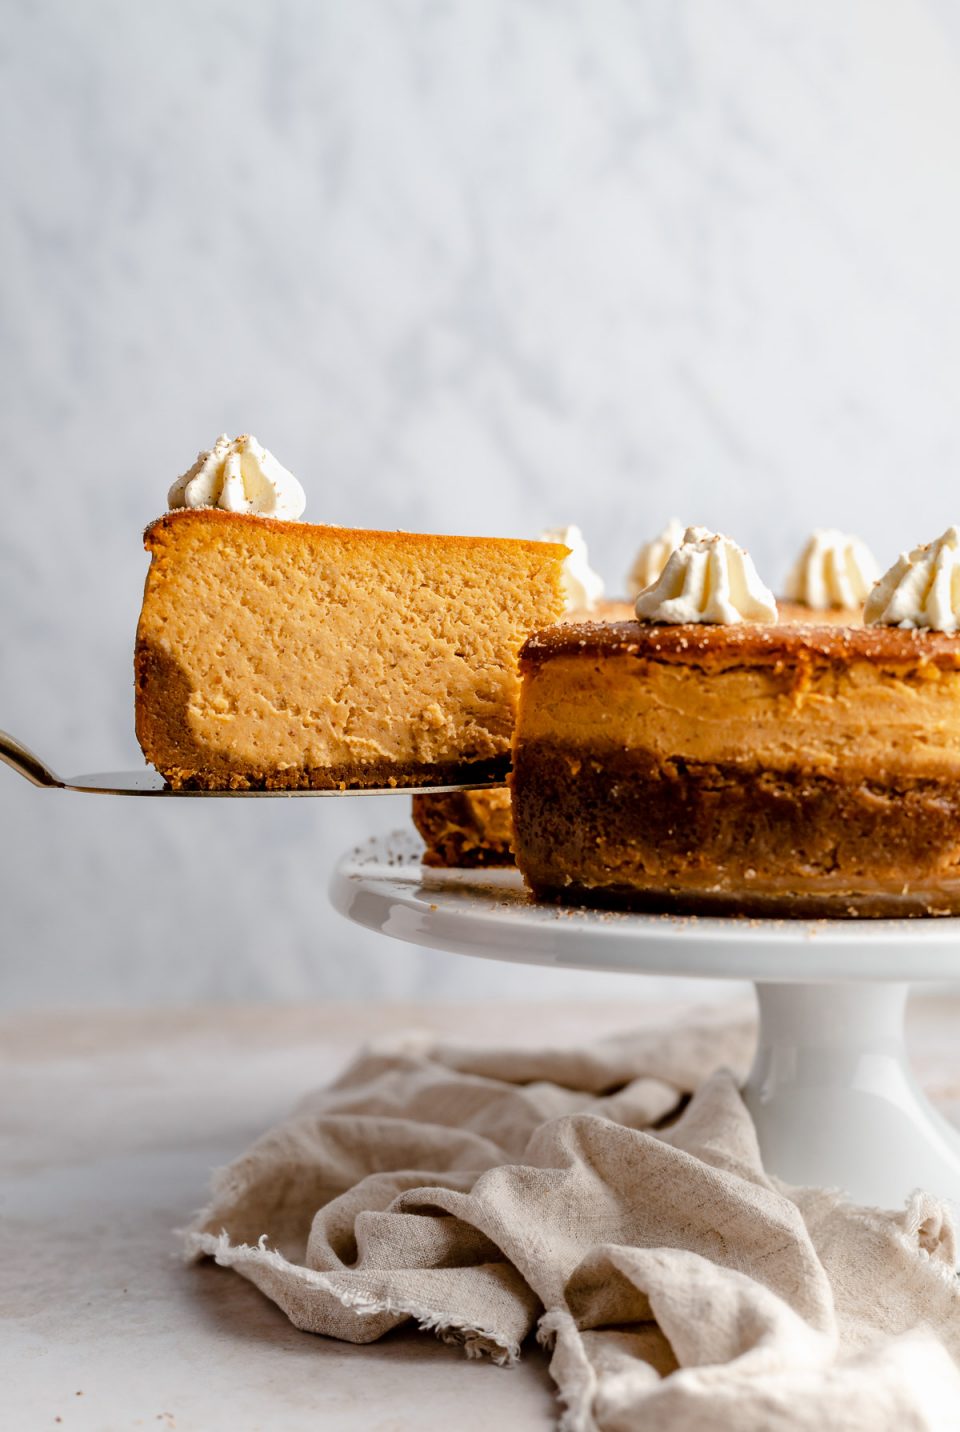
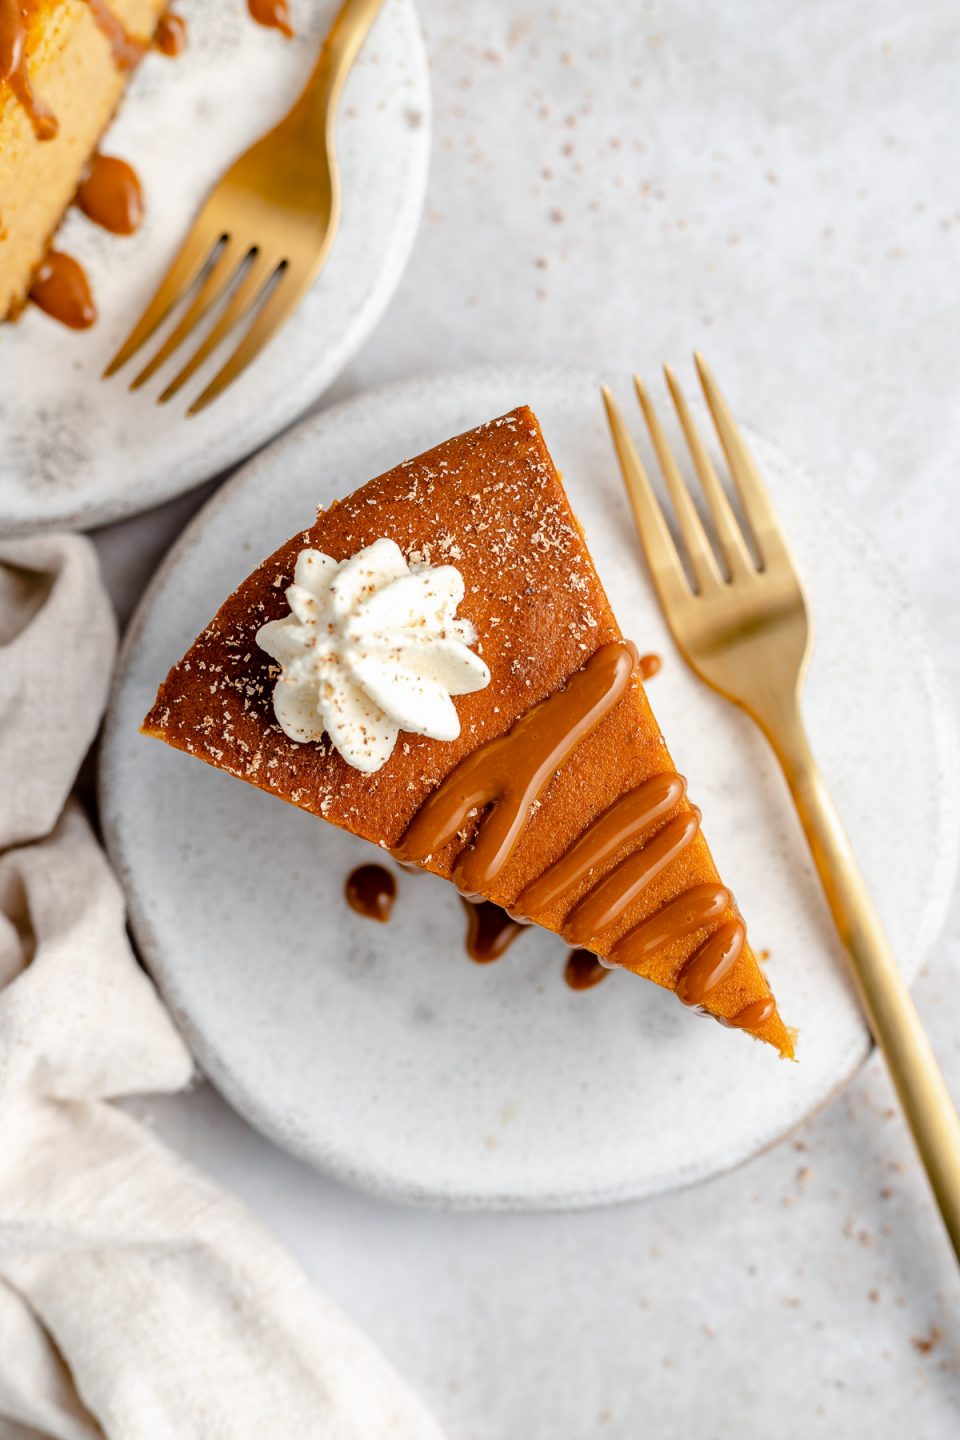
With your pumpkin cheesecake baked, chilled, and set to perfection, all that’s left is the very best part – serving it!
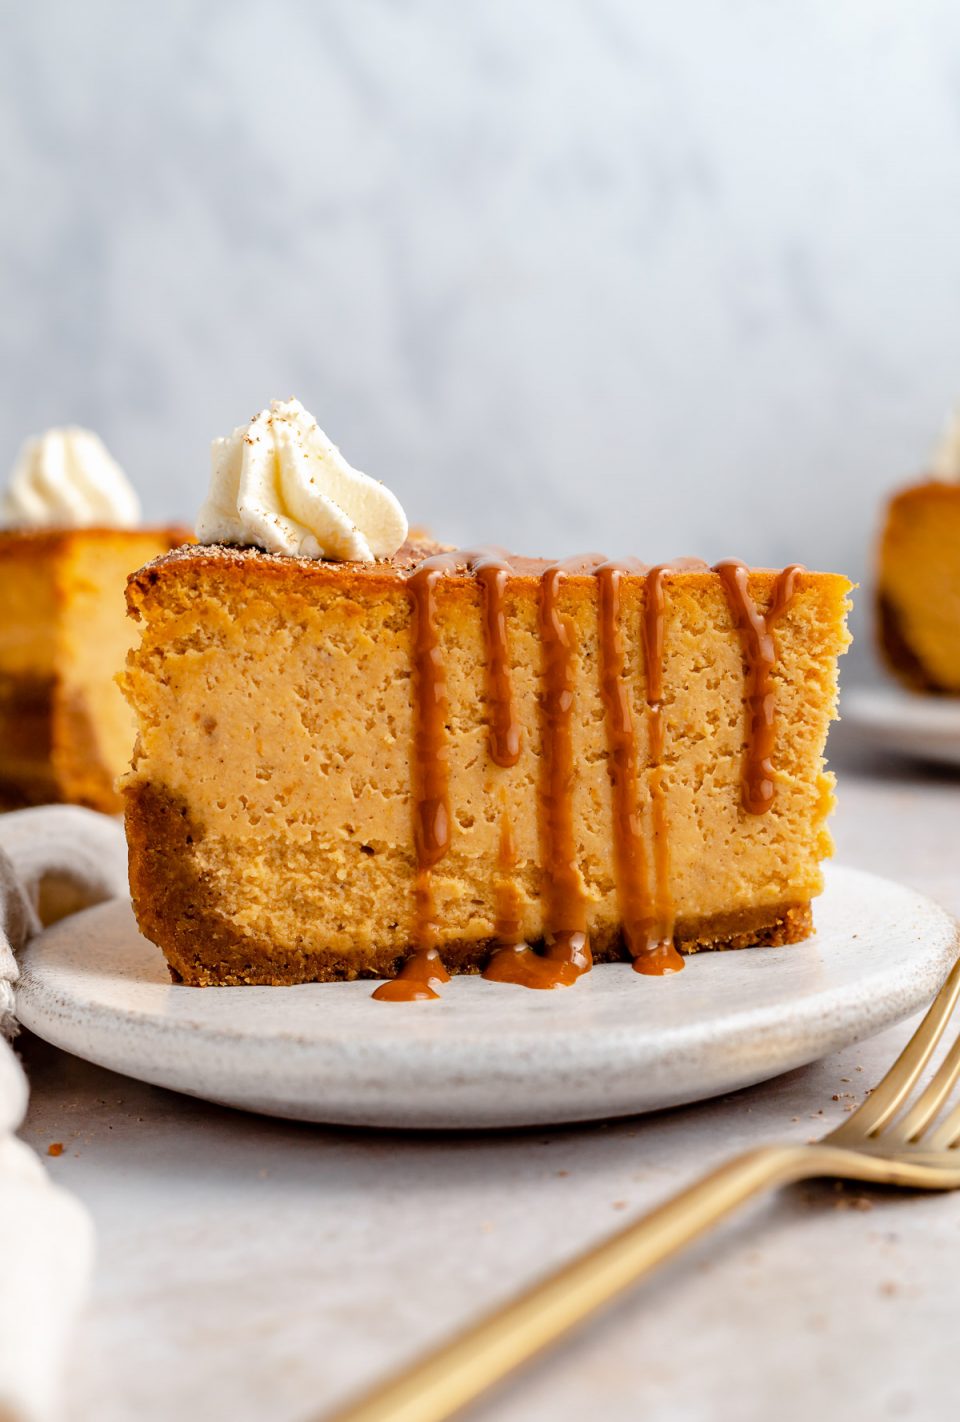
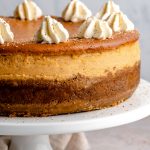
While it’s perfect on its own, I love to top each slice with freshly whipped cream, a dusting of grated nutmeg, and a drizzle of salted caramel.
We can’t wait for you to make this Best-Ever Pumpkin Cheesecake with Gingersnap Crust recipe. Once you taste it, I know you’ll be just as obsessed as my friends and family are!
If you do give it a try, be sure to let me know! Leave a comment with a star rating below. You can also snap a photo and tag @playswellwithbutter on Instagram. I LOVE hearing about and seeing your PWWB creations! Happy baking! ♡
Print
Better-than-Pie Pumpkin Cheesecake (with Gingersnap Crust!)
- Prep Time: 45 minutes
- Cook Time: 2 hours
- Total Time: 12 hours (includes inactive time)
- Yield: serves 8–12 1x
- Category: Breads & Cakes, Cheesecake, Dessert recipes
- Method: Baked, Water bath
- Cuisine: American
- Diet: Vegetarian
Description
I first made this Pumpkin Cheesecake with Gingersnap Crust for Thanksgiving 10+ years ago and I’ve never been able to make another Thanksgiving dessert because my friends and family demand it every year!
It’s truly the best ever – a rich and creamy cheesecake with the perfect light and fluffy texture, laced with warm pumpkin spices, and served on a super gingery gingersnap crust. The ultimate pumpkin dessert for Thanksgiving or Friendsgiving celebrations!
A few quick notes to get you started:
- Triple Ginger Gingersnaps from Trader Joe’s are my favorite gingersnap cookies to use here. They’re made with 3 kinds of ginger – fresh, ground dried, and crystallized – so they have the best spicy ginger flavor. If you don’t live near Trader Joe’s, use another crispy gingersnap (vs soft-baked), such as Stauffer’s.
- It’s very important to use room temperature ingredients where directed, mixing them just until they’re smooth and creamy. Over-mixing the batter can contribute to your cheesecake cracking as it bakes. For more guidance, check the Recipe Notes, below.
- Plan ahead! This cheesecake needs to bake for almost 2 hours and needs to set for at least 13 hours. Be sure to take this timeline into consideration as you’re planning your Thanksgiving menu – you need to bake it at least one day before your Thanksgiving celebration.
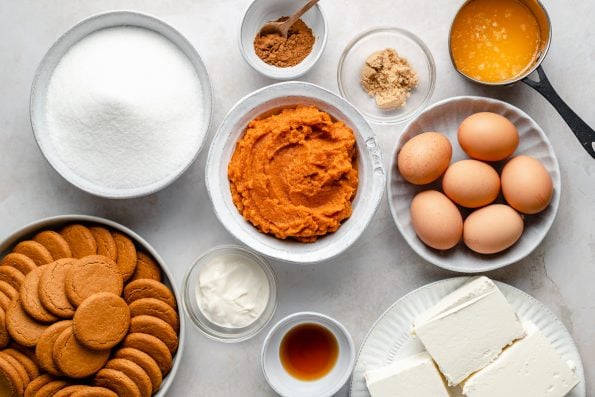
Ingredients
for the gingersnap crust:
- 14 ounces crispy gingersnap cookies (see Recipe Notes)
- 1 tablespoon brown sugar
- ½ cup unsalted butter, melted
for the pumpkin cheesecake
- 32 ounces cream cheese (four 8-ounce bricks), at room temperature
- ¼ cup sour cream, at room temperature
- 2 ½ cups granulated sugar
- one 15-ounce can pumpkin puree
- 6 large eggs at room temperature, lightly beaten
- 1 heaping tablespoon pumpkin pie spice
- 1 tablespoon pure vanilla extract
- for serving, as desired: freshly whipped cream, freshly grated nutmeg, salted caramel
Instructions
- Preheat the oven to 350 degrees F. Lightly grease a 9-inch springform pan, then wrap foil tightly around the base of the pan – this is the easiest way to ensure no liquid oozes in or out of the springform pan while the crust and the cheesecake bake.

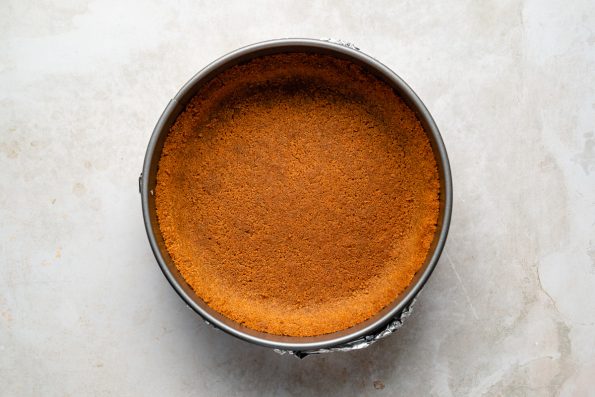
- Prep the gingersnap crust: Add the gingersnap cookies to the bowl of a food processor. Pulse until the cookies are crushed into very fine crumbs. You will have about 2 ½ cups of gingersnap crumbs. (If you do not have a food processor, you can also place the gingersnaps in a resealable bag and crush them with a rolling pin.) Transfer the gingersnap crumbs to a large bowl with brown sugar, melted butter, and a pinch of salt. Mix to combine until the entire mixture is moist. Transfer the gingersnap mixture to the prepared springform pan. Press the crumbs into an even layer – I like to press them halfway up the sides of the springform pan and use the bottom of a measuring cup to press it in really well and create some nice edges.
- Bake the gingersnap crust for 12-15 minutes, until golden and fragrant. Remove from the oven and set aside to cool. Reduce the heat of the oven to 325 degrees F.
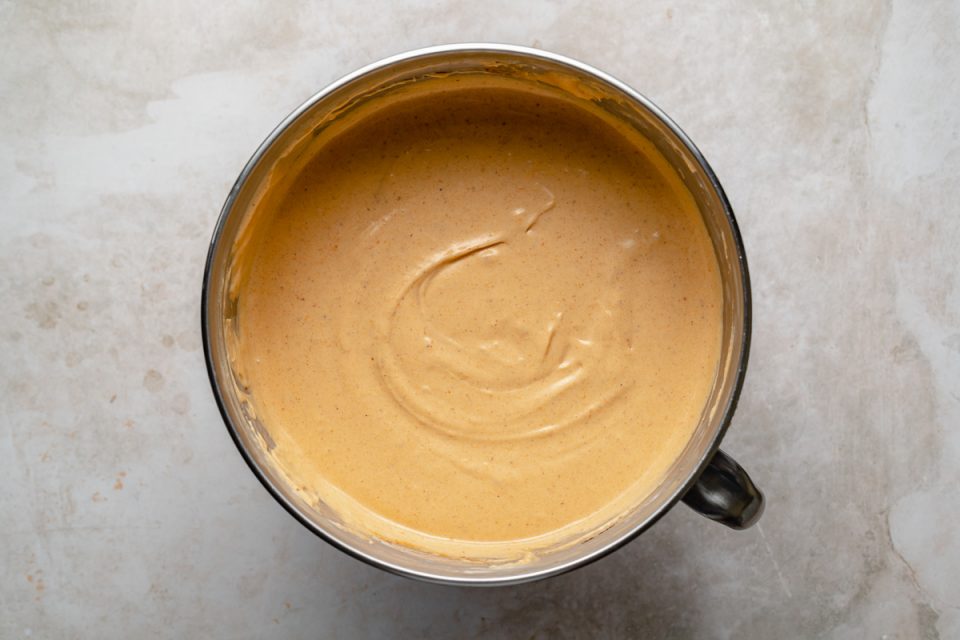
- Prep the pumpkin cheesecake filling: Meanwhile, as the gingersnap crust bakes, prep the cheesecake filling. In the bowl of a stand mixer, combine the cream cheese, sour cream and granulated sugar. Using the paddle attachment, beat on medium speed just until the mixture is smooth and creamy – with room temperature ingredients, this takes about 90 seconds – 2 minutes. Add the pumpkin puree, mixing just until combined. Reduce the speed to low and slowly add in the beaten eggs, vanilla extract, and pumpkin spice, mixing until just combined.
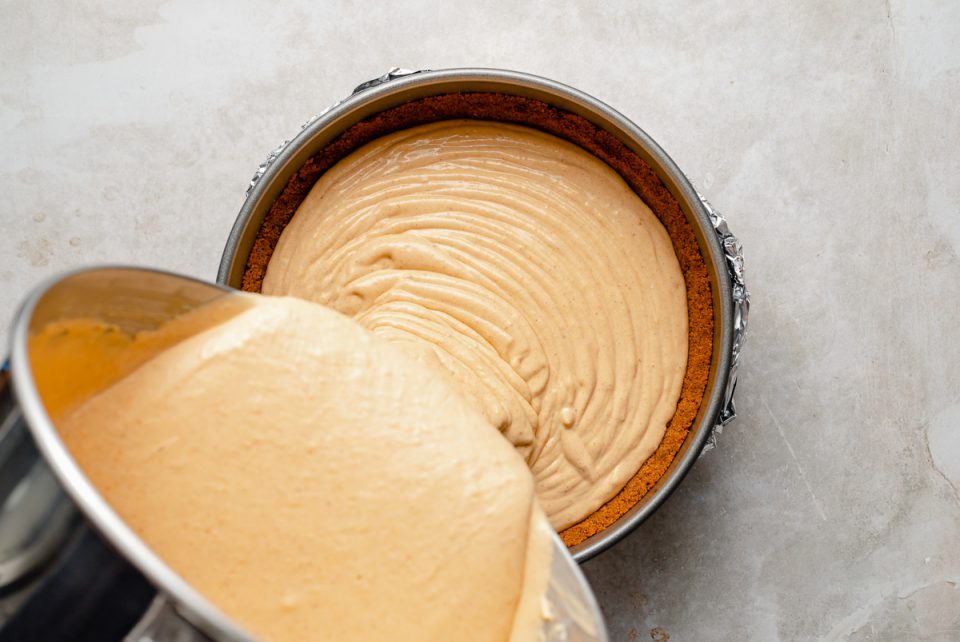
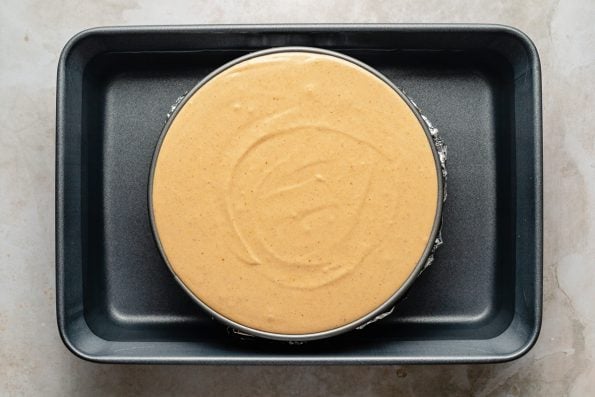
- Assemble the pumpkin cheesecake: Carefully pour the pumpkin cheesecake filling over the prepared gingersnap crust. The filling can go straight up to the top of the springform pan – it shouldn’t overflow as it bakes. Depending on how long you whipped the filling, you may have a little excess batter – set aside for later use or discard. Carefully tap the pan against the counter a few times to release any air bubbles.

- Prepare the water bath: Bring a kettle of water to a boil. Set a roasting pan on the middle rack of your oven, which should be heated to 325 degrees at this point. Add the cheesecake to the middle of the roasting pan, then carefully pour the boiling water in the pan, surrounding the cheesecake. The water should come about ½ way up the sides of the springform pan, but make sure the water level stays below the foil that is wrapped around the springform pan.
- Bake the cheesecake for 1 hour and 45 minutes, until the edges are set. The center of the cheesecake may still be a little loose – that’s okay, it will continue to set as it sits. Turn off the oven, leaving the cheesecake in the oven for 1 hour while the oven cools. The residual heat of the oven will gently bake the cheesecake to completion. Carefully remove the cheesecake from the oven and from the water bath. Cover and transfer to the refrigerator to set for 8-12 hours.
- Serve: Run a knife around the edges of the springform pan before releasing it. Slice the cheesecake into 8-12 slices. Top with whipped cream, freshly grated nutmeg, and a drizzle of salted caramel as desired. Enjoy!


Equipment
Buy Now → Notes
Jess’ Tips and Tricks for Success:
- Quick note on cracking: While I’ve prepared this pumpkin cheesecake recipe many times without experiencing cracking, cheesecake does crack sometimes. While it’s a disappointing outcome, it luckily does not affect texture or flavor – your cheesecake will still be very creamy and delicious! That said, there are 2 things you can do to help prevent cracking:
- Avoid overmixing. Overmixing beats an excessive amount of air into the cheesecake batter, which expands in the heat of the oven and can lead to cracking. Starting with room temperature ingredients and mixing just until they’re smooth and creamy makes a huge difference!
- Bake in a water bath and rest in the oven. Cracking also occurs as a result of intense temperature changes. A water bath helps by surrounding the cheesecake with gentle, consistent heat. Resting the cheesecake in the warm oven once its baked also helps, since doing so allows the cheesecake to gradually cool.
- Determining doneness: Baking time may vary depending on your oven. The cheesecake will be ready once the edges are set and the center has a slight jiggle to it. This typically takes 1 hour 45 minutes in my oven, but adjust the baking time as needed to achieve doneness.
- Equipment: A springform pan is essential to successfully making cheesecake! This one is made by one of my most trusted baking brands and has amazing reviews (less than $20!). You’ll also want a roasting pan to properly set up a water bath for this pumpkin cheesecake – this is the one I use.
Make-Ahead, Storage and Freezing:
- Make-Ahead and Storage: This Pumpkin Cheesecake with Gingersnap Crust will keep for up to 5 days after baking – feel free to make it ahead of time, or store your leftovers to enjoy later. Wrap the cheesecake in plastic and store in the refrigerator.
- Freezing: This pumpkin cheesecake is also incredibly freezer-friendly. Set the chilled cheesecake on a baking sheet and freeze solid before tightly wrapping in plastic or foil. Freeze for up to 3 months. Thaw the cheesecake overnight in the refrigerator before re-serving.
Follow along with Plays Well With Butter on Instagram, YouTube, Facebook, and Pinterest for more unfussy recipes that pack a big punch of flavor!


I baked two 6 inch cakes for Christmas, the pumpkin cheesecake with gingersnap crust and chocolate cake with buttercream frosting, both were a hit but the cheesecake was exceptional. It was creamy, unexpectedly light and fragrant (I made my own pumpkin pie spice). I had enough leftover batter for another 6 ” cheesecake that my husband and I coveted for ourselves. For the second cheesecake I made a Biscoff cookie crust adding a hint of caramel.
Lessons I learned:
Overmixing is real! If you have bits of coagulated egg white in your batter strain it out.
Make sure you add enough butter to crust crumbs.
Check your oven temperature.
This recipe is fantastic.
So happy to hear the cheesecake turned out great for you, Joanna! Using your own pumpkin spice sounds amazing!
Just wondering if I could sub plain Greek yogurt for the sour cream.
We’ve never tried that substitution, Angela, but you’re certainly welcome to give it a try! Be sure to report back if you do! 🙂
Cheesecake came out great! Subbing plain Greek yogurt for the sour cream was totally fine. They have similar texture and flavor so I figured it would be. 2 things I’ll change next time: 1) less butter in the crust. The crumbs seemed a little wet to me so I’ll reduce the amount of butter next time. 2) add more pumpkin spice. I added more than recipe called for and I think I’d still increase a little more next time.
Thank you so much for reporting back, Angela! Glad to hear the cheesecake turned out great for you!
Made this for Thanksgiving this year and it was perfection! I’ve never made a full size cheesecake before and the steps/tips were very helpful. It practically vanished once I brought it out of the fridge 😄
I’ll definitely remake it next year!
Ditto the other commenter asking for a peppermint version, maybe with an oreo crust?!
So happy to hear the cheesecake was a hit, Erin! We’ll definitely consider a peppermint version in the future! 🙂
So I’ve done a lot of cooking over my years and this cheesecake is one of the best things I’ve ever made. Everyone loved it for Thanksgiving. Now we wonder if you have a peppermint cheesecake recipe.
Wow Hays, that’s such high praise!! We don’t have a peppermint cheesecake recipe (yet!) but maybe someday! 🙂 Hope you had a great Thanksgiving!
I made this on Tuesday. It had a five hour car ride in a Yeti cooler on Wednesday, and another car ride on Thanksgiving to my family’s celebration. I didn’t unwrap it until it was time to serve and somewhat nervous to see how it faired. It was BEAUTIFUL. My cousins said it was the best cheesecake they’d ever had and I should enter it in a baking contest. 😂 The Gingersnap crust really made it shine.
Wow Mary, that’s such high praise! Happy to hear the cheesecake was able to handle your Thanksgiving travel, and so glad to hear it was a hit! Hope you had a great Thanksgiving! 🙂
I have made this cheesecake now for the past 2 Thanksgivings. We absolutely love the taste of it – but I have some serious issues with the crust sticking to the pan. I have tried greasing it well, but just wondering if there’s any trick to this (and if I’m the only one experiencing this). Thanks in advance!
Hi Tory, so glad to hear this is a favorite of yours, and sorry to hear about the crust sticking to the plan! We haven’t had any problems with that, but we’re happy to help troubleshoot! Are you serving the cheesecake cold? Making sure it’s super cold really helps with the pieces holding together nicely! You could also try lining the pan with parchment paper and greasing the parchment paper with nonstick spray, too. Hope this year goes better for you, please report back on how it turns out!
This was my first time making a cheesecake and made it for Thanksgiving for the family! It was delicious and a huge hit. Will be a staple for fall/winter desserts for sure! Thank you, Jess!
So glad to hear that it’ll be a repeat recipe for you, Jen!
I was so excited to post the review, I forgot to post the rating! Oops! Here it is now 🙂
Thanks so much for adding that start rating, Jen! 🙂
The nAme is perfect, really best ever. I made this for thanksgiving and everyone, I mean everyone loved it. “You could sell this!”
The recipe is easy to follow and create. Plan ahead better than me and don’t start at 10:30 pm! It came out perfectly though. The tips Jess offered are so helpful. I made two days ahead and had enough filling for two. It’s an instant classic in our house!
We’re so thrilled that the cheesecake was a hit at Thanksgiving, Tiff! Thank you so much for taking the time to leave a review!
Made this the second time for Thanksgiving this year. Nothing but rave reviews. For an added dimension, I added freshly ground nutmeg to top after decorating with whip cream and did serve with home made caramel drizzle – kind of “over the top” but oh so good.
I used TJ’s triple ginger cookies for crust. Followed directions exactly – important to have ingredients at room temp. and not to overmix. I covered spring form bottom with heavy duty foil to top rim of outside to prevent water intrusion with hot water bath 1/2 way up sides. Happy to share photo.
Thank you for this recipe and the exact instructions.
We DEFINITELY approve of being over-the-top with this cheesecake, Elaine! So thrilled it turned out great for you and that everyone enjoyed it!
Baked 2.5 hours did not set up properly.
I nervously made this, following the directions as closely as able and focusing on blending everything as smoothly and minimally as possible before adding the eggs. I didn’t have more filling than fit in the springform and had great results. Lot of compliments from family including “this doesn’t even need whip cream” and “this is the only pie* I ever want” (*yes, I know this is a cheesecake). I whipped some heavy whipping cream with granulated sugar and maple syrup, some with bourbon and some without, and left that for people to dish at will. I grabbed the only ginger cookies available at the store and added a bit of cinnamon and ground ginger to get a little more flavor in the crust. I’m pretty confident this will be requested for a long time to come. Thank you for sharing a great recipe!
We are so thrilled to hear this, Julie!! Cheesecake can definitely be intimidating, and we’re so glad you trusted us with your Thanksgiving dessert! That maple bourbon whipped cream sounds INCREDIBLE, too! 🙂
Made this exactly according to recipe and it came out a freaking masterpiece!!! Amazing, thanks so much!!
So thrilled to hear that, DB!! Happy Thanksgiving!
Happy Thanksgiving yourself☺️☺️☺️ I really wish I could post a pic. Looking forward to trying more of your recipes!
Hi! I have been looking at this recipe since last year and finally decided to make it this year. I am a bit nervous as i was scared to overmix but then when I poured into the crust there were still a few chunks of cream cheese. If I had watched the video first I might have used a hand mixer over the paddle attachment in the stand mixer. Do you think this will affect the overall outcome? I was going to put it back in the mixer and mix up the chunks but again didn’t want to over mix
Hi Jen, have you already baked the cheesecake? In the future, we’d definitely recommend putting the batter back into the mixer or mixing with the hand mixer for just long enough to ensure the batter is smooth. Make sure to let us know how it turned out for you! Hoping it all goes well! 🙂
I made this in a 6 inch springform by simply cutting measurements in half. Baked for 1 hour. Only changed 2 things due to some comments.
For the crust I only used 1.5 tablespoons of butter. Didn’t experience any seeping and it came out great! For the filling, I did 3/4 cup of sugar. Just couldn’t put 1.5 cups in such a small cake.
I’ve made a few cheesecakes before but this is the first one I tried with a water bath. My other cheesecakes never cracked but always sank, which I never minded. But this cheesecake after cooking in the waterbath and sitting in the oven for an hour was pretty much level! What a feeling of pride.
This pumpkin cheesecake was delicious, thank you.
Hi Taylor, thank you so much for taking the time to leave a review! We’re so glad the cheesecake turned out great for you – and thrilled to hear that it worked well in a smaller batch as well!
Best cheesecake ever!! So creamy and delicious. Everyone loved it. It did crack the the top so I made a bourbon whipped cream, put it on top and added gingerbread cookie crumbs! (No one ever knew it cracked) Looked like it was from a bakery and tasted better than any cheesecake I’ve ever had!! Great recipe!!
Hi Polly, we’re so glad the cheesecake turned out great for you!! Cracks definitely happen, but it sounds like you handled it beautifully 🙂 Hope you had a great Thanksgiving!
So good!! Made this for thanksgiving and it was a huge hit. It was my first time making a cheesecake so I was a bit nervous, but just followed the instructions carefully and it came out perfect. Made it the day before and served it with fresh whipped cream I made the morning of! Delicious!!!!!
Thank you so much for including in your Thanksgiving celebration, Bianca! That means so much to us and we’re SO glad that you found the instructions helpful! It sounds like it turned out perfectly!
Wonderful recipe! I made it exactly as written and it was perfect!
Patricia! I’m so glad to hear that you enjoyed. Have a happy Thanksgiving!
I used ginger snaps and vanilla wafers for the crust. Will definitely make again
So glad to hear it, Jeff! Nilla wafers sound like a great add-in. 😋
Happy Thanksgiving!
Jess
I’ve made this cheesecake for a holiday potluck and people literally cleaned the pan of any remains of the cheesecake. It was fairly easy to make, just take the time to follow instructions to reduce or prevent cracking. Otherwise, most of your preparation time involves baking and cooling. In my opinion, the combination of pumpkin and gingersnaps elevates this cheesecake to a five-star dessert that people will devour.
We’re so happy to hear that the cheesecake was a hit with everyone! We definitely agree that the gingersnap crust is a game-changer. Thank you so much for the review!
This recipe turnout great. I also had quite a bit of batter left over. I water bathed in a spring form pan. Turned out great but I was unable to leave it in the oven so I had one big crack.
I used a casserole dish and put parchment paper on the bottom, added a crust and used the remaining batter. I wasn’t able to water bath this one and it cracked much more then sunk a bit. Both tasted amazing and I thought it showed a great example of why water bath works so well.
Hi Lisa, so glad to hear that you loved this cheesecake, it’s one of our favorites! The water bath is definitely an important step, but we’re so glad to hear both cakes tasted great 🙂
Having made several cheesecakes with success, this recipe failed miserably while following the directions exactly. The crust stuck to the bottom and sides of the pan and tasted a little burned despite the water bath. The cheesecake itself was too moist and simply didn’t set (the batter was thinner than any I’ve made before). Big disappointment for Thanksgiving and a huge waste of ingredients.
Hi there! We’re sorry to hear that this happened, it’s really hard to say where things could have gone wrong as we’ve tested & made this recipe several times & have never run into this issue. We’d be happy to help troubleshoot with a bit more information – could you share more about the ingredients used (eg. were any substitutes made)? Thanks!
Holy crap this cheesecake blew up in my oven like I filled it all the way ip and it rose and overflowed. Just be careful!
Hi Erin, so sorry to hear that this happened! We’ve thoroughly tested this recipe & made it personally several times and have never had this happen (or heard of it happening from other readers) & would be happy to help troubleshoot with more details!
Made this yesterday and it looks beautiful.
I plan to serve this tomorrow for thanksgiving.
I’m afraid that the water bath got into my crust. I still have the cheesecake in the pan, in the refrigerator. Any suggestions for what to do if the crust gets wet?
Hi Sara! We’re so glad you made this recipe for your Thanksgiving celebration. It’s hard to fix a crust where the water bath leaked – it runs the risk of being a little soggy depending on how much water/ moisture got in. How did it turn out? We’re crossing our fingers that everything was ok!
Just looked in on my 12 hour setting Best Ever Pumpkin Cheesecake. It look spectacular no cracking or sinking (just to level of pan. I can’t wait till tomorrow to pop it out and dress it up!
Hi John! We are so glad to hear that & can’t wait for you to enjoy the finished product!! 🙂 Hope you have a Happy Thanksgiving!
I made this for thanksgiving yesterday (Canada 😉). Taste wise this was great – so creamy, well balanced sweetness, & the ginger snap crust was such a yummy addition. I was a bit disappointed that despite following the recipe exactly (I am an experienced baker and read the recipe completely through multiple times), including the room temp ingredients, water bath, etc. I still ended up with a significantly cracked cheesecake. But as I said, it still tasted really good and thankfully the cheesecake didn’t fall/sink in the middle or anything like that. I made a salted caramel sauce to go with it and that was also very delicious.
Hi Lauren! So sorry to hear that the cheesecake cracked. Typically the water bath & allowing the cheesecake to cool in the oven for an hour once the oven is turned off can counteract this. If we think of any more additional tips we’ll be sure to update the post in the future! All that said, we’re so happy that it was delicious & hope you had a wonderful holiday! 🙂
Perfection. Just love this cheesecake soo much.
This will be my 4th time making it for thanksgiving. For the last two years I’ve gotten calls from family members confirming I’m making it again.
I like this so much, that I actually don’t eat my slice after dinner. I worry that being so full from the meal will make it so I can’t fully enjoy it.
I eat it for breakfast the next day. 😀
The Tj cookie crust is perfect. Yes there’s some butter seepage, but I think it’s necessary to get the crust to form in the first place. I don’t love nutmeg but the 1 tbsp of the pumpkin pie spice is just perfect.
Also: LOL TO THAT COMMENT FROM 2021. I love it when people act so ridiculously. They must live in a funny crazy world. Imagine going to someone’s page to insult something you didn’t need to try. HAHAHAHAHA
Hi S.C.! We’re so glad you love this cheesecake as much as we do – it’s such a fun recipe to look forward to around this time each year. Cheesecake for breakfast sounds perfect & we so appreciate your support!