The Cheesecake That Earned a Forever Spot at Our Birthday Table
If you ask my husband Chris what cake he wants for his birthday, the answer hasn’t changed in years: peanut butter cheesecake.
Birthdays are a BIG deal at my house – I love celebrating my favorite people with their favorite foods!🥰 – so a few years ago I made it my mission to develop a version that lives up to the occasion. What came together is now Chris’s official birthday dessert: peanut butter-forward but light-as-air, with just enough dark chocolate and salt to take it right to the edge of salty-sweet.
And while it looks totally bakery-worthy, this cheesecake is deceptively easy to throw together. It’s built right in a springform pan and sets up in the fridge, so there’s no need to preheat the oven, no water bath, and no pesky cracks to worry about…just let it chill and serve with a birthday candle!🥳🎂

Maximum Flavor, Minimal Effort
3 foolproof secrets to low-fuss, flavor-packed dinners, learned from years working in restaurants.
Essentials for No-Bake Cheesecake
 Buy Now →
  Buy Now →
  Buy Now →
  Buy Now →
  Buy Now →
  Buy Now →
Stainless Steel Measuring Cups & Spoons
Buy Now → Buy Now →
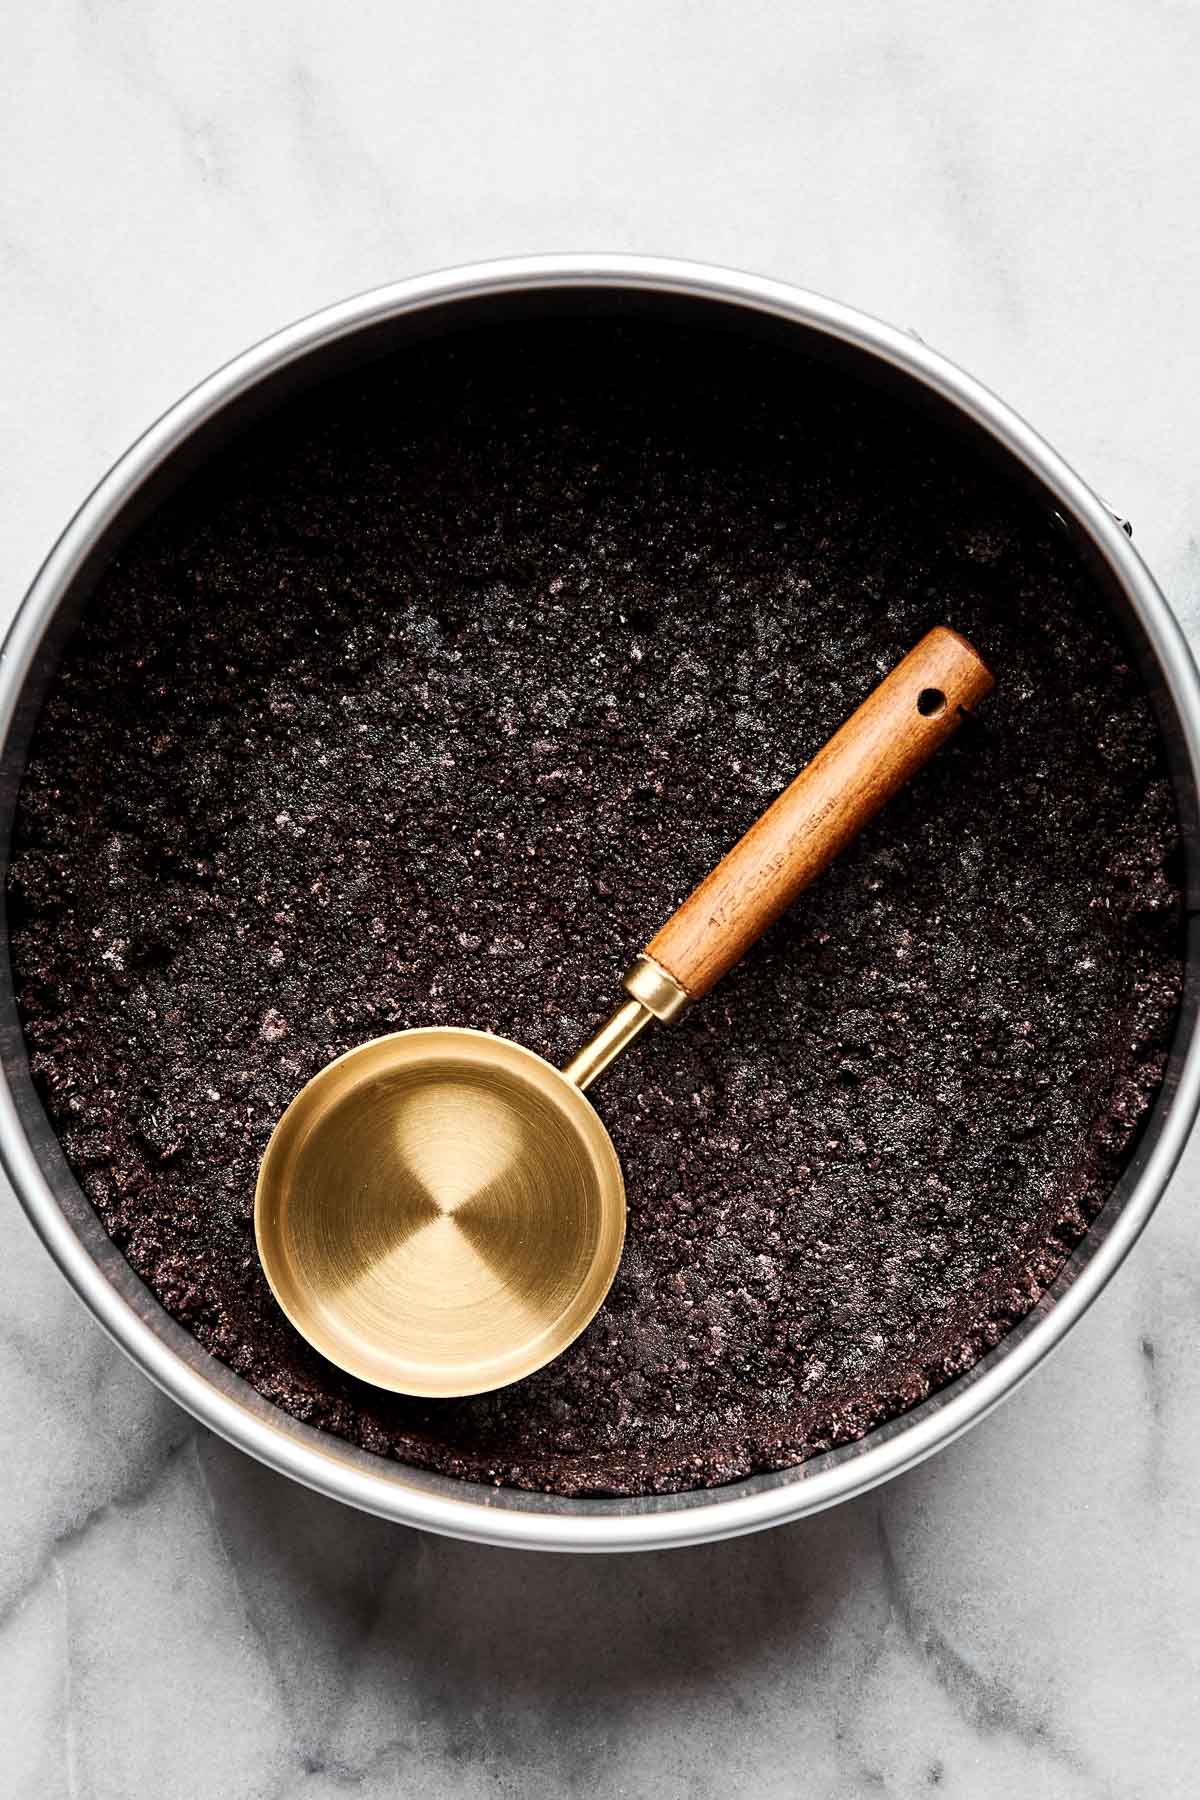
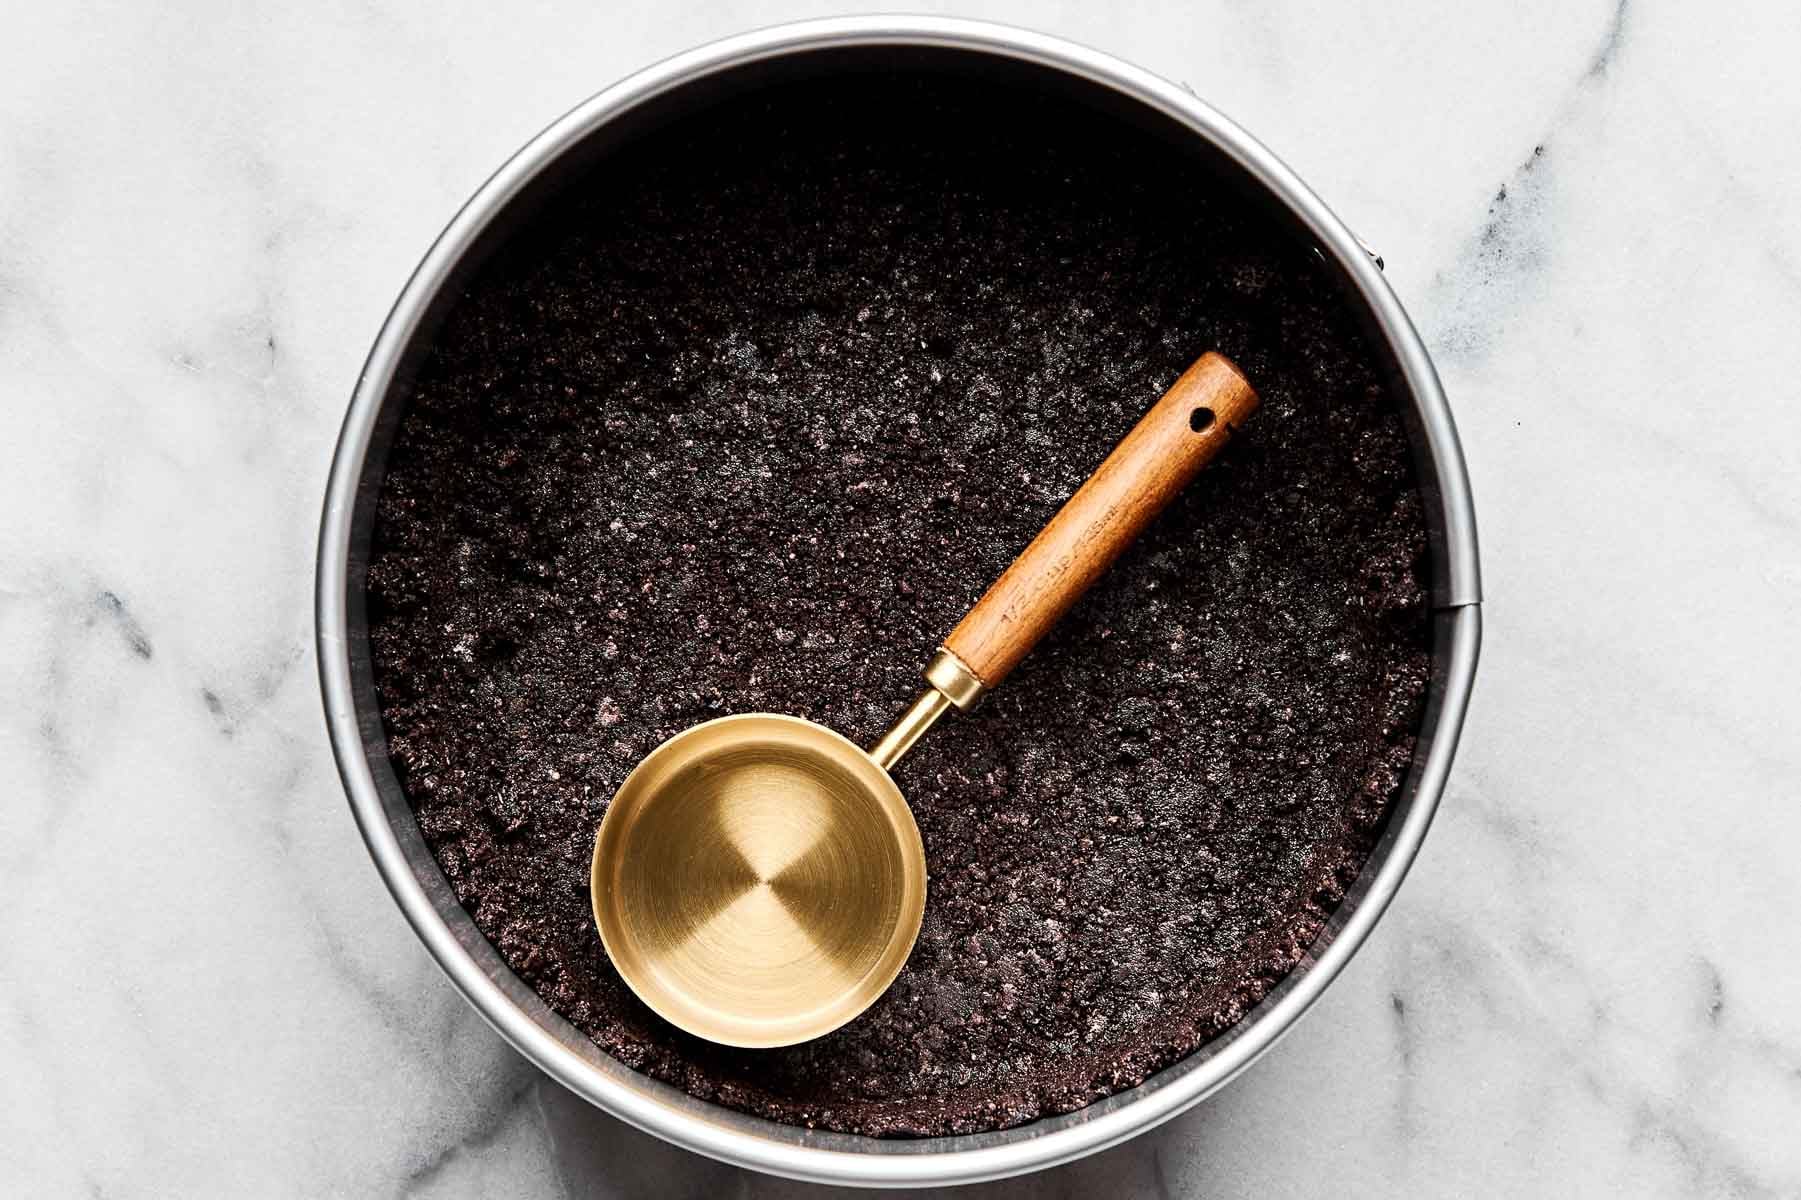
 Start with a No-Bake Oreo Crust
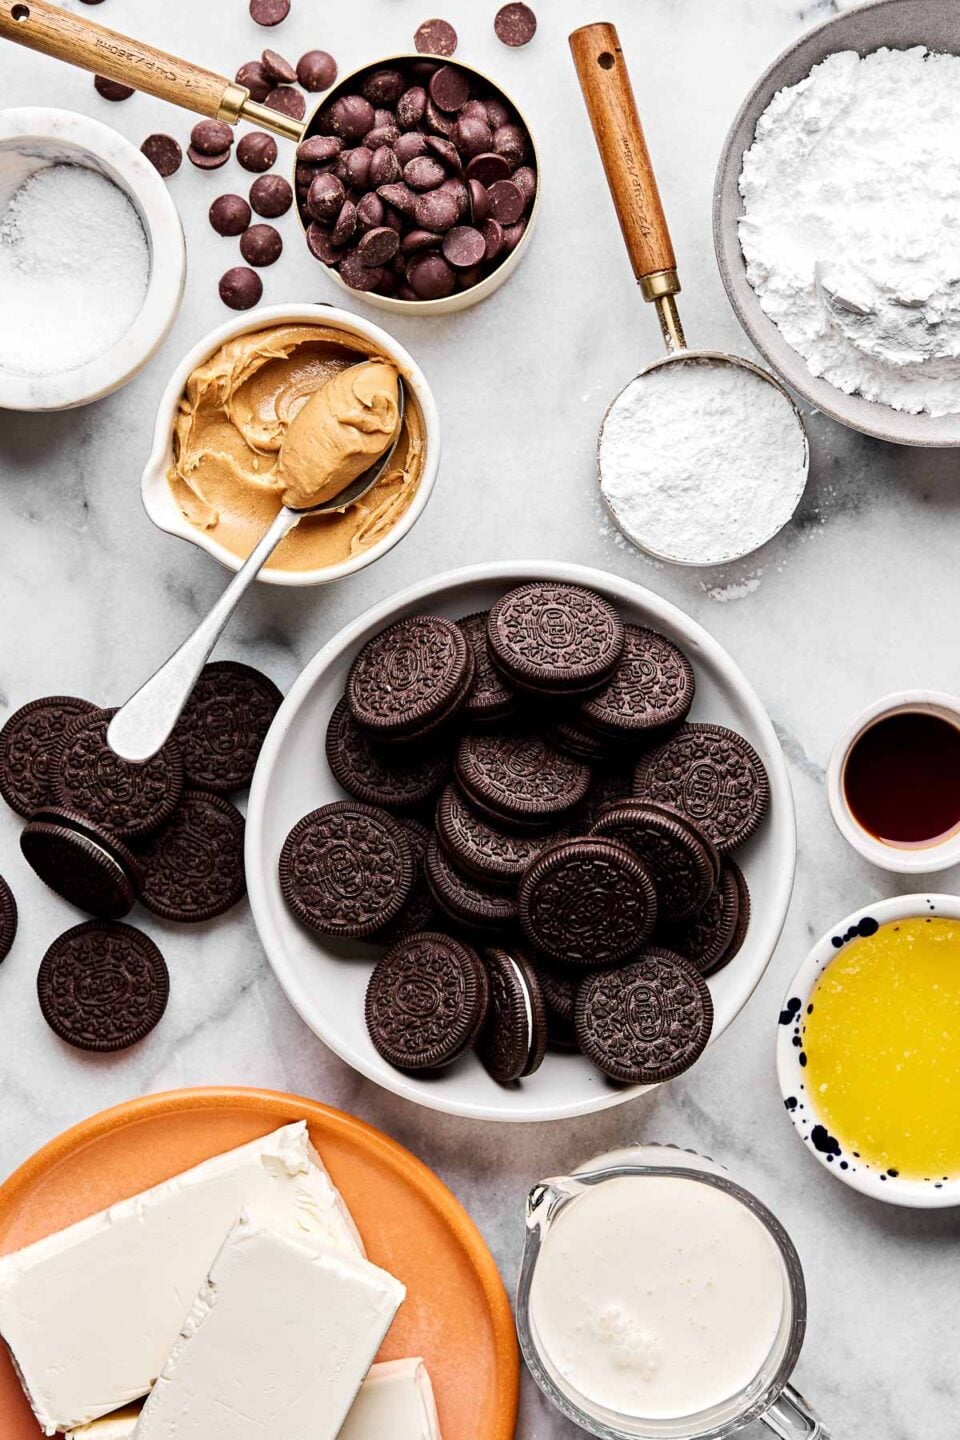
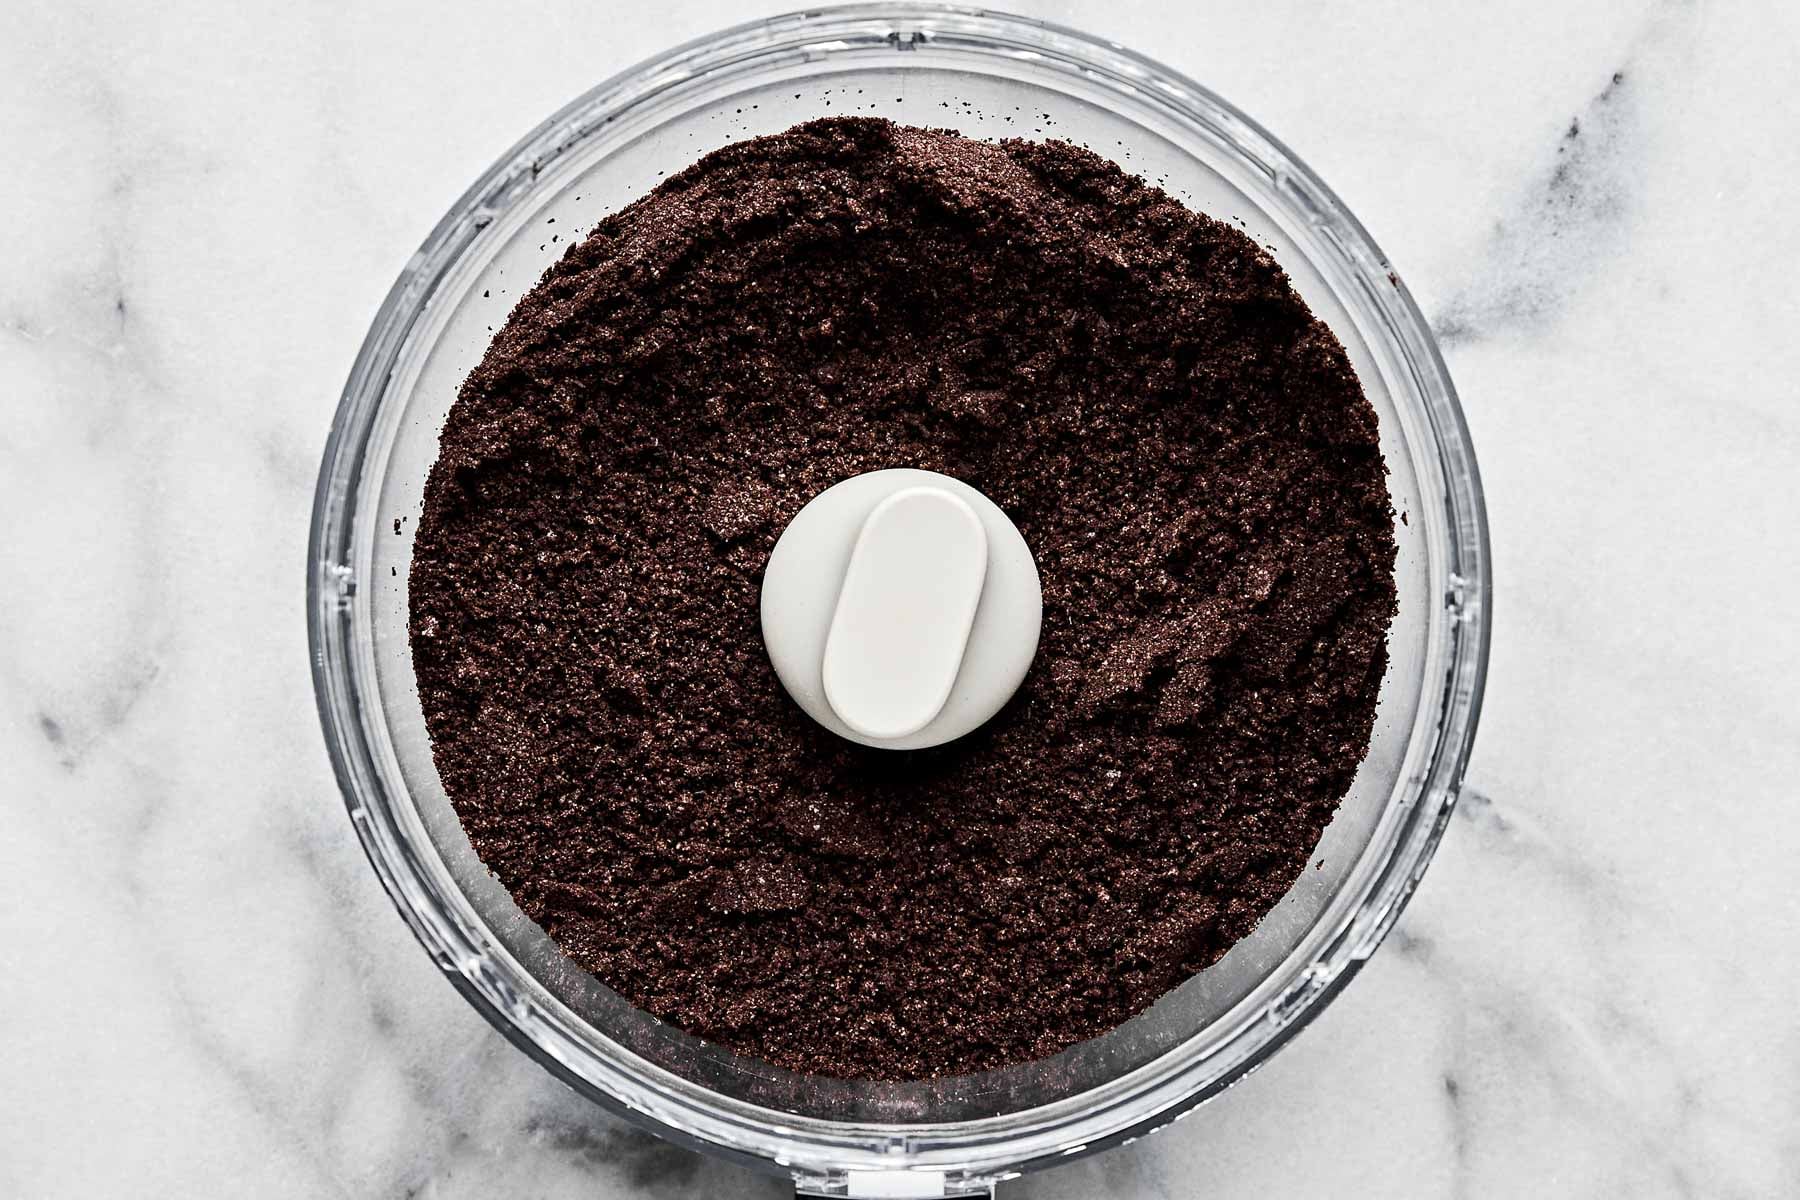
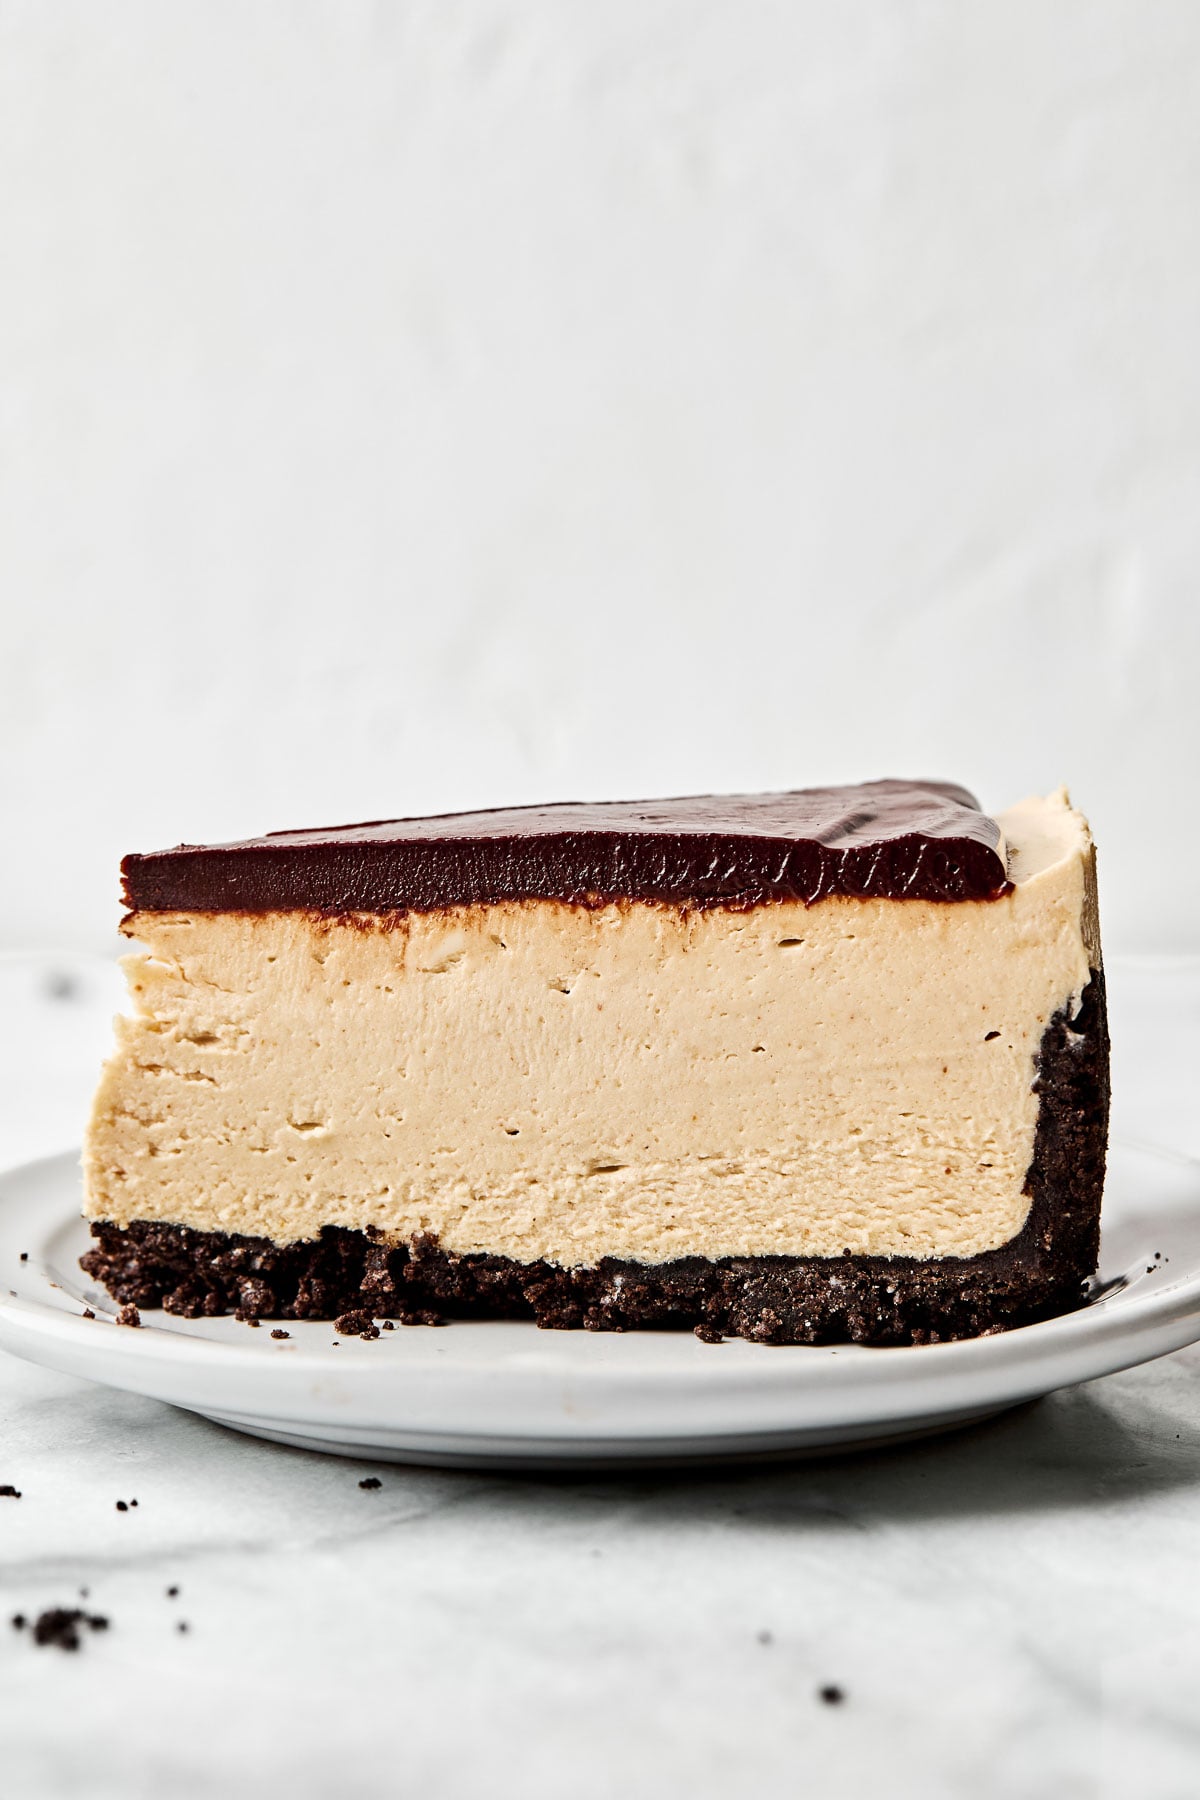
Graham crackers are the classic choice for a cheesecake crust…but why choose grahams when you can have Oreos?! 🤭 Jokes aside, Oreo’s signature bittersweet cocoa flavor balances the creamy peanut butter filling beautifully. It’s the perfect match.
I also wanted this cheesecake to be truly no-bake (so many recipes still require baking the crust, which is…not no-bake?!). Without any heat to help it along, the crust needs to be pretty sturdy on its own. Double Stuf Oreos (typically my first choice) were a touch too creamy – original Oreos have a better cookie-to-cream ratio for the job. The crust sets up beautifully in the fridge.

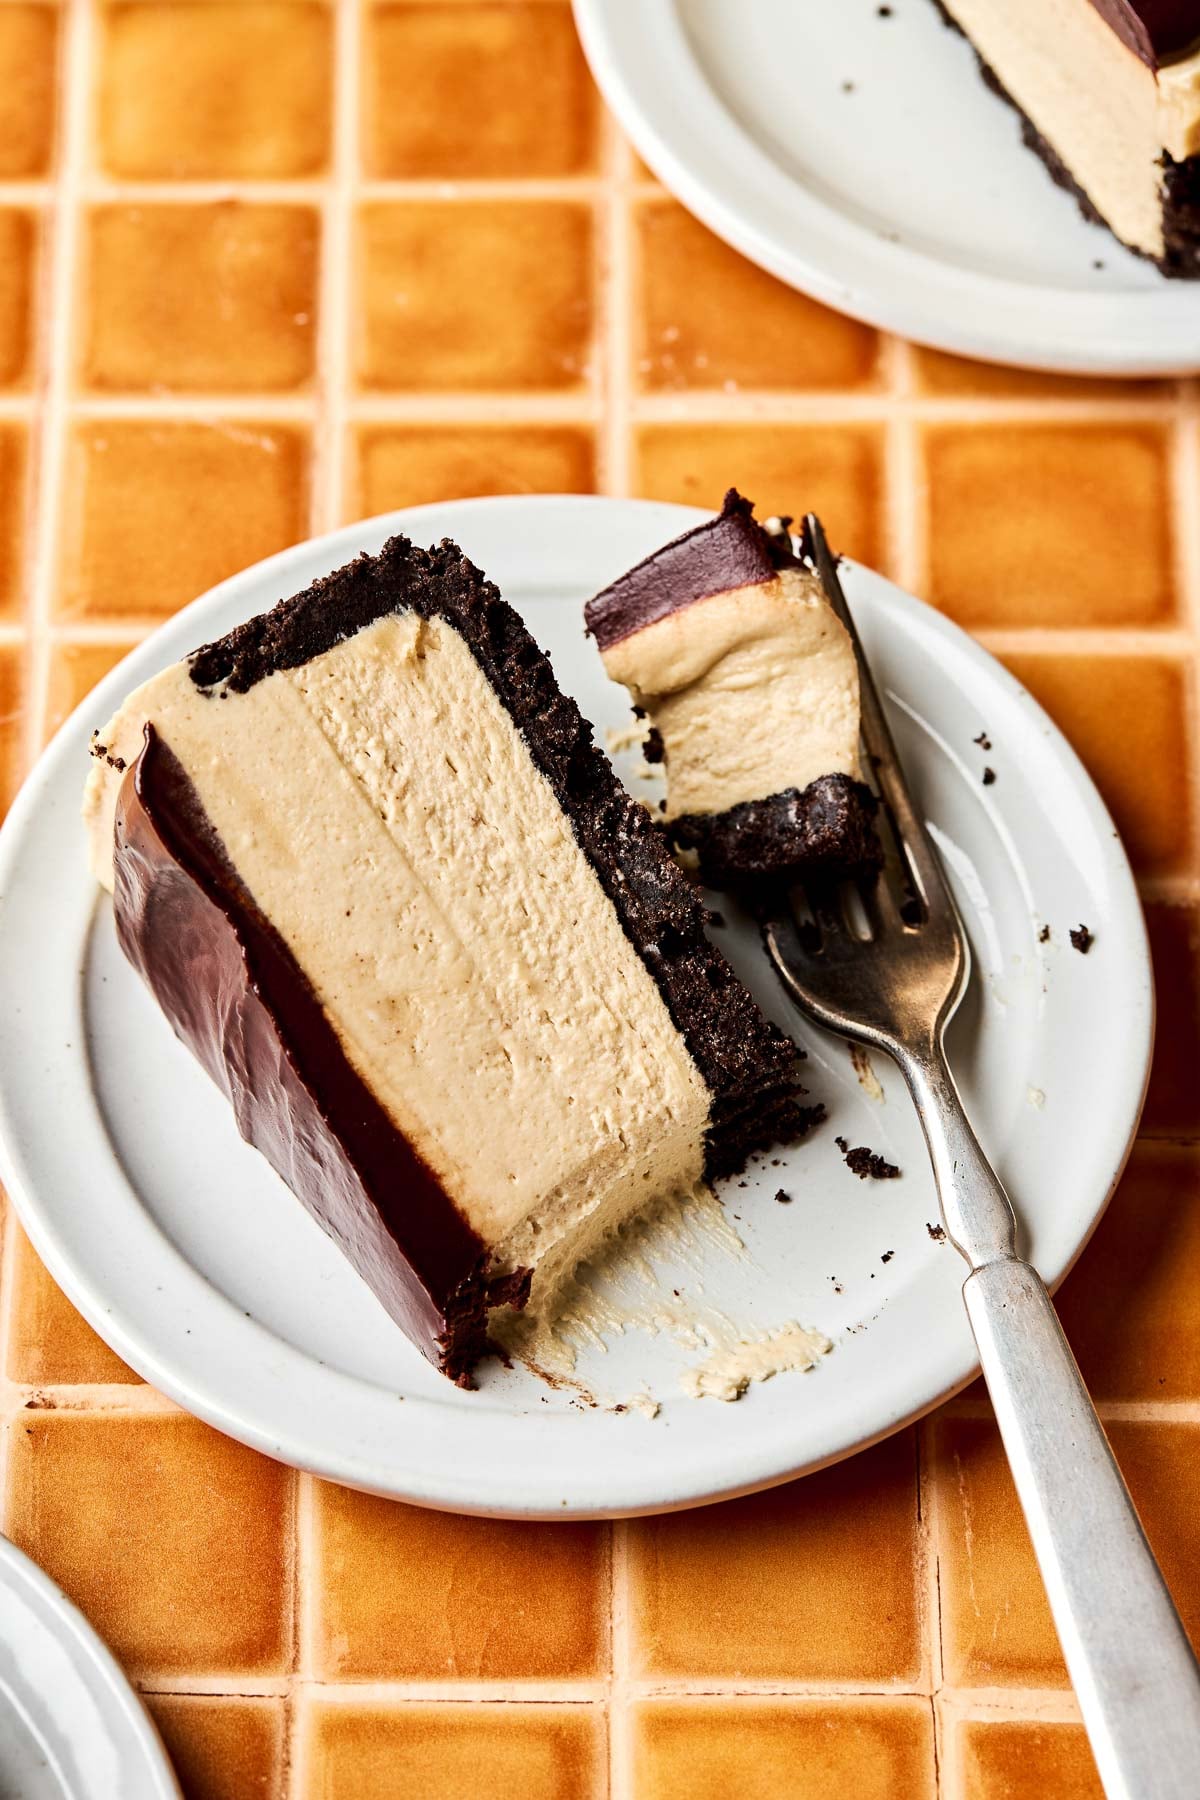
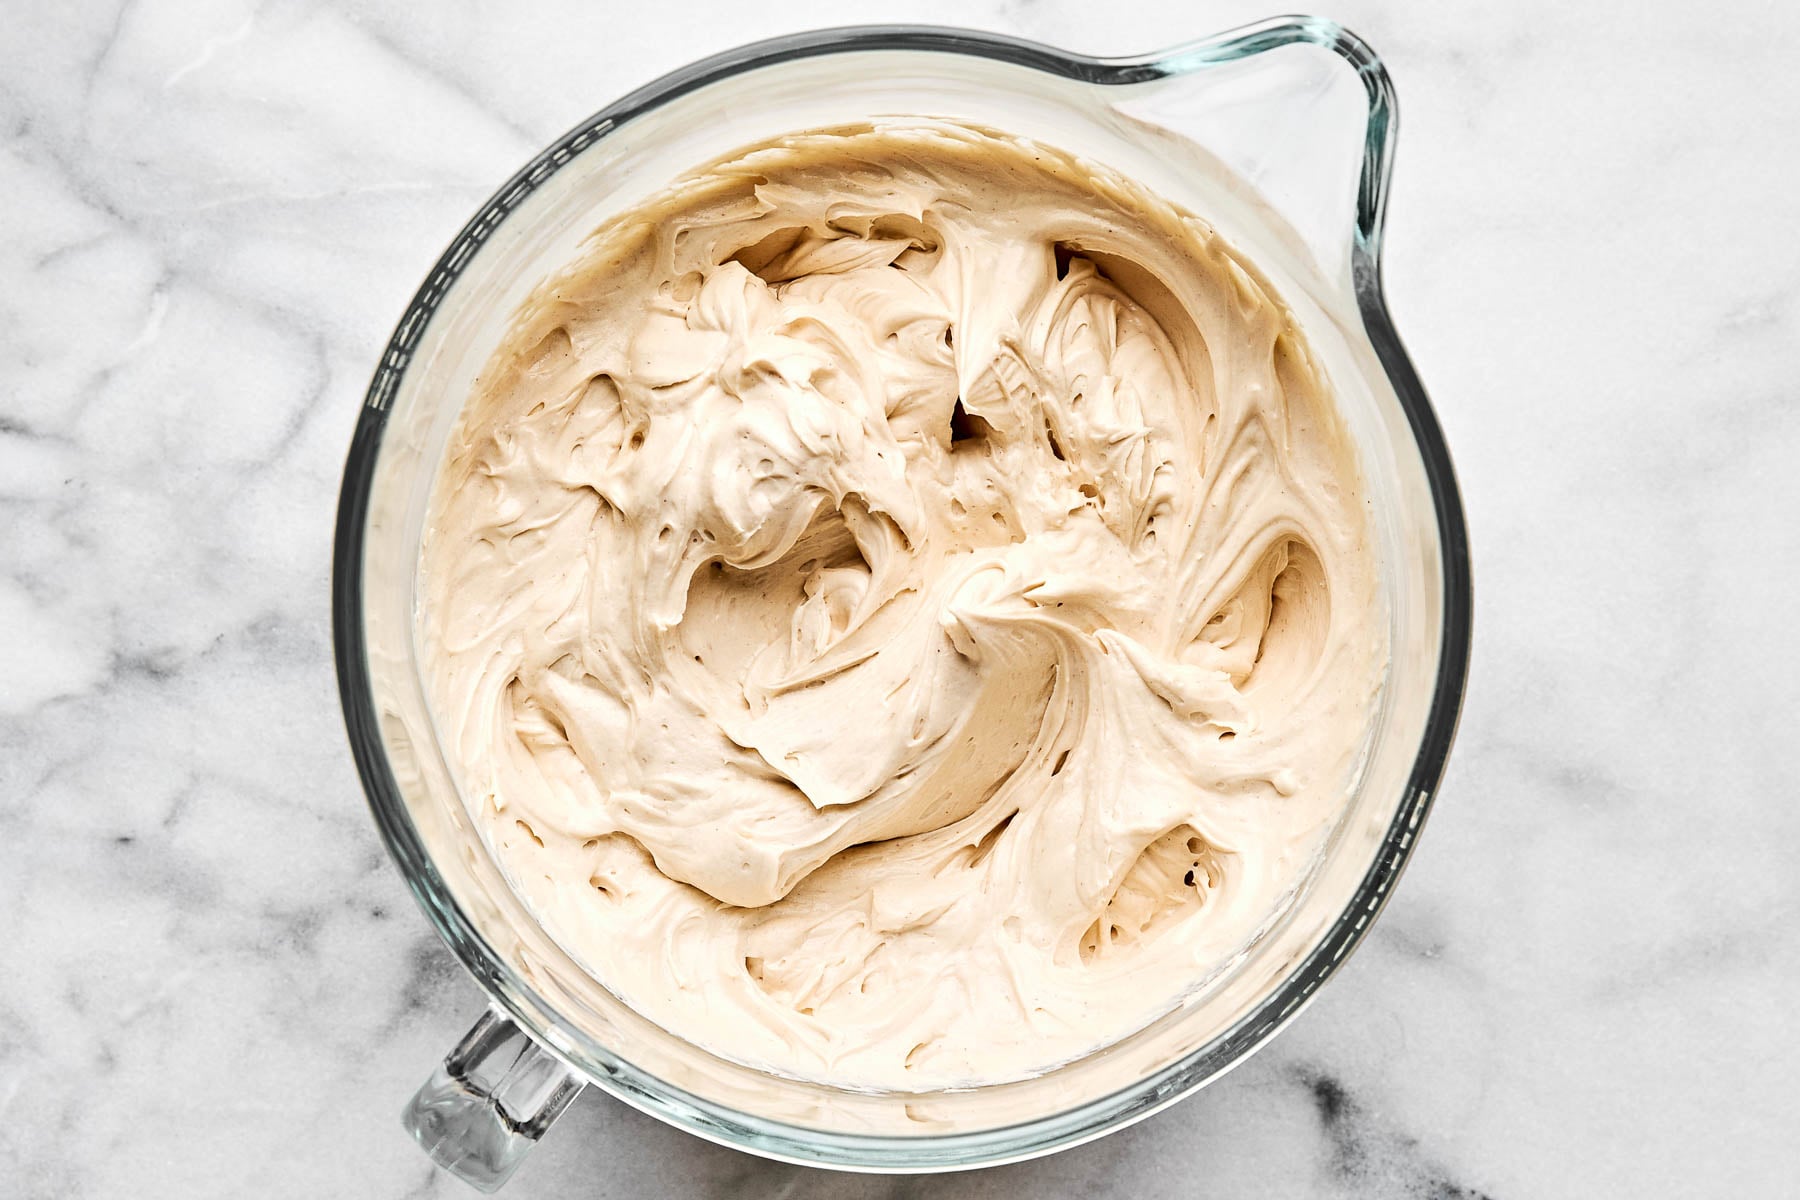
Whip Up a Creamy-Dreamy Peanut Butter Filling
Many of the peanut butter cheesecakes I’ve tried err on the side of a bit dense and heavy, but this one stays super light thanks to the no-bake method. Without eggs to weigh it down or any risk of overbaking, the cream cheese filling ends up stable enough to slice beautifully, but stays so fluffy it almost feels like a peanut butter mousse.
The secret to this cheesecake’s pillowy, airy texture is whipping the filling in 2 stages.
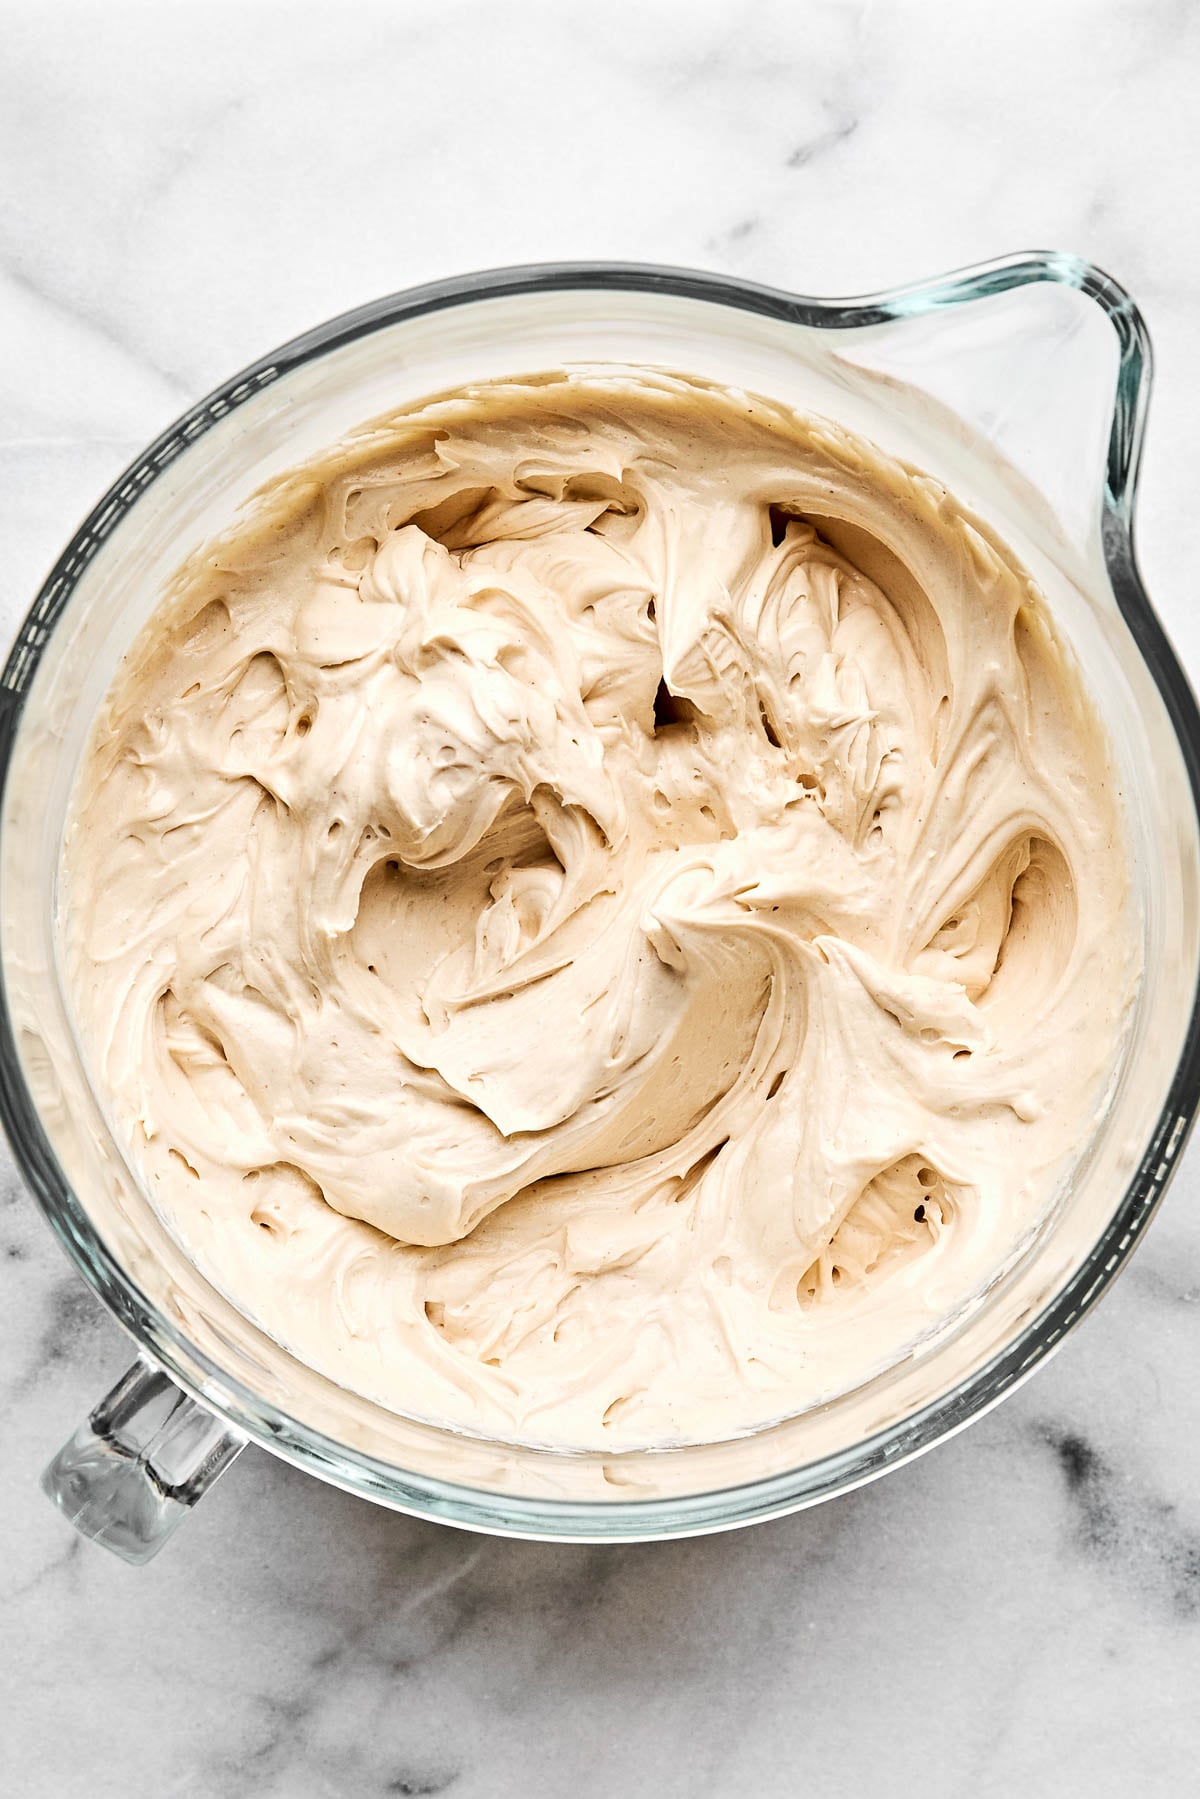
👩🏻🍳Quick Tips! ⇢ Room temperature cream cheese is non-negotiable for a cheesecake without any lumps or bumps. Also, stick with classic creamy peanut butter like Jif or Skippy. I love natural peanut butter in just about everything else, but it can leave the filling oily as it sets up in the fridge.
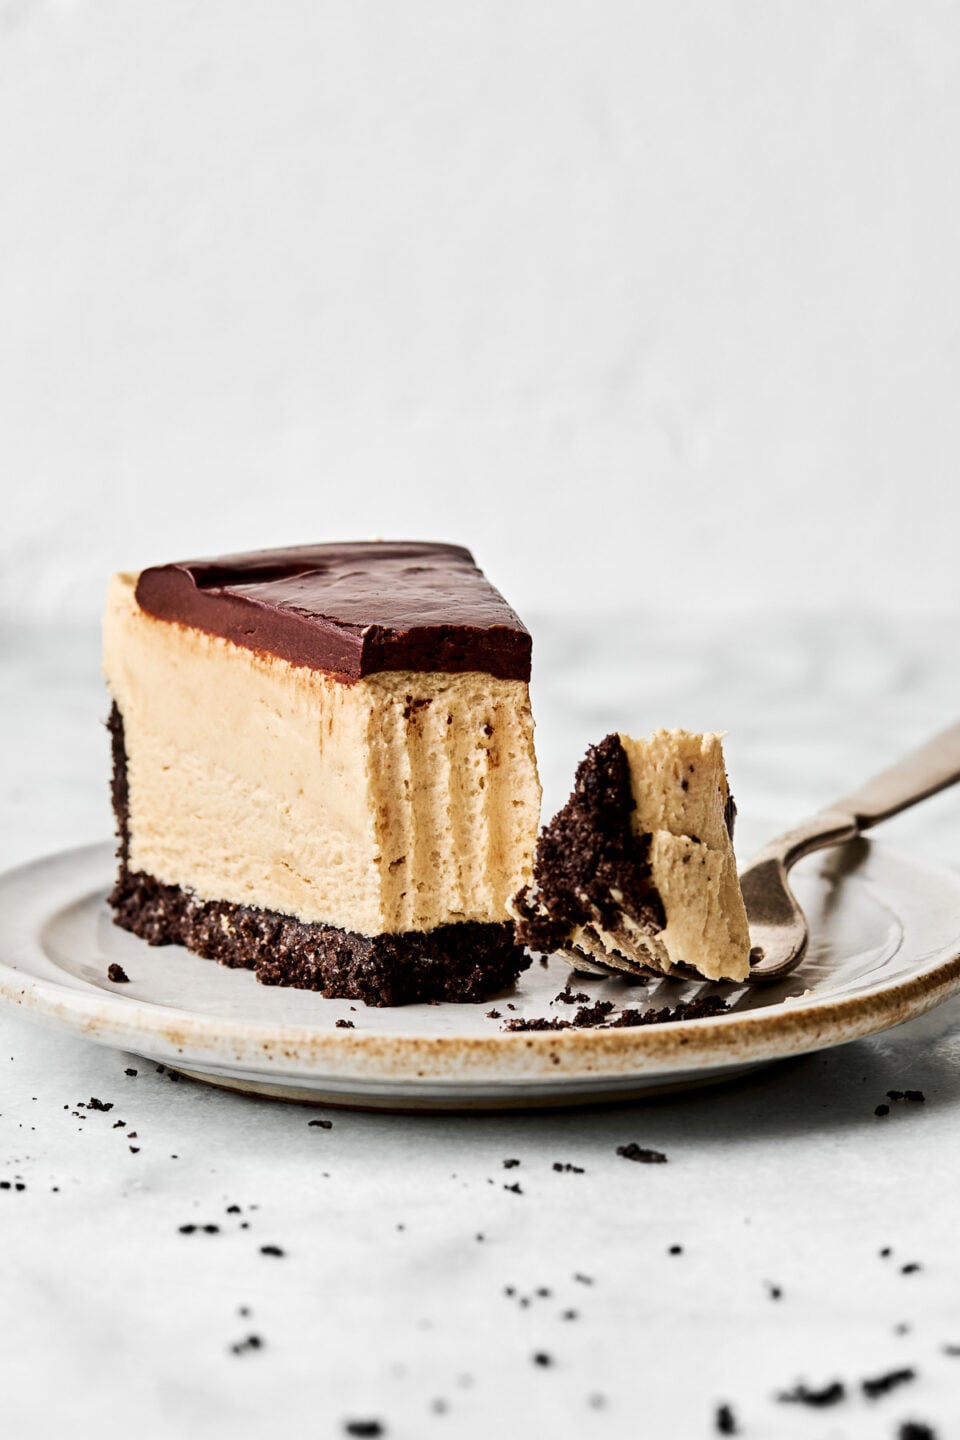
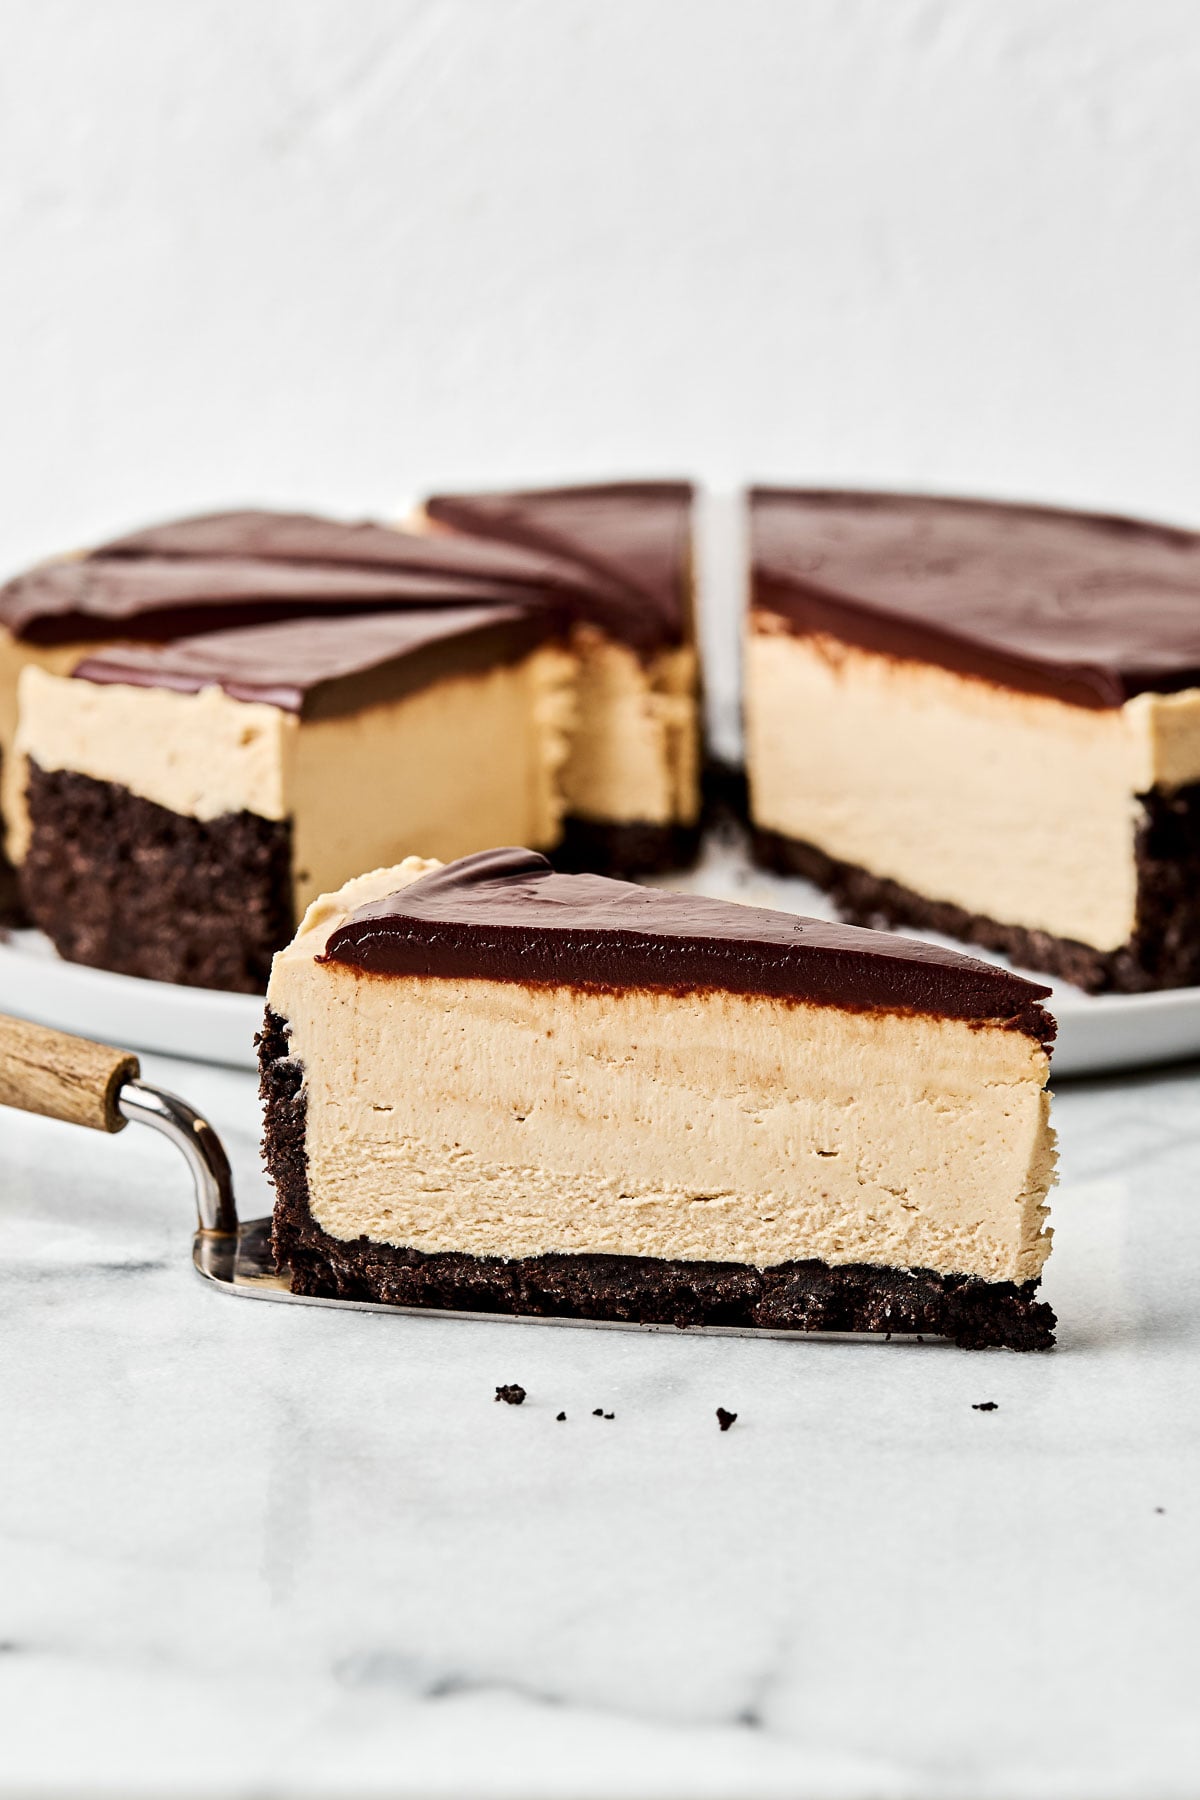
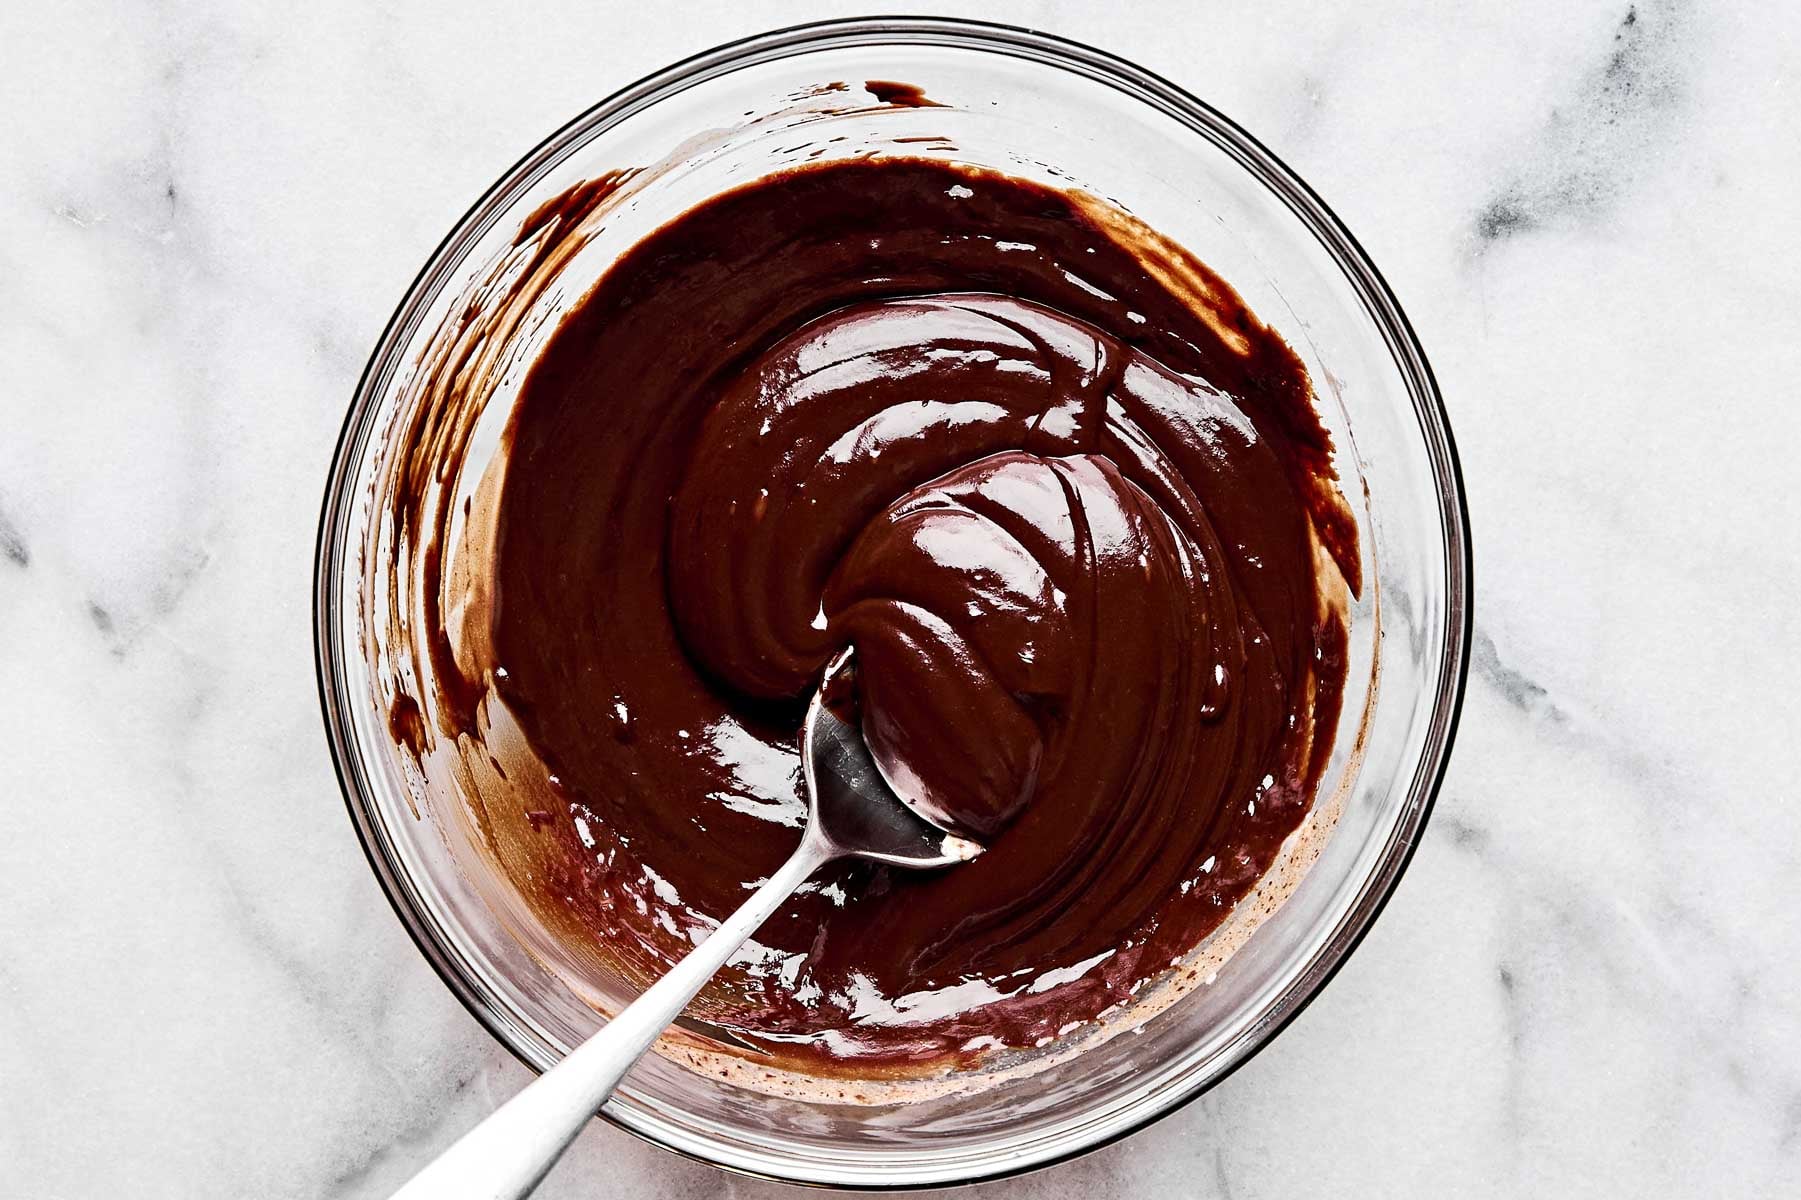
Finish with Dark Chocolate Ganache
I cannot resist chocolate ganache – and here, it turns the whole cheesecake into a giant peanut butter cup! 😍
After testing a few different ratios, I landed on a 1:1 ganache. With equal parts chocolate and heavy cream, this ganache strikes the perfect balance between delivering decadent chocolate flavor and fudgy texture, without sitting so heavy that it weighs down the whipped filling. (Bonus: it slices like a dream!)
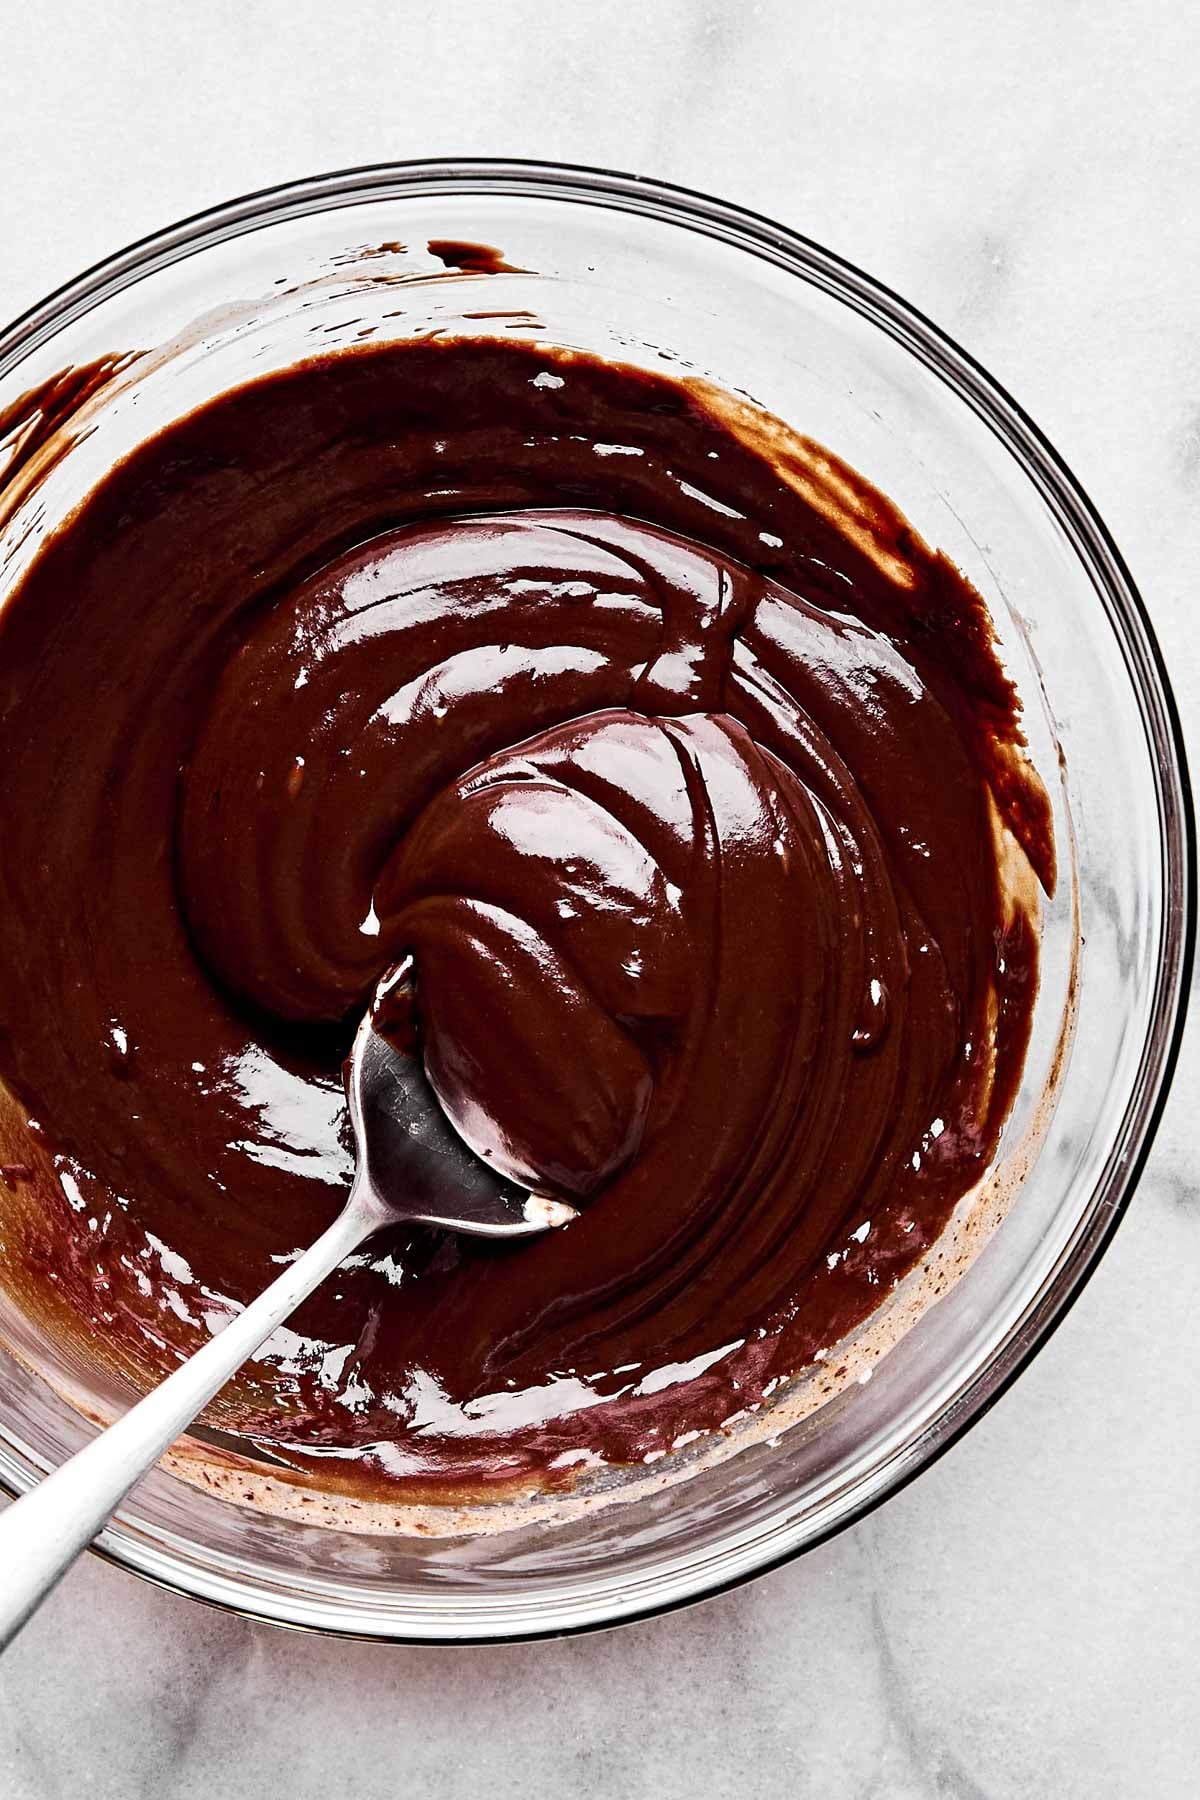
👩🏻🍳Quick Tip! ⇢ Spring for a good-quality dark chocolate! I’m not picky about bars vs. chips, but those bittersweet notes keep all 3 layers in nice balance – milk chocolate is a bit too sweet here.
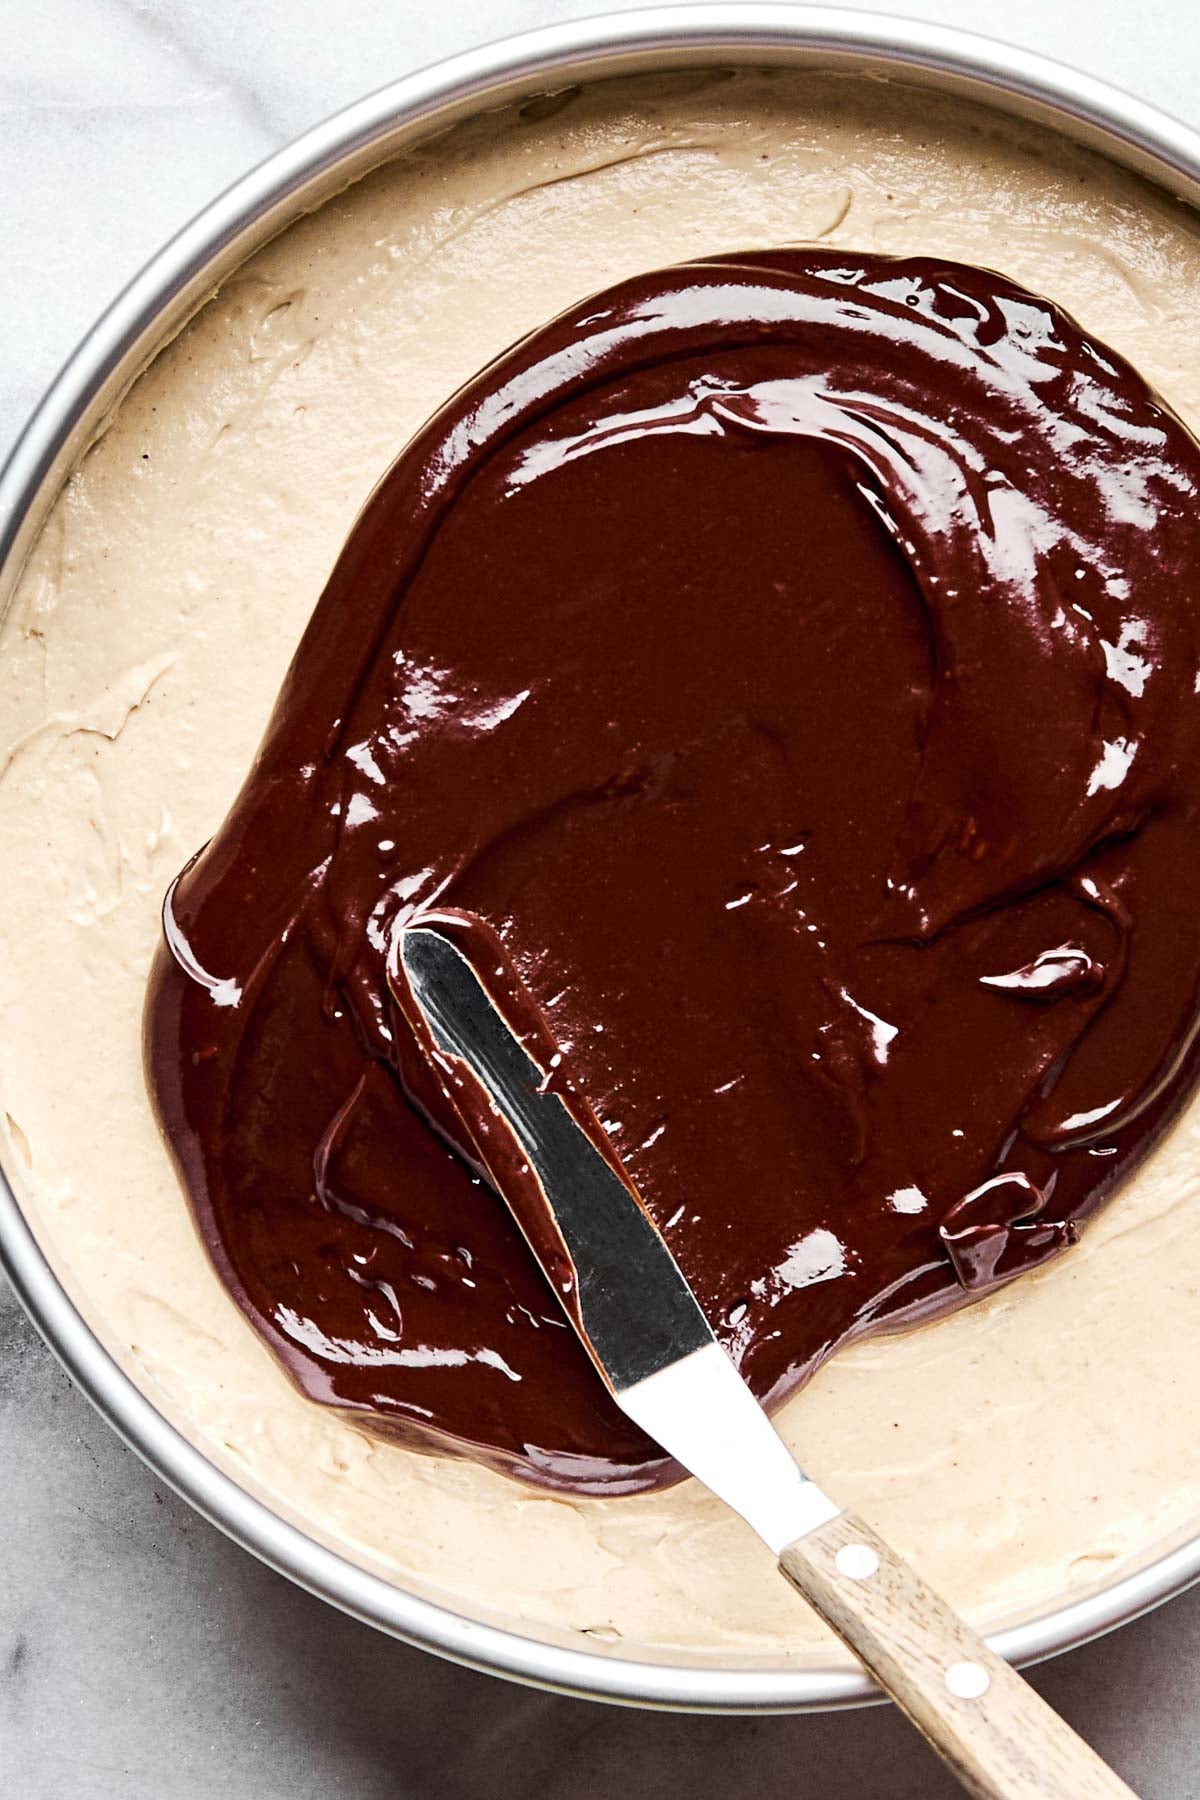
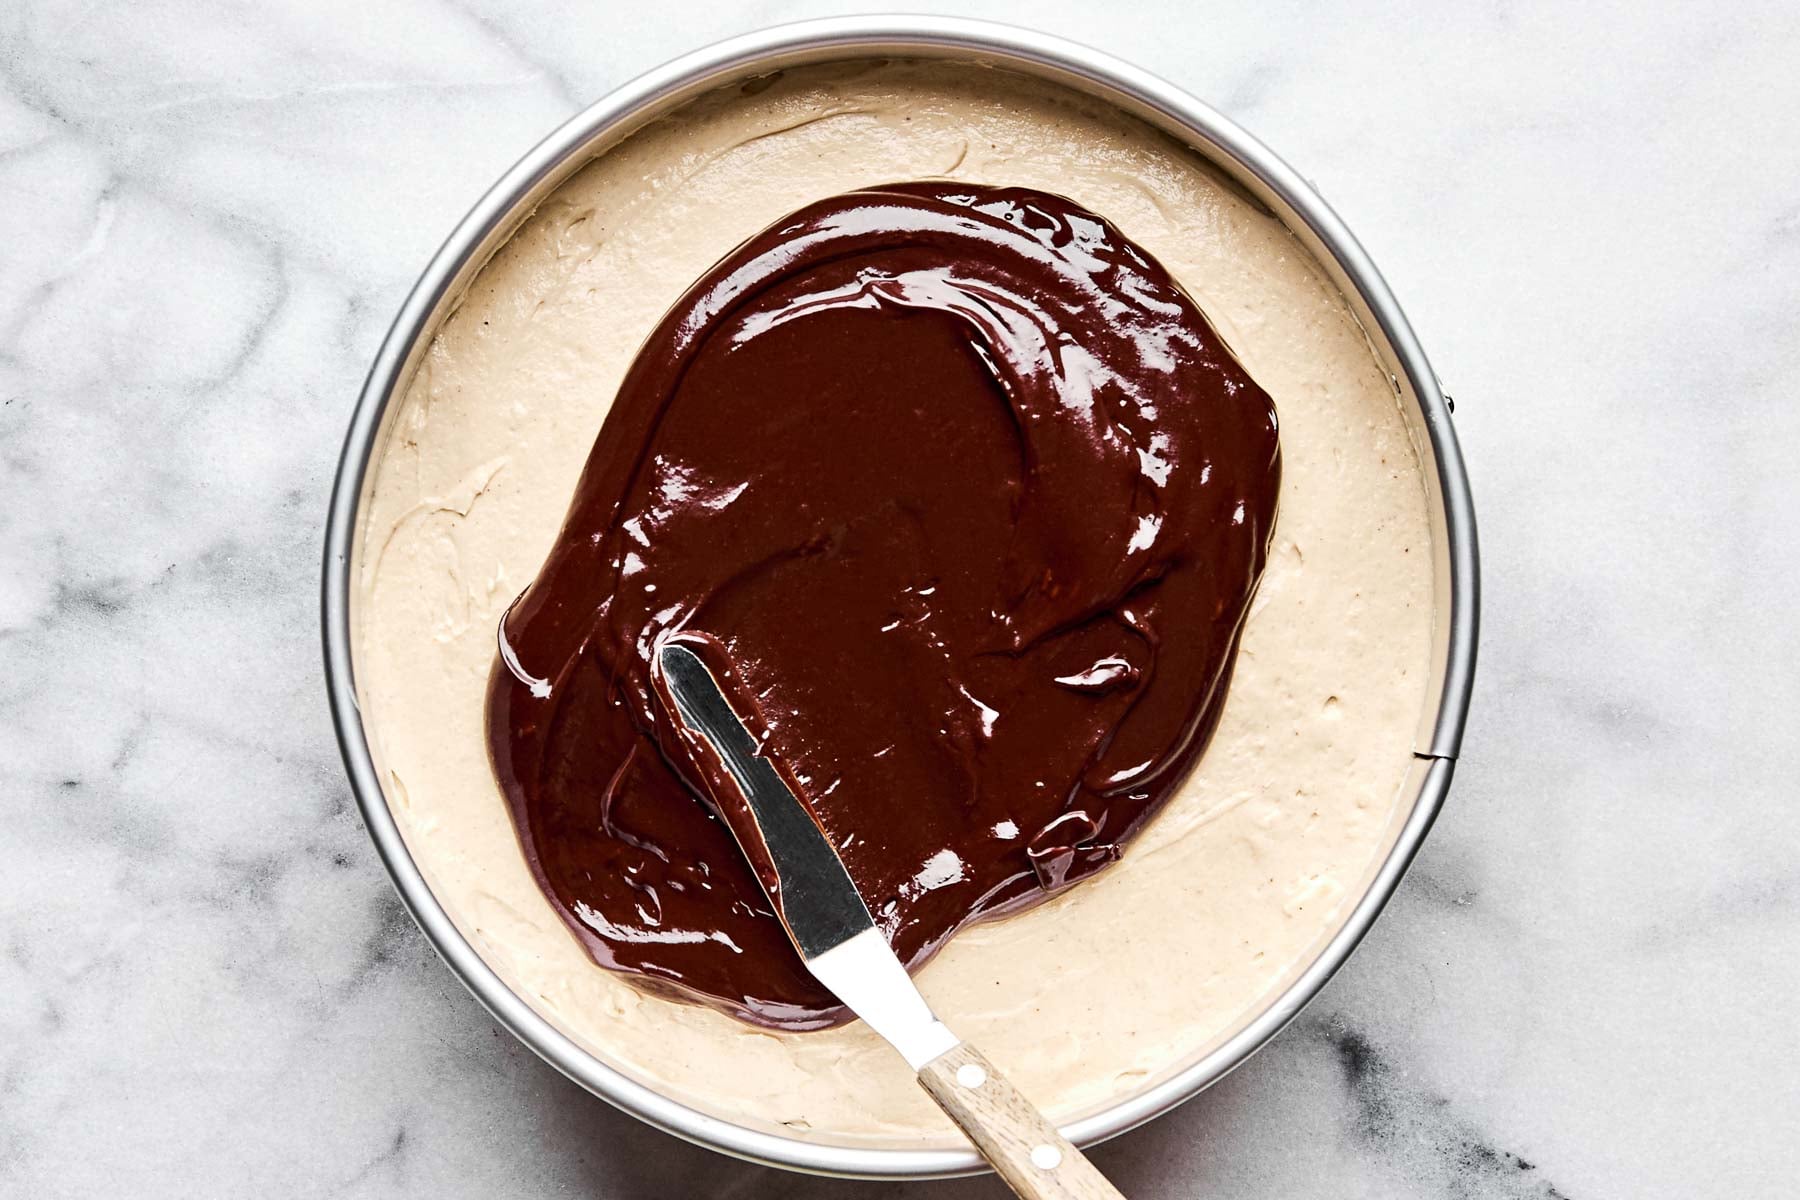
Bringing It All Together – Just Stack, Chill, and Slice!
With all 3 components ready to go, it’s time to bring the cheesecake together.
Then it’s straight to the fridge! Plan for at least 6 hours of chill time, though overnight is even better! Since the cheesecake filling is so light and creamy, it needs to be chilled all the way through, otherwise it won’t hold its shape.
When you’re ready to serve, run a thin knife around the inside of the pan before releasing it to keep the chocolate topping from tearing as you open the springform. For the cleanest slices, dip a sharp knife in hot water and wipe it dry between every cut.
I can’t wait for you to try this No-Bake Peanut Butter Cheesecake with Oreo Crust! If you give it a try, be sure to let us know! Leave a comment with a star rating below. You can also snap a photo and tag @playswellwithbutter on Instagram. We LOVE seeing your PWWB creations! ♡ Happy cooking!
Print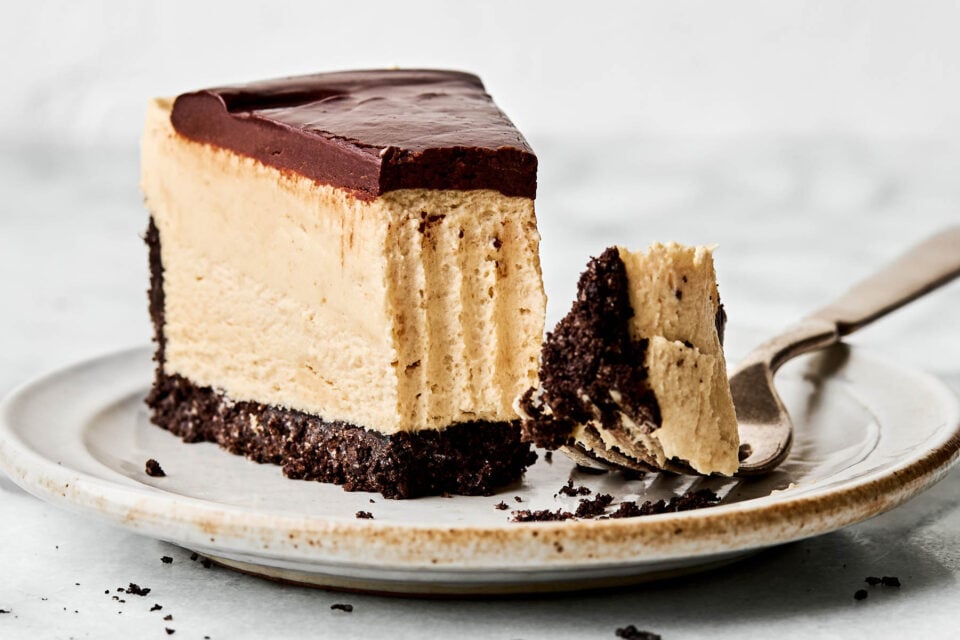
Light & Airy No-Bake Peanut Butter Cheesecake with Oreo Crust
- Prep Time: 45 minutes
- Inactive Chilling Time: 6 hours
- Cook Time: 0 minutes
- Total Time: 6 hours 45 minutes
- Yield: serves 8–12 1x
- Category: Breads & Cakes, Cheesecake, Dessert recipes
- Method: No-Bake
- Cuisine: American
- Diet: Vegetarian
Description
Light, airy, and impossibly creamy, this No-Bake Peanut Butter Cheesecake is stacked with 3 distinct layers: a crisp Oreo cookie crust, a whipped salted peanut butter cheesecake filling, and a fudgy dark chocolate ganache topping.
The whole thing comes together in a handful of simple steps and sets up in the fridge – no oven required…not even for the crust! – and each slice is tall, fluffy, and perfectly salty-sweet.
A make-on-repeat dessert for birthdays, anniversaries, and any excuse to celebrate your favorite peanut butter lover!
Ingredients
for the no-bake Oreo crust:
- one 13.29-ounce package Oreo Chocolate Sandwich Cookies (approx. 33 cookies)
- 6 tablespoons unsalted butter, melted
- pinch kosher salt
for the no-bake peanut butter cheesecake:
- 24 ounces cream cheese (three 8-ounce bricks), at room temperature
- 1 cup creamy peanut butter
- 1 ½ cups powdered sugar
- 1 tablespoon pure vanilla extract
- ½ cup heavy cream, at room temperature
- ½ teaspoon kosher salt
for the dark chocolate ganache topping:
- 8 ounces dark chocolate, finely chopped
- 1 cup heavy cream
Instructions
- Crush the Oreo cookies: Add the Oreo cookies to the bowl of a food processor. Pulse until the cookies are crushed into very fine crumbs; you will have about 3 cups of Oreo cookie crumbs. (If you do not have a food processor, you can also place the Oreo cookies in a resealable bag and crush them with a rolling pin.)

- Prepare the Oreo cookie crust: Transfer the Oreo crumbs to a large bowl with the melted butter and salt. Mix to combine until the entire mixture is moist. Transfer the Oreo mixture to a 9-inch springform pan. Press the crumbs into an even layer – I like to press partway up the sides of the springform pan and use the bottom of a measuring cup to press it in really well and create some nice edges. Set in the refrigerator to chill while you prepare the cheesecake filling and chocolate topping.

- Prepare the no-bake peanut butter cheesecake filling: Add the cream cheese and peanut butter to the bowl of a stand mixer fitted with a paddle attachment. Beat on medium speed until the mixture is totally smooth and creamy, about 3-4 minutes. Add the powdered sugar, vanilla, heavy cream, and salt. Mix 1-2 minutes more, until combined well. Set aside for cheesecake assembly.
- Prepare the dark chocolate ganache topping: Add chocolate and heavy cream to a medium microwave-safe bowl. Microwave in 30-second intervals, stirring thoroughly after each interval, until the chocolate is melted and the mixture is smooth. Set aside to cool slightly for cheesecake assembly.
- Assemble the no-bake peanut butter cheesecake: Transfer the prepared peanut butter cheesecake filling into the springform pan. Use a spatula to spread it out into a smooth layer over the Oreo crust. Pour the chocolate ganache topping over top. Use an offset spatula to spread it out into a smooth layer over the peanut butter cheesecake filling.
- Chill: Cover the cheesecake and transfer to the refrigerator to chill completely before serving, at least 6 hours.
- Serve: Run a knife around the edges of the springform pan before releasing it. Use a sharp knife to slice the cheesecake into 8-12 slices; for prettiest presentation, rinse the knife with hot water between cuts. Serve immediately. Enjoy!


Notes
Jess’ Tips and Tricks:
- Peanut butter: For best results, use a classic creamy peanut butter like Jif, Skippy, or another store brand. Avoid “natural” peanut butters, which separate as they sit.
- Oreo cookies: For best results, use classic or “Original” Oreo Sandwich Cookies (i.e. not the Double Stuff variety). If you’d like to keep your peanut butter cheesecake gluten-free, feel free to use Gluten-Free Oreo Cookies (again, be sure to use “original” variety vs Double Stuff).
- Equipment: A springform pan is essential to successfully making cheesecake! This one is made by one of my most trusted baking brands and has amazing reviews – plus, it’s less than $20!
Make-Ahead, Storage, and Freezing:
- Make-Ahead and Storage: This no-bake peanut butter cheesecake will keep for up to 5 days after assembly – feel free to make it ahead of time or store your leftovers to enjoy later. To store, wrap the cheesecake in plastic wrap and store in the refrigerator for up to 5 days.
- Freezing: This peanut butter cheesecake is also incredibly freezer-friendly. Set the chilled cheesecake on a baking sheet and freeze solid before tightly wrapping in plastic wrap or aluminum foil. Freeze for up to 3 months. Thaw the cheesecake overnight in the refrigerator before re-serving.
Follow along with Plays Well With Butter on Instagram, YouTube, Facebook, and Pinterest for more unfussy recipes that pack a big punch of flavor!


This looks soooo yummy! My kids do not like peanut butter, can I make this without?
Thank you
Hi Heather, peanut butter is a key ingredient in this cheesecake, but you could definitely swap out peanut butter for almond butter or another alternative if you prefer! Be sure to let us know how it turns out for you! For something a little different, you could try our Berry Cheesecake Tart – perfect for all those fresh spring berries!