A Savory Galette Inspired by Cheesy French Onion Soup
It’s no secret that I adore all things French onion. Of course, it’s one of my favorite soups but I also love using rich caramelized onions to make fun dinner recipes like my viral Cheesy French Onion Meatballs or my one-skillet French Onion Chicken.
This Caramelized Onion Galette is the latest iteration of my obsession.
If galettes are new-to-you, you’re in for a fun treat! They’re rustic, hand-formed pies typically filled with sweetened fruits, like apples or berries.
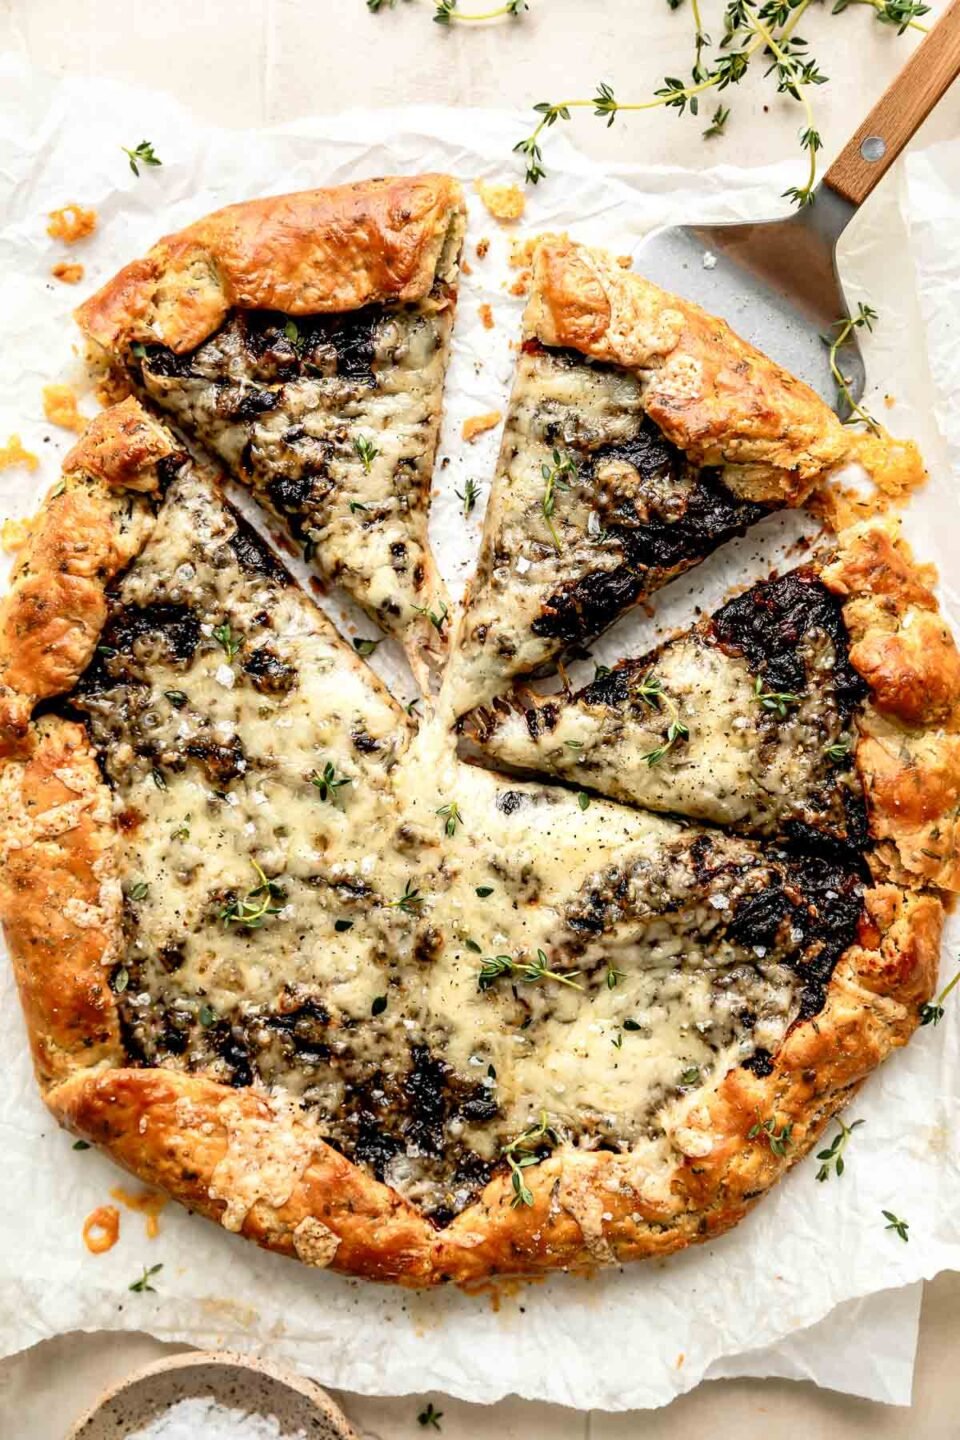
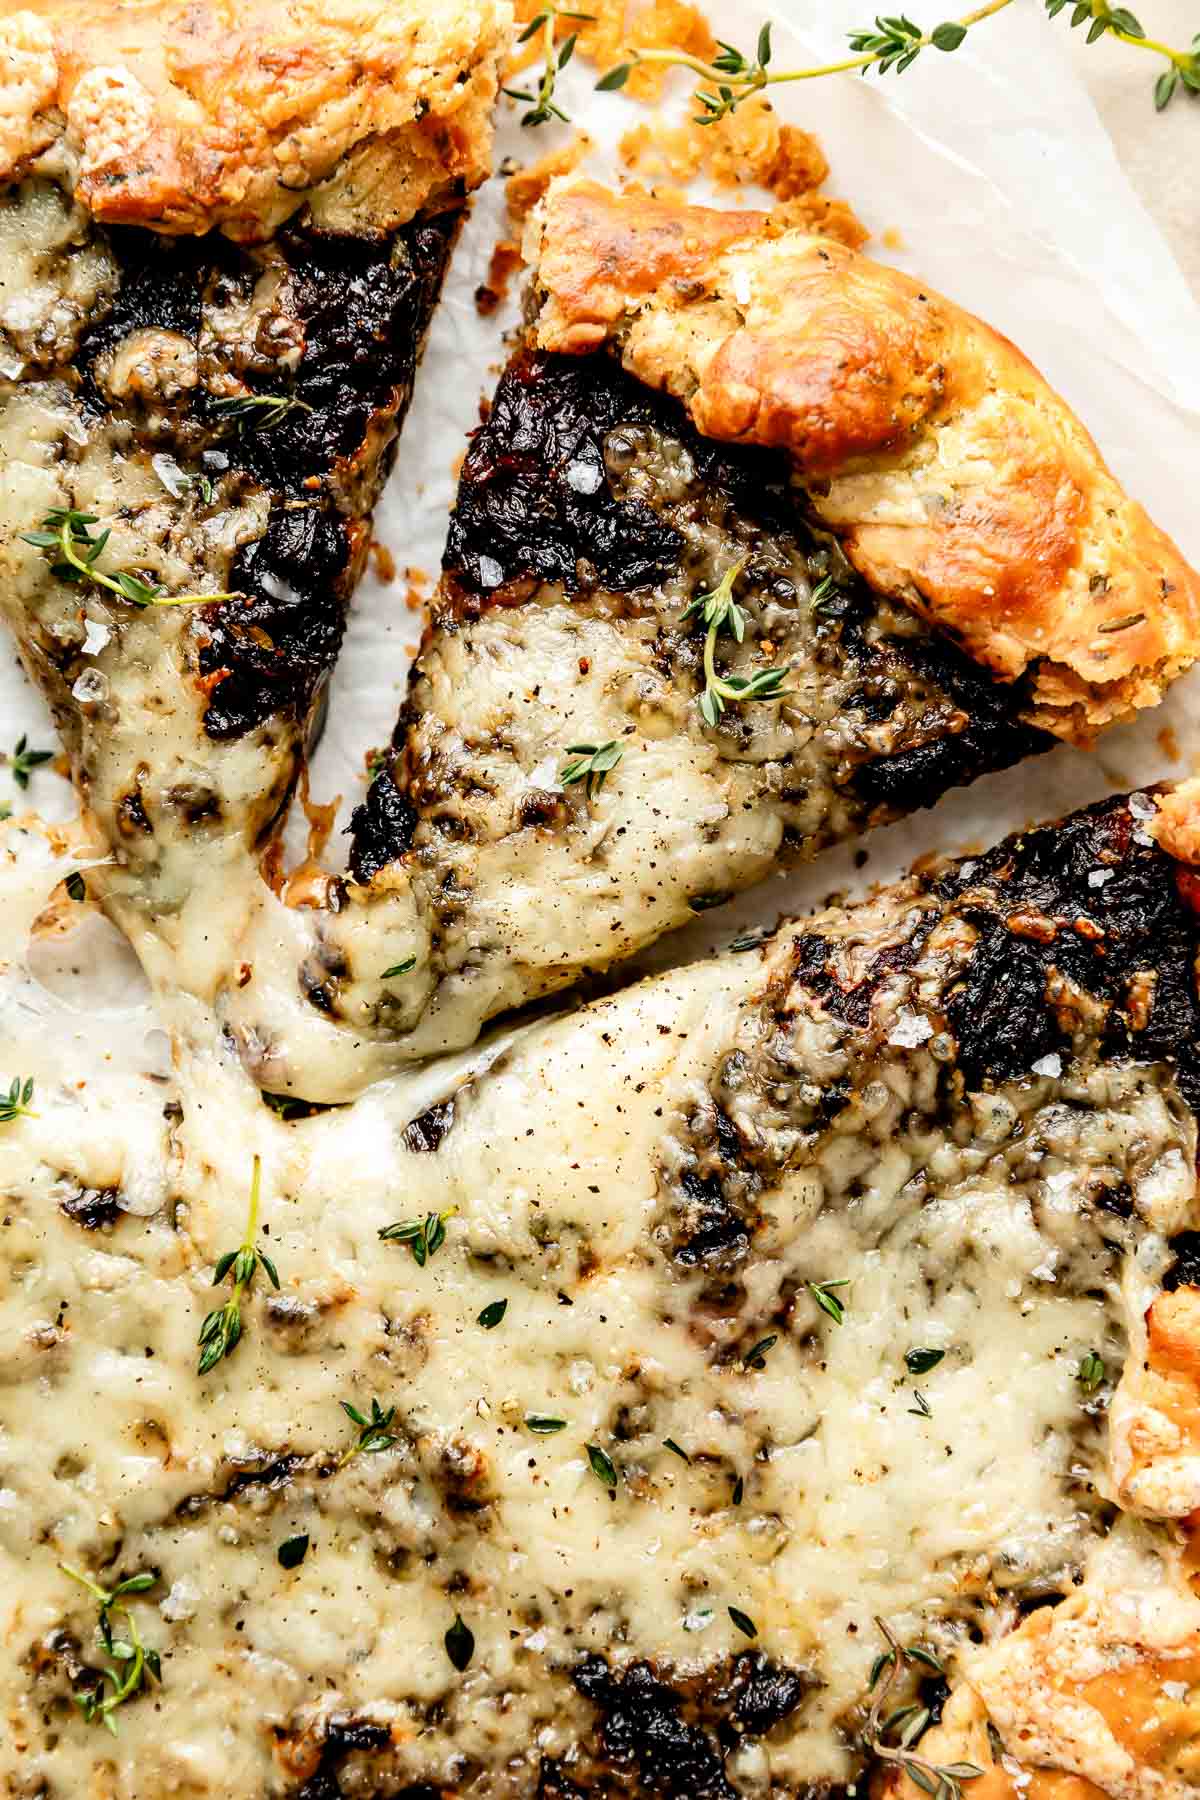
To make a French Onion-inspired galette, we’re wrapping jammy caramelized onions and gooey Gruyère cheese in the flakiest crust studded with fresh herbs for extra wow-factor.
The result is totally savory and totally delicious!

Even though it’s pretty fancy-feeling, there’s no need to be intimidated here. I’ve written this post to walk you through every step along the way—from my tried and true method for caramelizing onions to foolproof tips for a flaky all-butter pastry dough.
Each component is simple to make and a bit more hands-off than you might expect, so it ends up being a really fun kitchen project with a totally cafe-worthy result.
And the best part? You can enjoy this savory galette any time of the day! It’s fancy-feeling enough for special occasion brunches but also perfect for an epic bistro-inspired dinner.
A decadent, all-purpose treat with SO much to love!
Maximum Flavor, Minimal Effort
3 foolproof secrets to low-fuss, flavor-packed dinners, learned from years working in restaurants.
Jess’ Baking Essentials

Bob’s Red Mill Organic Unbleached All-Purpose Flour
Buy Now → Buy Now →
Le Creuset Enameled Cast Iron Braiser
Buy Now → Buy Now →
  Buy Now →
Stainless Steel Measuring Cups & Spoons
Buy Now → Buy Now →
  Buy Now →
  Buy Now →
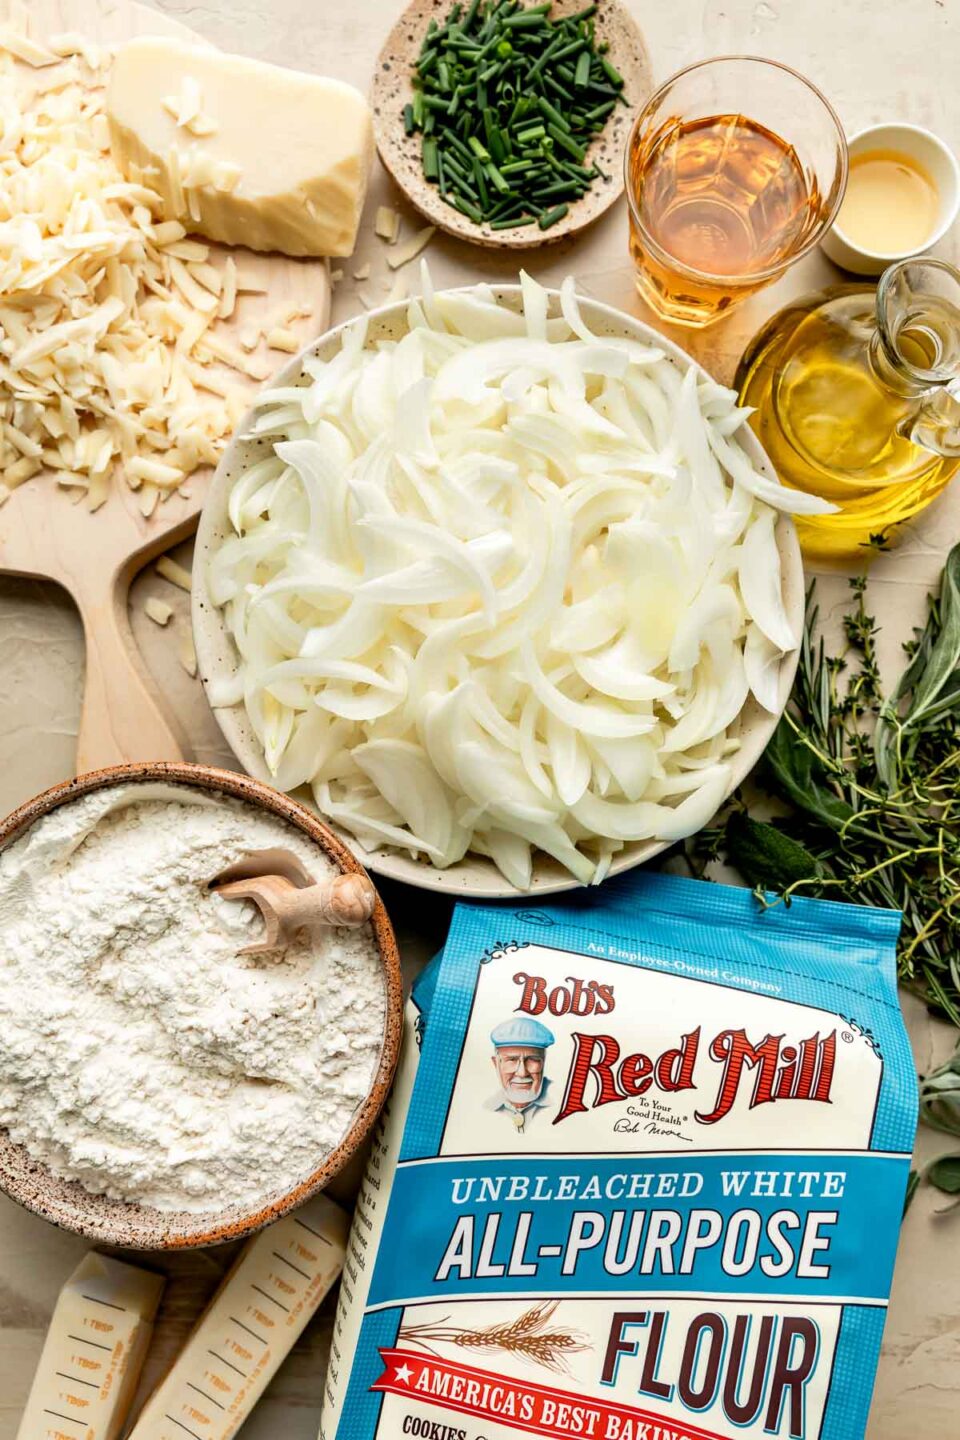
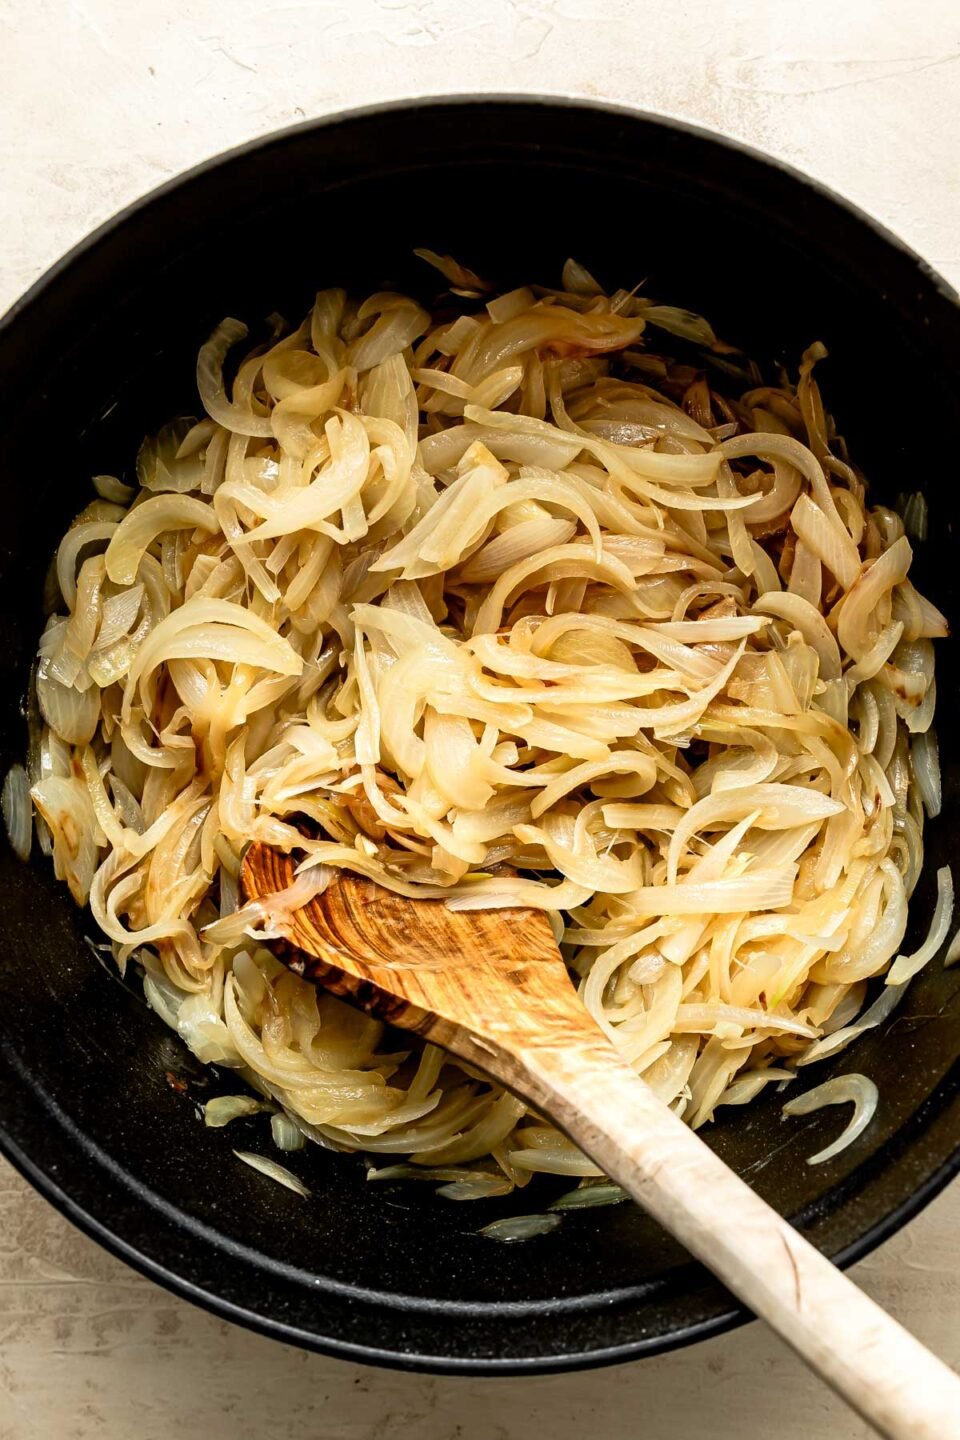
My Tried and True Method for Perfect Caramelized Onions
This recipe starts with a batch of my go-to sherry caramelized onions. Caramelizing onions is a pretty straightforward task, but time is the most important ingredient—the process can’t be rushed!
🤓 How it works! ⇢ Cooking onions low and slow on the stovetop releases all their moisture until their natural sugars start to caramelize. This can take up to 45 minutes, so be patient! Burnt onions are not caramelized onions. The good news is it’s mostly a hands-off process. Learn More! ⇢ How to Caramelize Onions.
Soften the onions. Toss them in a pot on the stove with melted butter. Keep the lid on and cook for 15 minutes. Why? ⇢ The goal is to let the onions soften, which takes some time. Just let the heat do its thing! The lid will retain most of the moisture so the onions don’t burn—there’s not much to sweat at this point! 😉
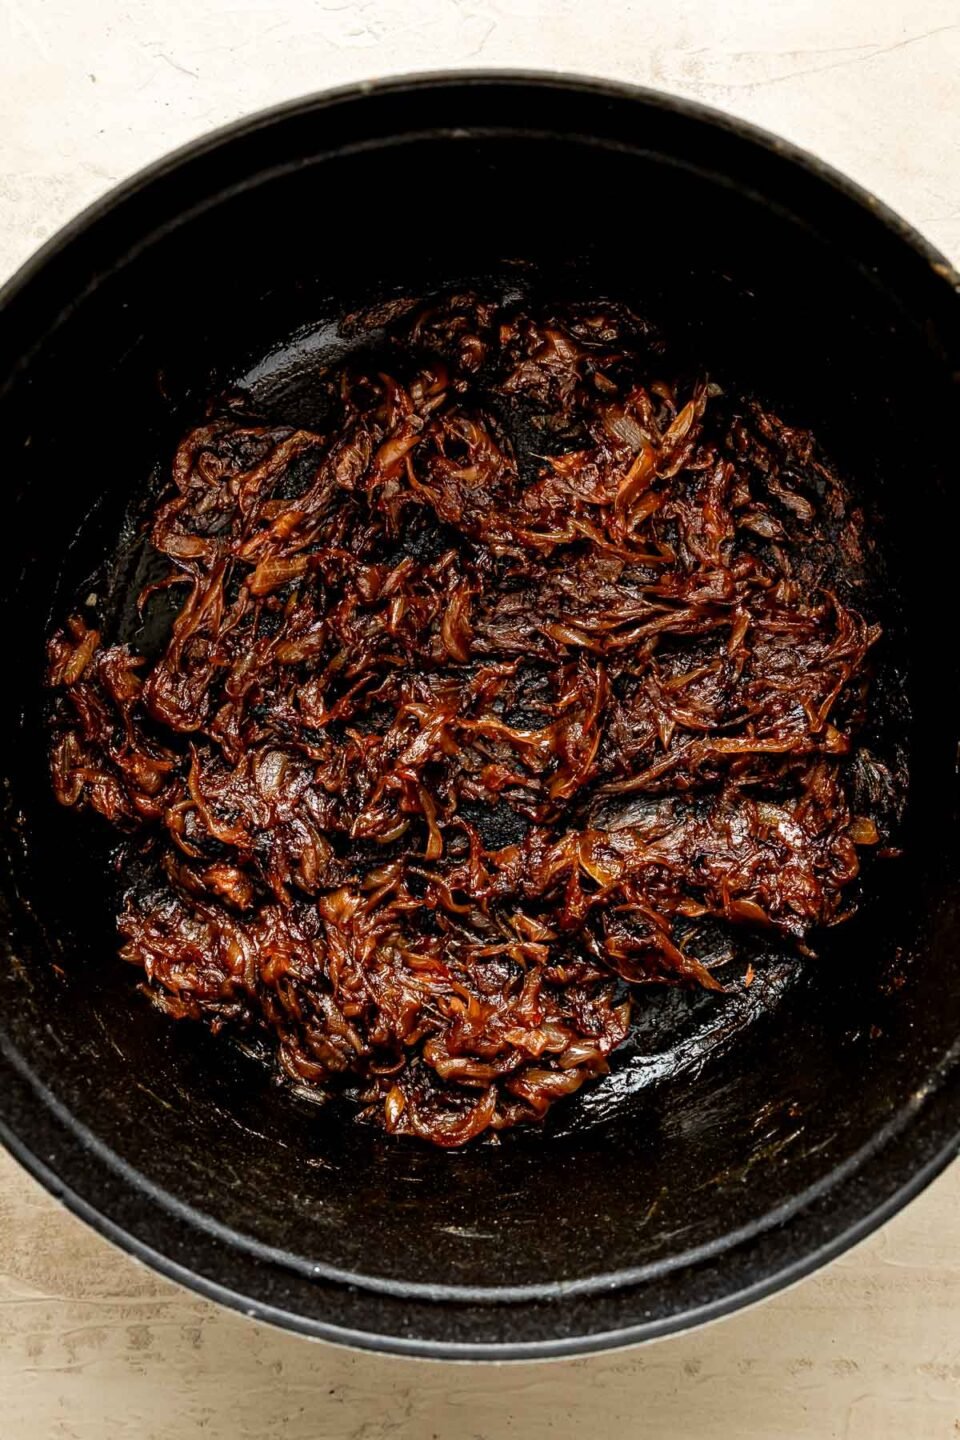
Caramelize the onions. Lower the heat and season the onions with salt. This releases more moisture from the onions to help them caramelize. Remove the lid and keep cooking until the onions are deeply browned. This can take another 30 minutes, so be patient! Once the onions are closer to caramelizing, you’ll need to stir them more frequently to prevent burning. Tip! ⇢ This hands-off time is a good moment to multitask and prep your pastry dough.
Deglaze with sherry. Once the onions are deeply browned, season them with fresh thyme. Then pour in the dry sherry to deglaze the skillet, scraping up all the flavorful browned bits stuck to the bottom of the pot. Why? ⇢ Dry sherry adds a beautiful crisp flavor to cut through the richness of the onions. Once the wine simmers off, the caramelized onions are good to go!
Make-Ahead Tip!
Caramelizing onions is the most time-consuming part of this savory galette recipe, so feel free to tackle this step ahead of time. You can prep the caramelized onions up to 1 week in advance and keep them in the fridge until you’re ready for assembly. Check the Recipe Notes, below, for more guidance!
Easy All-Butter Herbed Pastry Dough
This is my go-to homemade pastry dough made with all-butter and fresh herbs for incredible flavor.
Pastry dough is quite simple, so using high-quality flour makes all the difference. I always use Bob’s Red Mill Unbleached Organic White All-Purpose Flour.
🎉 Quick encouragement! ⇢ Homemade pastry may sound like an intimidating time commitment but I promise you—this is SIMPLE stuff. The food processor does all the work and you can easily make it while your onions are caramelizing. If I can do it, you can do it!
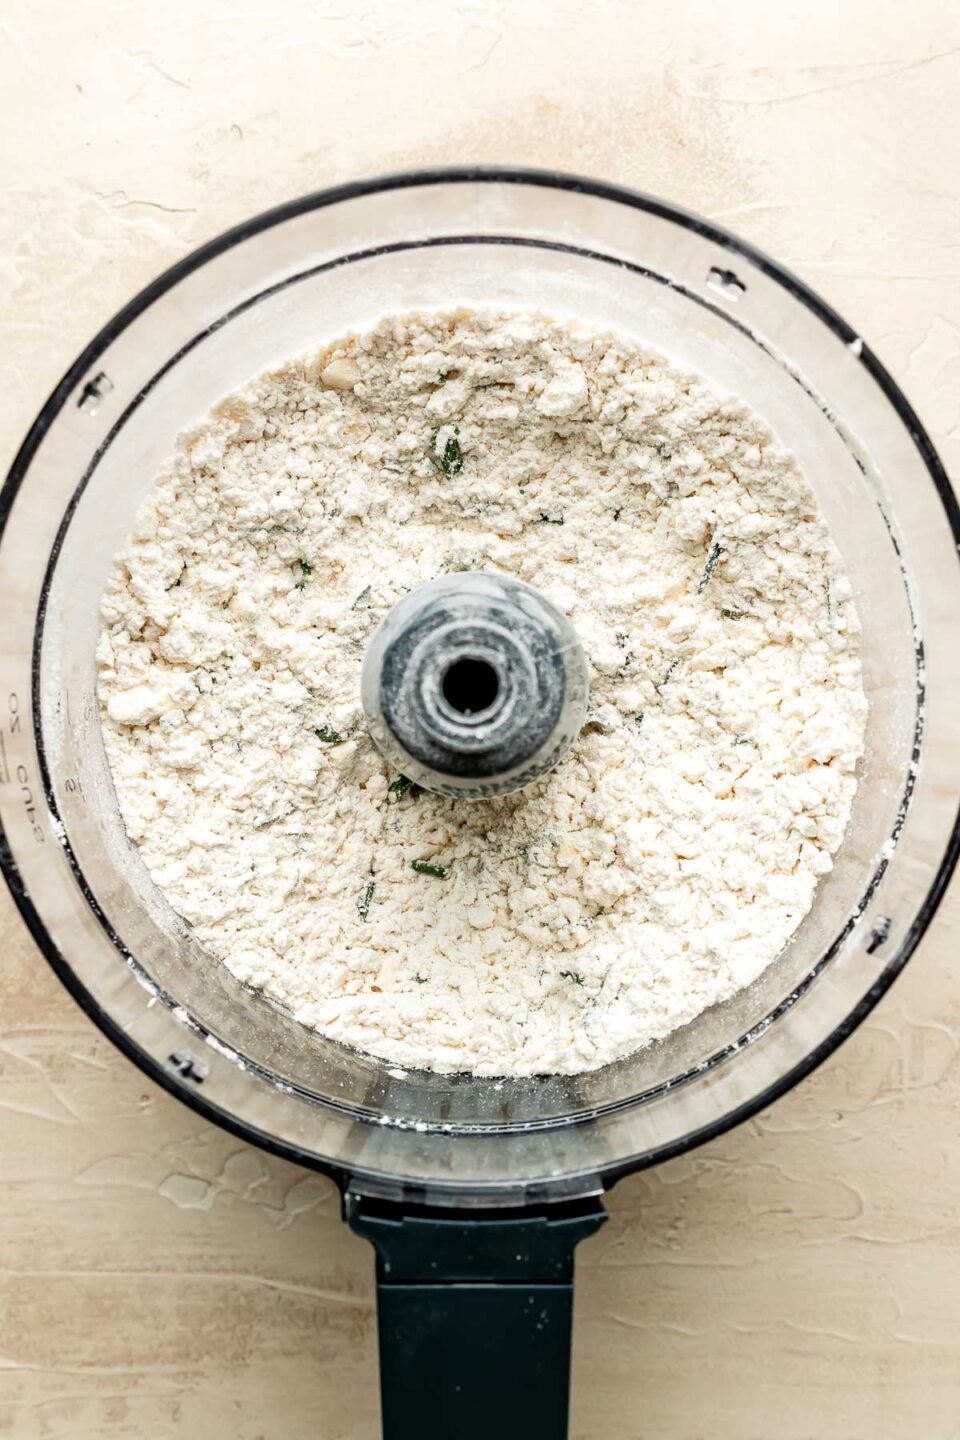
Pulse the dry ingredients with cold butter. Use your food processor to pulse flour, herbs, and salt with small pieces of cold butter. As the dry ingredients blend into the small pieces of butter, the mixture should start to look like coarsely grated parmesan cheese. Remember! ⇢ Keeping your butter cold is KEY to flaky, tender pastry dough. Do your best to work quickly and feel free to pop the mixture in the fridge if it the butter warms up (you’ll begin to smell its buttery aroma).
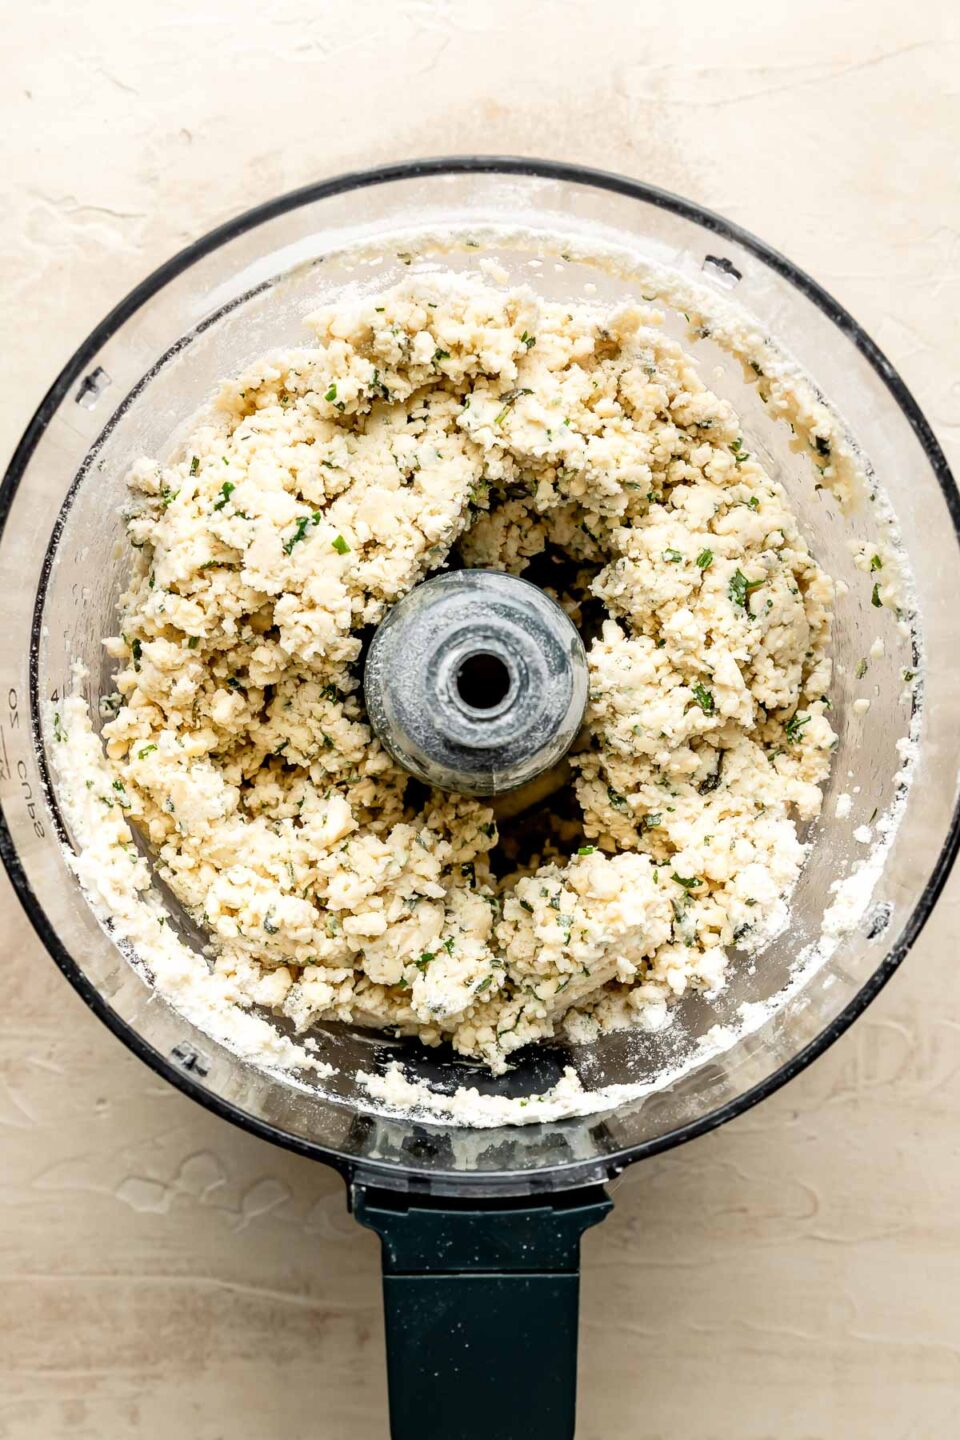
Add liquid to form a dough. Add apple cider vinegar and drizzle in ice-cold water as you pulse, working one tablespoon at a time. Why? ⇢ The vinegar’s acidity keeps the pastry tender and the water helps form the mixture into a rough dough. The dough is ready as soon as it starts to pull away from the sides of the bowl—do not overmix!
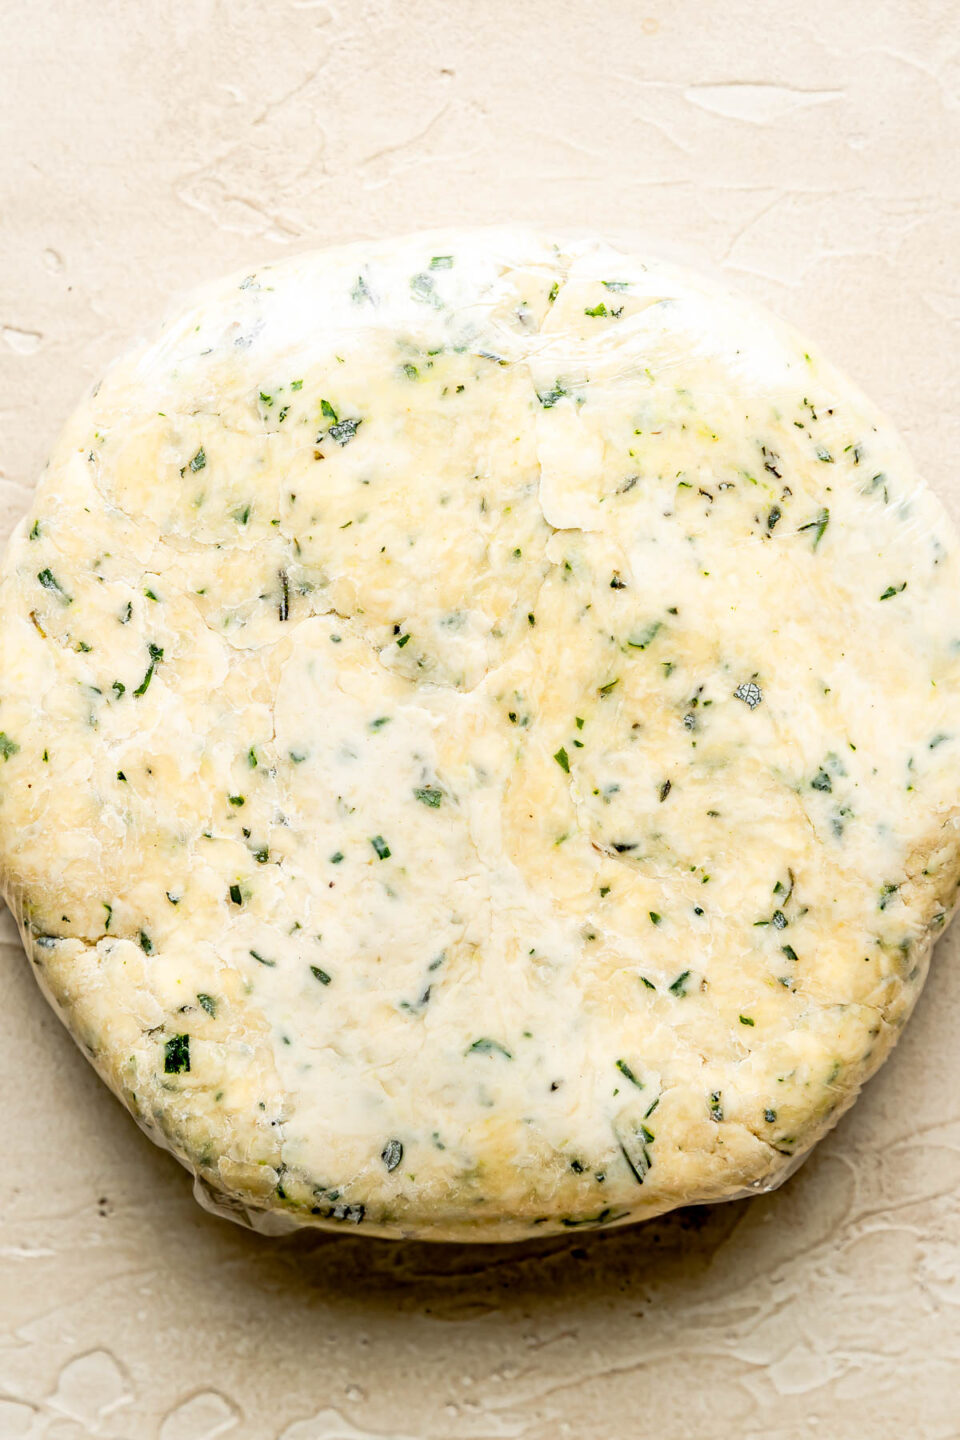
Chill. Shape the pastry dough into a flat disc, wrap it in plastic, and place it in the fridge until you’re ready to use it. Tip! ⇢ You want to work quickly to keep your dough nice and chilled—the more you handle it, the more it will warm up. Cold dough yields the extra-flaky results we’re after here!
Make-Ahead Tip!
Feel free to prep the herbed pastry dough up to 3 days in advance. The most important thing is that you keep it cold until you’re ready to assemble the French onion galette. Check the Recipe Notes, below, for more guidance.
Caramelized Onion Galette Assembly and Baking
A galette sounds like a fancy cafe treat but it’s totally do-able to make at home!
Before you begin assembly, make sure your caramelized onion filling is nice and chilled. Hot caramelized onions will make your crust soggy!
Roll out the herbed pastry dough. Working quickly so the pastry stays chilled, use a rolling pin to shape the dough into a 14-inch circle that’s about ⅛-inch thick. Remember! ⇢ A galette is supposed to look rustic, so don’t stress if the edges are a little jagged—that just adds to the charm!
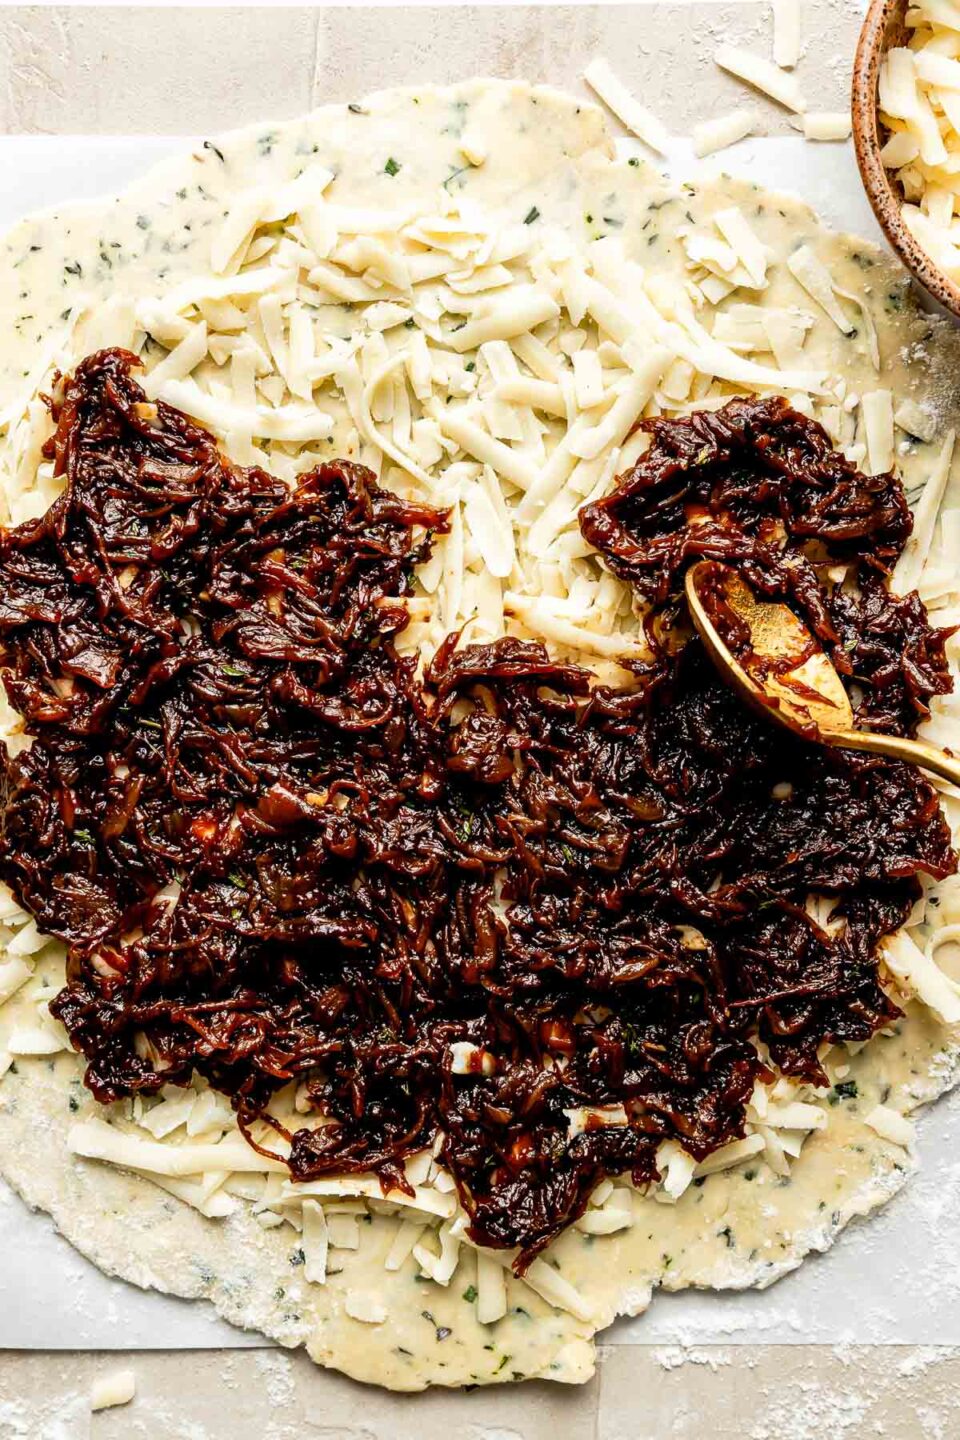
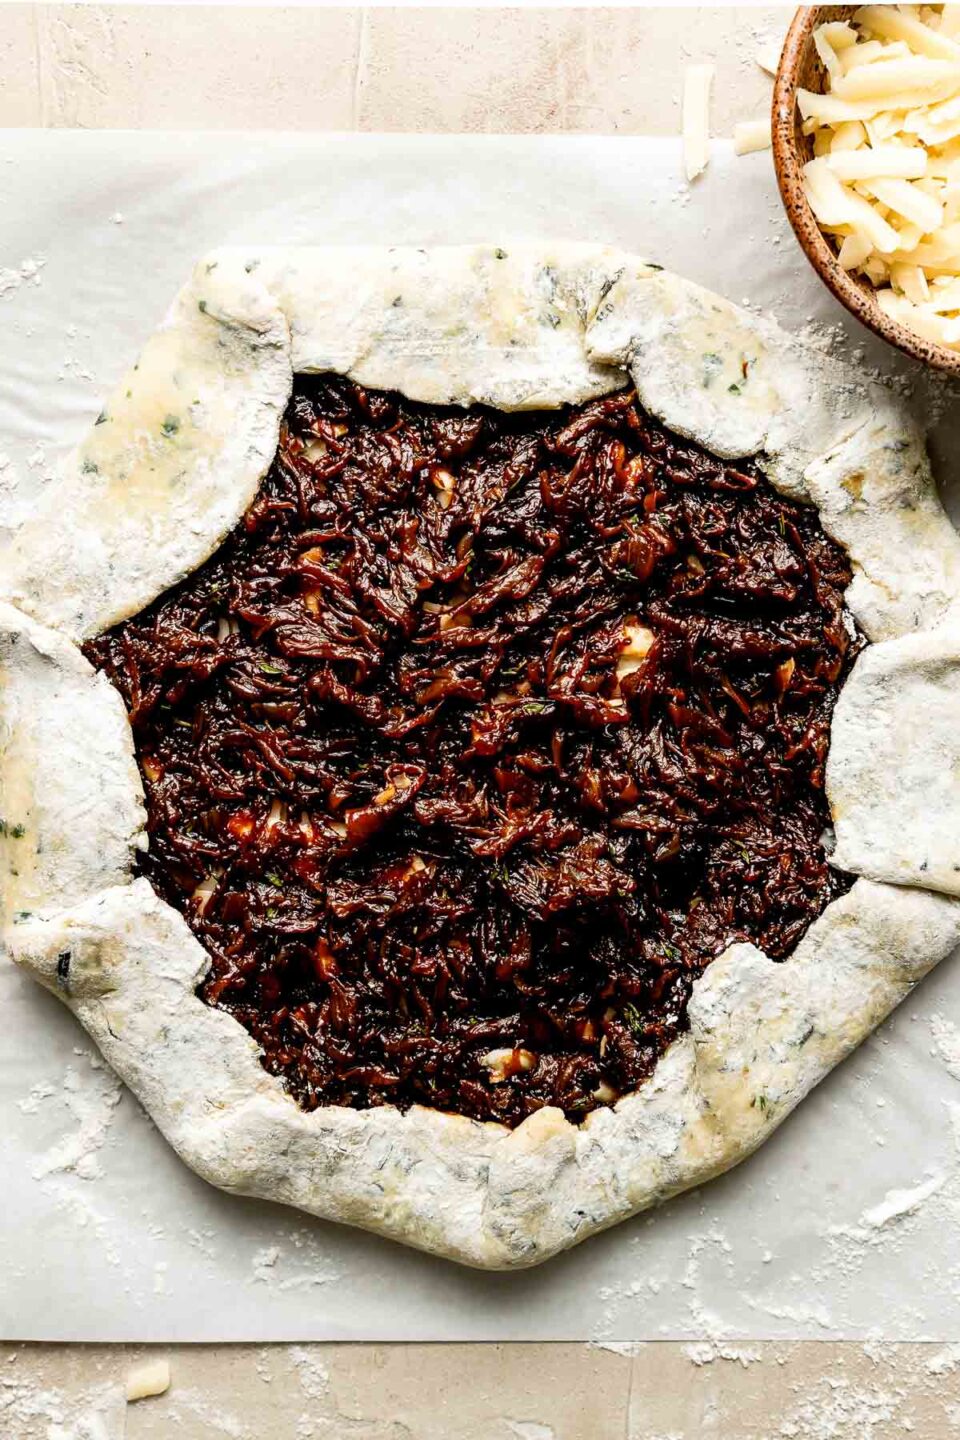
Add the filling and fold. Sprinkle the dough with Gruyère cheese, leaving an inch around the border, then top the cheese with jammy caramelized onions. Fold the edges over the filling to form a crust.
Chill the caramelized onion galette on a parchment-lined baking sheet while your oven preheats. Why? ⇢ Remember, keeping the dough cold is the key to a tender, extra-flaky crust!
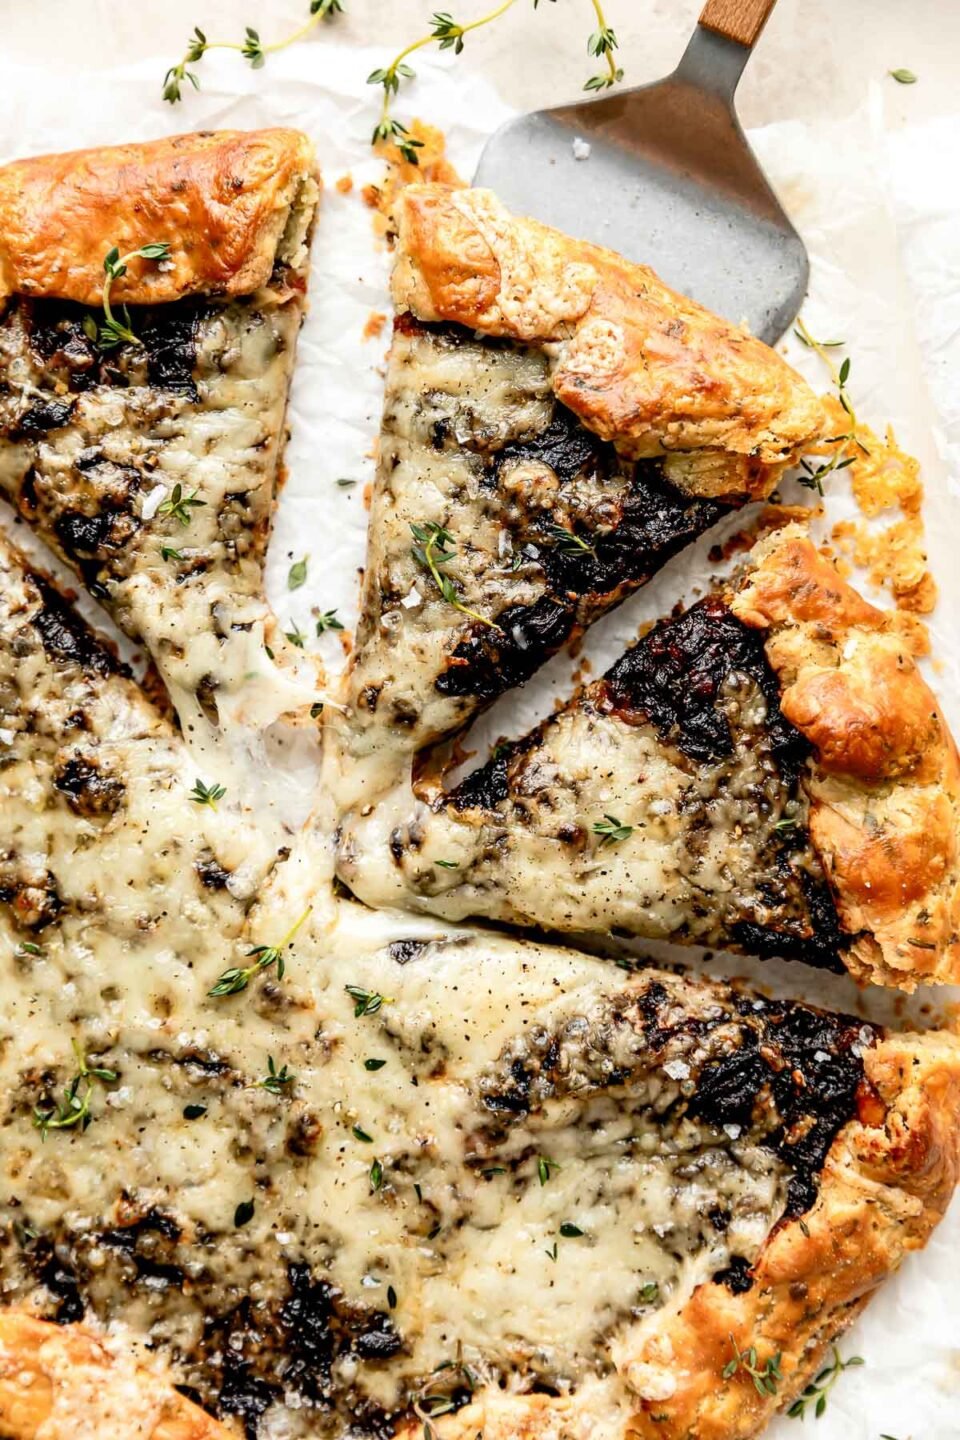
Bake. Brush the crust with egg wash to help the pastry turn golden as it bakes. Then place the caramelized onion galette in a 425-degree oven to cook for 40-50 minutes. Tip! ⇢ About 10 minutes before it’s done, add more Gruyère to the center of the galette for an extra-cheesy finish, just like French onion soup!
Make-Ahead Tip!
Assembling the caramelized onion galette ahead of time is a great hostess trick, especially if you plan on serving it for breakfast and brunch (more time to sleep in! 😉). Feel free to assemble the French onion galette and store it in the fridge for up to 3 days. In the morning, just pop it in the oven—easy! Check the Recipe Notes, below, for more guidance.
Serving Suggestions
This savory galette is versatile enough for any meal of the day! Try serving it for…
- Weekend brunch. A caramelized onion galette is a great treat for special occasions like Mother’s Day, Easter, birthdays, and more!
- A cozy lunch on snowy winter afternoons when you’re looking for a little kitchen project.
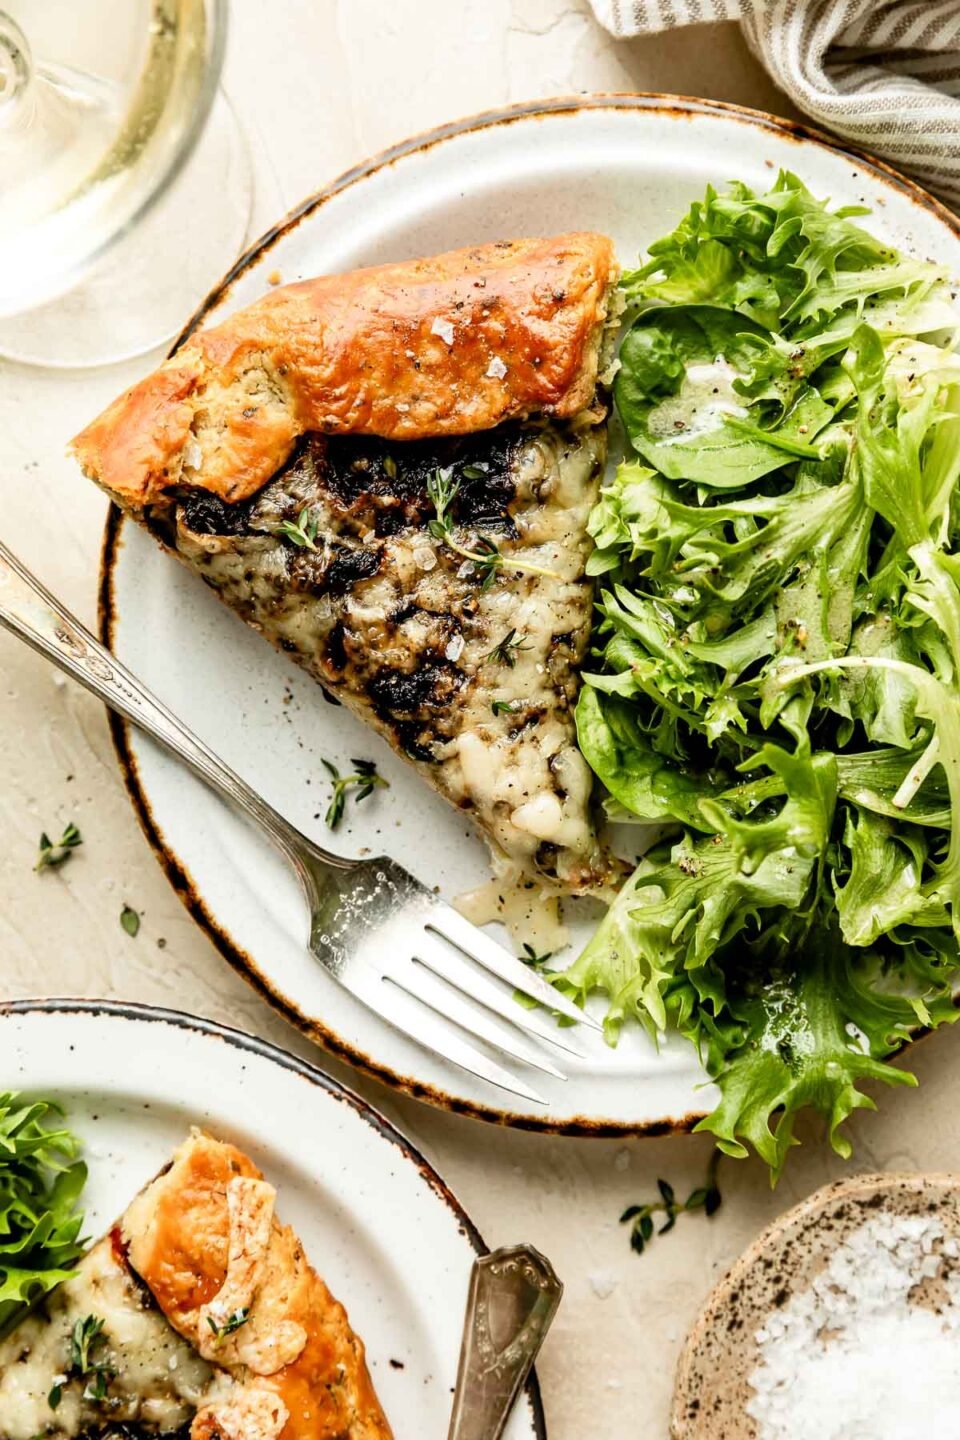
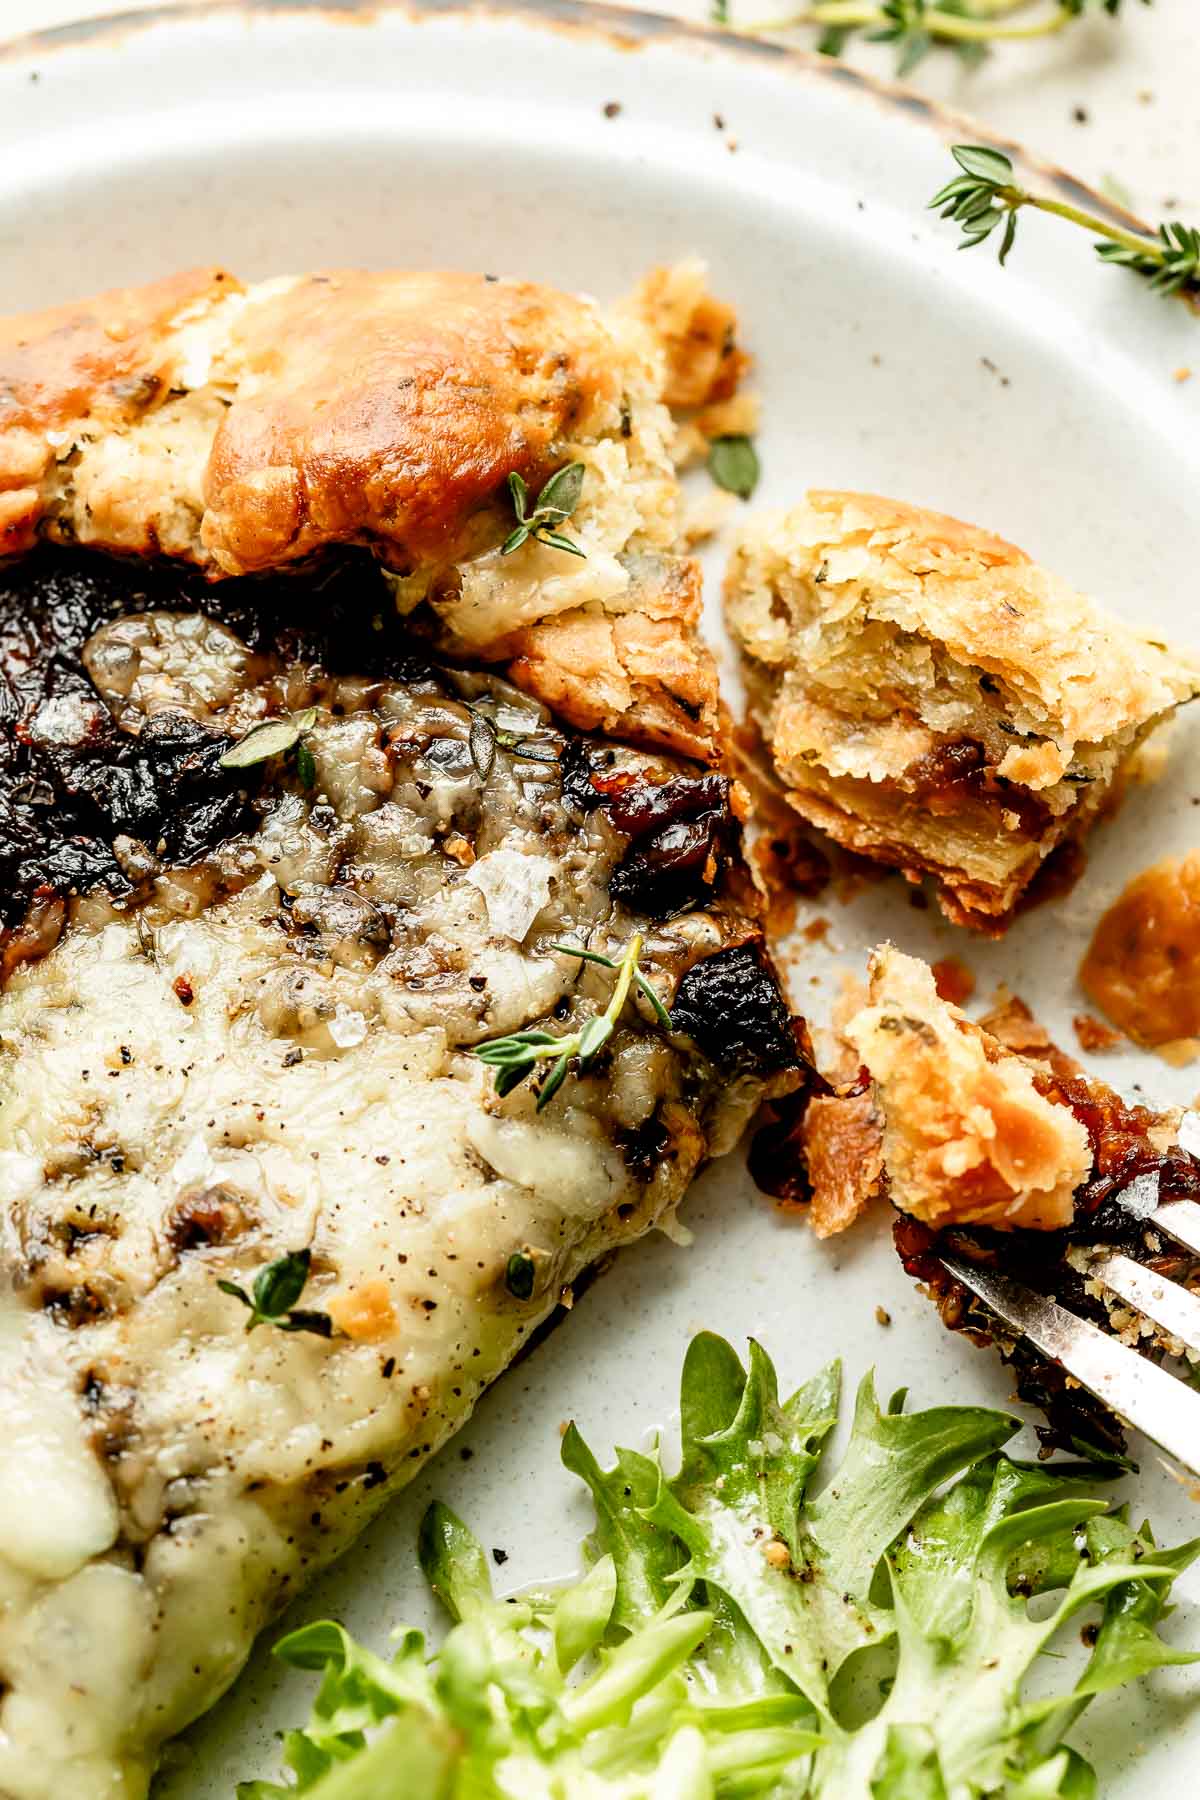
- Dinner dates (kind of like a fancy pizza night!). Chris and I love to enjoy this French onion galette with our go-to Fresh Mixed Greens Side Salad for an epic bistro-inspired dinner at home.
I can’t wait for you to try this Cheesy French Onion Galette! If you do, be sure to let us know! Leave a comment with a star rating below. You can also snap a photo and tag @playswellwithbutter on Instagram. We LOVE seeing your PWWB creations! ♡ Happy cooking!
Print
Cheesy French Onion Galette with Flaky Herb Crust
- Prep Time: 45 minutes
- Cook Time: 1 hour 45 minutes
- Total Time: 2 hours 20 minutes
- Yield: serves 6-8 1x
- Category: Main Dishes
- Method: Baked
- Cuisine: American, French-Inspired
- Diet: Vegetarian
Description
Jammy caramelized onions and gooey Gruyère cheese wrapped in a flaky crust studded with fresh herbs—a savory galette with a French onion-inspired twist!
Even though it’s pretty fancy-feeling, there’s no need to be intimidated here. This recipe has 2 key components, and each is simple and a bit more hands-off than you might expect:
- Caramelized onions. Here we’re using my tried and true method, which results in onions that are rich, jammy, and finished with a little dry sherry for extra depth.
- Homemade crust. This all-butter crust is shatteringly flaky and studded with fresh herbs for extra savory flavor. The food processor does all the work!
Ingredients
for the French onion galette:
- caramelized onions (below)
- flaky herbed crust (below)
- 6 ounces freshly shredded gruyére or cheese of choice, divided
- egg wash (1 large egg beaten with 1 tablespoon water)
for the caramelized onions:
- 4 large yellow or sweet onions, thinly sliced (approx. 2 pounds)
- 1 tablespoon unsalted butter
- 1 tablespoon olive oil
- 2 teaspoons kosher salt
- 1 tablespoon fresh thyme leaves (can substitute 1 teaspoon dried thyme)
- ½ cup dry sherry (see Recipe Notes, below)
for the flaky herbed crust:
- 2 cups Bob’s Red Mill Unbleached Organic White All-Purpose Flour, plus more for dusting
- ¼ cup roughly chopped fresh chives
- ¼ cup destemmed hardy fresh herbs (fresh rosemary, sage, thyme)
- 1 heaping teaspoon kosher salt
- ¾ cup cold unsalted butter, diced into ½-inch cubes
- 1 tablespoon apple cider vinegar
- ice water
Instructions
- Soften the onions: Add the butter and oil to a large, heavy-bottomed pot with a lid over medium heat (I use a 4-quart braising pan). Once the butter is melted, add the sliced onions, stirring to coat. Cover the pot. Cook 12-15 minutes, until softened and fragrant. The onions shouldn’t require too much attention at this point, but feel free to uncover and stir occasionally.

- Caramelize the onions: Once softened, uncover the pot and reduce heat to medium-low. Season the onions with 2 teaspoons kosher salt, stirring to combine. Continue to cook, stirring occasionally, until tender, fragrant, and deeply browned, 30-45 minutes more. See the Recipe Notes, below, for a few more helpful pointers.
- Deglaze the pan: Once the onions are caramelized, stir in the fresh thyme and deglaze the skillet. Slowly pour in the dry sherry, using a wooden spoon to scrape up any browned bits formed on the bottom of the pan. Increase the heat to medium-high to bring the wine to a simmer, then simmer 2-3 minutes or until reduced. Remove from the heat and cool for galette assembly.
- Prepare the flaky herbed crust: Meanwhile, as the onions caramelize, prepare the galette crust. To the bowl of a food processor, add the flour, chives, herbs, and salt. Pulse to combine well. Add the cold butter. Pulse just enough to cut the butter into the flour, aiming for pea-sized pieces of butter—the flour mixture should look similar to coarsely grated parmesan cheese. Pulse in the apple cider vinegar, then pulse in 1 tablespoon of ice water at a time, just until the mixture begins to pull from the side of the bowl—this usually takes 5-6 tablespoons of water.
- Chill the dough: Transfer the flour mixture to a lightly floured surface. Working quickly and carefully, use your hands to press the dough into a ball and flatten into a disc. Wrap in plastic and transfer to the refrigerator to chill. Dough can be prepped up to 3 days ahead of time.
- French onion galette assembly: Once the caramelized onions are cooled and the dough is prepped, assemble the galette. Roll out the herbed crust dough on a lightly floured sheet of parchment paper—aim for creating a 14-inch round about ⅛-inch thick. Sprinkle about ⅔ of the cheese over the dough, leaving about 1 inch around the border. Spoon the caramelized onions over the cheese. Fold the edges of the dough over the filling, creating a 1-inch crust. Transfer the parchment paper to a baking sheet and set in the refrigerator to chill while the oven preheats.
- Bake the French onion galette: Preheat the oven to 425 degrees F, ensuring a rack is positioned in the center of the oven. Once the oven is preheated, remove the galette from the refrigerator. Generously brush the the crust with egg wash. Bake for 40-50 minutes, until the crust is deeply browned. About 10 minutes before the galette is ready, sprinkle the remaining cheese over the center and return to the oven to melt.
- Serve: Allow to cool slightly, then slice the French onion galette into 6-8 pieces. Enjoy!


Equipment
Bob’s Red Mill Organic Unbleached All-Purpose Flour
Buy Now →
Buy Now → Le Creuset Enameled Cast Iron Braiser
Buy Now →Notes
Jess’ Tips and Tricks:
- Dry sherry is a fortified wine with beautifully crisp flavor that helps cut through the richness of caramelly onions. You should be able to find dry sherry easily in the fortified wine section at your favorite wine or liquor shop. Sherry substitutes. ⇢ If you cannot find dry sherry, you can substitute with dry vermouth or dry, unoaked white wine for this recipe. If you prefer not to cook with alcohol, substitute with an equal amount of chicken stock with a splash of apple cider vinegar whisked into it.
- Tips for perfectly caramelized onions: Caramelizing onions is a pretty hands-off process, but there are a few tricks that will help ensure a perfect result. Monitor the onions pretty closely as the cook and be sure to adjust heat as needed to allow the onions to caramelize slowly and prevent burning. When you stir the onions, try to scrape up any browned bits formed at the bottom of the pan; they’re full of flavor! The closer the onions get to reaching caramelization, the more often you will want to stir to promote even browning and prevent burning. Learn More! ⇢ How to Caramelize Onions.
- Serving suggestions: I love serving a savory galette alongside a simple, bright and tangy mixed green salad. The freshness of the greens and brightness of the vinaigrette is the perfect way to lighten up the decadent and rich-tasting onion galette.
Make-Ahead Guidance: Since there are a couple of different components involved in this French onion galette recipe, prepping it ahead of time is a great option for weeknight cooking or an effortless date night.
- Make-Ahead Option #1 – Prep components up to 3 days ahead of time: Prepare both the caramelized onions and flaky herbed crust up to 3 days ahead of time. For the onions: prepare according to Steps 1-3, cool completely, transfer to an airtight container, and store in the refrigerator for up to 1 week. For the crust: prepare according to Steps 4-5, wrap tightly in plastic, and store in the refrigerator for up to 3 days. At dinnertime, simply preheat, assemble, and bake according to Steps 6-7.
- Make-Ahead Option #2—Assemble the galette for later: Prepare according to Steps 1-6. Wrap the galette tightly in plastic and store in the refrigerator for up to 3 days. At dinnertime, simply preheat, and bake according to Step 7.
Storage and Reheating: Leftover French onion galette will keep, covered well and stored in the refrigerator, for up to 5 days. For best results, reheat in the oven (400 degrees F) until warmed through.
Follow along with Plays Well With Butter on Instagram, YouTube, Facebook, and Pinterest for more unfussy recipes that pack a big punch of flavor!


I skipped the cheese and layered thinly sliced potatoes to add a bit more bulk and it came out unbelievably good. Now on rotation
Adding potatoes is a great idea, Aura! So happy you loved the galette, it’s a good one! 🙂
The only negative thing I have to say about this recipe is that there’s no way I could have fed 8 people – my husband and I gobbled up 2/3 of it on our own it was so good!
We definitely should’ve warned about that potential outcome! 🙂 So glad you enjoyed the galette as much as we do!