An All-Time Favorite Homemade Fried Chicken Recipe.
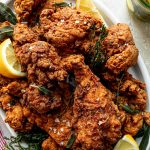
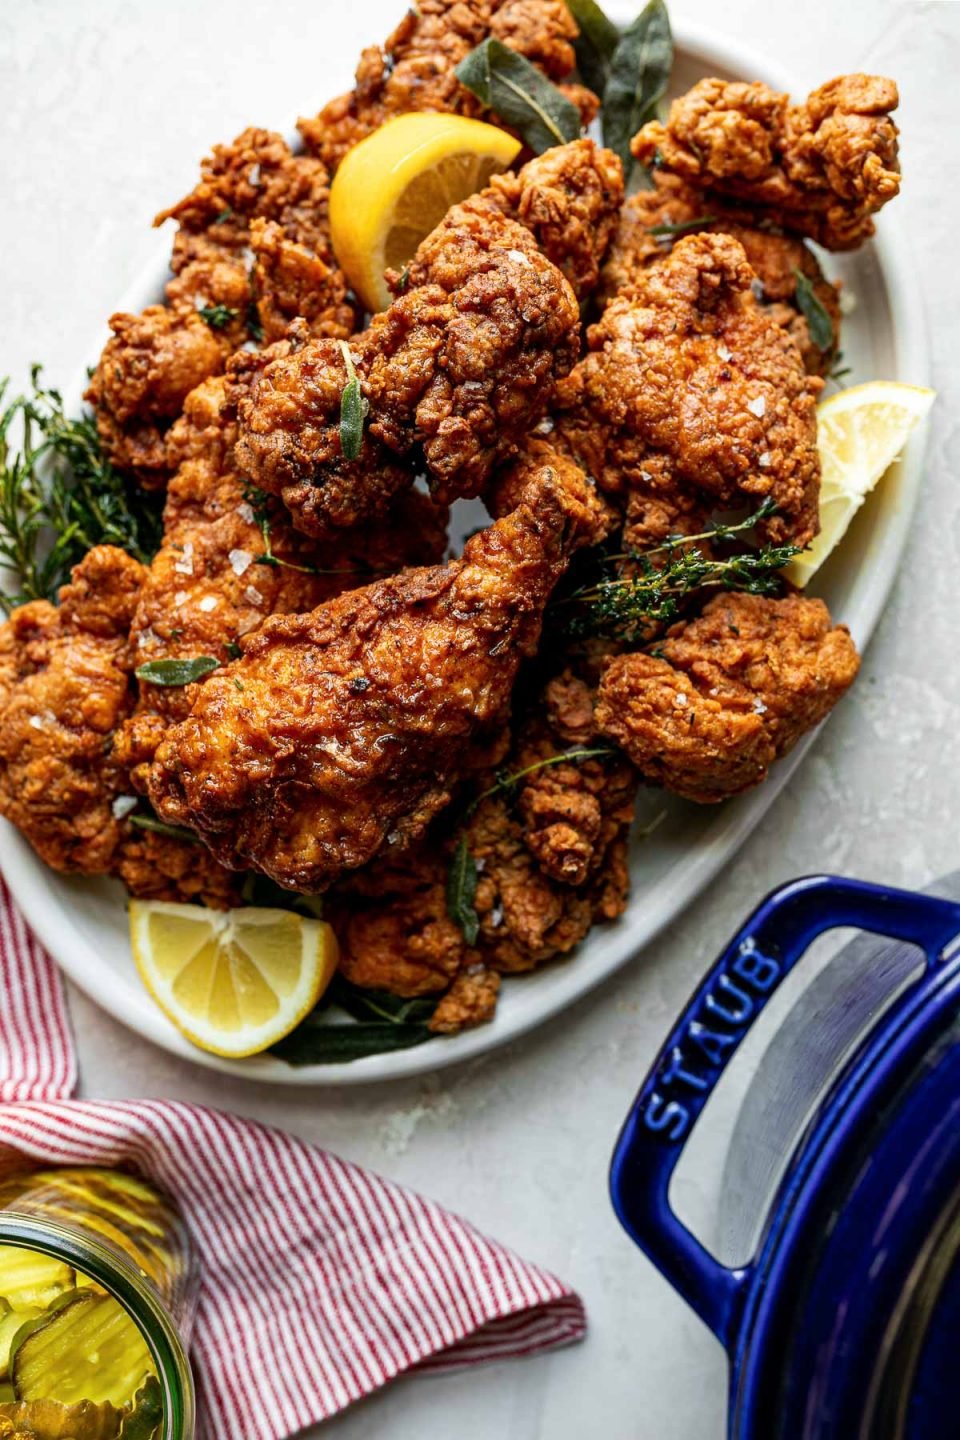
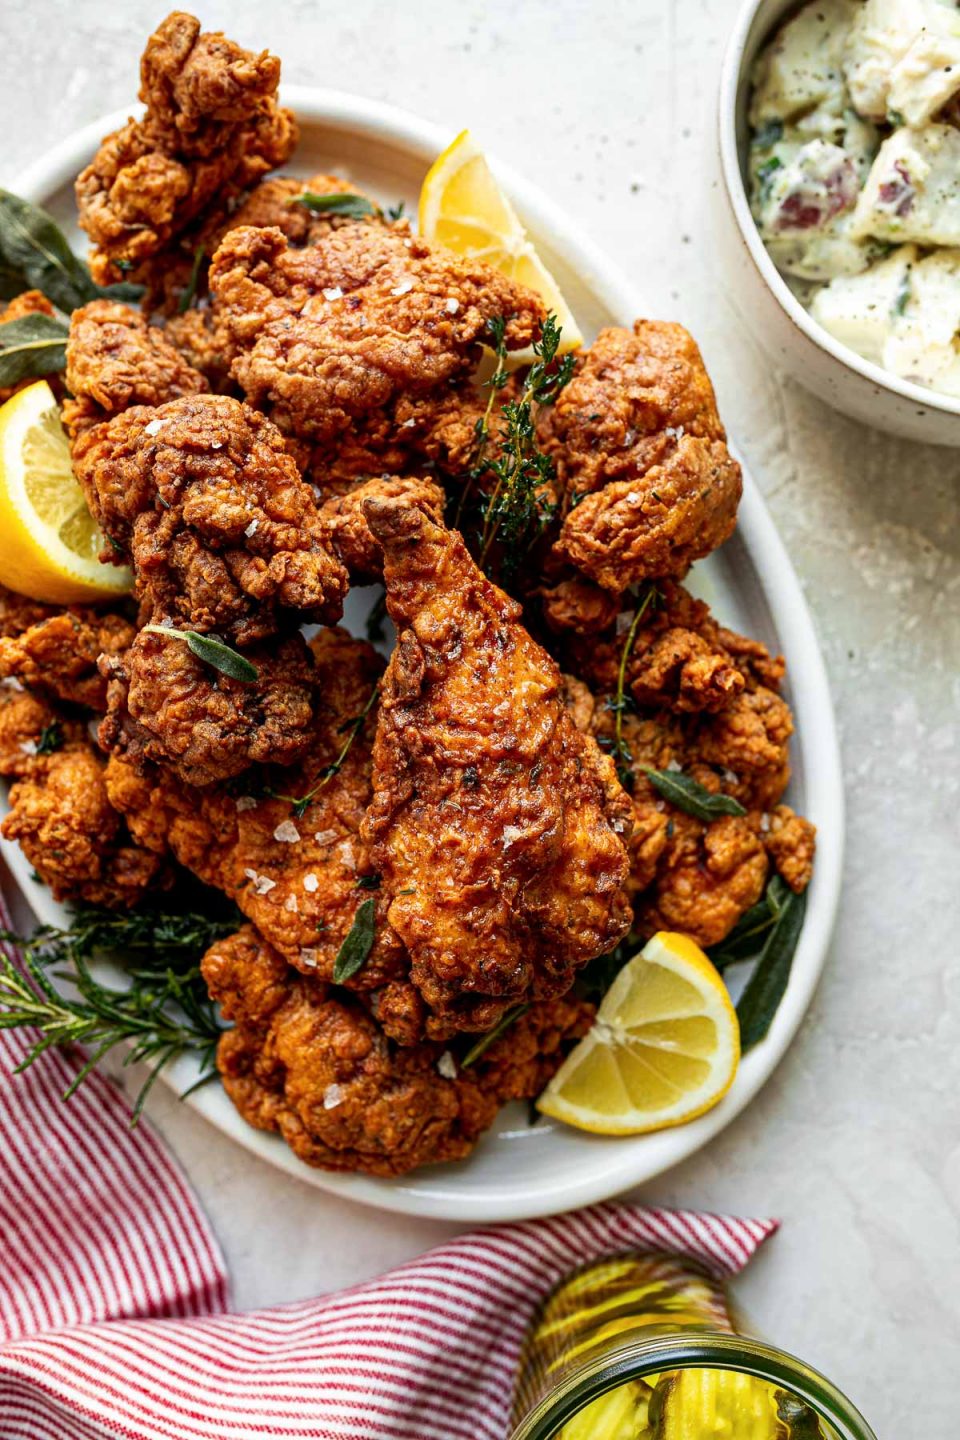
There are few things that make me go weak in the knees like a platter of gorgeously crispy & golden brown buttermilk fried chicken. I’m so excited to be sharing this All-Time Favorite Buttermilk Fried Chicken recipe with you today.
It’s a recipe I’ve been tweaking & perfecting for a number of years, influenced by a few of my favorite fried chicken memories – notably the spicy chicken tenders my mom made throughout my childhood & the epic buttermilk fried chicken Chris & I shared on our honeymoon in San Fransisco.

The chicken soaks up a very simple brine before being coated in a buttermilk & flour breading laced with poultry spices like paprika & thyme. What takes it completely over the top is the frying oil, which is infused with a whole head of garlic & tons of fresh herbs.
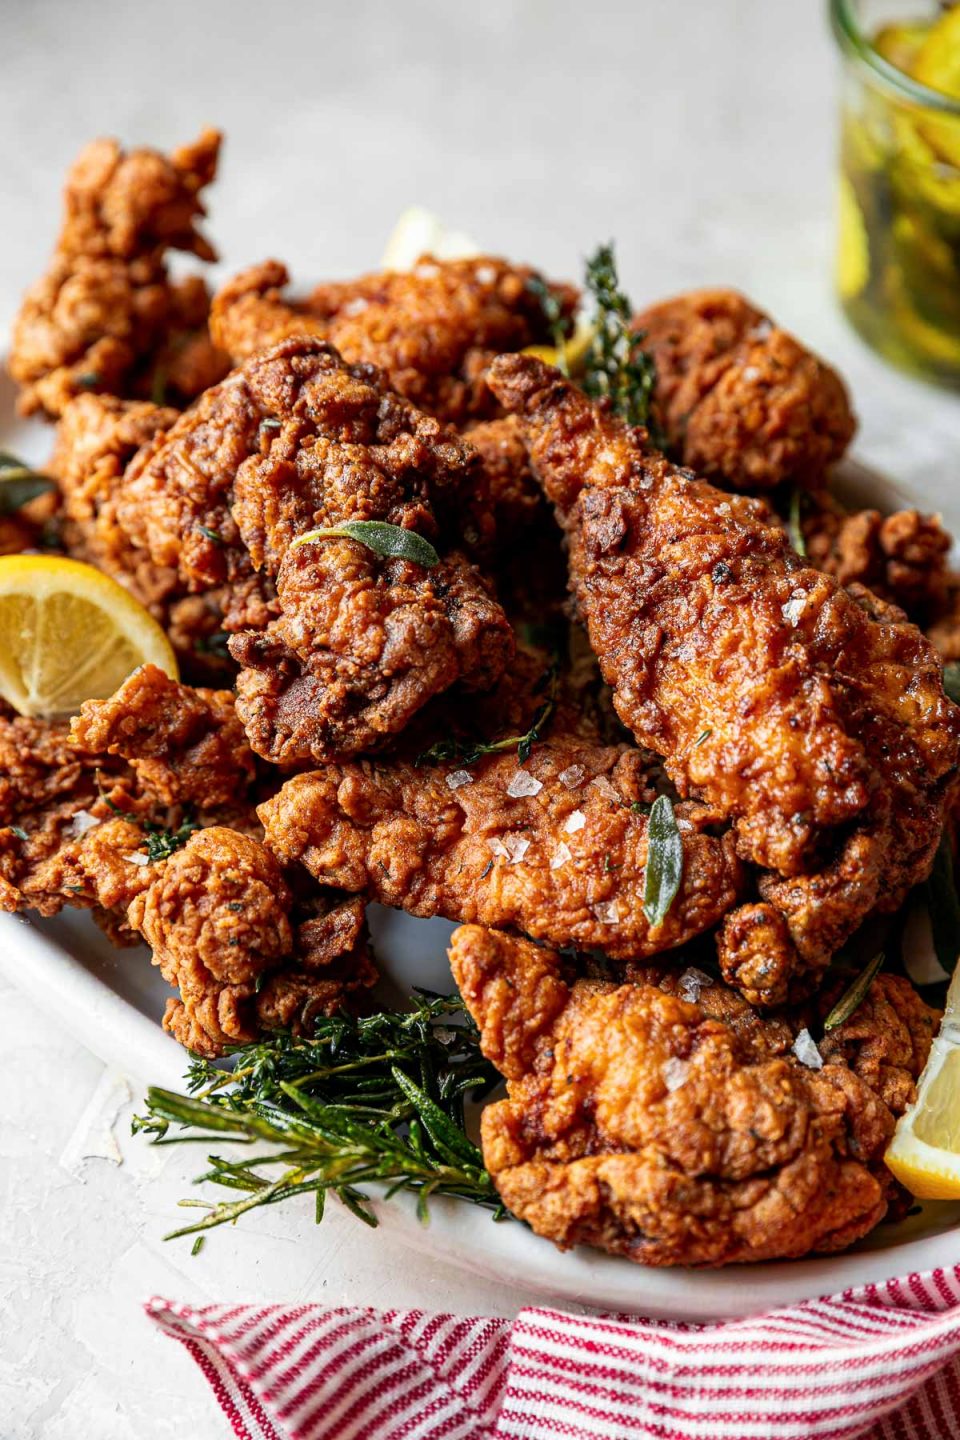
It makes your kitchen smell like absolute heaven (seriously!), & results in the most perfect fried chicken every time – juicy & tender, layers of complex flavor, & ridiculously crispy.
Favorite Buttermilk Fried Chicken Recipe Highlights
This buttermilk fried chicken recipe is…
- MEGA FLAVORFUL. This recipe is designed with layers & layers of flavor in mind – an easy brine, a quick buttermilk soak, a seasoned flour dredge, & garlic- & fresh herb-infused frying oil. No bland chicken here!
- STRAIGHT-FORWARD. While homemade fried chicken requires a bit of technique, the process is honestly very simple. This is a 3-part recipe with step-by-step instructions to help build your confidence as you venture into at-home deep frying, & I’ve included many tips & tricks along the way. You’ve got this!
- DAMN GOOD. Comfort food does not get better than classic, crispy fried chicken, & this buttermilk fried chicken is absolutely crave-worthy. This recipe has stood the test of time in my own kitchen & I’m so excited to share it with you!
Homemade fried chicken has never tasted this good, I swear! ♡ Read on to learn more about this Garlic- & Herb-Infused Buttermilk Fried Chicken, or jump straight to the recipe & get cookin’!
How to Make Homemade Fried Chicken – A 3-Part Recipe:
This buttermilk fried chicken recipe consists of 3 simple parts, each crafted to result in super flavorful & super juicy fried chicken:
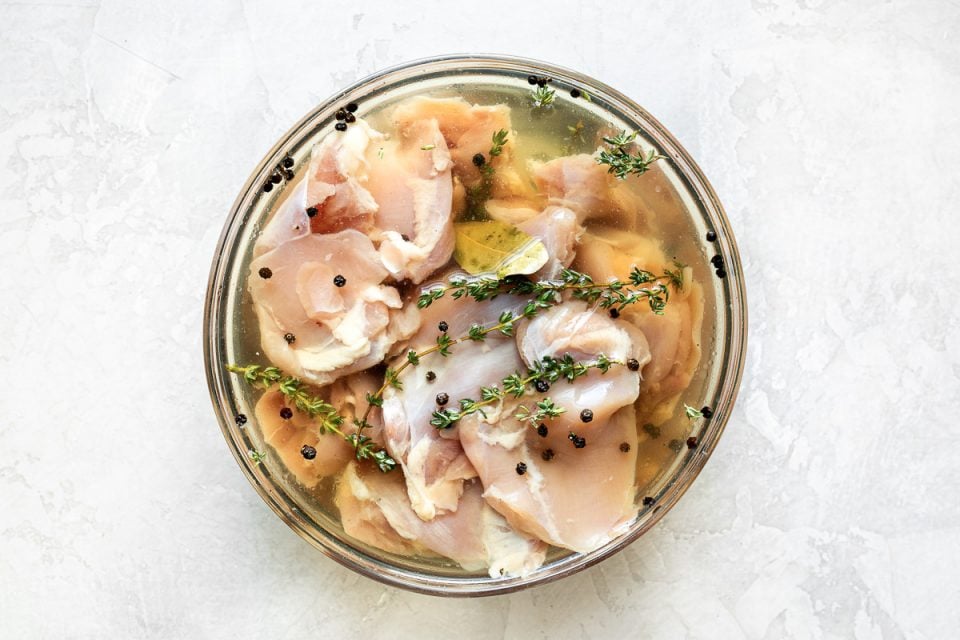
- Brine – This homemade fried chicken recipe begins with a really simple poultry brine, which you can prep up to 3 days ahead of time. The brine flavors the chicken from the inside out & helps ensure the fried chicken stays completely juicy & tender once cooked.
- Breading – Bread the chicken by submerging in buttermilk & dredging in a flour mixture. Both the buttermilk & the flour mixture are heavily seasoned with a simple homemade poultry spice blend, creating irresistibly crispy & flavorful fried chicken.
- Frying – The breaded chicken is deep fried in oil that’s been infused with aromatic herbs & garlic, resulting in the most heavenly juicy & flavorful crispy fried chicken. It’s restaurant-worthy & absolutely perfect in every way!

A quick word of encouragement: If you’ve never made homemade fried chicken before, don’t be too intimidated! Frying totally crispy & totally juicy chicken is something that certainly requires some technique, but once you get the hang of it, homemade fried chicken is honestly pretty simple. Take things step by step & enjoy it as a really fun kitchen project.
Simple Poultry Brine
This buttermilk fried chicken recipe begins with a simple poultry brine. It’s an optional step but completely worth it to help achieve juicy & tender chicken!
What does a brine do? ⇢ Since chicken is such a lean protein, brining before frying is crucial for 2 reasons. First, a good brine helps season & flavor the chicken from the inside out. Second, the brine helps keep the chicken totally juicy & tender once fried.
How to prep a simple poultry brine for fried chicken ⇢ I’m a fan of keeping things as simple as possible in the kitchen, & the brine for this buttermilk fried chicken is just that! The brine is simply a combination of hot water, kosher salt, brown sugar, & a couple of staple spices. Whisk it together, submerge the chicken pieces in the brine, & set it in the fridge to soak for at least 12 hours before frying.
Quick meal prep tip ⇢ As a general rule, the longer you’re able to brine, the better – the fried chicken will be even more flavorful & juicy as a result. Prep the brine ahead of time to save time the day you plan to fry your chicken. It takes about 5 minutes to throw together & can work its magic in your fridge for up to 3 days. Easy!
Breading for Buttermilk Fried Chicken
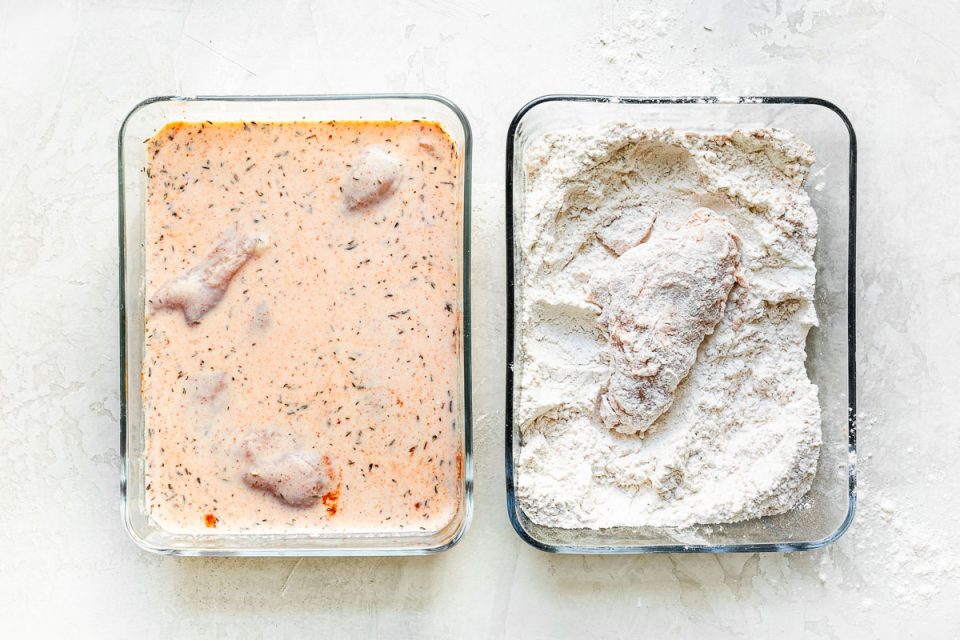
The breading for this buttermilk fried chicken recipe consists of two parts: a quick buttermilk soak & a dredge through well-seasoned flour mixture. The combination of the two creates addictively crispy fried chicken.
The quick buttermilk soak ⇢ Whisk together buttermilk, egg, & simple poultry spices (paprika, onion powder, garlic powder, etc.), & submerge the brined chicken in it. Why ⇢ Buttermilk adds tangy, rich flavor, while the egg helps the flour dredge adhere to the chicken. Buttermilk substitute ⇢ If you do not have buttermilk on hand, you can make a quick substitute by adding a little lemon juice or vinegar to milk. Check the Recipe Notes for more guidance!
The seasoned flour dredge ⇢ Whisk together all-purpose flour, baking powder, & the same simple poultry spices you used in the buttermilk soak (paprika, onion powder, garlic powder, etc.). Transfer the chicken from the buttermilk to the flour, coating it completely & shaking off any excess. Why ⇢ Baking powder provides a little lift, keeping the breading light & airy. Doubling down on the poultry spices makes the homemade fried chicken that much more flavorful.
For extra crispy fried chicken ⇢ If you’d like, transfer the dredged chicken back into the buttermilk mixture & repeat the soak & dredge once more. Why ⇢ A second dredge creates thicker breading, which gets extra crispy as the chicken fries. Check the Recipe Notes for more guidance!
The fun part! – Frying your chicken
With your chicken prepped & ready to go, the fun begins! It’s time to get frying!
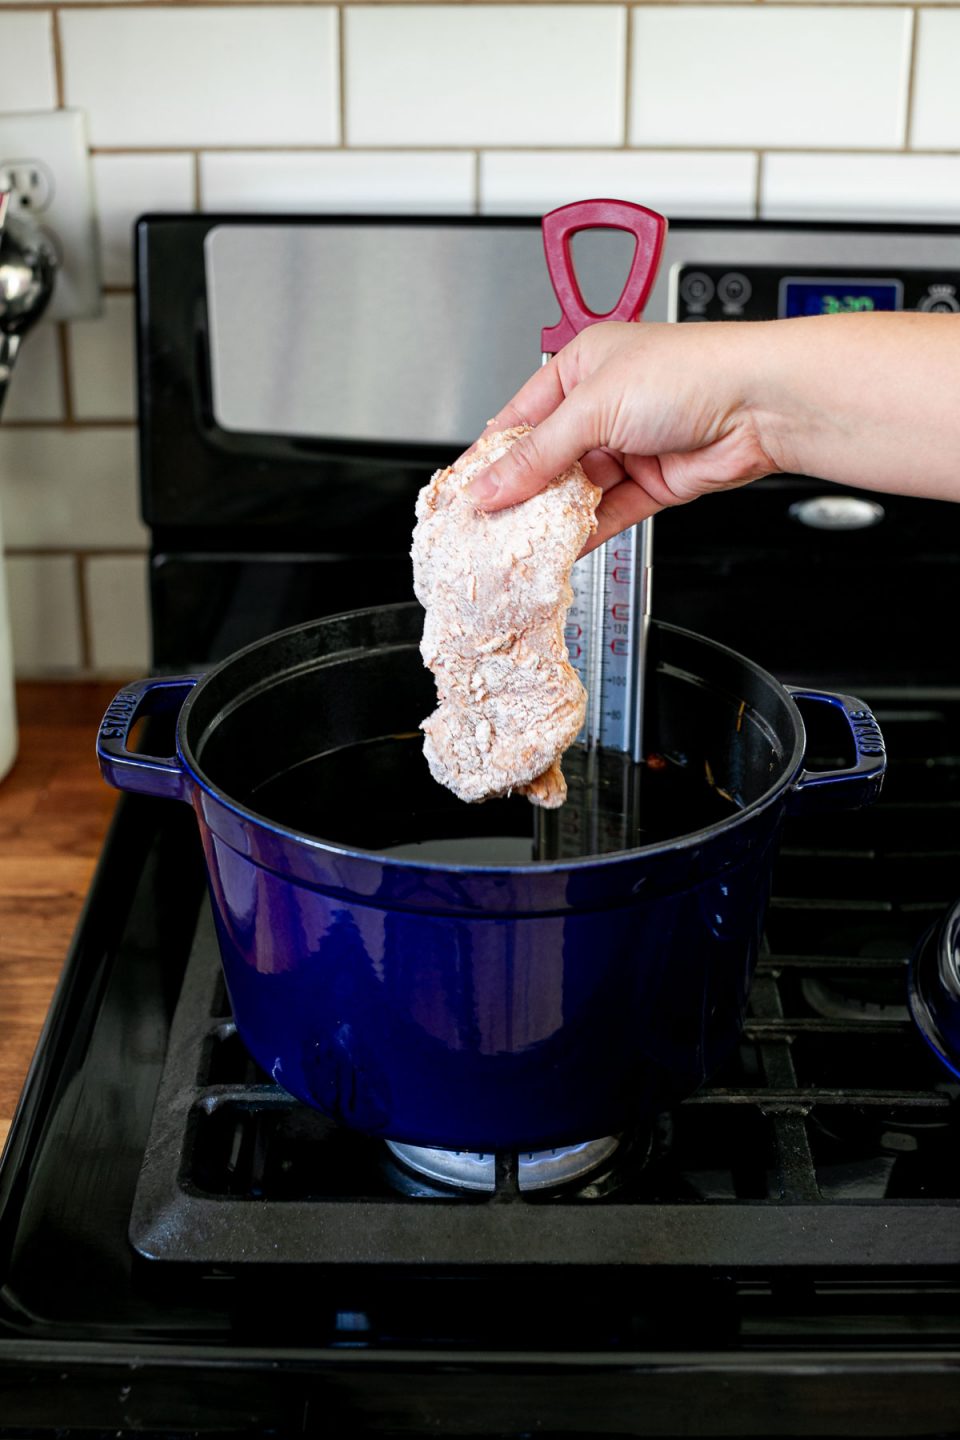
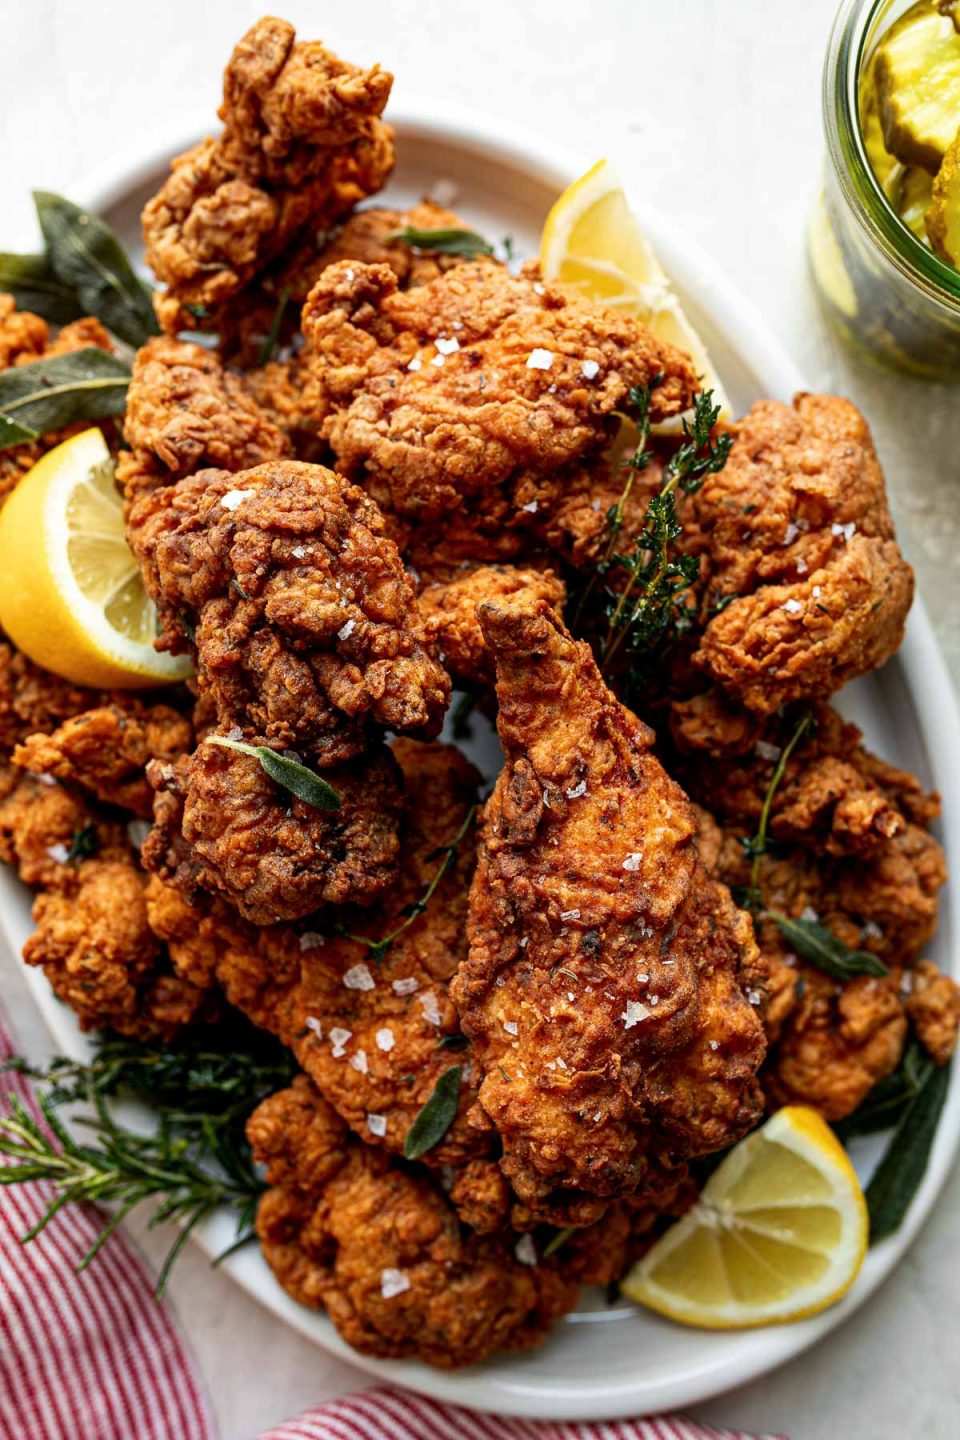
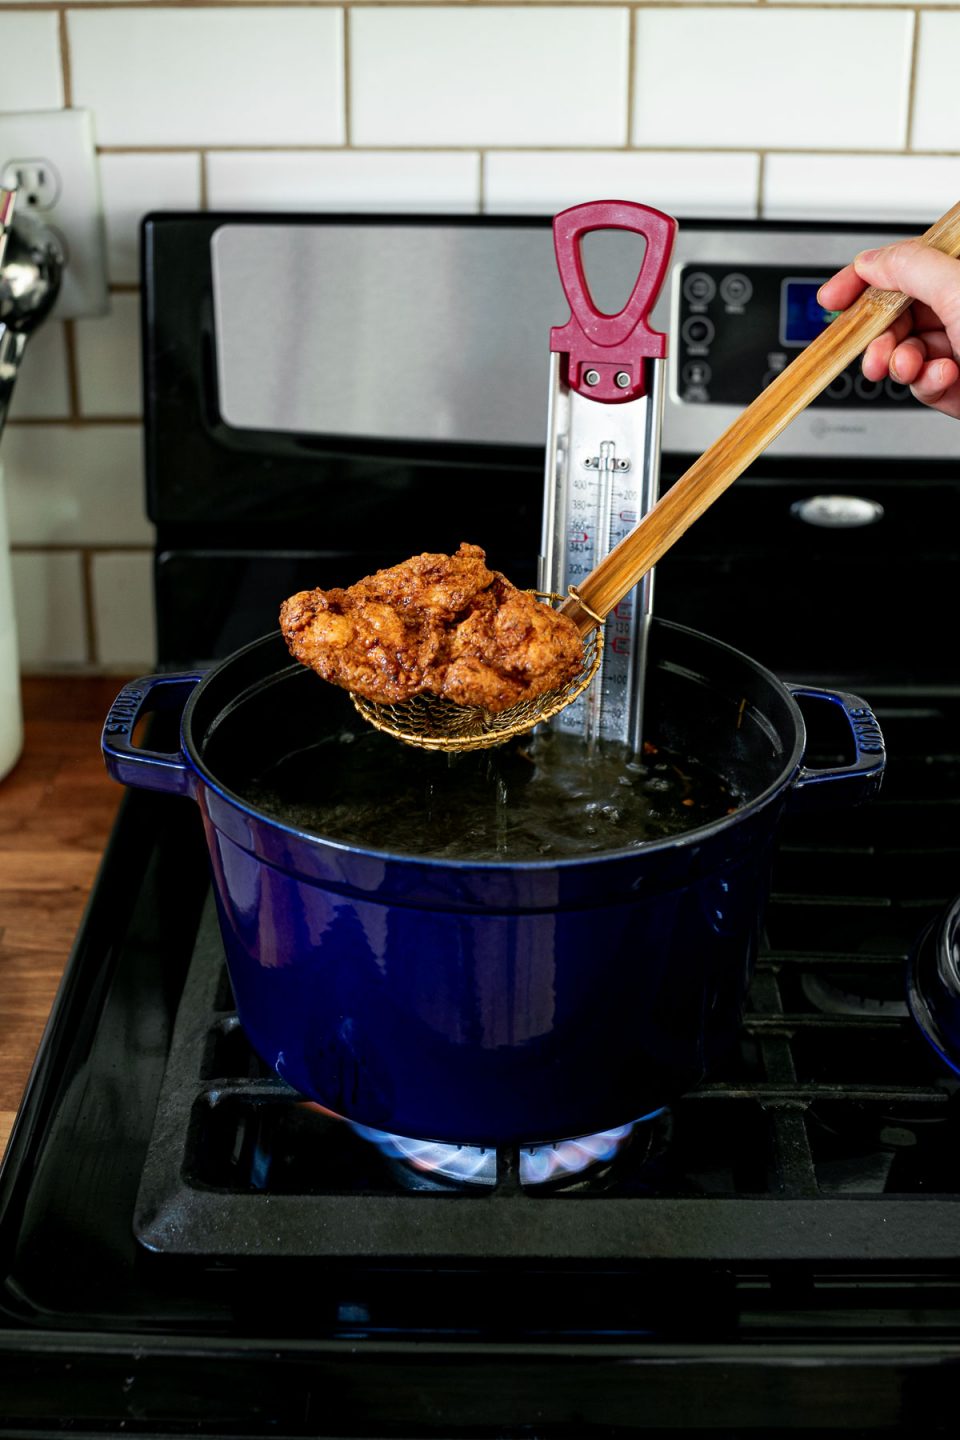
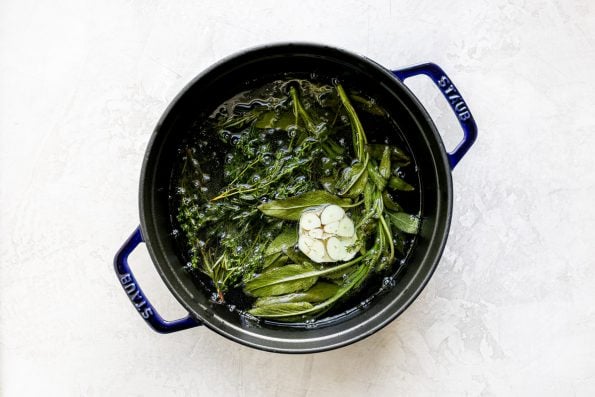
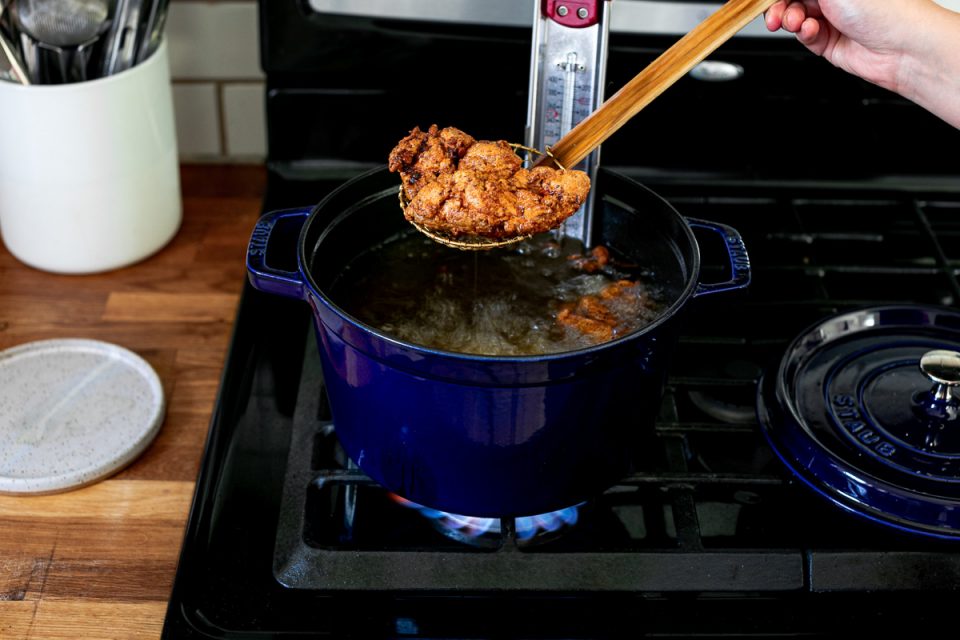
Preheat the oil (& infuse it with aromatics, while you’re at it!) ⇢ About 30 minutes before you’d like to start frying, preheat the oil. Add a couple quarts of oil to a heavy-bottomed 5-quart pot or Dutch oven. Take it to the next level ⇢ Add a head of garlic & a bunch of fresh poultry herbs to the pot, which will sizzle & perfume the oil with extra aromatic flavor as it preheats. Your kitchen will smell heavenly.
Fry the buttermilk chicken ⇢ Carefully slide the breaded chicken into the hot oil. Fry until crispy, golden brown, & cooked through (at which point an instant-read thermometer inserted in the thickest part of the chicken registers a safe 165 degrees F). You just made homemade fried chicken…congrats!!!
A few tips & tricks:
- Equipment matters! Having the right equipment makes a world of difference in making homemade fried chicken a fun, stress-free, & easy kitchen project. A tall cocotte is amazing for frying; it’s built to retain heat well & its tall sides help to minimize splatters & eliminate boil overs. Other useful frying equipment: a candy thermometer, an instant-read thermometer, & a spider strainer.
- Oil temperature is crucial: Think of frying as an active cooking method – you need to actively monitor the oil temperature as you fry & actively adjust the heat under the pot to maintain your target frying temperature.
- Take your time & have fun with it! Fry in batches as needed – frying too many pieces of chicken at a time will naturally lower the oil temperature, which is difficult to rebound from.
Other Homemade Fried Chicken FAQs:
What is the best chicken to use for fried chicken?
The best chicken to use for fried chicken is the highest quality chicken accessible to you, plain & simple.
A case for boneless, skinless fried chicken: Fried chicken purists will say you should always opt for bone-in, skin-on chicken parts for deeper, richer flavor & extra juiciness. I like to use boneless, skinless chicken thighs &/or breasts, which is just a matter of personal preference. When I make fried chicken, it’s usually just for Chris & myself, & one of us typically opts to make a fried chicken sandwich, which is much easier to eat with boneless, skinless fried chicken.
What is the best oil for deep frying chicken?
I am partial to peanut oil, though you can use any oil with a higher smoke point typically used for frying (e.g. vegetable, safflower, canola, etc.). Steer clear of pressed oils such as olive oil & avocado oil.
What should the oil temperature be for deep frying chicken?
For this recipe, you’ll aim to maintain a consistent frying temperature of 325-350 degrees F. Use a candy thermometer to keep an eye on the oil temperature as you fry, & actively increase or decrease the heat under the pot to keep the temperature within this range. Work in batches as needed – frying too many pieces of chicken at a time will naturally lower the oil temperature, which is difficult to rebound from.
How long do you deep fry chicken?
For this recipe, 7-8 minutes is the sweet spot for perfectly golden brown & crispy fried chicken. Again, this recipe calls for small-to-medium boneless, skinless chicken parts. Check the Recipe Notes for more guidance in frying larger &/or bone-in, skin-on parts.
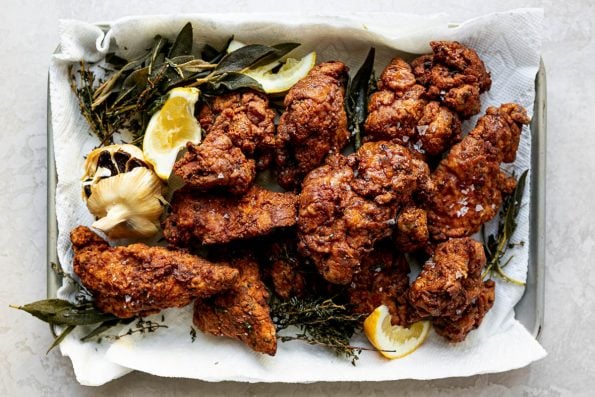
How to keep fried chicken crispy?
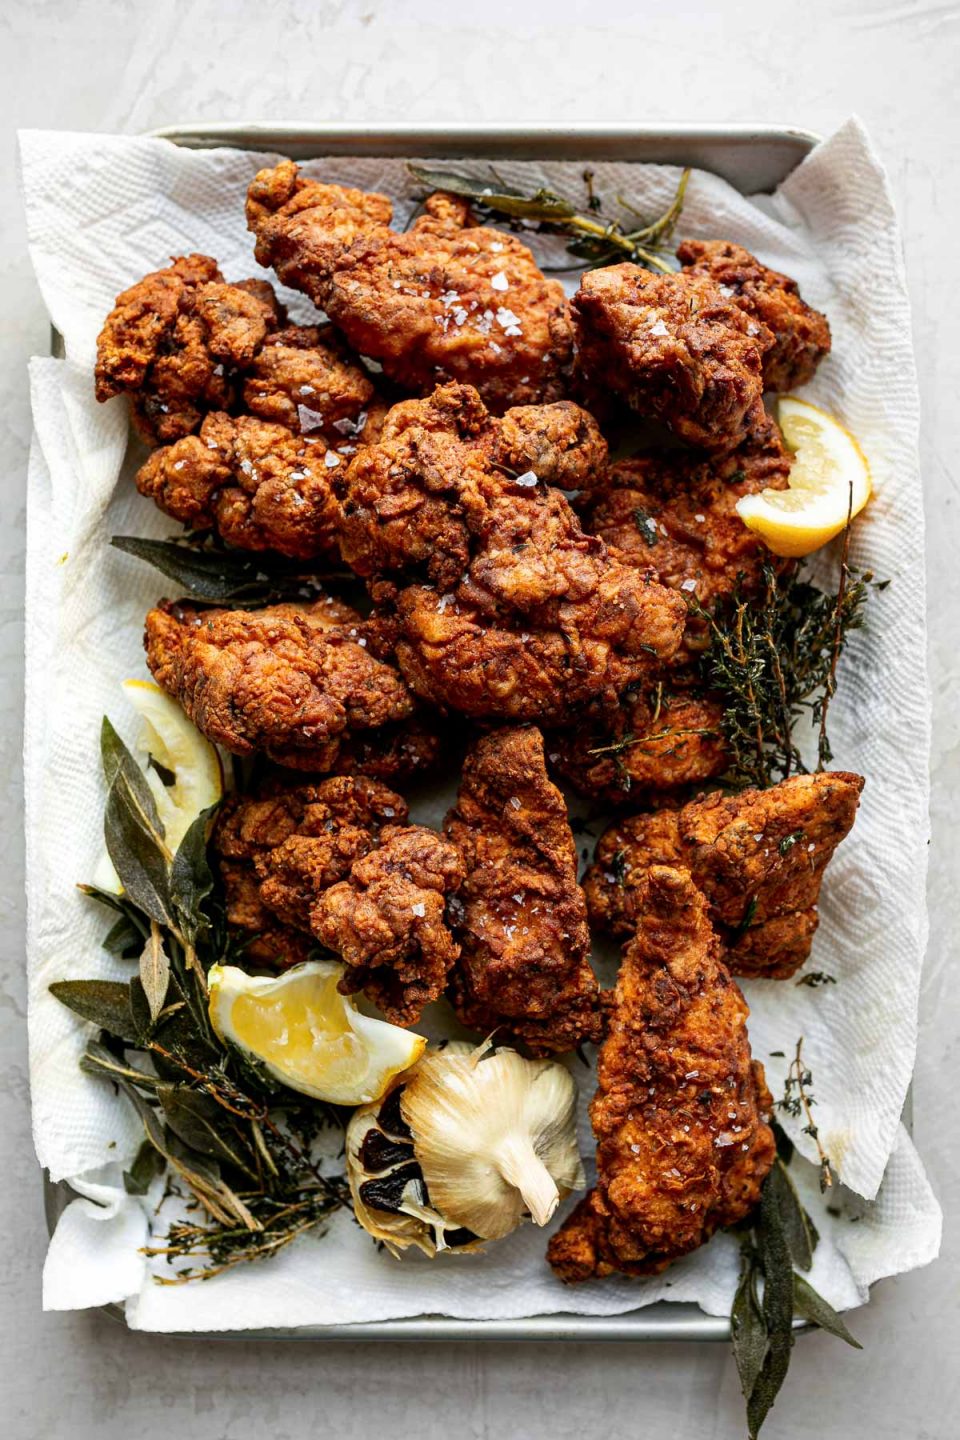
Once the chicken is fried, transfer it to a paper towel-lined sheet pan or plate. This soaks up any excess oil, leaving crispy chicken only! Crispy fried chicken is best served fresh, though you can revive some of its crispiness with proper reheating. Check the Recipe Notes for more guidance.
I cannot wait for you to try this Favorite Buttermilk Fried Chicken! It’s my absolute favorite, & I’m positive you’re going to love it too. If you do give it a try, be sure to let me know! Leave a comment with a star rating below. You can also snap a photo & tag @playswellwithbutter on Instagram. I LOVE hearing about & seeing your PWWB creations! Happy cooking! ♡
Print
Favorite Buttermilk Fried Chicken with Fresh Herbs & Garlic
- Prep Time: 30 minutes
- Cook Time: 30 minutes
- Total Time: 60 minutes (includes inactive time)
- Yield: serves 6-8 1x
- Category: Main Dishes, Chicken Recipes
- Method: Stovetop, Deep Fried
- Cuisine: American
Description
Homemade fried chicken has never been so delicious! This is my all-time favorite Buttermilk Fried Chicken – brined chicken is quickly soaked in buttermilk & dusted with flour before frying in garlic- & fresh herb-infused oil. The resulting fried chicken is absolutely juicy & tender, intensely flavorful, & ridiculously crispy. Absolutely perfect, in absolutely every way!
Ingredients
- 2–3 pounds boneless, skinless chicken breasts or thighs (see Recipe Notes, below)
- simple poultry brine, below
- poultry spice blend, below
- 2.5 quarts frying oil
- 1 head garlic, halved crosswise
- 3/4-ounce pack fresh poultry herbs (see Recipe Notes, below)
- 2 cups buttermilk (see Recipe Notes, below)
- 1 large egg
- 2 cups all-purpose flour
- 1 teaspoon baking powder
for the simple poultry brine:
- 4 cups hot water
- 2 tablespoons kosher salt
- 2 tablespoons brown sugar
- 1 tablespoon whole peppercorns
- 2–4 dried bay leaves
- optional: 8-10 sprigs fresh thyme
for the poultry spice blend:
- 1 heaping tablespoon garlic powder
- 1 heaping tablespoon onion powder
- 1 heaping tablespoon smoked paprika
- 2 teaspoons dried thyme
- 2 teaspoons kosher salt
- optional: 1 -2 teaspoons cayenne pepper
Instructions
- Optional: Brine the chicken: To a large bowl or resealable bag add the simple poultry brine ingredients – hot water, kosher salt, brown sugar, whole peppercorn, bay leaves, & fresh thyme (if using). Whisk to combine. Add the chicken to the brine, ensuring all pieces are submerged. Cover or seal & transfer to the refrigerator to brine for 12-72 hours. About 1 hour before you’d like to start frying the chicken, remove from the refrigerator & set on the counter to allow the chicken to come up to room temperature.

- Preheat the garlic- & herb-infused frying oil: About 30 minutes before you’d like to start frying the chicken preheat the oil. Fit a heavy-bottomed 5-quart pot or Dutch oven with a candy thermometer to accurately monitor the oil temperature. Add the frying oil, garlic, & fresh poultry herbs to the pot. Preheat over high or medium-high heat until the thermometer registers 300 degrees F. Use a spider strainer to carefully transfer the fried aromatics to a plate or bowl. Reduce heat to medium-high or high until the thermometer registers 350 degrees F, at which point you’re ready to begin frying the chicken.
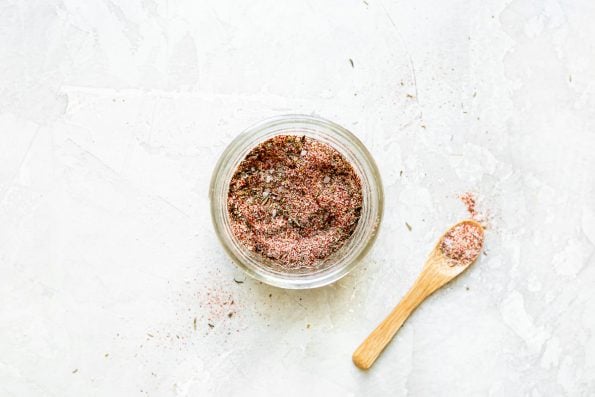
- Mix poultry seasoning: Meanwhile, as the oil heats, prep the poultry seasoning. Combine all listed ingredients – garlic powder, onion powder, smoked paprika, dried thyme, kosher salt, & cayenne pepper (if using) – in a jar or small bowl. Whisk or shake to combine. Set aside or store sealed on your spice rack for up to 1 month.
- Prep chicken for frying: Meanwhile, as the oil heats, prep the chicken for frying. Remove the chicken parts from the brine, using paper towel to pat them as dry as possible. In bowl or shallow container, whisk together buttermilk, egg, & 2 tablespoons of poultry seasoning. In second bowl or shallow container, whisk together flour, baking powder & remaining 2 tablespoons of poultry seasoning. Working in batches, dredge the chicken. Submerge the chicken in the buttermilk mixture, then transfer to the dry flour mixture & coat completely, shaking off any excess buttermilk & flour as you go. Transfer the breaded chicken pieces to a large plate & continue with the remaining chicken parts.
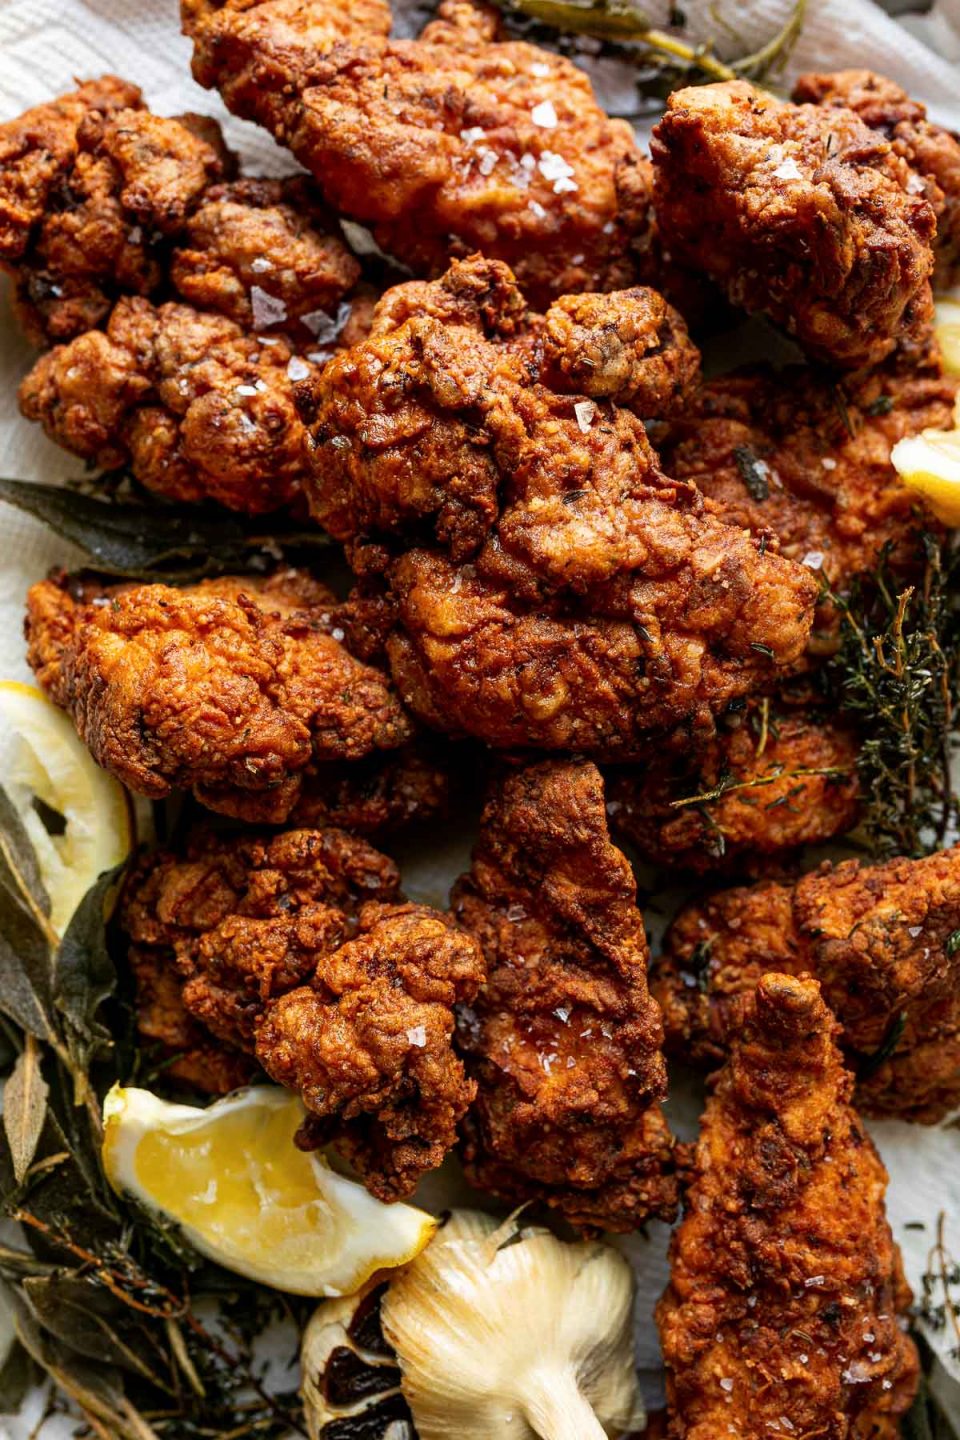
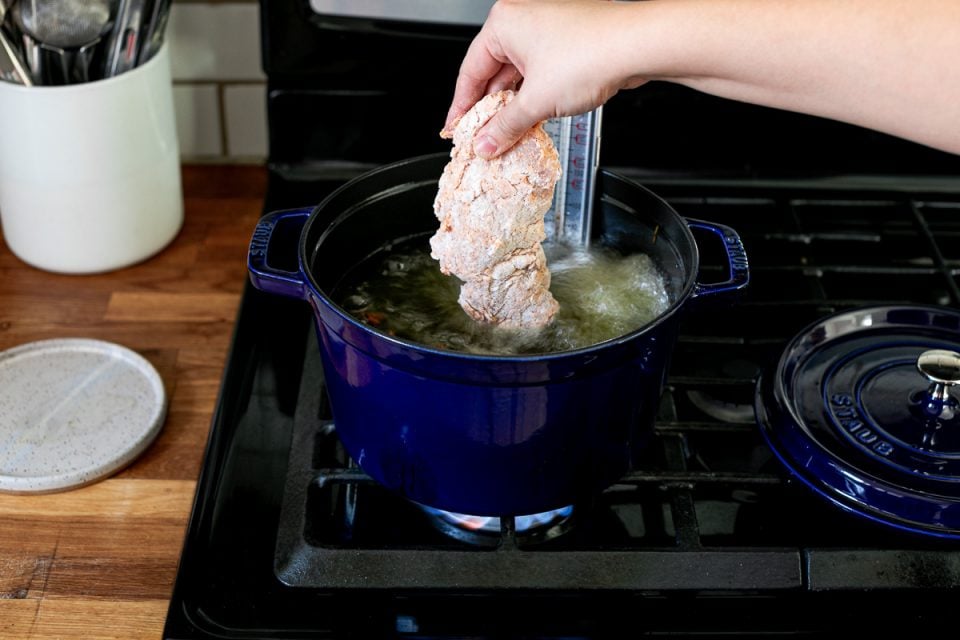
- Fry the buttermilk chicken: Working in batches of 5-6 pieces of chicken at a time, carefully slide the breaded chicken into the hot oil. Adjust the heat as needed to maintain the oil temperature at a steady 325-350 degrees F. Fry the chicken for 7-8 minutes until crispy, golden brown, & an instant read thermometer inserted in the thickest portion of each piece registers 165 degrees F. Use a spider strainer to carefully transfer the fried chicken to a plate or bowl. Repeat the frying process with all remaining breaded chicken.

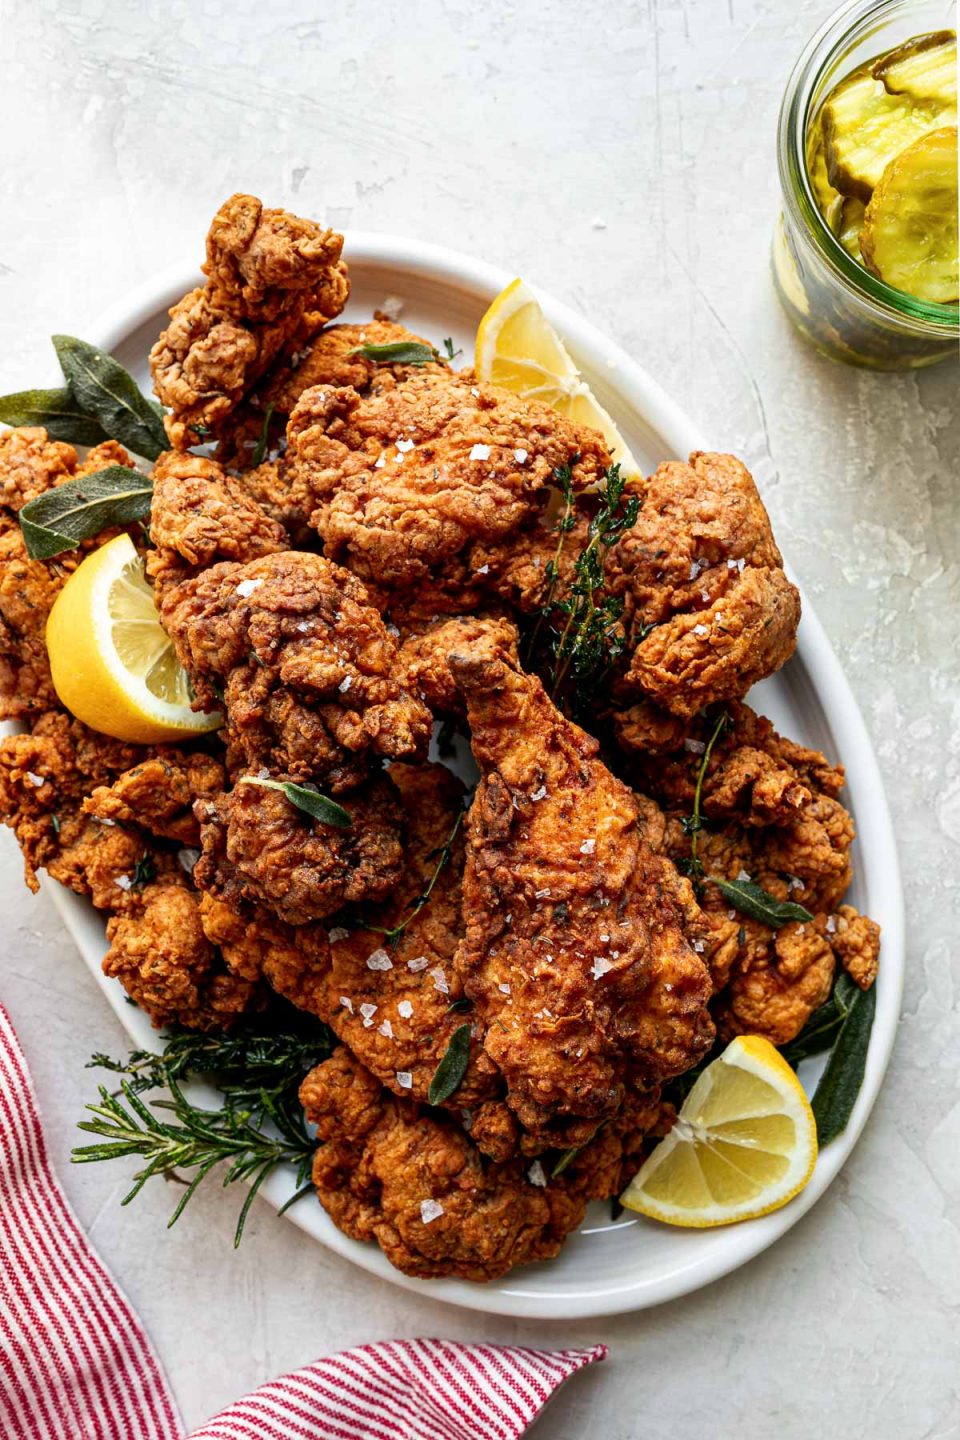
- Serve the buttermilk fried chicken immediately, with the spent crispy herbs, flaky sea salt, & lemon wedges. Enjoy!


Equipment
 Buy Now →
 Notes
- Chicken: The size of the chicken pieces used plays a crucial role in how long it takes the chicken to fry. I always err on the side of smaller or medium boneless skinless thighs or chicken breasts when I make this fried chicken recipe, & I halve chicken breasts at an angle crosswise to create 2 thinner pieces of about the same thickness as the chicken thighs. This is what the fry temperature & fry time indicated in the Recipe Directions, above, reflects. If your pieces of chicken are on the larger side or if you opt to use bone-in, skin-on parts, you’ll want to reduce the frying temperature slightly (try 300-325 degrees F) & increase cooking time (which will vary based on the size of your chicken, use an instant-read thermometer to check for doneness & adjust temperature/timing for your subsequent batches).
- Poultry herbs: Rather than buying fresh herbs individually, many grocery stores that sell fresh herbs also carry a “poultry blend” consisting of fresh rosemary, sage & thyme. If you prefer to purchase herbs individually (or you have a bountiful herb garden!), you can create your own “poultry blend” with 2-3 sprigs fresh rosemary, 8-10 fresh sage leaves, & 8-10 sprigs fresh thyme.
- Buttermilk substitute: If you do not have buttermilk on hand, you can make a quick substitute for this buttermilk fried chicken recipe by adding 2 tablespoons lemon juice or vinegar to a scant 2 cups milk. Stir to combine & let the mixture sit for a minute to thicken slightly.
- Storage & Reheating: Crispy buttermilk fried chicken is best served fresh, though leftovers will keep in an airtight container in the refrigerator for up to 3 days. The best way to reheat is to toast them in the oven or in an air fryer.
- Reheating in an oven: Preheat the oven to 425 degrees F. Place the buttermilk fried chicken on a baking sheet and bake for 3-4 minutes per side, until toasty & warmed through.
- Reheating in an air fryer: Preheat the air fryer to 375 degrees F. Place the buttermilk fried chicken in the air fryer basket & air fry for 2 minutes per side, until toasty & warmed through.
- 10-Minute Meal Prep: While this buttermilk fried chicken is a slightly more hands on recipe, you can make day-of frying a little bit easier by prepping parts in advance. To prep, brine the chicken & mix up the spice blend. At dinnertime, all you have to do is dredge & fry – easy!
- Brine the chicken according to Step 1 of Recipe Directions, above, and store in a sealed container in the refrigerator for up to 3 days. (5 minutes active prep)
- Prep the poultry seasoning according to Step 3 of Recipe Directions, above, and store in a sealed container on your spice rack for up to 1 month. (5 minutes active prep)
Follow along with Plays Well With Butter on Instagram, YouTube, Facebook, and Pinterest for more unfussy recipes that pack a big punch of flavor!
Thank you so much for reading & supporting Plays Well With Butter & the companies I partner with to keep bringing you great original content. I only feature brands & products I truly love & use on the reg in my own home. All opinions are always my own!