So I made you something that I’m *pretty sure* you’re going to love.
Lolololololololz. jk.
I’m absolutely certain you’re going to love these s’mores bars.

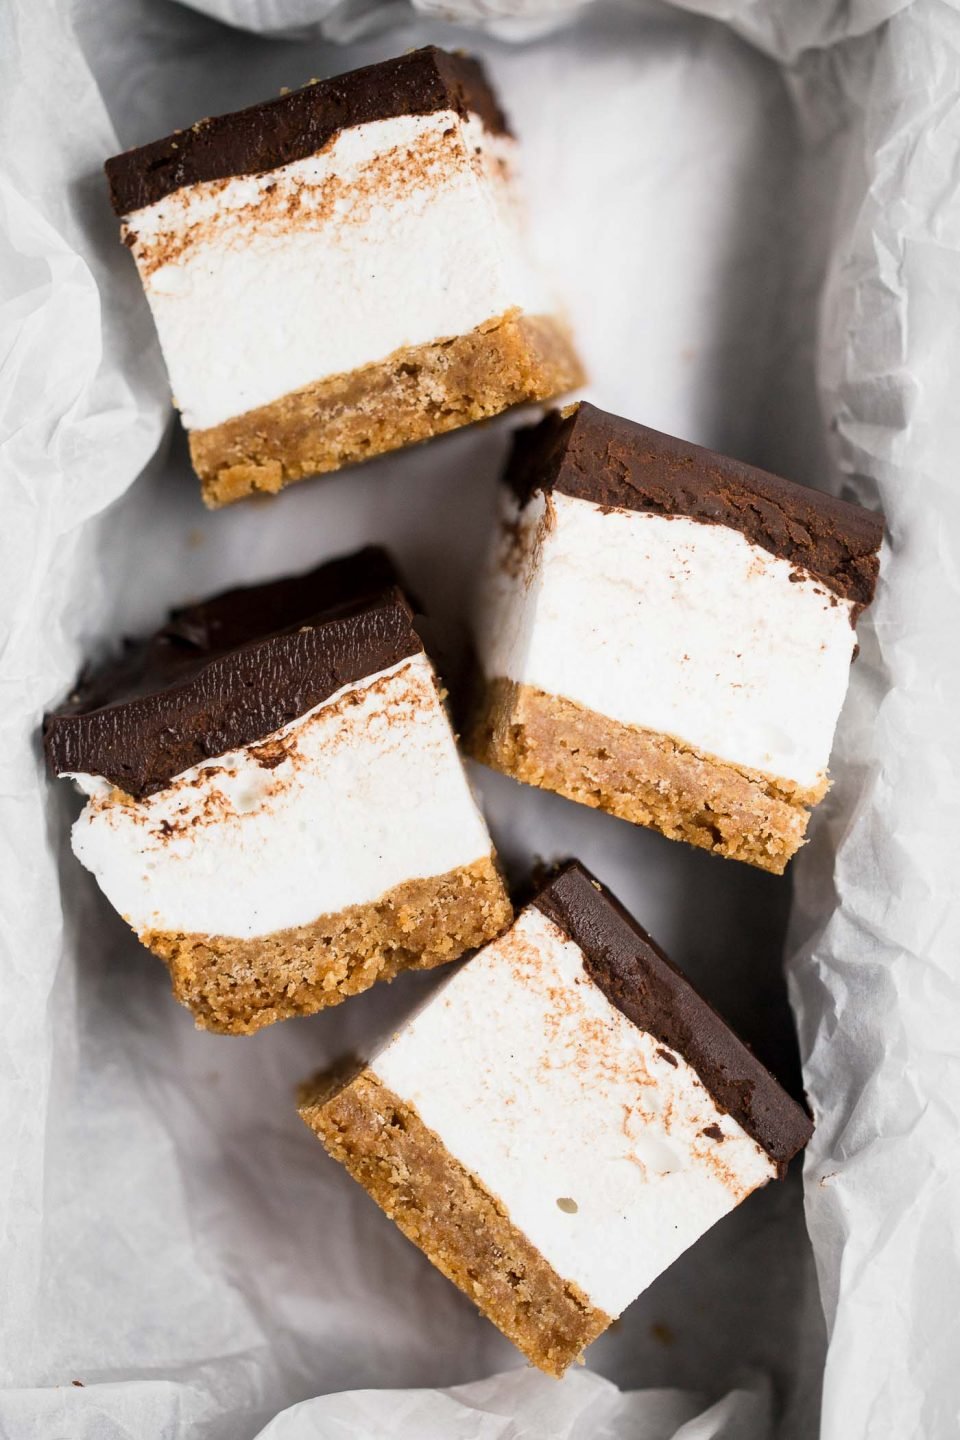
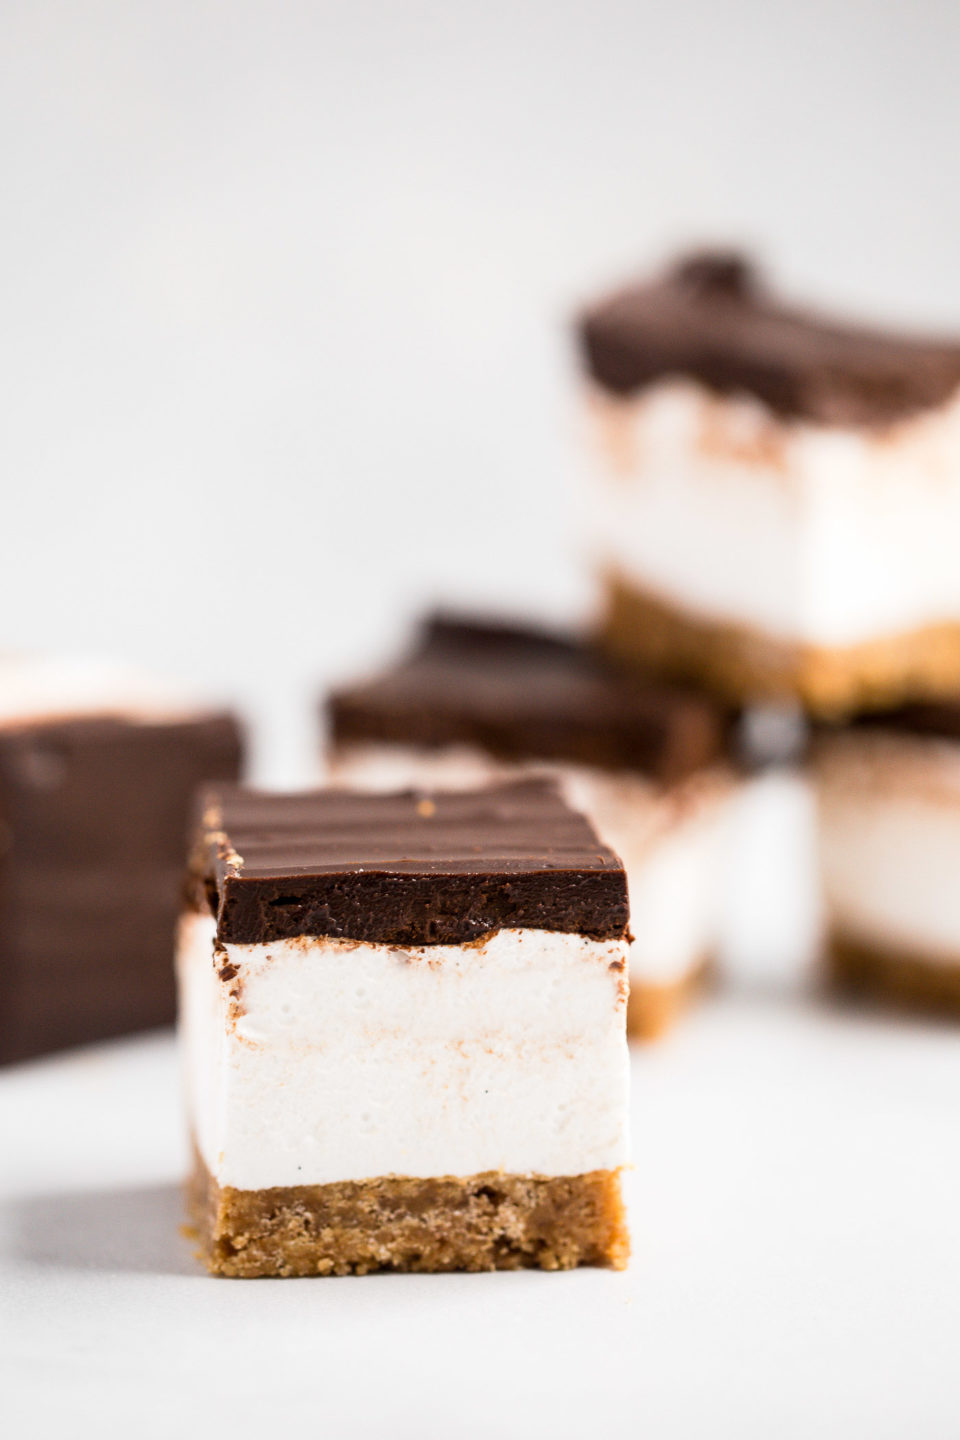
There is nothing not to love about these bad boys. By definition, they are pretty much everything you could ever want out of a dessert: buttery graham cracker crust, fluffy homemade vanilla bean marshmallow, & a thick layer of salted dark chocolate ganache.
I’ve had this recipe concept in my mind for almost a year now, ever since I tried the OMG bars at Baked & Wired in Georgetown. We went to D.C. last September because Chris was running a Ragnar. (aka a 200-mile team relay race – doesn’t that sound like absolutely the most horrible thing imaginable?!) Being the supportive wife I am, I accompanied him to cheer him on.
But in actuality, I spent the time he was running perusing Georgetown & eating cupcakes by mahself (#wifeoftheyear).
The OMG bars at Baked & Wired are basically a fancied-up s’more: layers of graham cracker crust, homemade marshmallow, & fudgy ganache. Eating an OMG bar at Baked & Wired was borderline life-changing. They’ve been on my mind ever since, & I knew I had to take a crack at them for PWWB this summer.
& guys? these s’mores bars are SO good. like, SO good.
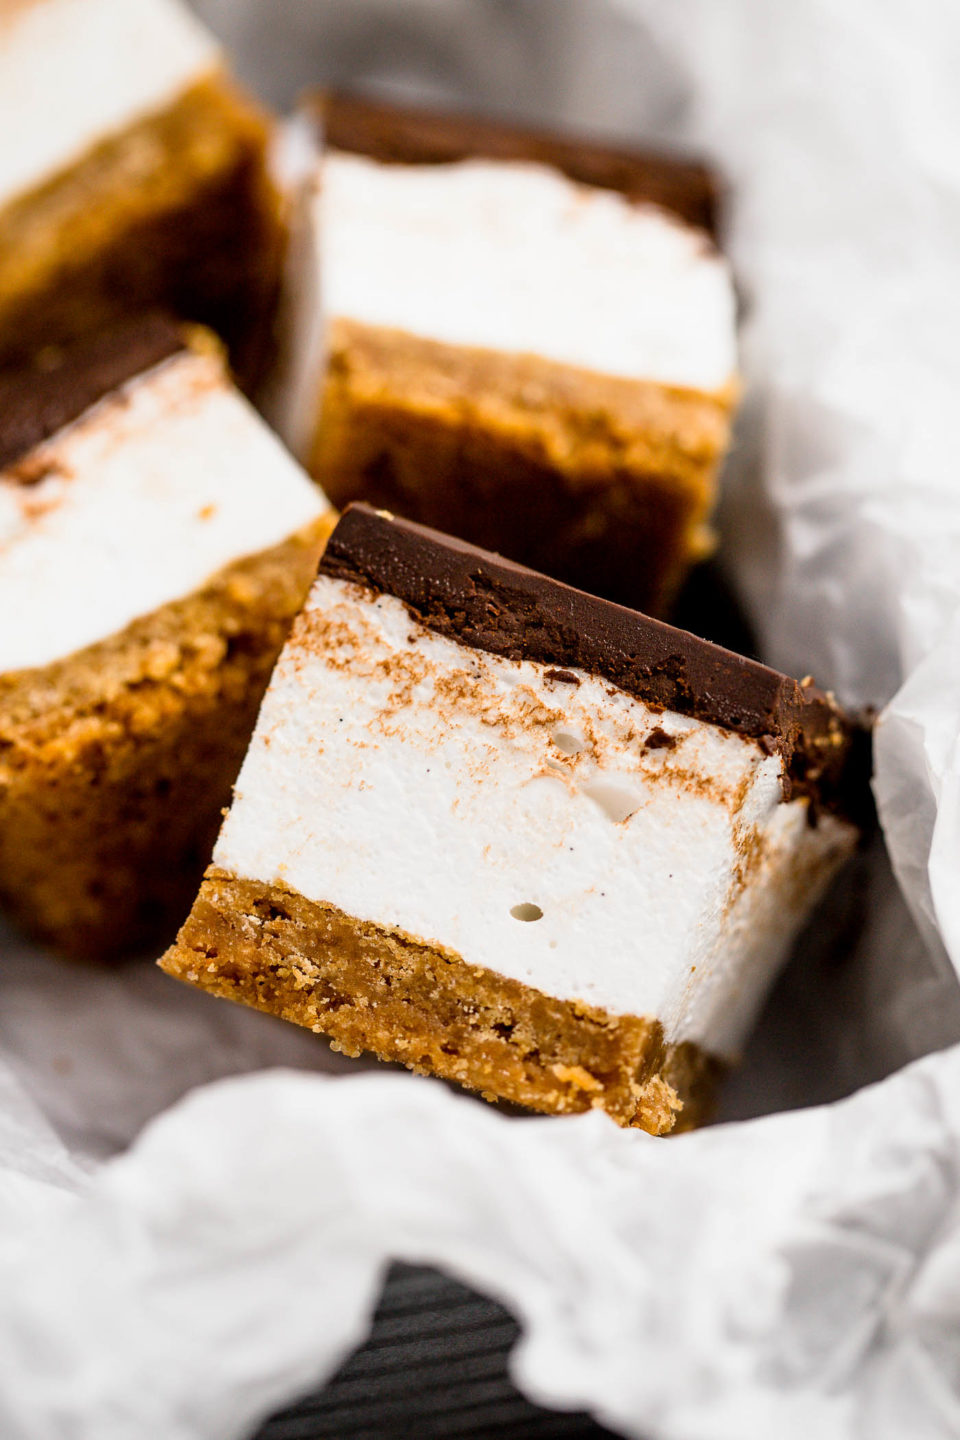
The combination of graham cracker + marshmallow + chocolate is pretty tough to beat, but these pretty little s’mores bars take s’mores to the next level.
But in true PWWB fashion, the best part of these s’mores bars (um, other than the fact that they’re s’mores bars!) is that they’re actually really easy to throw together. Majorly impressive on the presentation front, but majorly easy – a surefire combo for a winning recipe.
Let’s break it down:
- Graham cracker crust: aka melting some butter & stirring it into some graham cracker crumbs. This recipe is written to yield a pretty thick layer of graham cracker crust, because I like these s’mores bars to have a sturdy base. I think they’re easier to eat that way. but you could reduce the amount of crust if you’re looking to make s’mores bars with proportions more closely to that of traditional s’mores.
- Homemade marshmallow: admittedly it sounds super fancy & intimidating, but marshmallow is really the simplest candy to make. Plus, you will not believe how much fluffier homemade marshmallows are than store-bought. The difference is astounding, & well worth the minimal work. You do need a candy thermometer, but aside from that if you can boil some sugar water & set your stand mixer to whisk at its highest setting, you’ll be able to make homemade marshmallow no problem. I throw the beans of 1 vanilla pod into mine (because why not!), but you could get totally crazy with flavors here. Some cocoa powder for chocolate marshmallow would be fab. As would swirls of raspberry preserves (omg) or salty caramel (omg omg).
- Salted dark chocolate ganache: you’ve seen it already once this summer in my turtle sundae ice cream pie, it’s my go-to topping. Microwave up some chocolate & cream, & stir, stir, stir for the fudgiest layer of dark chocolate ever.
So the moral of this story? If you’re ever in D.C., you need to grab an OMG bar at Baked & Wired. If you’re ever in Minneapolis, consider this your official invitation to give me a call & come over for some s’mores bars.

But in the meantime, you need to take a crack at this recipe yourself.
& then you need to try your hardest not to eat the entire pan of s’mores bars.
I triple dog dare ya.
Print S’mores Bars with Homemade Vanilla Bean Marshmallow
- Prep Time: 20
- Cook Time: 15
- Total Time: 1440
Description
Everyone’s childhood summer favorite gets a major update in this recipe for s’mores bars. These s’mores bars sandwich a thick layer of fluffy homemade vanilla bean marshmallow in between graham cracker crust and salted dark chocolate ganache. Your favorite campfire treat will never be the same!
Ingredients
- 1/2 cup (1 stick) butter, melted
- 1 1/2 cups graham cracker crumbs, finely crushed
- 1 1/4 cups granulated sugar, divided
- 1 teaspoon kosher salt, divided
- 2 tablespoons (2 packets) gelatin
- 2/3 cup light corn syrup
- 1 vanilla bean, split & beans removed
- 5 ounces dark chocolate, finely chopped
- 1/4 cup heavy cream
Instructions
Make the graham cracker crust
- Preheat the oven to 350 degrees. Line an 8×8 baking dish with parchment paper. Set aside.
- In a medium bowl, combine the melted butter, graham cracker crumbs, 1/4 cup granulated sugar, and 1/4 teaspoon kosher salt. Stir to combine thoroughly.
- Transfer the graham cracker crumb mixture to the 8×8 baking dish. Spread the crumbs, so they cover the surface of the bottom of the pan. Firmly press the crumbs down, forming a compact layer.
- Bake for 8-10 minutes, until crust is slightly golden and fragrant. Remove from the oven and set aside, allowing the crust to cool completely.
Once the graham cracker crust is completely cooled, make the homemade marshmallow
- In the mixing bowl of your stand mixer, add the gelatin and 1/3 cup water. Stir to combine and set aside.
- In a medium pot fitted with a candy thermometer, combine the remaining 1 cup granulated sugar, 1/4 teaspoon kosher salt, corn syrup, and 1/3 cup water, whisking to combine. Heat the mixture over medium high heat, stirring occasionally, for about 7 minutes, until the candy thermometer reaches 240 degrees.
- Carefully transfer the hot sugar mixture into the stand mixer mixing bowl with the gelatin. Beat, using the whisk attachment of your stand mixer, on high.
- The mixture will gradually become opaque and beautifully glossy. Add in the vanilla beans and continue to mix, until the mixture forms soft peaks and gently pulls strands away from the side of the bowl as it mixes. This will take a little bit of time – about 10-15 minutes!
- Using a nonstick spatula, transfer the marshmallow to the pan, on top of the graham cracker crust. Use the spatula to spread the marshmallow into a smooth layer.
- Rest uncovered for 8 hours, or overnight, so the marshmallow sets & dries.
Top with salted dark chocolate ganache
- Melt dark chocolate in the cream with the remaining 1/2 teaspoon of kosher salt in the microwave, heating in 30 second intervals and mixing thoroughly between each interval. Once the chocolate is completely melted, continue to stir for an additional minute or two so the chocolate takes on a beautiful sheen. The texture should be glossy and smooth.
- Pour the chocolate ganache over the top of the marshmallow layer, forming a uniform chocolate layer, about 1/4 inch thick.
- Rest for another 4 hours, or up to overnight, so chocolate sets completely.
Once the chocolate sets, cut the bars
- Lift the bars (using the parchment paper) out of the pan. Gently pull the parchment away from the bars. The marshmallow will stick, but you can use your fingers or a sharp knife to help pull it away from the parchment. Once you get a small part of the marshmallow to unstick, the rest should pull away relatively easily.
- Using a sharp knife, cut into 16 bars. Enjoy!
Nutrition
- Serving Size: 12


These were good. But I didn’t get that s’mores vibe. I think maybe toasting the top prior to adding the ganache would have made them much better. Also I used semisweet choc for the ganache and added flaked salt to the top which was delish. Thanks for the recipe!
Toasting the top is a great idea, Lisa! Glad you still enjoyed the bars! 🙂
These bars are delicious! Definitely a fan favorite!
This is a long shot, but is there any way they can last two weeks?
Also, how do you make sure the chocolate ganache actually sets? Mine didn’t and they were still yummy, but wondering how I can get it to set next time.
Thank you for this wonderful recipe!
Hi Michelle, so happy to hear you love these bars as much as we do! Unfortunately, the bars won’t last that long! You could always try freezing some and see how they thaw back out – if so, make sure to report back!! 🙂
Best way to store? Fridge? Counter?
You can store them in an airtight container at room temperature!
I made these tonight. Haven’t tried them yet since I just finished the marshmallow layer. How do you cut them to make clean edges?
Hi Michelle, the bars are easy to cut cleanly with a sharp knife! Can’t wait to hear what you think! 🙂
These are phenomenal. I’ve made them three times in the last two weeks. I have another batch being made now. Super easy and so delicious!
Three times in two weeks is such high praise! Thanks for taking the time to leave a review, Michelle!
These look amazing! I just made them, but the chocolate still needs to set for a few hours, so I haven’t tried them. I can’t wait!
S’mores are my daughter. And I wanna make these for a bridal reception. What is the shelf life? Could I make them three days in advance and would they be OK?
Hi Ann, baked goods are always best within a day or two of baking, but 3 days should be just fine! Can’t wait to hear what you think of them!
I’m going to make the smores bars this weekend!! I don’t have vanilla beans for the marshmallows. How much extract would be equivalent? And will it affect the marshmallow texture?
Hi Tina, 1 tsp of vanilla extract should work great, and shouldn’t affect the texture!
This looks so good! What a great combination of flavors!
Can’t go wrong with s’mores!! 🙂
I made these yesterday and was surprised how easy the marshmallow was to make. The only problem with this recipe is the marshmallow sticking to the parchment. Next time, I’ll try a light spray of non-stick spray on the parchment after baking the crust. Also lightly sprayed my knife for cutting the bars. Also used 200g of semi-sweet chips and 75 grams of butter melted over a double boiler for the topping. Totally worth the effort!
Hey Sheila! So glad to hear the recipe turned out great for you! Non-stick spray is a great way to help with the stickiness 🙂
Hi! Should you “rest” the bars in the fridge or, covered on a counter?
Looks yummy!
Hi Kate! These can rest at room temperature, lightly covered on the counter 🙂 Hope that helps & that you try soon!
This looks amazing & SO FUN! My daughter loveS marshmallows & I’m so excited to make this dessert. When you say rest for 8 hours you mean refrigerator correct?
Thanks for sharing!!!
Jamie
I love baked and wired OMG bars and this recipe is good – but missing the caramel layer that comes in the OMG that Baked and wired makes
Hi Amilia, so glad you enjoyed! While the recipe is inspired by Baked & Wired it’s not exactly the same – feel free to customize if you choose!
These look soooo good!! Store-bought marshmellows contain so much bad stuff and I never want my kids to eat them. I definitely have to try making yours!
Hope you give them a try soon, Andrea! They are fun to make & much easier than you’d think!!
These were amazing! Thank you so much. The meringue was a bit tough on my hand mixer but was do able. Hands down a fairly easy and detailed recipe to follow. Huge hit in my house!
Hi Jess! So glad you enjoyed & that these were a hit! Thank you for sharing!!
I don’t have a stand mixer… it’s not in my budget just yet! But could I make these with a hand mixed? They look soooo good!!!
Yes, you can definitely make the meringue with a hand mixer, Sasha! I hope you’re able to try them – they are SO good!!! xx
Hey Jess. I know the homemade marshmallow layer would be heavenly but could I melt store bought marshmallows? Work had a hot chocolate bar today and there are tons are large marshmallows left over. Looking for something to make that isn’t Rice Krispies square. I’m not sure what the consistency will be once the melted marshmallows come to room temperature. 🤷🏻♀️
Hey Lori! I’ve never tried this, but I think it should work. It might not be as smooth as a layer of fresh meringue, but I think it’ll work!
I’ll give it a try & let you know the outcome! 🤞🏻
Good luck!
I’m sooooo excited that you have a recipe for these! I live in DC and am frequently the “omg bar fairy” for friends and family. I cannot wait to make these! Any chance you have a recipe for a caramel to go on them as well, since there’s usually an amazing layer between the graham and marshmallow?!
Thanks for the recipe! So excited to make them!
These look amazing! Definitely on my list to make!
let me know how it goes, stephanie! you’re going to love them!!! xo
UMMM OMG! I’ve been drooling over these since you posted and I soooo want to make them for a party. Like, really badly. Also, this is so weird, but I’m really digging all of your crisp slice marks. Is that weird?
omg! i was totally planning to edit them out but decided they were too pretty. thank you, thank you! please do make them & tell me how it goes!!! xx
Wowzas!! These look amazing!! Any chance you tried taking a mini torch to the side of the marshmallow without melting all the chocolate off? ?
hey aileen! thank you, and thank you for dropping in! i personally haven’t tried to toast the sides of the marshmallows, but i really don’t foresee an issue with the chocolate melting. it’s a pretty thick layer of ganache, & the marshmallow should toast up pretty quickly if you use a kitchen torch! give it a try and let me know how it goes!!! xx
ohhhhhhh my goodness. these look INCREDIBLE. like I need them in my life immediately.
do we just need to start menu planning for your visit soon?! xx
What brand or percentage of chocolate did you use?
Hi Janelle, any brand of high-quality dark chocolate (60% or higher) will work! Totally up to your own preferences 🙂
Great! Thank you for your reply. I want to make these for a bonfire this weekend.
Hope they turned out great for you!! 🙂
Yep, I need these in my life…like right now!
come on over, maria! i’ve got a big pan of them! =) if we ever do a sweet peas workshop, i’ll make some! xx
omg omg omg. I’m still so upset that I never ended up making it to baked & wired last month, but this TOTALLY makes up for it. These bars look un.freaking.real. and the perfect way to get my s’more fix since I sadly do not have a fire pit. Can’t wait to try theseee
eeeeeeek i hope you do!!! let me know how it goes – i think they’re JUST as good as the baked & wired bars!! xx