Description
Every special gathering with my family always involves dim sum. Whether it’s a birthday, holiday, or even just a summer evening at the cabin, you’ll always find us sitting around the table & nibbling for hours as we enjoy each other’s company.
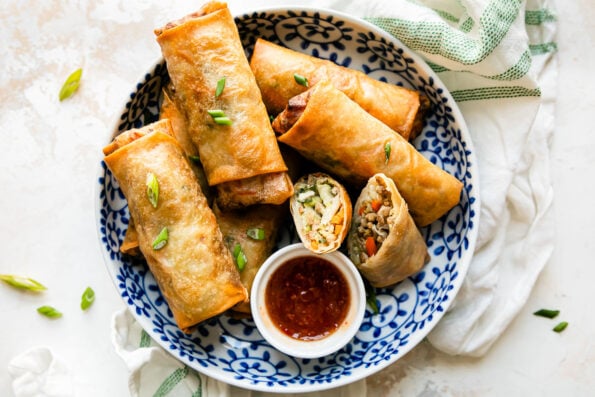
At our house, our dim sum spreads always include pork shumai, char siu pork, & some sort of stir fried noodles, but the star of the table is always the platter of Mom’s Pork Egg Rolls. They’re golden, crispy, & absolutely perfect!
There are 3 things that set Mom’s recipe apart from the rest. They’re…
- Seriously veggie-loaded! The pork filling is seriously juicy & succulent, but it’s also loaded with veggies like cabbage, carrots, & onions, each adding different layers of aromatic flavor & texture that makes the filling super satisfying & feel-good all at once.
- Shallow-fried to perfection! Rather than deep frying, which can be messy & a little overwhelming, Mom shallow fries her egg rolls, which is quick & always yields perfectly golden & crispy results.
- Perfect for dipping! A golden & crispy egg roll practically begs to be dipped in a tangy-sweet sauce, & Mom’s homemade duck sauce is our absolute favorite. It’s made with 3 pantry staple ingredients & has the perfect balance of flavor.
We’re thrilled to share this special family recipe with you, & it’s our hope that you enjoy it just as much as we do at our house. Be sure to check out the blog post, above, for more tips, tricks, & secrets to success, & watch the Youtube video below for step-by-step guidance. ♡ Happy cooking!
Ingredients
- ¾ pound ground pork
- ½ teaspoon sesame oil
- 1 teaspoon oyster sauce
- ½ teaspoon soy sauce
- ½ teaspoon kosher salt
- ¼ teaspoon white pepper
- ⅛ teaspoon garlic powder
- ⅓ head green cabbage, shredded (approx. 10 ounces or 4 ½ cups)
- 1 carrot, julienned (approx. 3 ½ ounces or 1 cup)
- ½ yellow onion, thinly sliced (approx. 2 ounces or 1 cup)
- 2 green onions, thinly sliced
- 1 package egg roll wrappers (approx. 15 wrappers, see Recipe Notes)
- 3 cups frying oil
for Mom’s duck sauce (our favorite egg roll sauce for dipping):
- ½ cup apricot jam
- ½ cup sweet chili sauce
- 1 teaspoon soy sauce
Instructions
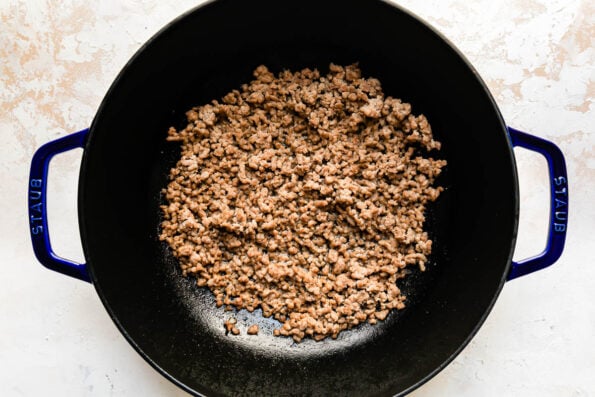
- Prepare the pork egg roll filling: Add the sesame oil to a large skillet over medium-high heat. Once the oil is hot & shimmering, add the ground pork & brown for 5-6 minutes. As the pork cooks, season with oyster sauce, soy sauce, salt, white pepper, & garlic powder, & use a wooden spoon to break it apart into fine pieces.
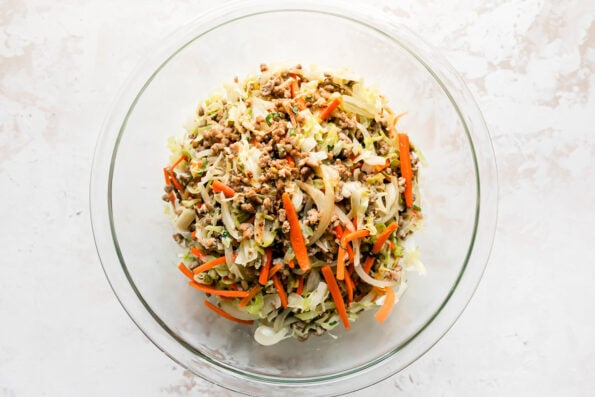
- Stir fry the vegetables: Once the pork is cooked through, add in all the vegetables. Stir to combine with the pork, then stir fry 3-4 minutes, until softened slightly. Remove the skillet from the heat & transfer the pork egg roll filling to a large bowl lined with paper towel. Set aside to cool.
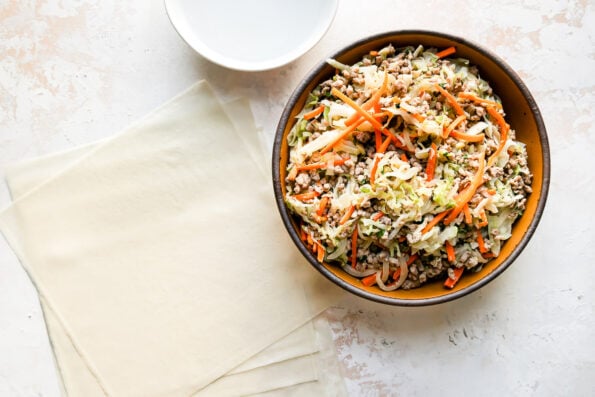
- Egg roll assembly prep: Line a quarter sheet pan with wax paper or parchment paper & set aside. Fill a small bowl with water. Place the pork egg roll filling, egg roll wrappers, & water within arm’s reach of where you plan to assemble the egg rolls.
- Assemble the egg rolls: Once the filling is cooled, place an egg roll wrapper on a work surface in front of you such that one of its points is pointing toward you, orienting it in a diamond shape. Spoon about ⅓ cup of the cooled pork egg roll filling on the center of the wrapper. Fold the point closest to you away, such that it folds over the egg roll filling. Fold the points to the left & right of the filling to the center. Roll the filling away from you towards the last point, creating an egg roll. Use your fingertips to brush a little water over the last point, then press it against the egg roll to seal. Be sure to fold & wrap as tight as you can – this is key to beautiful, restaurant-worthy homemade egg rolls! Transfer the egg roll to the prepared baking sheet & repeat until you’ve used all of the remaining pork mixture. Set the assembled egg rolls aside as you heat the frying oil, or transfer to a parchment lined airtight container & store in the refrigerator for up to 1 day. (You may have some leftover egg roll wrappers, which can wrap well & freeze for the next time you make egg rolls). [gallery size="full" ids="37377,37378,37380,37382,37384,37386"]
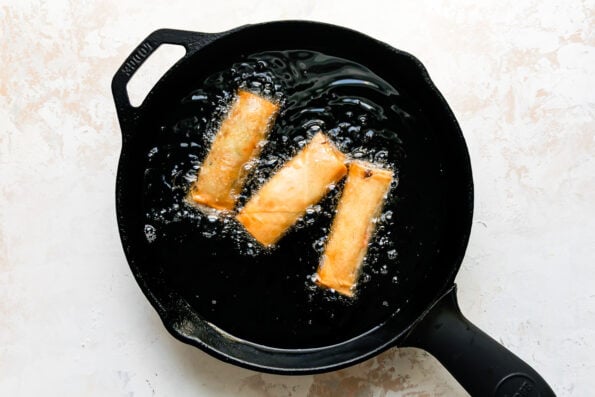
- Shallow fry the egg rolls: Add frying oil to a 10-inch skillet, filling it about halfway full. Preheat over medium-high heat, until the oil is hot (approx. 350-375 degrees F). Working in batches to avoid overcrowding the skillet, carefully place the egg rolls in the oil. Cook 1 minute – 1 minute and 30 seconds, until the bottom of the egg roll is golden, then flip & cook 1 minute longer, until the entire egg roll is golden & crisp. Carefully transfer to a paper towel-lined plate. Repeat frying until all egg rolls are cooked, allowing the oil to come back up to temperature between batches.
- Serving: Enjoy your egg rolls straight off of the stove while they’re still warm with Mom’s duck sauce as desired (combine all listed ingredients & season to taste). At our house, we most often enjoy egg rolls alongside an entire spread of other pupus & dim sum, like Mom’s pork siu mai dumplings, sesame chicken wings, char siu bao, & stir fried noodles. Enjoy!
Notes
- Ingredient & Equipment Notes:
- Egg roll wrappers: At my house, we always make these pork egg rolls using store-bought wrappers, which are readily available in the freezer aisle of a well-stocked Asian grocery store. Instead of regular egg roll wrappers, my mom often uses spring roll wrappers (pictured) since they fry a little more evenly, resulting in extra-crispy egg rolls. Feel free to use whichever you prefer! You may have some leftover wrappers, which can wrap well & freeze for the next time you make egg rolls.
- Easy frying set up for homemade egg rolls: Rather than fussing with deep frying, my mom always opts for a shallow fry set up for her homemade egg rolls. It requires less oil & results in much less mess! Any small, heavy-bottomed skillet works wonderfully.
- Storage, & Freezing:
- Storage & Reheating: Leftover steamed pork egg rolls will keep, stored in an airtight container in the refrigerator, for 3-4 days. Reheat in the microwave until warmed through. Or for best crunchy quality, reheat in 400° F air fryer for 4 minutes, flip over and air fry for another 3 minutes.
- Freezer Instructions: You can also freeze leftover egg rolls. Transfer the chilled fried pork egg rolls to a freezer bag & freeze for up to 3 months. Thaw overnight in the refrigerator, then reheat in the microwave until warmed through.
- Make-Ahead Pork Egg Rolls: While this pork egg rolls recipe is pretty straight-forward, preparing the pork filling & folding the egg rolls does take a little time – it’s kind of a kitchen project in that way! If you’d like to do a little prep in advance to cut down on active hands-on time when you fry your egg rolls, there are a few options:
- Make-Ahead Option #1: Prep the pork egg roll filling in advance. Prepare the egg roll filling according to Steps 1-2 of Recipe Directions, above. Transfer to an airtight container & store in the refrigerator for up to 3 days. The day you’d like to prepare your egg rolls, simply fill & wrap dumplings according to Steps 3-4, above, then proceed with shallow frying.
- Make-Ahead Option #2: Assemble the pork egg rolls in advance. Prepare the pork egg rolls according to Steps 1-4 of Recipe Directions, above. Transfer to a parchment or wax paper-lined airtight container & store in the refrigerator for up to 1 day. If cooking after storing in refrigerator, be sure that filling was well drained prior to assembly to avoid soggy egg rolls. Cook the egg rolls straight from the refrigerator according to Steps 5 of Recipe Directions, above, adjusting cook time by 30 seconds to 1 minute per side, as needed, to ensure golden, crispy results.
- Make-Ahead Option #3: Build a freezer stash! Prepare the pork egg rolls according to Steps 1-4 of Recipe Directions, above. Transfer to a parchment or wax paper-lined baking sheet & flash freeze the egg rolls solid (about 1 hour), then transfer to an airtight freezer container. Cook the egg rolls straight from the freezer (without thawing) according to Steps 5 of Recipe Directions, above, adjusting cook time by a few minutes per side to ensure golden, crispy results.

