
Description
The first time I tried to grill a steak was an EPIC fail. Our little charcoal grill wasn’t ventilating properly, & we optimistically waited around for hours before finally accepting that it simply wasn’t going to cook. I’ll never forget how defeated I felt in that moment.
All this to say…if this is your first time grilling steak, trust me, I understand how intimidating & overwhelming it can be. You’re in very good hands here – I’ve learned a lot about grilling steak perfectly in the time since!
This Seriously Perfect Grilled Steak recipe is the product of years of practice, testing, & tinkering. It results in what I consider the perfect grilled steak – one that is juicy & melt-in-your-mouth tender with beautiful grill marks & tremendous rich flavor.
There are 2 secrets to a perfectly grilled steak:
- Grilling with 2 zones of heat: Gentle indirect heat yields precise doneness + meltingly tender texture, while intense direct heat creates crave-worthy charred grill marks.
- Herb butter brush: A homemade basting brush made of fresh herbs drenches the steak in garlic butter just as it comes off the grill, infusing it with rich & herbaceous flavor.
We love this recipe so much. It yields perfect results every time & it’s simple enough for any night of the week yet it has major wow factor for special occasions & summer entertaining.
As always, read the recipe in full before you begin cooking so you have a sense as to what comes next. Everything goes pretty quickly once you begin grilling! Be sure to refer to the blog post, above, for extra guidance on doneness & grilling steak tips. Happy grilling! ♡
Ingredients
- 2 (two) 1 1/4 – 1 1/2-inch steaks of choice – ribeye, New York Strip, T-bone, etc. (see Recipe Notes, below)
- kosher salt & ground black pepper, to season
- 4 long sprigs fresh rosemary
- 10-15 long sprigs fresh thyme
- 3 tablespoons unsalted butter, sliced into 3-4 pieces
- 4 cloves garlic, smashed open
Instructions
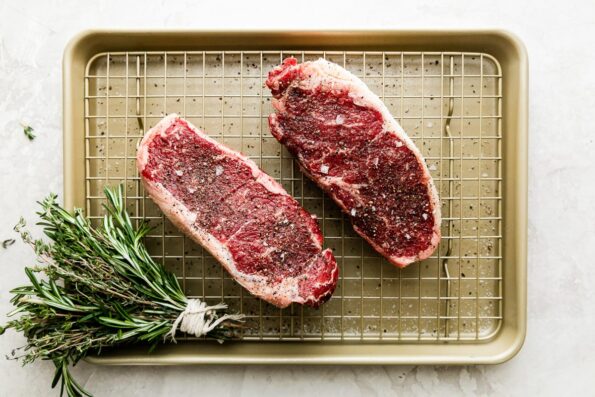
- Steak prep: At least 2 hours or up to 2 days before you’d like to make your grilled steak, prep the steak. If your steak has a fat cap or excess fat, use a paring knife trim it off (as it renders on the grill, it will cause unwanted flare-ups). Liberally season all sides of the steak with kosher salt. A good rule of thumb is 1 teaspoon per pound of meat. Loosely wrap the steak in paper towel. Place on a rack fitted in a rimmed baking sheet. Set in the coldest area of your fridge. 30 minutes before grilling the steak, remove from the refrigerator & set on the counter to come up to room temperature as the grill preheats.
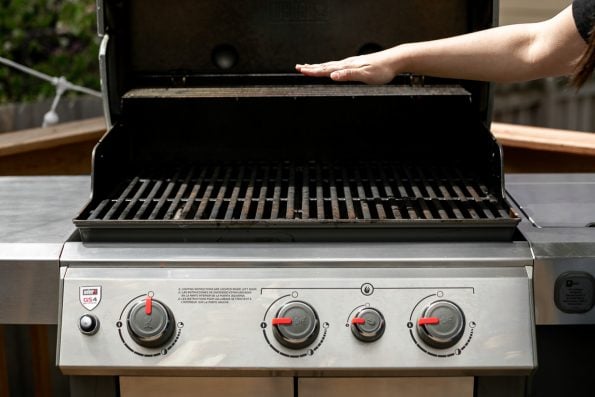
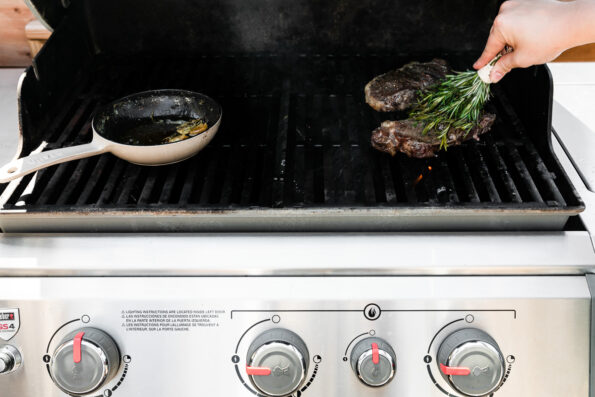
- Light the grill: Prepare your grill for indirect cooking, creating a zone of direct high heat & a second zone of indirect heat. If using a gas grill, begin preheating at least 15 minutes before grilling. If using charcoal, light the charcoal at least 30 minutes prior to grilling. Once preheated, clean the cooking surface by firmly brushing a wire brush over the grates. (To learn more about zone grilling, be sure to check out this post.)
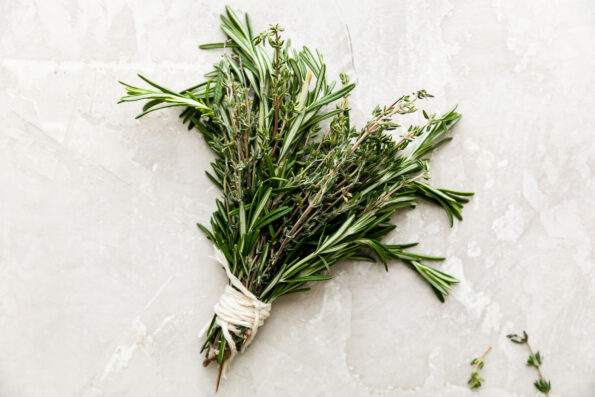
- Assemble the herb brush: Meanwhile, as the grill preheats, build your herb brush for basting the grilled steak. Cut a piece of kitchen twine, about 8-12 inches long. Set aside. Arrange the sprigs of rosemary side-by-side on a work surface. Spread the sprigs of thyme over top. Take care to ensure the ends of the sprigs are aligned on one side – gather the herbs by the stem at this end, creating a nice bundle of herbs. Tightly wrap this end with kitchen twine, tying the ends to secure. You should have a nice bundle of fresh herbs at this point, & you can use your fingers to spread out the stems & create a brush shape. Set aside for grilling. This is also a great time to prepare the garlic butter for basting. Simply place the butter & garlic in a small heat-safe skillet.
[gallery size="full" ids="29928,29929,29930"]
- Grill the steaks with indirect heat: Once the grill is hot, place the steaks on the indirect side of the grill. At this point you can also place the skillet with the butter & garlic on the indirect side of the grill, too. Close the grill lid. Cook with indirect heat for 2-3 minutes per side or until an instant read thermometer inserted in the center of the steak registers an internal temperature of 90 degrees F for final doneness of medium-rare. Subtract or add 5-10 degrees for each level of doneness (i.e. 95-100 degrees F for final doneness of medium). Temp the steaks after each turn to keep close track of the steak’s internal temperature. (Keep an eye on the butter as you temp the steaks – it should melt, becoming foamy & slightly browned. If it reaches this point before the steaks are ready to move to direct heat, carefully move the skillet to a heat-resistant surface to avoid burning.)
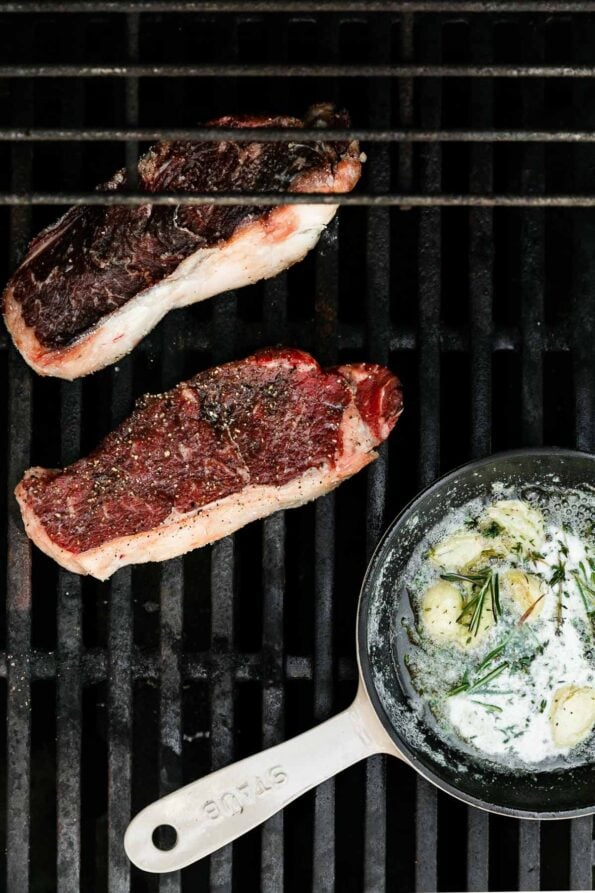
- Finish grilling the steaks over direct heat: Place the steaks over direct heat to finish them off with a good char. Cook 90 seconds – 2 minutes per side, basting the steaks with butter occasionally as they cook. To baste, simply dip the prepared herb brush in the melted garlic butter, letting any excess butter drip back into the skillet to avoid flare-ups, then rub the brush against the steak. Temp the steaks often & keep a close eye on the steak’s internal temperature. Once an instant-read thermometer inserted in the center of the steak registers an internal temperature of 115-120 degrees F (for medium-rare doneness – refer to blog post above for more guidance on different steak temperatures), transfer the steaks to a plate & use the herb brush to baste any remaining garlic butter. (Tips: Be sure to let excess butter drip off the herb brush back into the skillet to avoid flare-ups. If you do not feel comfortable having your hand so close to the flame, simply pinch the end of the herb brush with your grill tongs. Take extra care to not let excess butter drip down into the flame as you baste the steaks. Remember, if you have a large flare up, simply close the grill lid to kill the flame.)
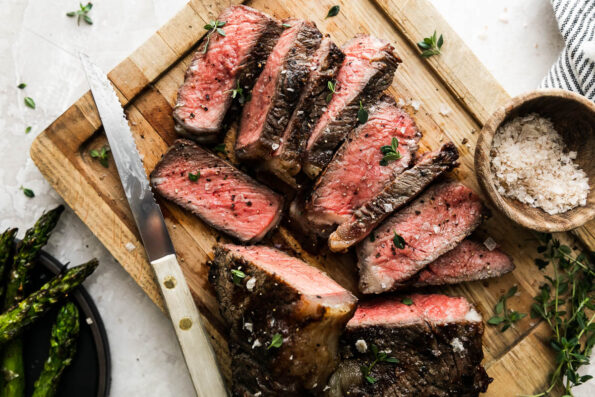
- Rest, carve & serve: Set the steaks aside to rest for 5-10 minutes, then carve & serve as desired. We think this grilled steak is wonderful as-is, finishing with just a touch of smoky finishing salt, but you can serve it with a vibrant sauce like chimichurri or pesto if desired. Enjoy!


Notes
- Best steaks for grilling: Whenever you’re making steak at home, buy the highest quality steaks you can find. The steak is really the star of the show here! (Plus, no matter what, I guarantee you’ll spend less on your steak than you would for a steak dinner at a nice restaurant!) We love New York strip or ribeye at our house, as both are tender with great flavor. This method will work for sirloin or tenderloin, too, noting you may need to adjust cook times based on the thickness of the steak.
- No skillet? No problem!: If you do not have a heat-safe skillet that you feel comfortable putting on your grill grates, you can simply melt the butter on the stovetop. Let it get foamy & slightly browned, then transfer to a small bowl for herb brush-basting on the grill.
- Storage & Reheating: Leftover steak will keep, stored in an airtight container in the refrigerator for up to 3 days. Enjoy leftovers cold from the fridge, or reheat on the stovetop or in the microwave, just until warmed through.