
Description
This quick and easy Shredded BBQ Chicken recipe is your new go-to for summer meals! With a flavorful homemade BBQ dry rub, juicy chicken breasts or thighs are seared, baked in smoky, tangy BBQ sauce, and shredded to perfection. Whether you pile it on sandwiches, tacos, pizza, or sliders, this BBQ pulled chicken is guaranteed to be a crowd-pleaser.
Plus, it’s make-ahead and freezer-friendly, with slow cooker and Instant Pot directions included! Be sure to check out the blog post, above, for lots of serving inspiration and the recipe notes, below, for some make-ahead tips. ♡ Happy cooking!
Ingredients
Scale
- 2 pounds boneless, skinless chicken thighs or breasts (see Recipe Notes)
- 3 tablespoons + 1 ½ teaspoons PWWB BBQ Dry Rub
- 2 tablespoons olive oil
- ⅓ cup BBQ sauce of choice
- 2 tablespoons apple cider vinegar
- 1 tablespoon Worcestershire sauce
- 1 teaspoon liquid smoke
Instructions
- Prep: Preheat the oven to 375 degrees F. Gather and prep all ingredients according to Ingredients List, above.

- Mix the BBQ dry rub and season the chicken: Add all listed BBQ dry rub ingredients to a small bowl or jar. Whisk or shake to combine. Set aside for immediate use or store in an airtight container on your spice rack for up to 1 month. Season the chicken liberally with the BBQ dry rub, using your hands to really work the mixture into all the nooks and crannies of the chicken.

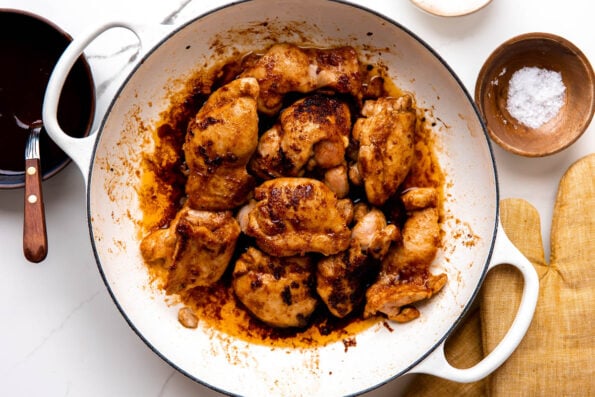
- Brown the chicken: Add the oil to a medium oven-safe skillet over medium heat. Once the oil is hot and shimmers in the pan, carefully add the bbq dry rubbed chicken to the skillet. Work in batches, as needed, to avoid overcrowding the pan (which prevents browning). Cook 2-3 minutes per side, until browned. The chicken will not yet be fully cooked – this is expected and totally fine.
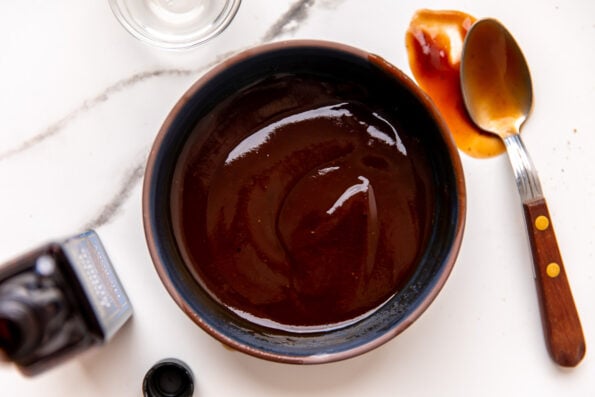
- Mix the BBQ sauce: Meanwhile, as the chicken browns, whisk together the bbq sauce mixture. Add the BBQ sauce, apple cider vinegar, Worcestershire sauce, and liquid smoke to a small bowl or jar. Whisk or shake to combine. Set aside.
- Roast the chicken: Once browned, remove the skillet from the heat. Pour the BBQ sauce mixture over the browned chicken, turning to coat in the sauce. Transfer to the oven and roast for 15-20 minutes, or until an instant-read thermometer inserted in the thickest portion of the chicken registers an internal temperature of 165 degrees F. Set aside to cool slightly.
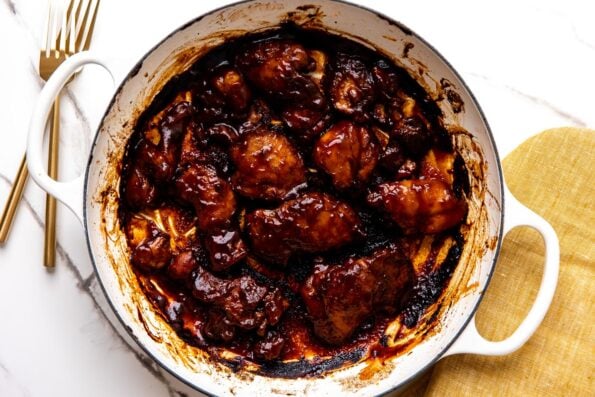
- Shred the BBQ chicken: Once cool enough to handle, carefully shred the chicken into bite-sized pieces – you can do so using 2 forks, or my favorite trick: pop the BBQ chicken directly into in a stand mixer and let the paddle attachment do the work for you (I swear this works!). Transfer the pulled BBQ chicken back into the skillet, tossing to combine it with any cooking liquid left in the skillet.

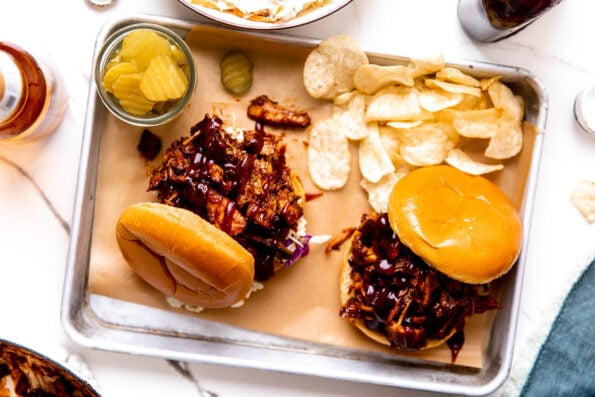
- Serve immediately as desired. Nestle in a bun with coleslaw for an epic BBQ chicken sandwich, pile on top of a pizza, place in tortillas or make a burrito bowl with rice and beans – sky’s the limit with this versatile shredded BBQ chicken! Enjoy!


Notes
- Chicken thighs vs chicken breasts: I prefer using boneless, skinless chicken thighs in this pulled BBQ chicken recipe since they’re flavorful and stay really nice and juicy through roasting, but you can swap them out with breasts if you prefer. Either pound the breasts out flat or slice them in half lengthwise (butterflied) to ensure they cook up evenly.
- Storage and Freezing:
- Storage and Reheating: Leftover pulled bbq chicken will keep, stored in an airtight container in the refrigerator, for up to 4 days. Reheat in the microwave or on the stovetop until warmed through.
- Freezer instructions: This pulled BBQ chicken is also a wonderful freezer staple since you can quickly thaw it out and use it on sandwiches, BBQ chicken pizza, tacos, nachos, salads, burrito bowls, etc. for an easy dinner down the road. To freeze, transfer cooled pulled BBQ chicken to a freezer bag or container, or divide between multiple freezer containers for smaller portions – these are my absolute favorite freezer containers! Freeze up to 3 months. Defrost by placing in the refrigerator overnight to thaw, or by submerging the freezer bag/container in room temp water for 20-25 minutes. Reheat in the microwave or on the stovetop until warmed through.
- Alternate Cooking Methods:
- Slow Cooker or Crockpot Pulled BBQ Chicken: If your slow cooker has a browning/searing feature, sear the chicken in the slow cooker according to Step 3 of Recipe Directions, above. If not, simply add the seasoned chicken, BBQ sauce, apple cider vinegar, Worcestershire sauce, and liquid smoke to your slow cooker. Slow cook on high for 3-4 hours or on low for 6-8 hours. Shred and serve according to Steps 6-7 of Recipe Directions, above.
- Electric Pressure Cooker or Instant Pot Pulled BBQ Chicken: Use the Instant Pot’s browning/searing feature to sear the chicken in the Instant Pot according to Step 3 of Recipe Directions, above. Prep the BBQ sauce mixture, diluting it with 1/2 cup water, chicken stock, or beer to ensure the Instant Pot seals properly, and pour over the chicken. Secure the lid on the Instant Pot, ensuring the sure valve is in its sealed position! Cook on high pressure for 12 minutes. Allow the pressure to naturally release for 5 minutes, then carefully quick release any remaining pressure in the pot by flicking the valve to its venting position. Remove the lid. Shred and serve according to Steps 6-7 of Recipe Directions, above.
- Note: This recipe has been updated since its original publish in October 2017. If you are looking for the original recipe, which included bell peppers and a slow cooker preparation, click here to download a printable version!