Description
Aim to deep clean your grill at least once a year. Deep cleaning gives each component of your grill a little extra love & care to ensure your grill is in tip-top shape for seasons to come.
There are several major steps in an annual deep clean, which can be broken down by the area of the grill you’ll be focusing on:
- Grill Grates
- Grill Burners
- Grill Bucket
- Exterior
Ingredients
Instructions
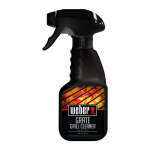
- Deep Cleaning Grill Grates: First, check the integrity of your grates. If they’re a little dirty, a little grate cleaner & elbow grease should get them back into great shape! If the grill grates are beginning to flake away actual metal (not just food debris), or if they are rusting through, it is, unfortunately, time to replace them. The good news is grill grates are very simple to replace (you just drop new ones on in!) & replacing grill grates is a heck of a lot more affordable than replacing an entire grill. If needed, order replacement grates directly through your grill’s manufacturer.
- Deep Cleaning Gas Grill Burners: If your gas grill burns unevenly, the culprit may be food debris. The good news? Cleaning the burners should fix it! Here’s what you’ll do…
- Check the integrity of the flavorizer bars. Flavorizer bars are the metal triangle pieces that cover the burners on a gas grill. The same logic from examining the grill grates applies. If they are just a little dirty, a simple scrape with a metal brush should knock any debris right off. If the flavorizer bars are rusting through, it is time to replace them. Order replacement flavorizer bars, as needed, directly through your grill’s manufacturer. Flavorizer bars are also very simple to replace – you simply drop new ones in.
- Cleaning gas grill burners: First, examine the burner tubes for any holes or damage. If there are any holes (other than the small pinholes where flames come through), it is time to replace the burner tubes. This is slightly more in-depth & we won’t go into it in this tutorial; check Youtube for some great step-by-step videos! If the burner tubes aren’t showing any damage, use a simple wire brush to scrape the burners clean. Be sure to scrape the burners across the pinholes, not along the line of them. If the burners are getting weak & you scrape along the line of the holes you can potentially break the metal & shorten the life of the burners (see video).
- Deep Cleaning a Grill Bucket: With the grates and flavorizer bars removed from the grill, you will likely see burned food remnants, debris & ash that have collected in the bottom of the grill. Use a shop vac to remove all the debris from the grill bucket. Not only will this remove the debris, but it also helps with airflow, providing a more even cook moving forward. If desired, use a degreaser or grate cleaner to clean out the inside of the grill bucket.
- Deep Cleaning the Exterior of a Grill:
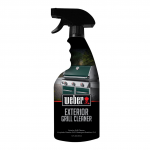
- Wipe down the exterior: We doing so using Weber’s porcelain exterior grill cleaner. Again, we always suggest purchasing cleaning products from your grill’s manufacturer, since they are likely specifically designed for use on their grills.
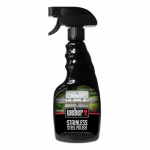
- Treat stainless steel: Again, we like to use Weber’s stainless steel polish, but you can use any kitchen stainless steel cleaner you like best.


