
Description
A cozy pot of slowly Braised Beef Chili is the ultimate winter meal! Simply simmer hearty stew meat or chuck roast with peppers, tomatoes, beans, and smoky spices, resulting in a fall-apart-tender, full-flavored chuck roast chili.
Best enjoyed alongside cornbread with all the fixings – guacamole, cheese, tortilla chips, and more! – for the perfect rich and comforting dinner. Stovetop recipe with oven-braised, slow cooker/Crockpot and Instant Pot directions provided. Make-ahead and meal prep-friendly.
Ingredients
- 3 tablespoons olive oil or high smoke point vegetable oil of choice, divided
- 2 pounds stew meat or beef chuck, trimmed and cubed into 1-inch cubes
- 2 medium yellow onions, diced
- 2 medium bell peppers or poblano peppers, deseeded and diced
- 2 medium jalapenos, deseeded as desired and diced
- 6 cloves garlic, finely chopped or grated
- ¼ cup tomato paste
- 2 tablespoons chili powder
- 2 tablespoons ground cumin
- 1 tablespoon dried oregano
- 1 tablespoon smoked paprika
- 1 teaspoon garlic powder
- ½ teaspoon ground cinnamon
- 1 tablespoon apple cider vinegar
- 1 tablespoon pure maple syrup
- 1 tablespoon Worcestershire sauce
- 28 ounces diced fire-roasted tomatoes with their juices
- 8 ounces tomato sauce
- 2 (two) 15-ounce cans beans of choice (pinto, kidney, black, etc.), drained
- 1 ½ – 2 cups beef stock or beer of choice
- kosher salt and ground black pepper, to season
Instructions
Prep Notes: About 20-30 minutes before you’d like to begin preparing your chili, transfer the beef from the refrigerator to the kitchen counter, allow it to come to room temperature for even searing. Gather and prep all ingredients according to Ingredients List, above – chop the onions and peppers, measure the spices, open the cans, etc. – and place them within an arm’s reach of the stovetop for easy chili assembly.
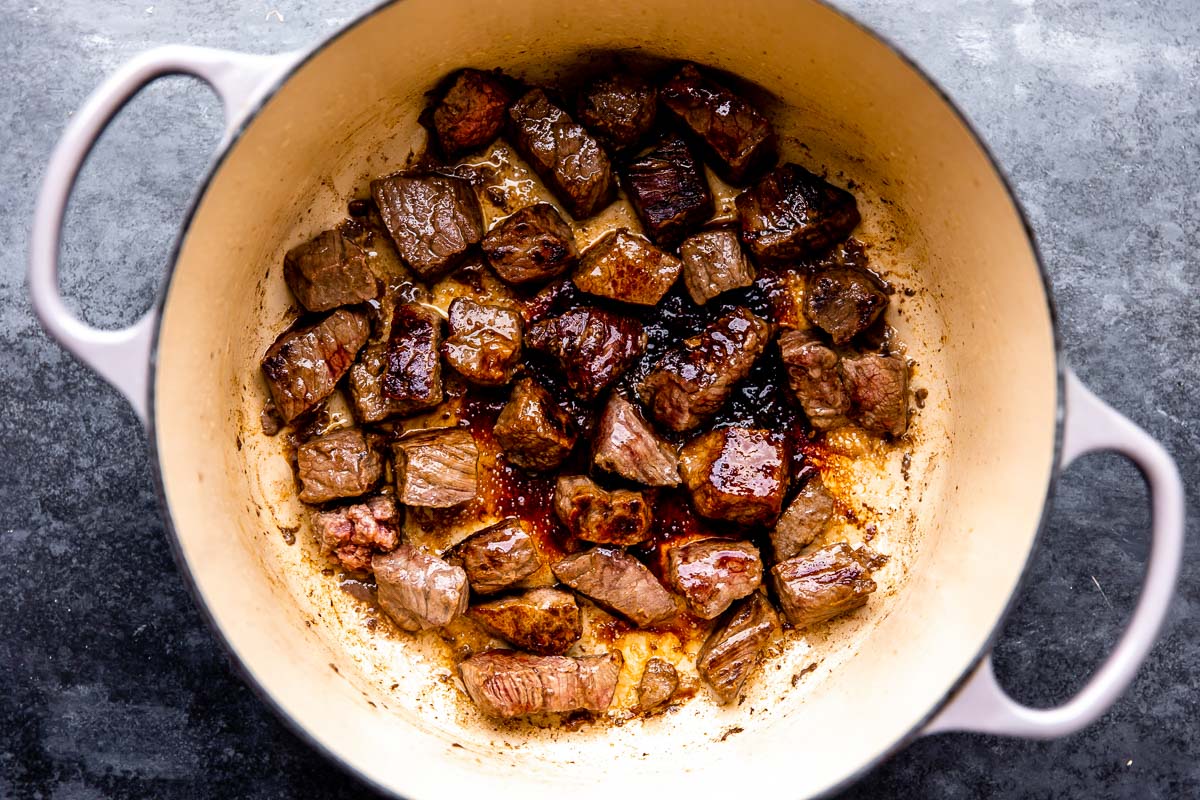
- Brown the beef: Add 2 tablespoons of the olive oil to a large, heavy-bottomed pot with a tight fitting lid over medium-high heat (I use a 5-qt Dutch oven). Use paper towel to pat the surface of the beef as dry as possible, then season generously with about 2 teaspoons kosher salt and ground black pepper as desired. Once the oil in the pot is shimmering hot, carefully add in the seasoned beef – work in batches as needed to avoid overcrowding the pot. Cook 2-3 minutes per side, until nicely browned. Transfer the browned beef to a plate and set aside.
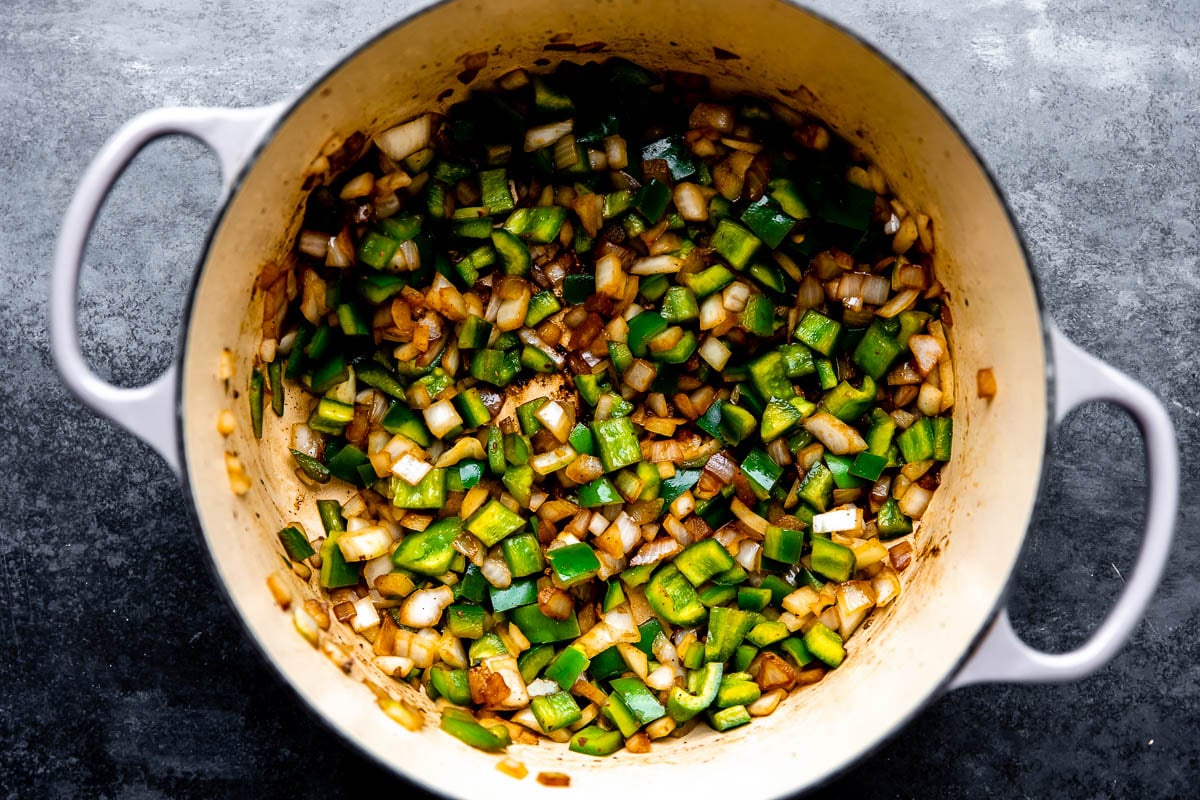
- Cook the aromatics: If needed, add the remaining 1 tablespoon of olive oil to the same pot used to brown the beef. Once the oil is hot and shimmering, add in the yellow onions, bell/poblano peppers, and jalapenos, seasoning with 1 teaspoon kosher salt and ground black pepper as desired. Stir to combine. Cook, stirring occasionally, until softened and fragrant, about 5 minutes. Once softened, add the garlic and tomato paste to the pot, stirring to coat the veggies. Cook until fragrant and browned, about 2-3 minutes longer.
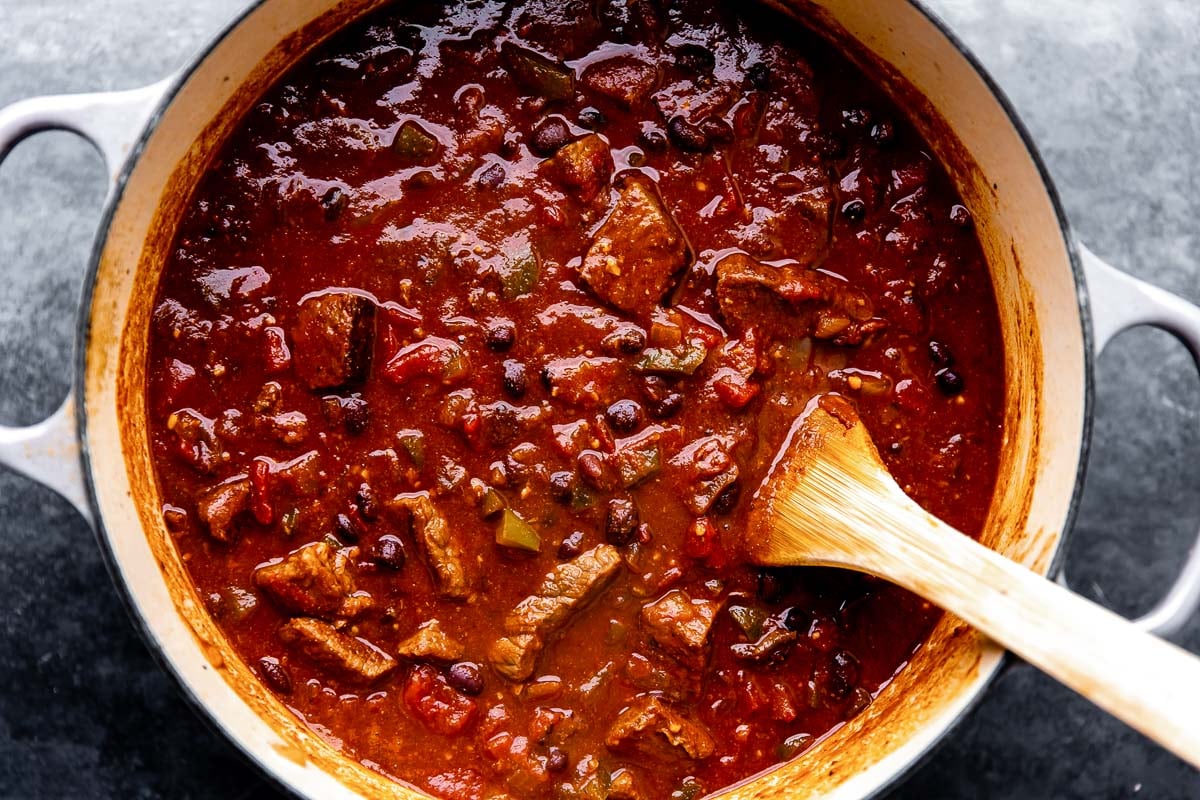
- Build the beef chili and braise: Nestle the browned beef from Step 1 into the vegetables, then add all remaining ingredients into the pot – the chili spices, apple cider vinegar, pure maple syrup, Worcestershire sauce, diced tomatoes, tomato sauce, and beans. Stir in the beef stock – start with 1 ½ cups and increase to 2 as needed or desired. Bring the mixture to a boil, then reduce heat to maintain a steady simmer. Cover and simmer 2 ½ – 3 hours, stirring occasionally, until the beef is fall-apart tender. The braised beef chili will be ready once the meat is fork-tender, or you can easily break it apart with a wooden spoon.
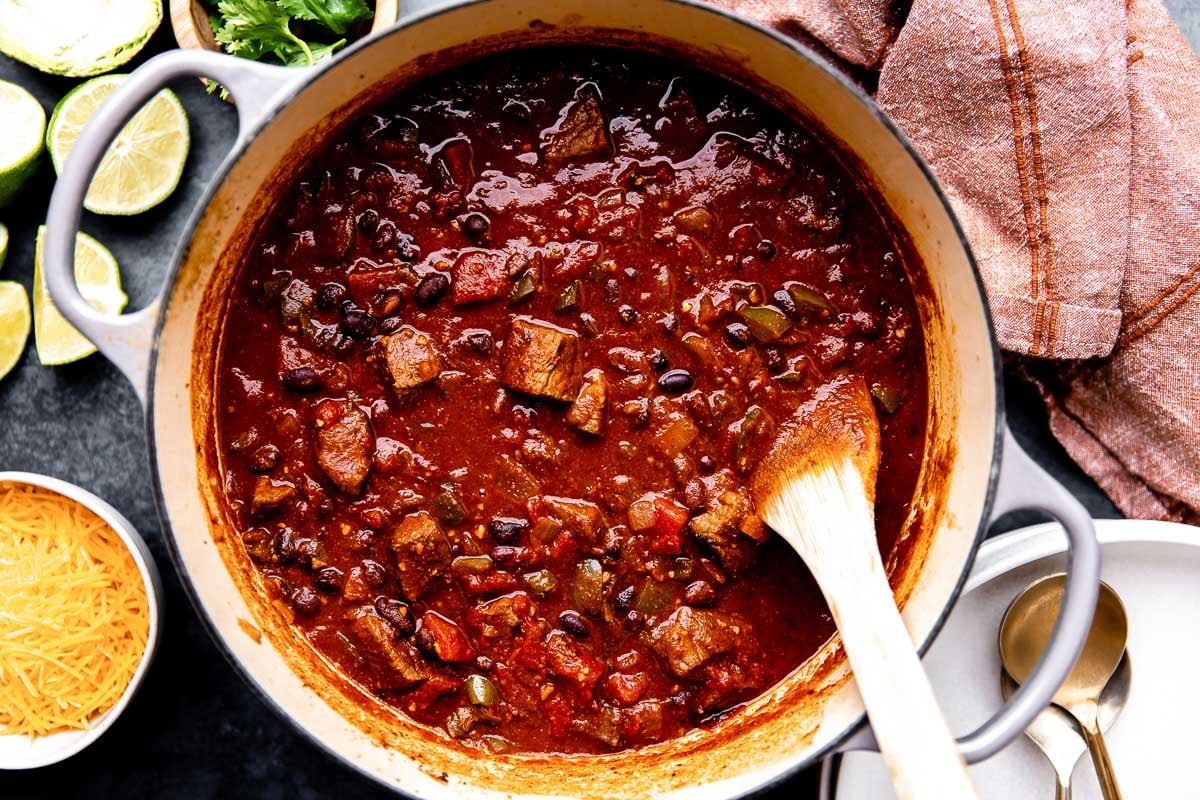
- Serve: Portion the braised beef chili into bowls, serving with your favorite chili toppings: shredded pepper jack or cheese of choice, smashed avocado or guacamole, chopped cilantro, thinly sliced jalapeño, crushed tortilla chips, etc. Enjoy!


Notes
- Storage and Freezing:
- Storage and Reheating: This braised beef chili is incredibly meal prep and make-ahead friendly – it stores so well and it’s one of those things that gets even better as it sits and its flavors meld together. Transfer cooled braised beef chili to an airtight container and store in the refrigerator for up to 5 days. Reheat on the stovetop or in the microwave until warmed through.
- Freezer Instructions: Braised beef chili is also incredibly freezer-friendly. Transfer the cooled chili to a freezer container or divide between multiple freezer containers for smaller portions. Freeze for up to 3 months. To thaw, place the frozen chili in the refrigerator overnight or submerge the freezer container in room temperature water for a quicker thaw. Easily reheat on the stovetop or in the microwave until warmed through, adding in a splash of water or beef stock to thin everything out a little as needed.
- Alternate Cooking Methods:
- Oven-Braised Beef Chili: Prepare the recipe according to Steps 1-3, above, ensuring you’re cooking in an oven-safe pot. Rather than braising on the stovetop, transfer the covered pot to a 325 degree F oven. Braise 2 ½ – 3 hours, until the beef is fall-apart tender, then serve as desired according to Steps 4 of Recipe Directions, above.
- Slow Cooker / Crock Pot Beef Chili: Prepare the recipe according to Steps 1-2, above. Build the chili in the slow cooker as directed in Step 3. Slow cook on high for 4-5 hours or on low for 7-8 hours, stirring occasionally, until the beef is fall-apart tender. If your slow cooker has a searing/browning feature, you can use it to cook the entire beef chili recipe (Steps 1-3) in the slow cooker.
- Electric Pressure Cooker / Instant Pot Beef Chili: Use your Instant Pot’s “Sauté” setting to cook the recipe according to Steps 1-3, above. Cover and seal the pressure cooker and cook on manual high pressure for 35 minutes. Allow the pressure cooker to naturally release pressure for 10 minutes before carefully flicking the valve to its “venting” position to vent out any residual pressure. Use the Instant Pot’s “Sauté” feature to thicken the chili sauce as desired.
- 10-Minute Meal Prep: Nearly all of the active prep work for this braised beef chili comes from prepping the veggies. Take care of this in advance – it takes 10 minutes, tops – and you can jump straight in to cooking during the week. Here’s what you’ll do:
- Dice 2 medium yellow onions, 2 medium bell peppers or poblano peppers, and 2 medium jalapenos. Transfer to an airtight container and store in the refrigerator for up to 5 days. (10 minutes active prep)