THIS POST IS SPONSORED BY
Zojirushi, who has been a pillar in my family’s kitchen for as long as I can remember! Zojirushi rice cookers are the secret to cooking rice perfectly every single time (& so much more!)! 🙌🏼 All thoughts & opinions are my own.

A Trick for Easy Homemade Sushi? Stack Instead of Roll!
Sushi cravings are a regular occurrence here at the PWWB House. I’ve been obsessed with sushi stacks ever since I first saw the internet-famous spicy shrimp stacks years back. They’re a fun way to mix up homemade sushi night & really easy to make. These Spicy Tuna Sushi Stacks are my favorite version to date!
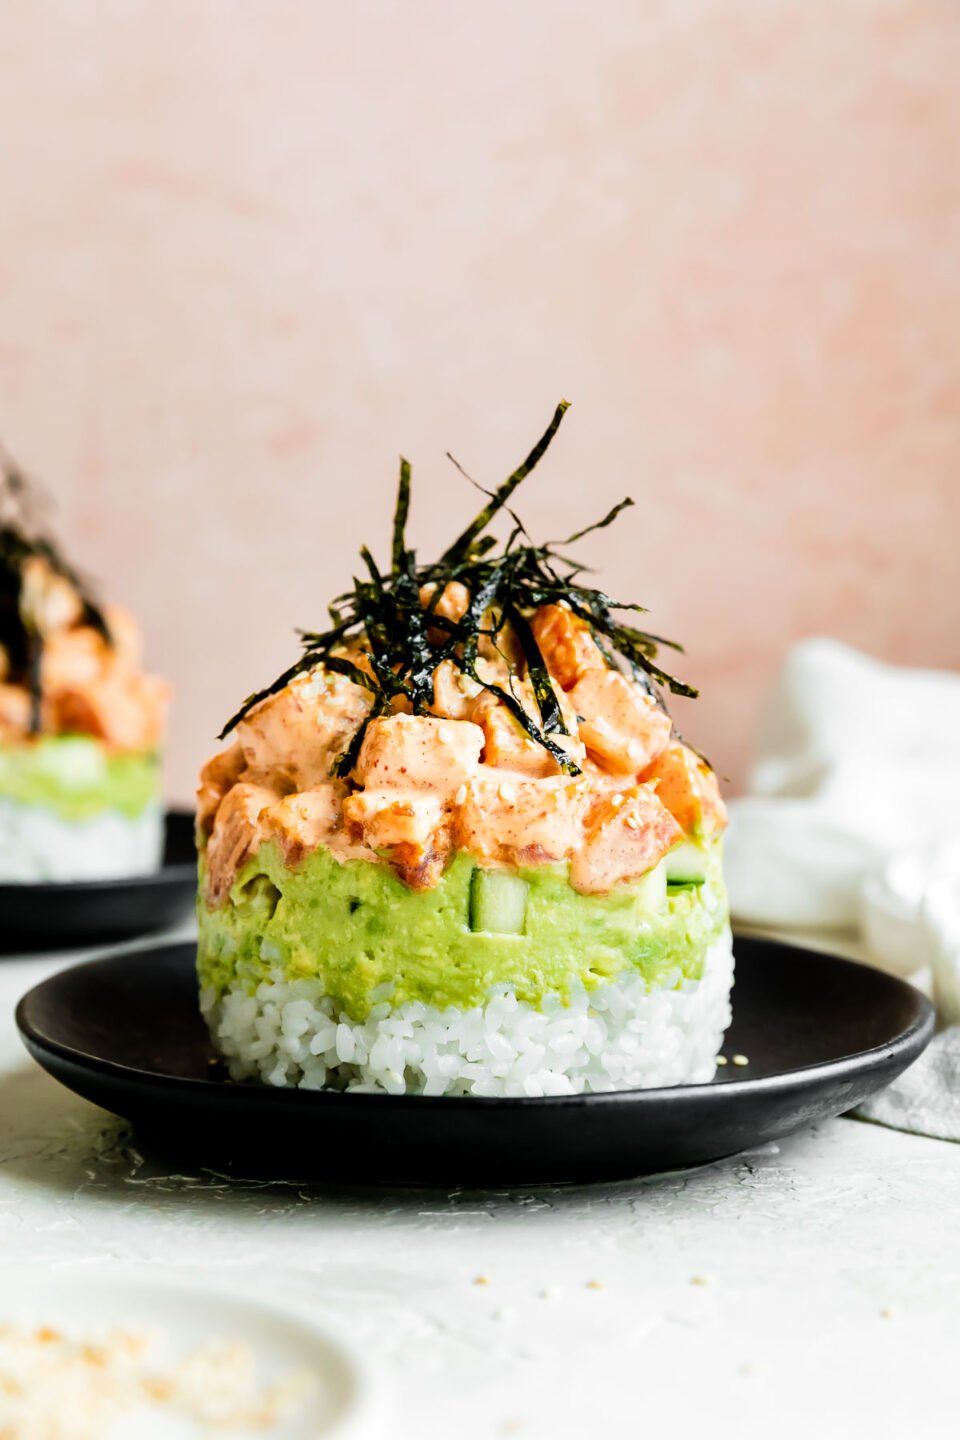
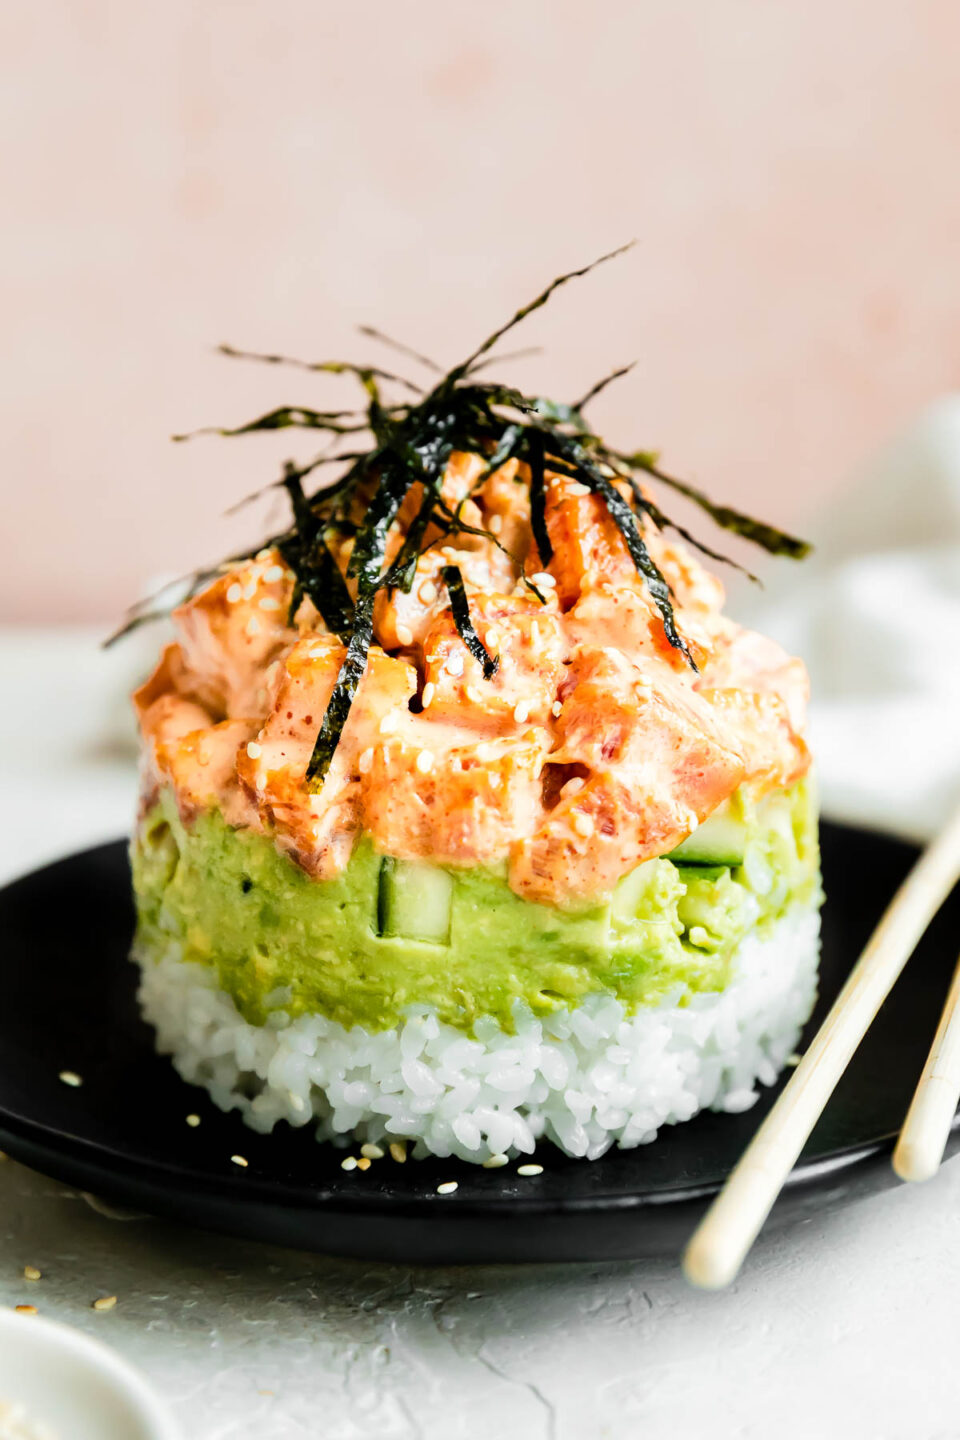
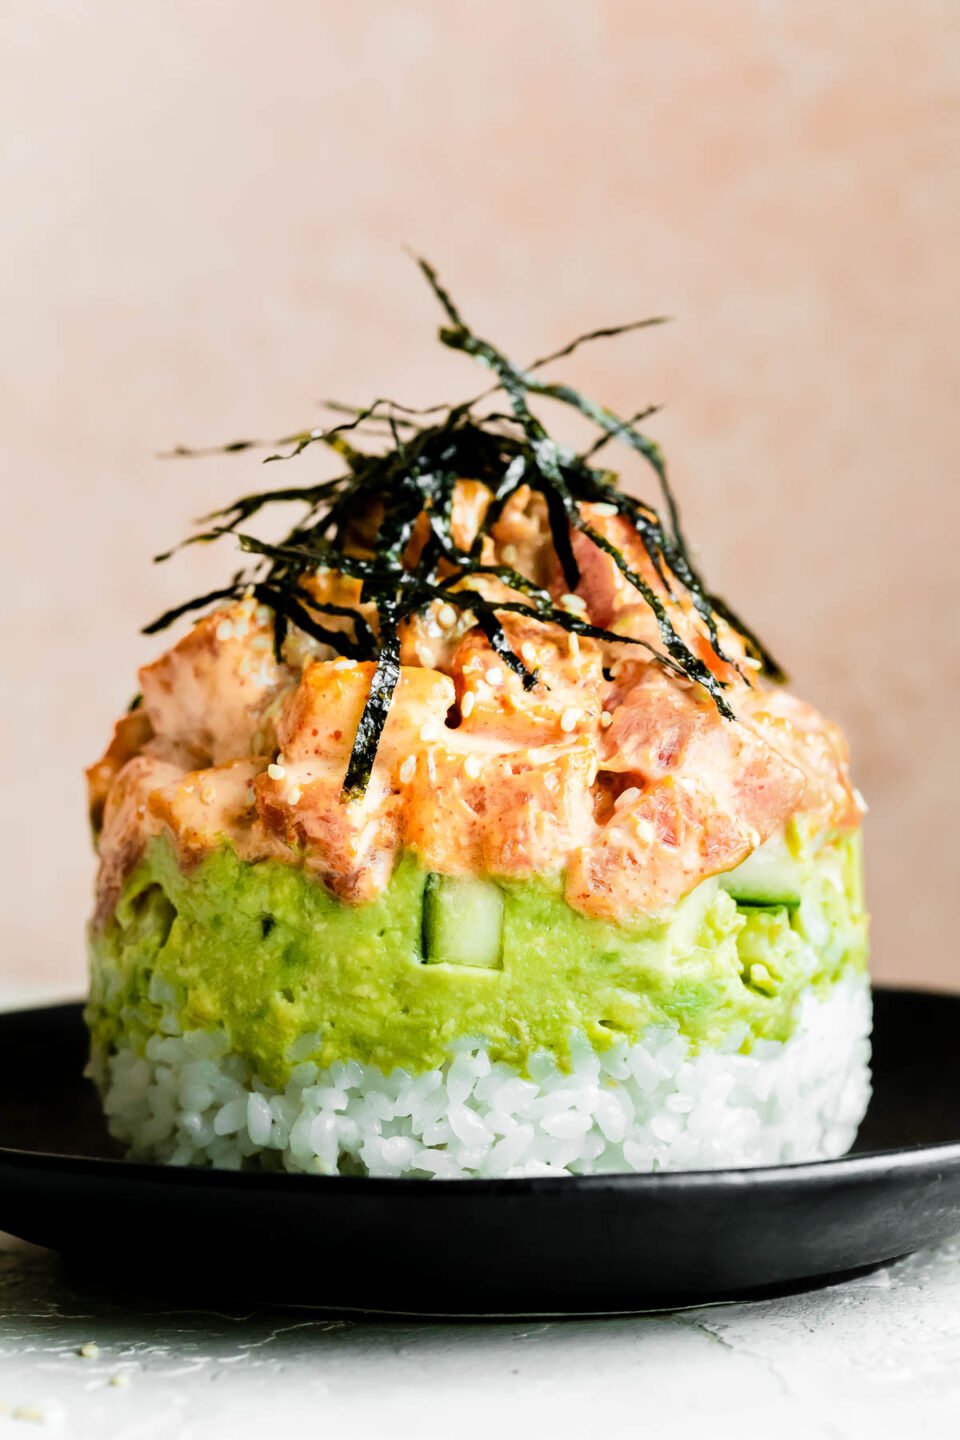
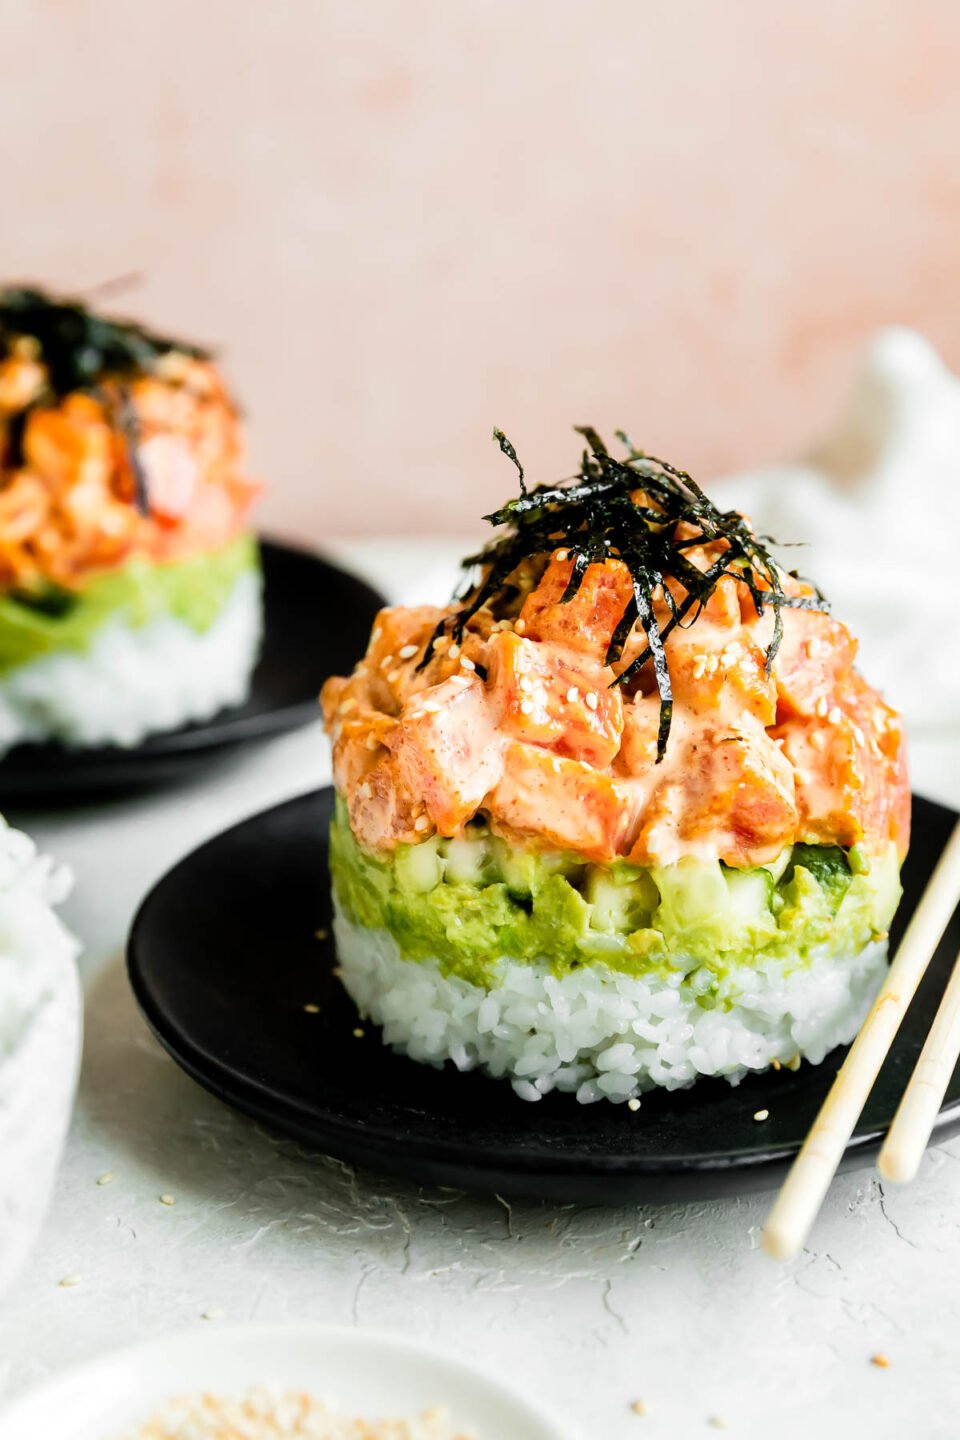
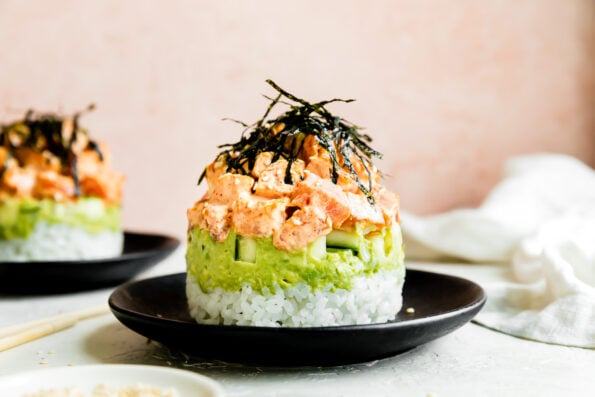
Each sushi stack layers spicy ahi tuna, cucumber, & seasoned avocado over wonderfully sticky & fluffy sushi rice. I use my Zojirushi NS-TSC10A Rice Cooker to cook the rice beautifully every single time & my Japanese Great Grandma Yoshida’s sushi rice recipe to season it to perfection – a touch of family tradition in a modern twist on sushi! 🥰
The flavors & textures are just like a classic spicy tuna roll, but stacking the ingredients (rather than wrapping them into maki rolls or hand rolls) makes things a little more approachable – especially for homemade sushi beginners! Plus, every beautifully layered stack has so much wow-factor – perfect for a date night at home or an evening with friends (& no takeout required!).
Sushi Stack Recipe Highlights
You’re going to be obsessed with these spicy tuna sushi stacks. They’re…
STACKED WITH GOODNESS. With spicy tuna, cucumber, & seasoned avocado piled on top of my great grandma’s always-perfect sushi rice recipe, each bite tastes just like a spicy tuna roll. Deliciousness in every layer!
SNEAKILY EASY! Rather than wrapping homemade sushi rolls, sushi stacks take an easier layered approach. Simply cook the sushi rice (the rice cooker does all the work!), mix up the spicy tuna, then stack it all together & reveal a picture-perfect sushi stack. No rolling, no fuss!
PURE FUN. A special-feeling & fun take on homemade sushi guaranteed to impress. Great for date night, Galentine’s, or an easy weeknight dinner.
At-home sushi just got way easier! 🙌🏼🍱 ♡ Read on to learn more about how to make these Spicy Tuna Sushi Stacks, or jump straight to the recipe & get cooking!
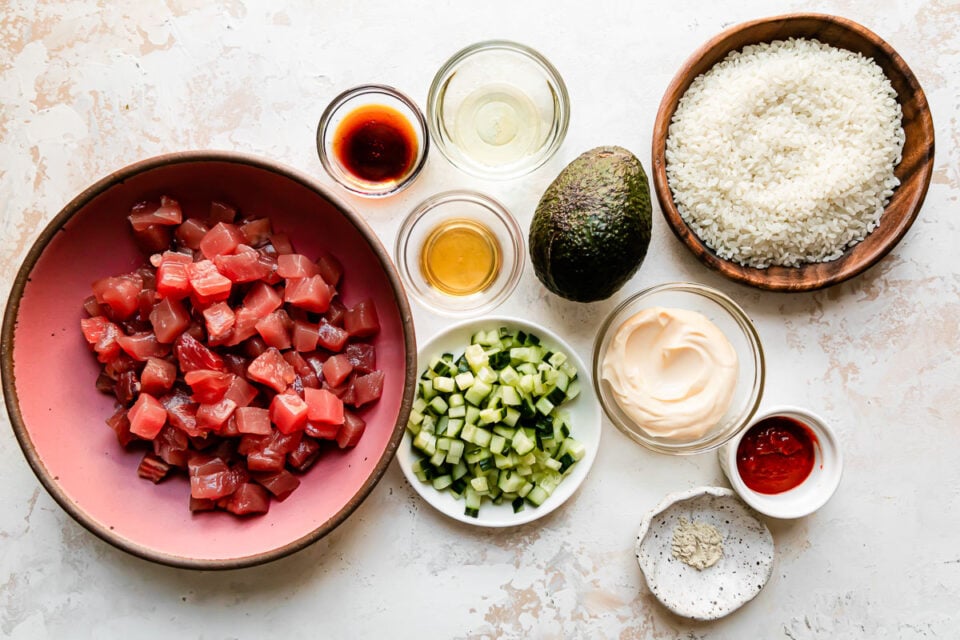
Key Ingredients
Each layer of these spicy tuna sushi stacks comes together with a handful of simple staple ingredients. When combined, the layers recreate the flavors & textures of a classic maki-style spicy tuna roll, but in the form of a flavor-packed, picture-perfect sushi stack!
Note: Full ingredients list & measurements provided in the Recipe Card, below.
You need…
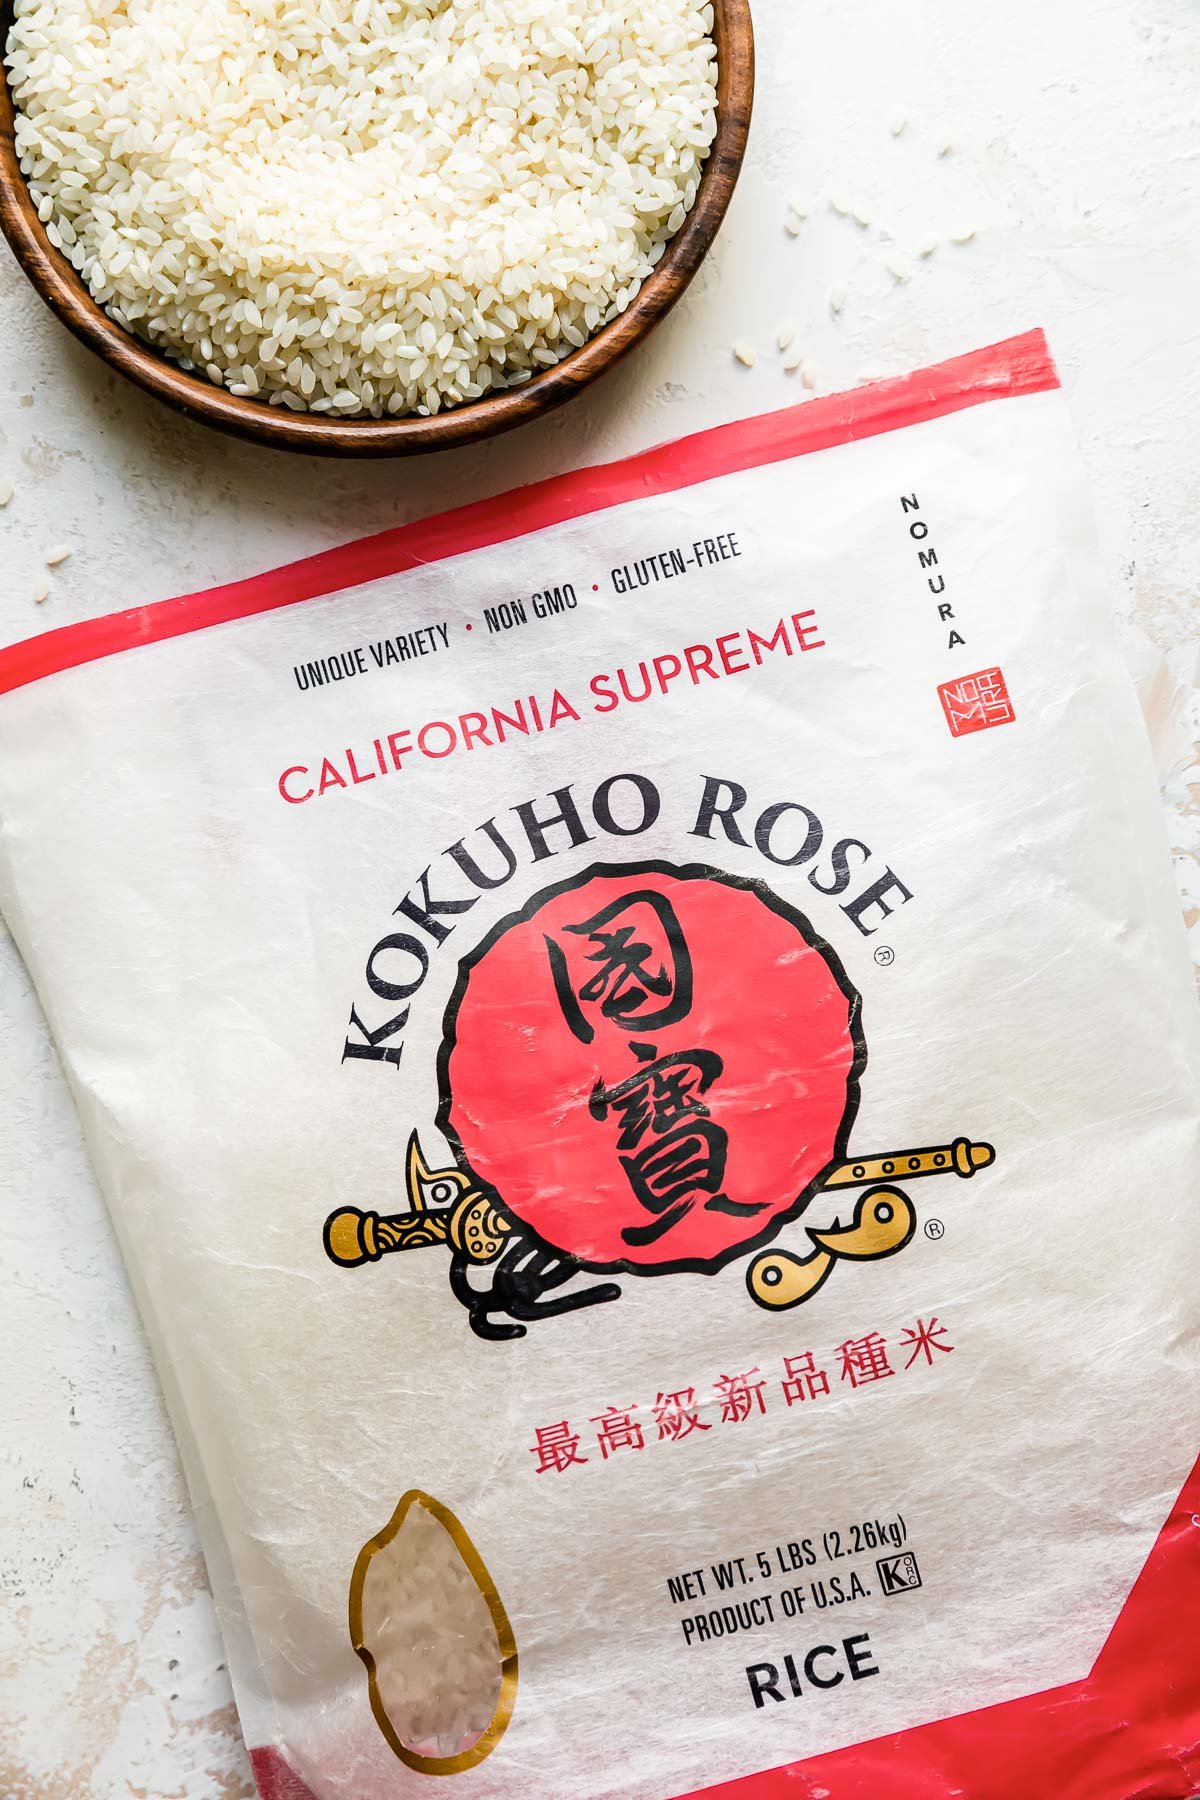
- Rice – Any short or medium-grain white sushi rice works beautifully for this sushi stack recipe. My family is partial to Calrose-style medium-grain white rice – Botan & Kokuho Rose are our go-to brands.
- Sushi rice seasoning – My Great Grandma Yoshida’s was famous for her sushi rice seasoning, which is made with Japanese rice vinegar, mirin, sugar, & salt.
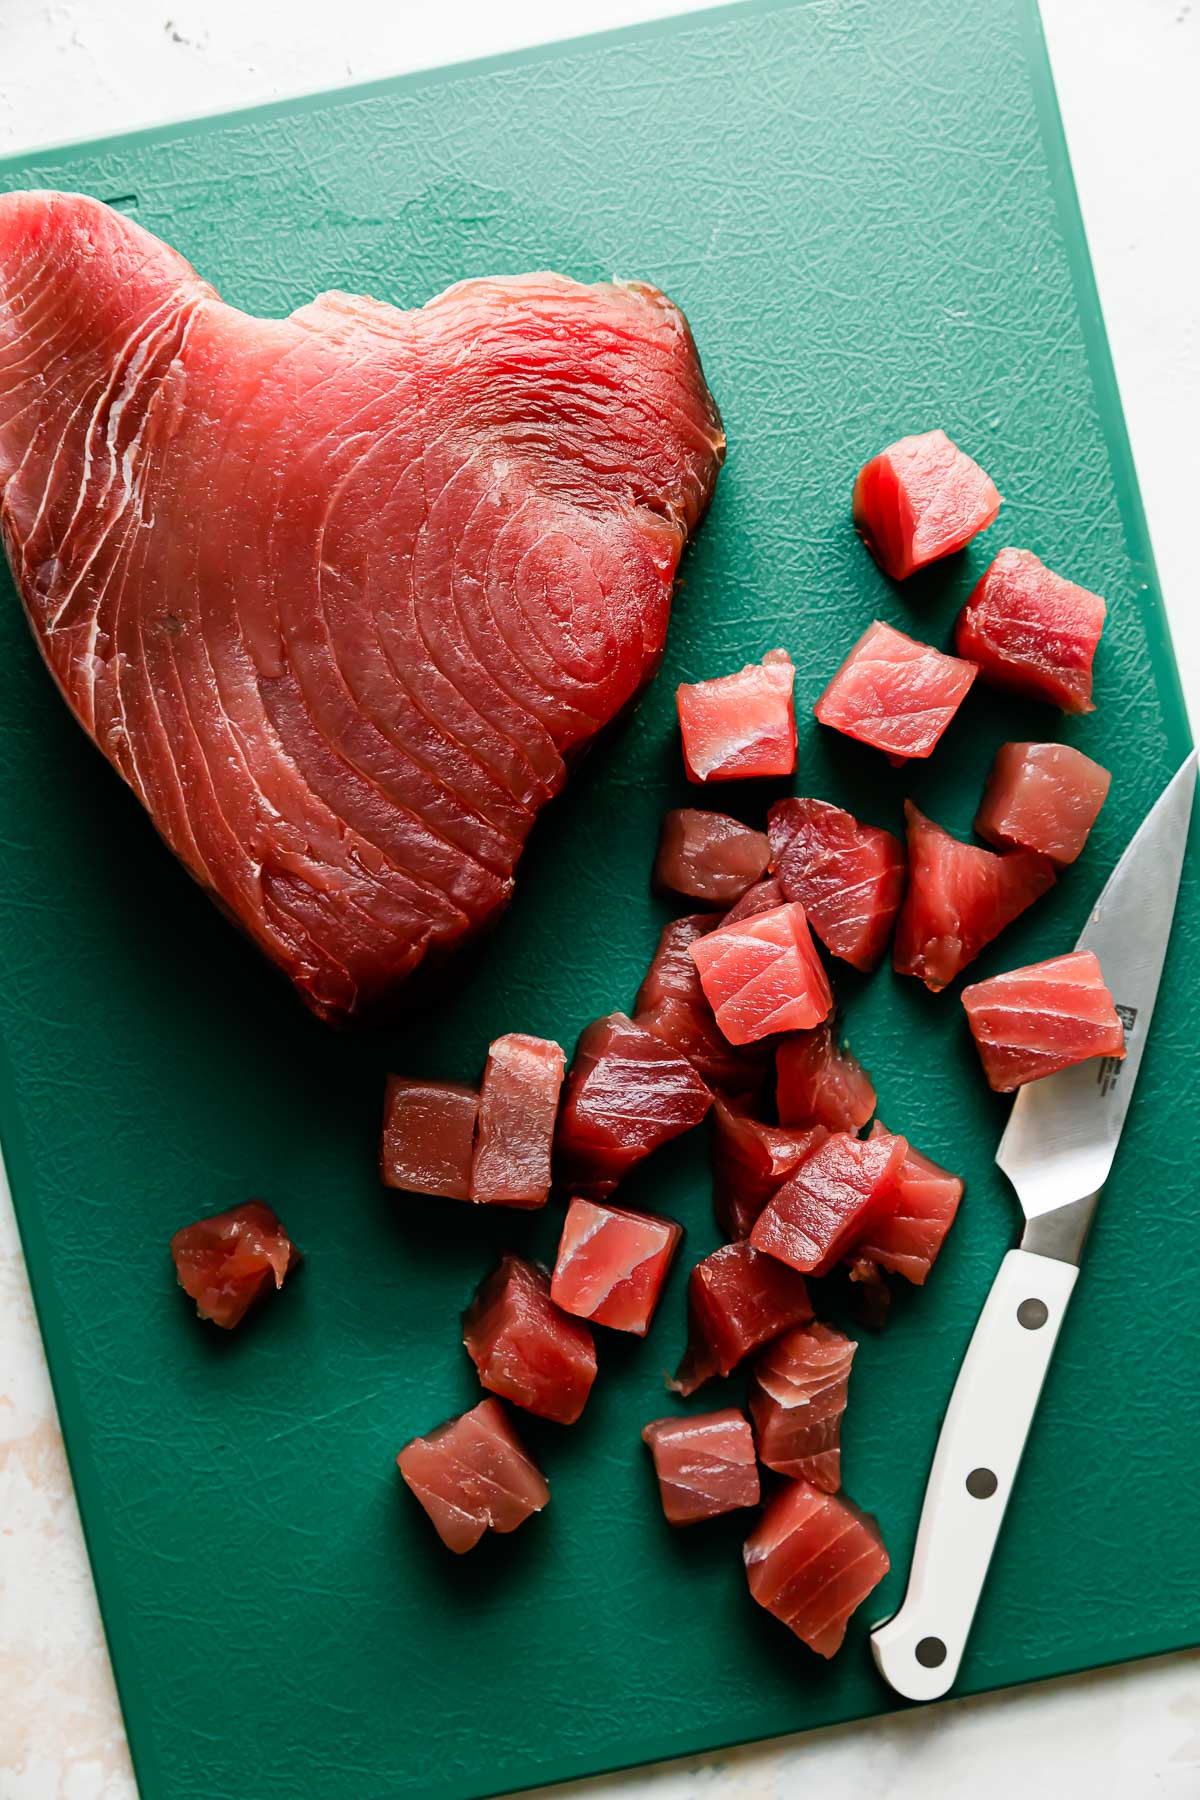
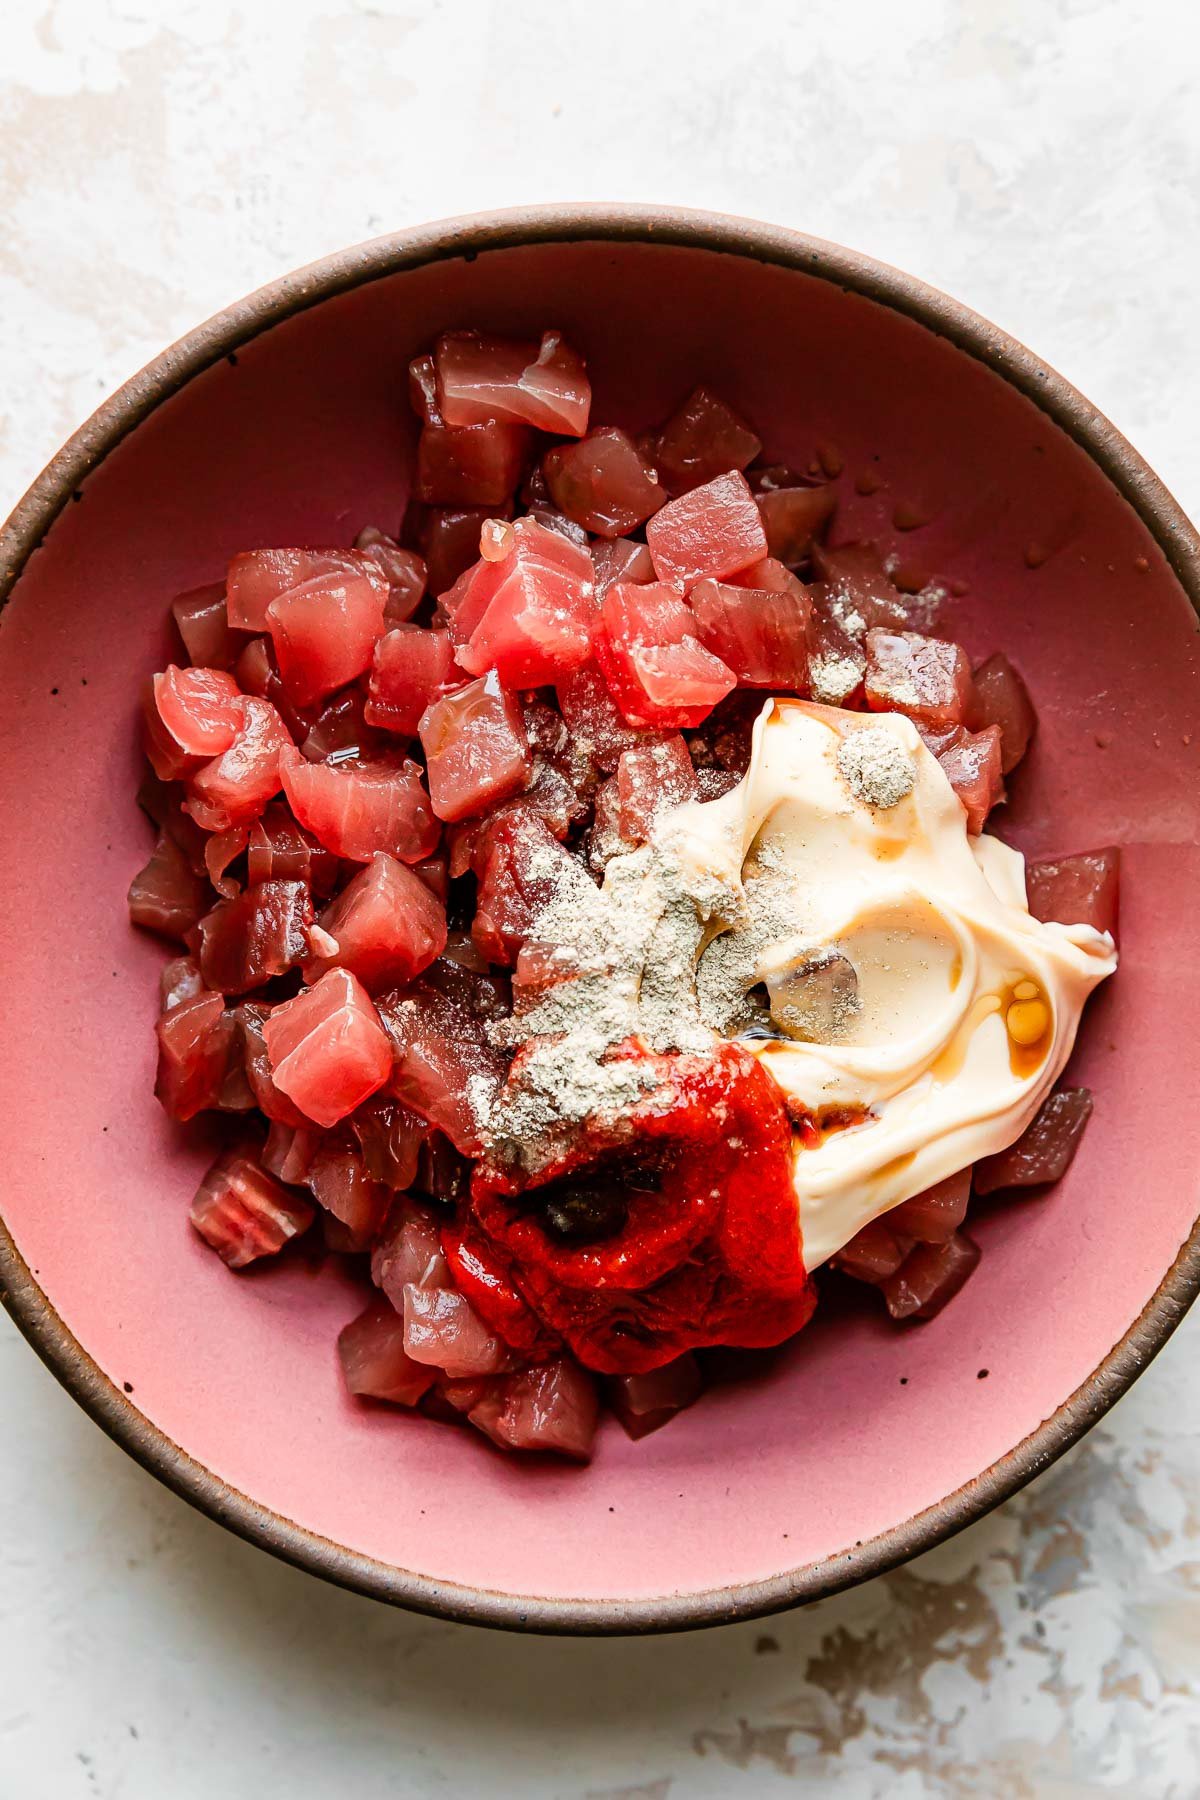
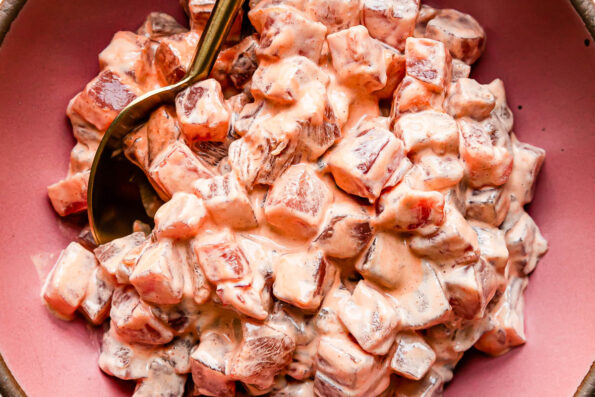
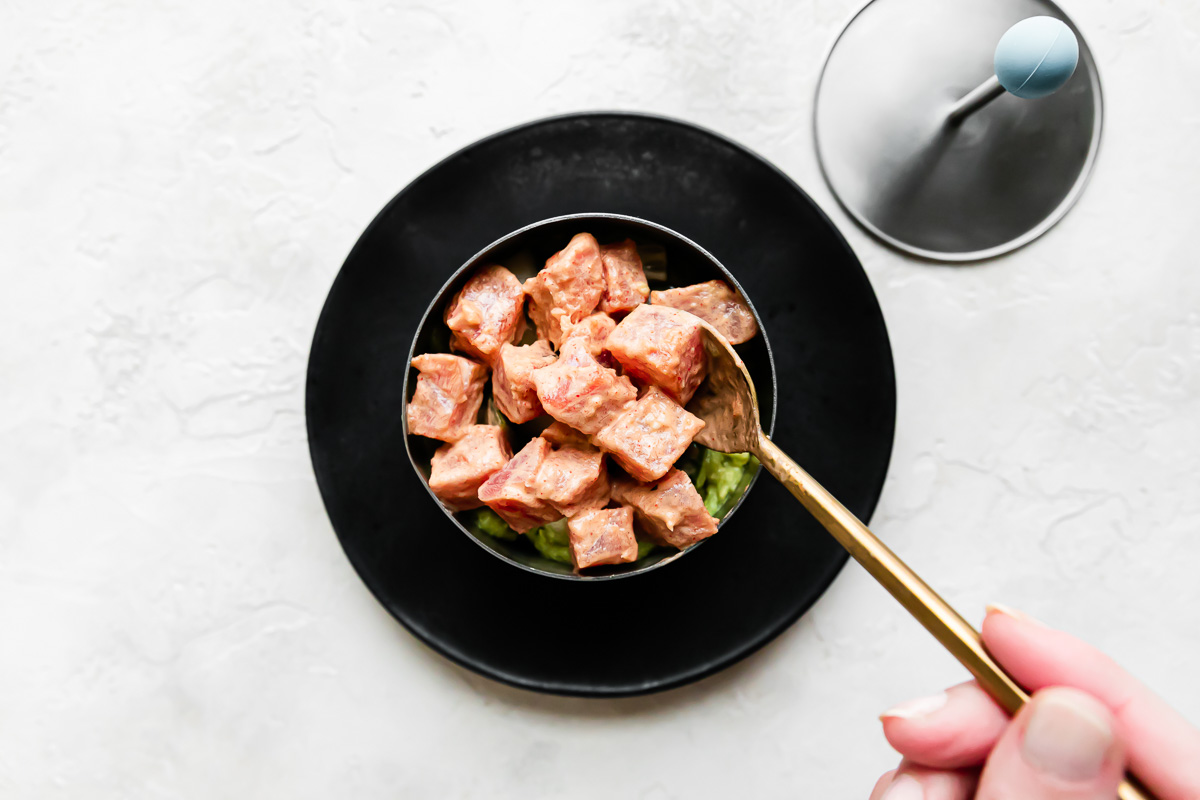
- Spicy tuna – A surprisingly easy-to-make mixture of fresh sashimi-grade ahi tuna, mayonnaise, sriracha, soy sauce, toasted sesame oil, & white pepper. Simple & perfect!
- Seasoned avocado – Simply mash the flesh of a ripe avocado with lemon or lime juice & toasted sesame oil in a small bowl.
- English cucumber – Dice the cucumber into small cubes for assembly. Feel free to peel or not!
- Sushi stack toppings – We love finishing the spicy tuna sushi stacks with thinly sliced nori seaweed & toasted sesame seeds.
Easy Sushi Stack Variations
One of the best things about sushi stacks is how incredibly versatile they are! While I love spicy ahi tuna, you can easily prepare your sushi stack with any other type of seafood. A few ideas to get you started…
- Swap raw tuna for salmon ⇢ Or whatever looks best at the fish counter! Your local fishmonger is a great resource when shopping for sashimi-grade fish – let them guide you toward what’s freshest!
- Prefer fully cooked seafood? ⇢ Top your sushi stacks with teriyaki salmon, imitation crab, or mix cooked shrimp into the spicy mayo for spicy shrimp sushi stacks!
- Add another seafood topping! ⇢ I like to pile my sushi stacks high with extra spicy tuna, but a few pieces of tempura shrimp or a mixture of different sushi-grade fish work well too!
Shop This Post

Zojirushi NS-TSC10A Rice Cooker
Buy Now → Buy Now →
  Buy Now →
  Buy Now →
  Buy Now →
  Buy Now →
  Buy Now →
 Rinsing & Cooking Sushi Rice
Sushi rice is unlike any other kind of white or brown rice. It’s a shorter-grain rice with an exceptionally sticky texture, perfect for giving shape & structure to both sushi rolls & sushi stacks. Properly rinsing & steaming your sushi rice is key to creating its signature sticky texture!
Why You Should Always Rinse Sushi Rice
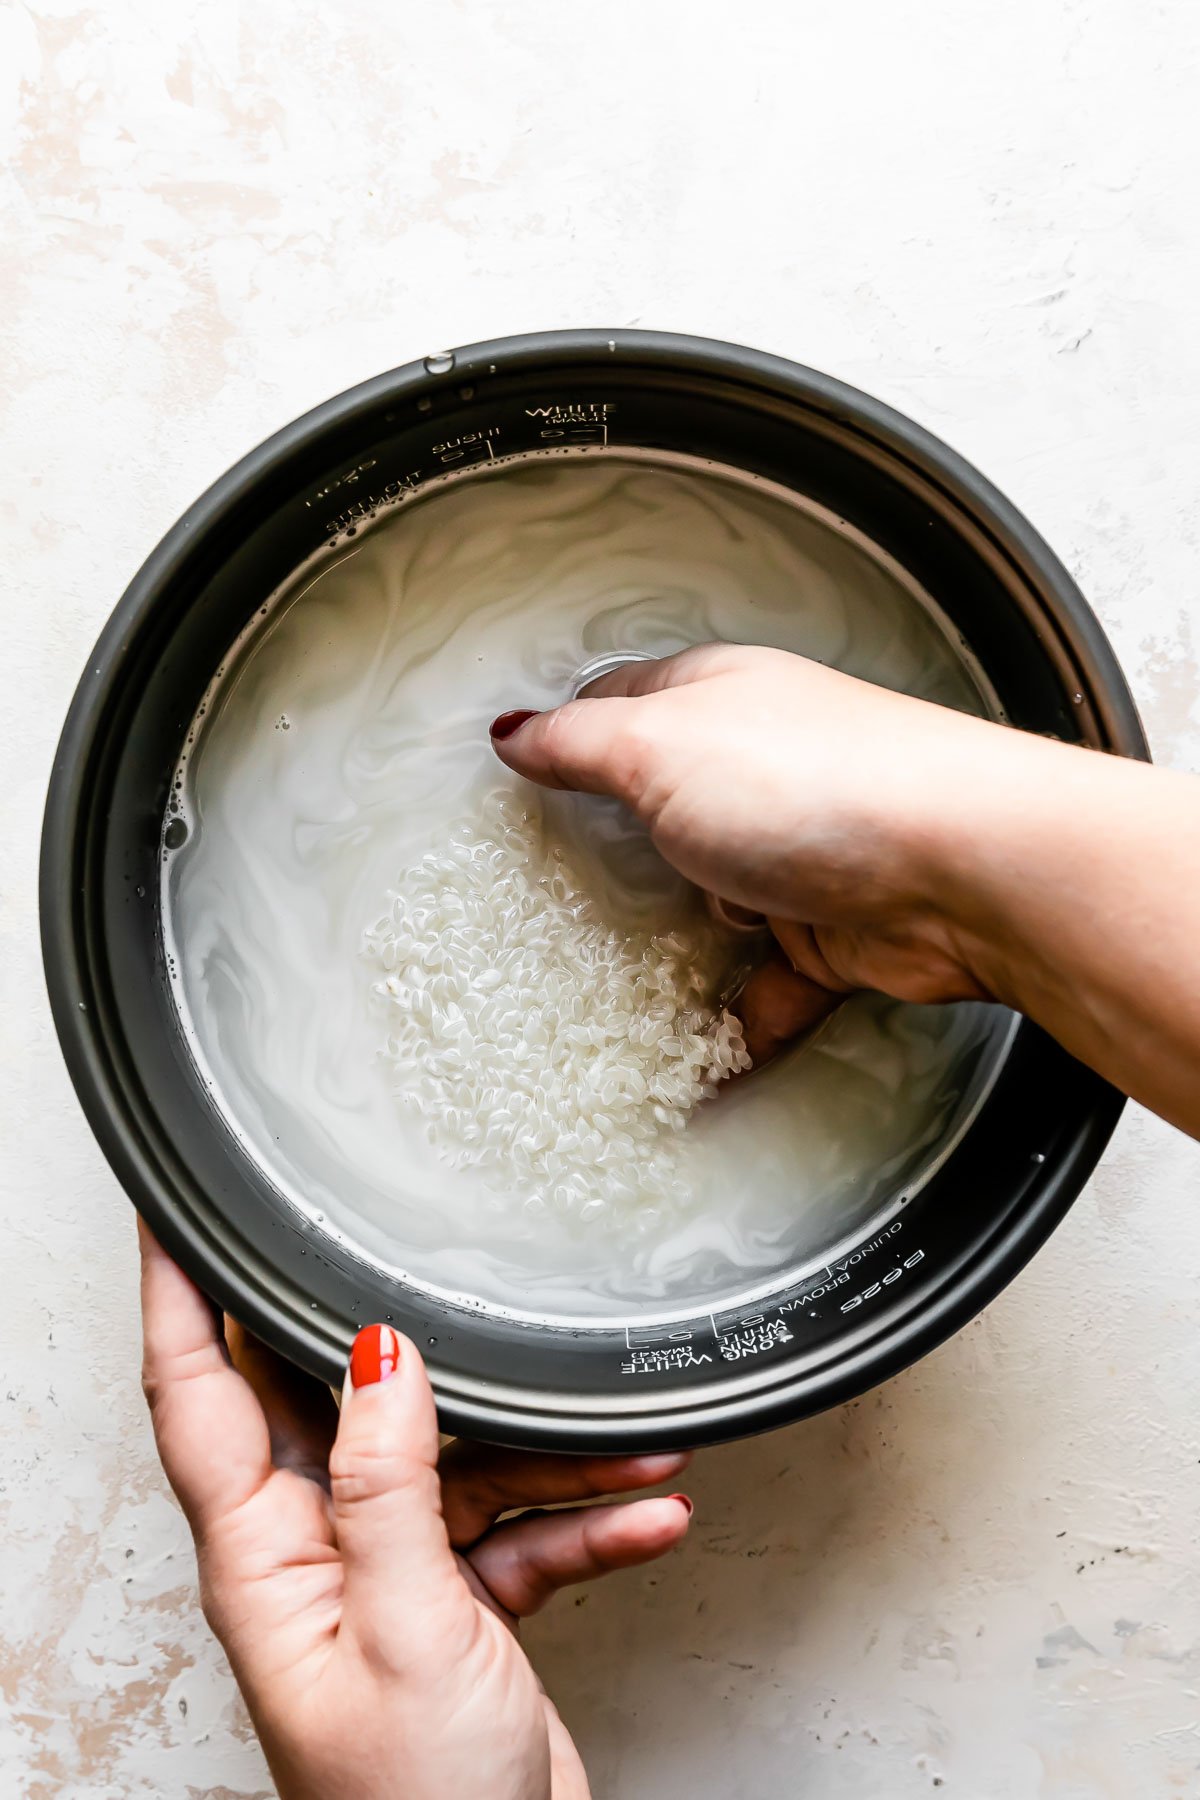
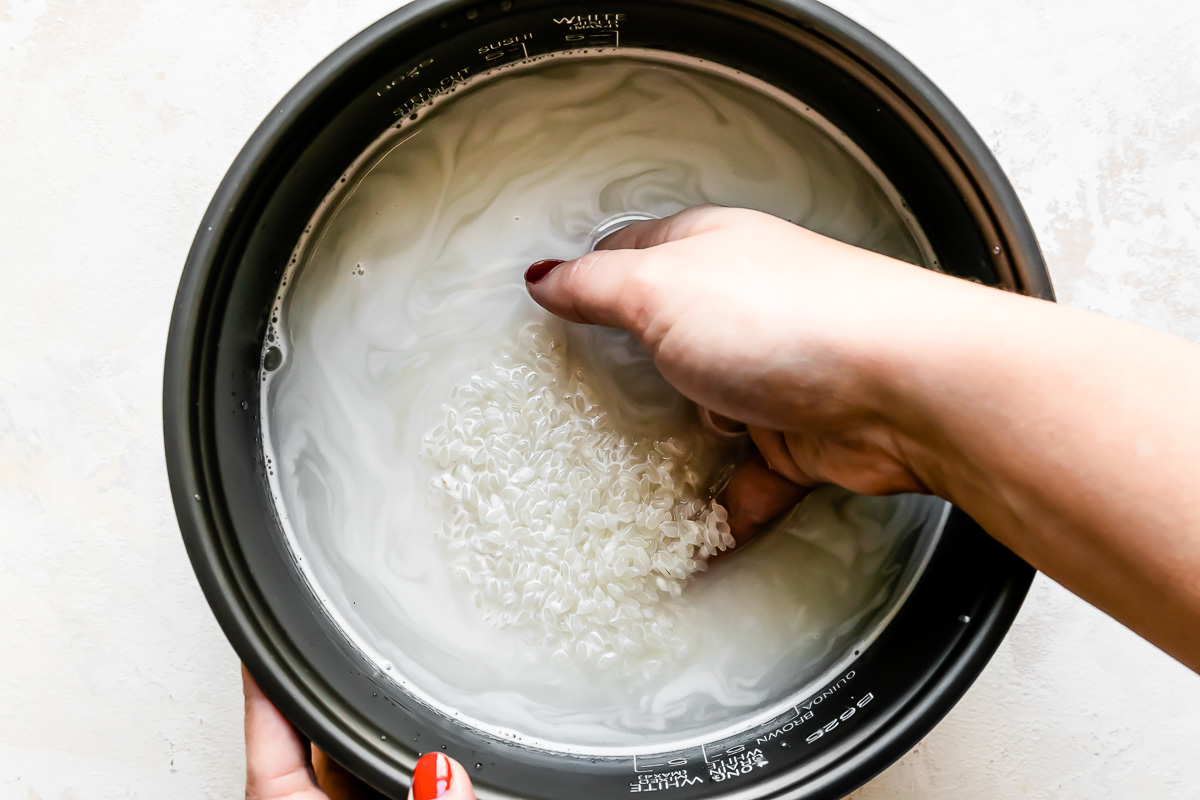
Sushi rice has a high starch content that creates its classic sticky texture. Thing is, if you don’t wash some of these starches off the rice then it becomes too sticky. The grains will stick together in large clumps as they cook, creating a mushy texture. We’re after perfectly sticky, fluffy rice here, so that’s why it’s so important to always rinse your sushi rice!
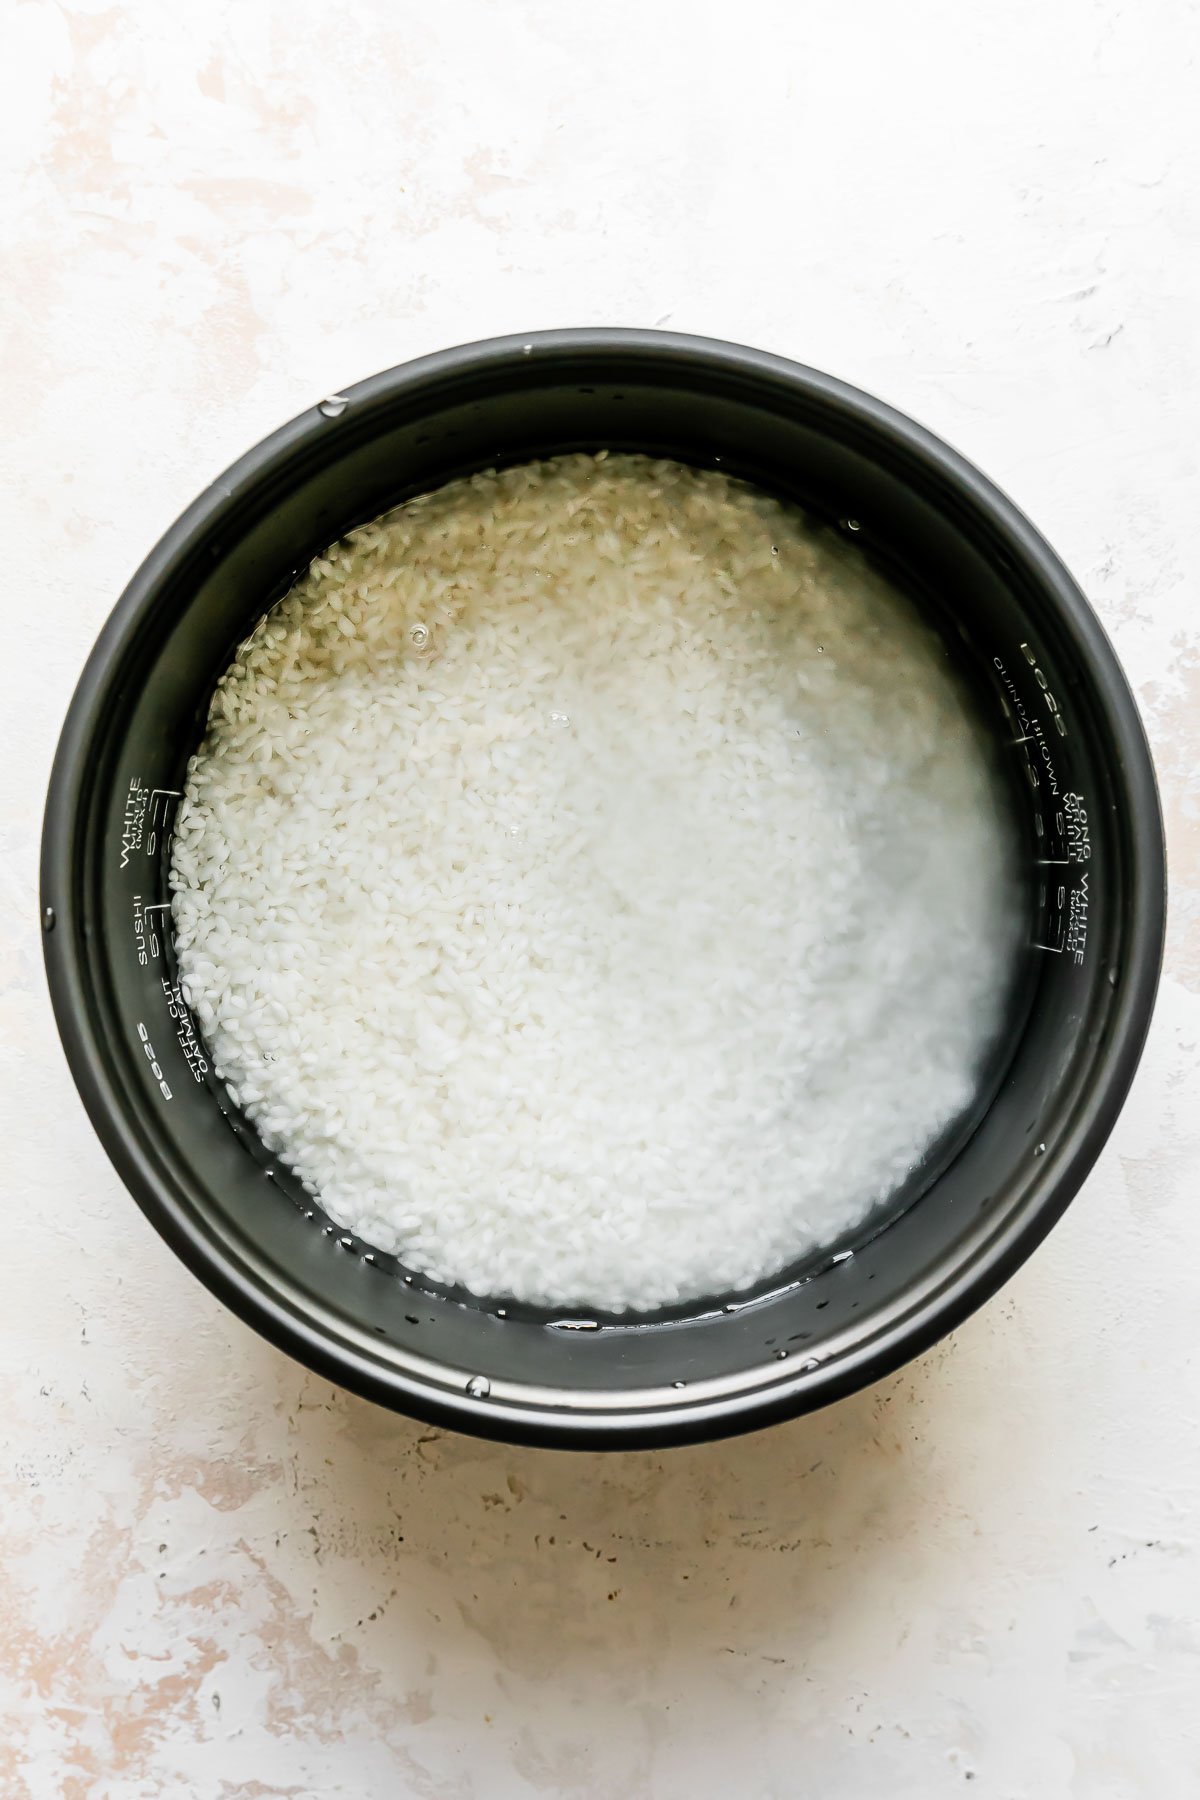
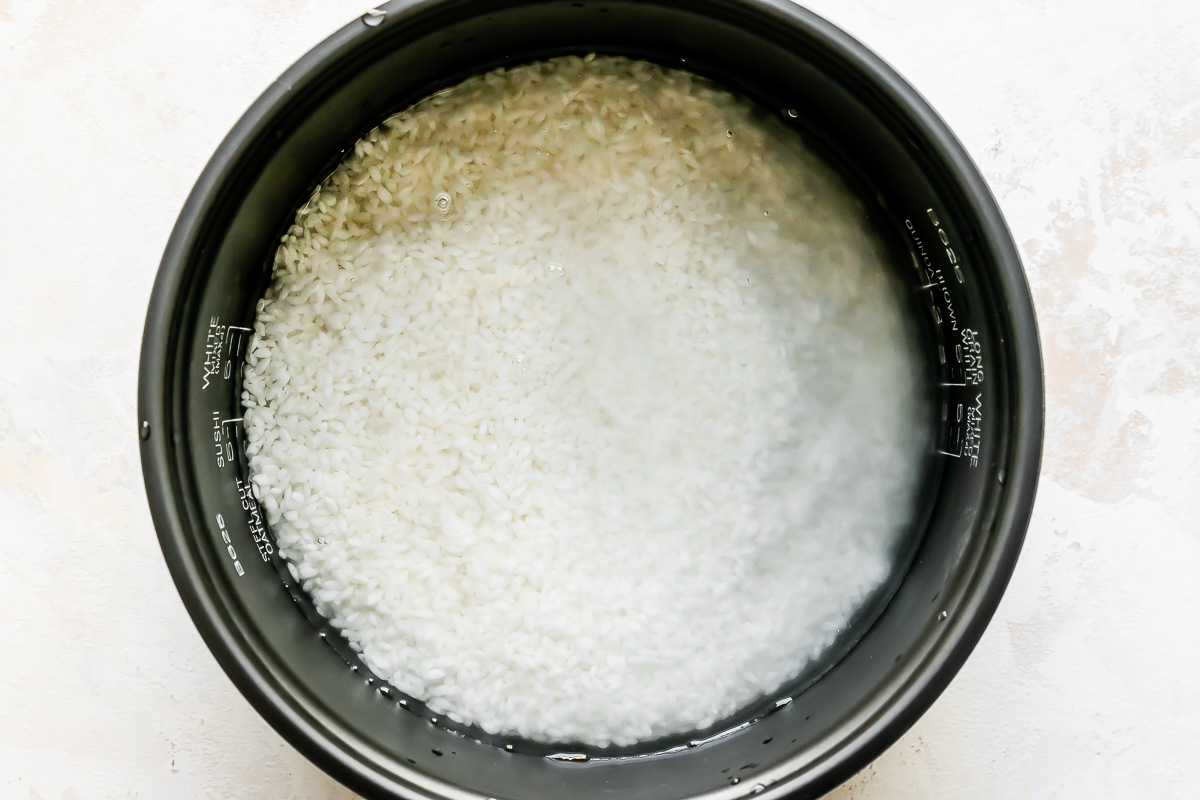
Tips for rinsing rice. ⇢ I like to wash sushi rice right in the inner cooking pan of my rice cooker, filling it with water & jostling the rice around with my hands to shake dust off the surface of the individual grains of rice. Be patient! It takes few minutes for the water to run clear, but the result is well worth it – notice the difference in the before & after below? Learn more 🤓 ⇢ How to Wash Rice.
Full Recipe Directions, including step-by-step photos, are included in the Recipe Card, below.
How to Cook Sushi Rice
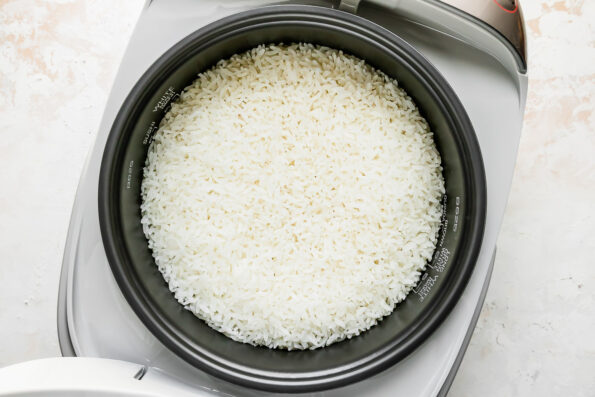
If you’ve never used a rice cooker before, no worries! A rice cooker like the Zojirushi Micom NS-TSC10A takes over & does all the work – no need to worry about a pot on the stove or managing heat to maintain a perfect simmer! – to cook up a pot of perfectly sticky rice every time! It has cooking functions specific to sushi rice & uses a triple heater on the bottom, side, & lid of the pot for precise temperature control.
Simply use the measuring cup that comes with the rice cooker to measure out your rice, fill the pot with enough water to reach the corresponding fill line, & let the rice cooker take over – it couldn’t be easier!
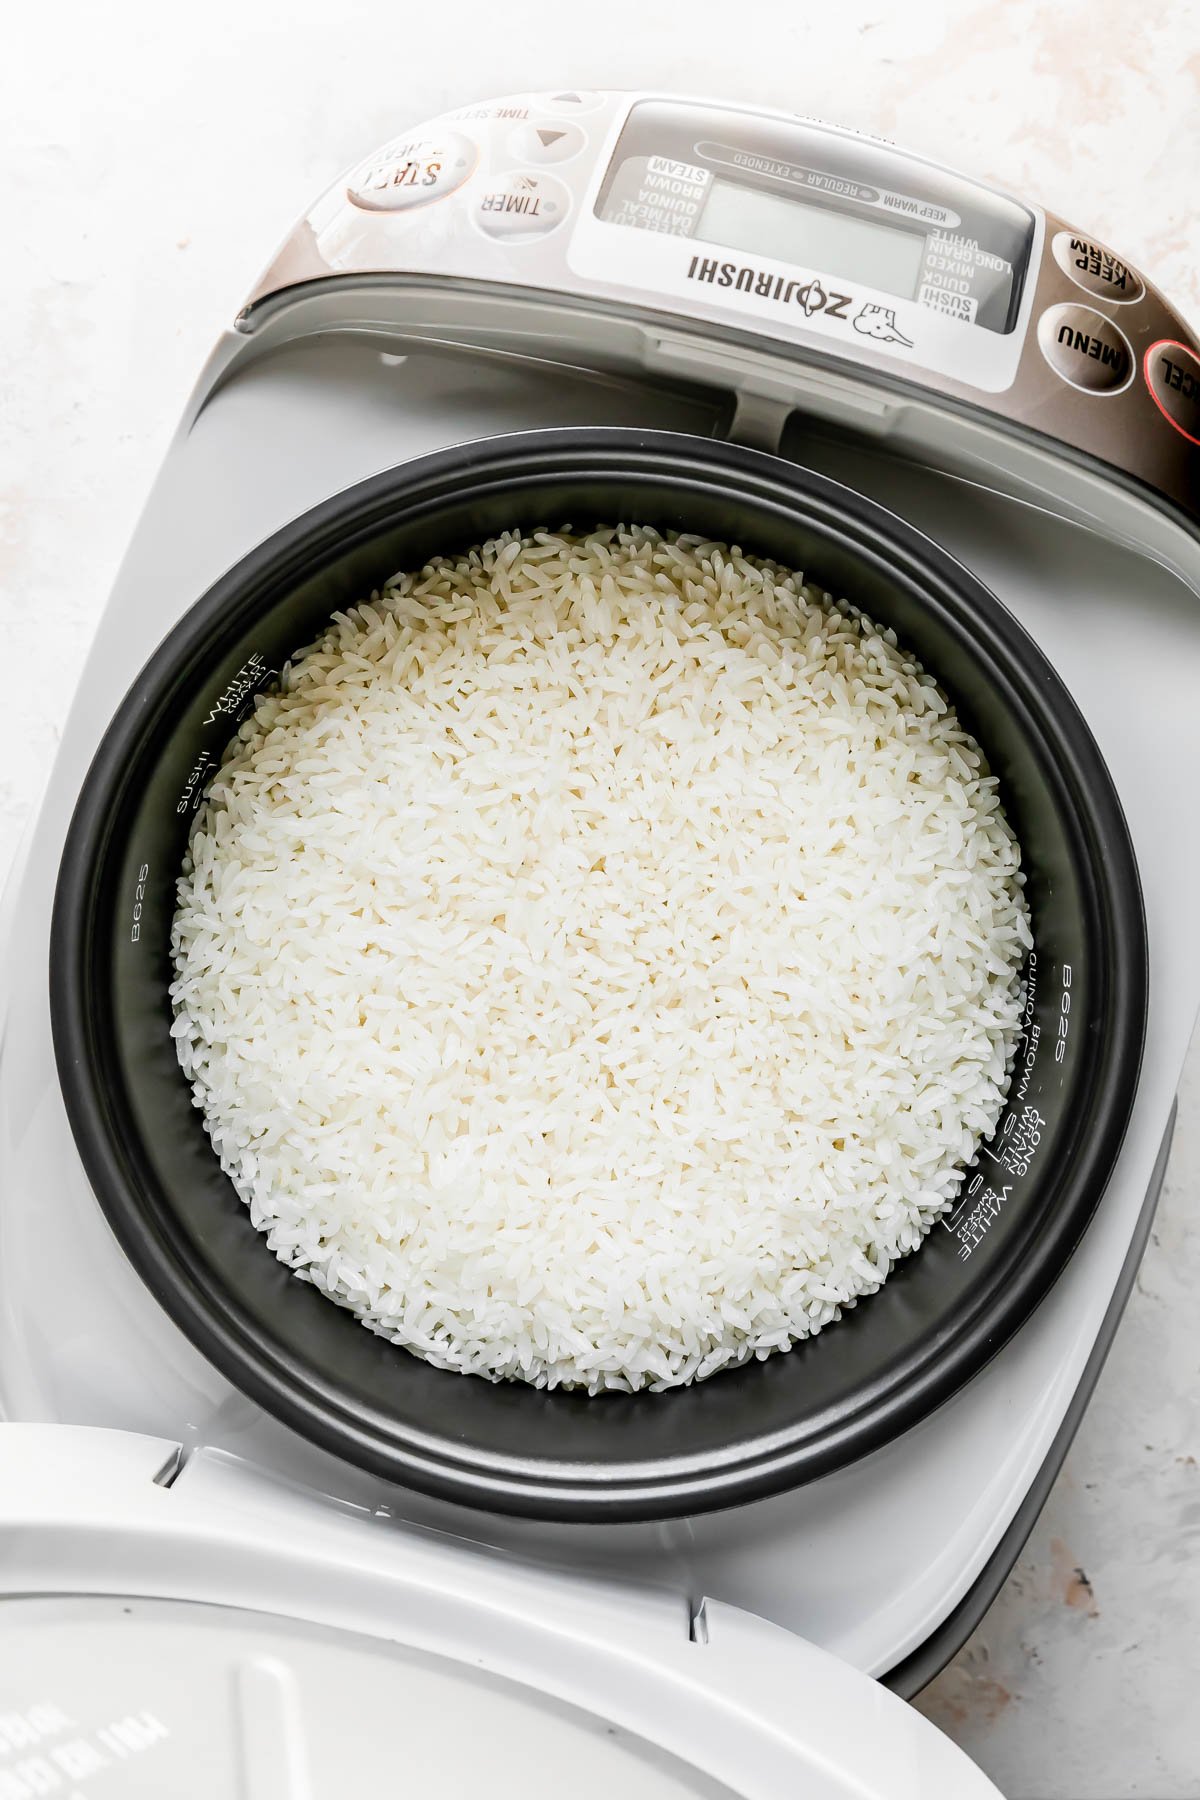
Important reminder! ⇢ Once the rice is cooked, be sure to let it rest & steam for another 5-10 minutes. In my experience, this extra steaming time is key to perfectly sticky sushi rice. This is another perk of the Zojirushi Micom NS-TSC10A – it has an automatic keep warm feature, keeping the sushi rice nice & fresh until you’re ready to season it & build your sushi stacks.
How to Season Sushi Rice (Japanese Family Recipe!)
At the base of these spicy tuna sushi stacks is my Great Grandma Yoshida’s sushi rice recipe – I’m super excited to share it with you! Her grandkids (my mom & aunts) all say that her seasoned sushi rice was the best & I agree 100%. Plus, it’s really simple to prepare!
Full Recipe Directions, including step-by-step photos, are included in the Recipe Card, below.
Why season sushi rice? ⇢ Vinegar is commonly used to season sushi rice since its acidity balances the flavor of raw seafood. It also preserves the freshness of the fish naturally & helps all the starches of the rice stay nice & sticky. Rice vinegar has a sweeter, more subtle taste than other vinegars & pairs well with mirin, a sweet Japanese wine. You can typically find both rice vinegar & mirin in the “international” aisle of most conventional grocery stores or at an Asian grocery store – they’re worth seeking them out!
How to season sushi rice:
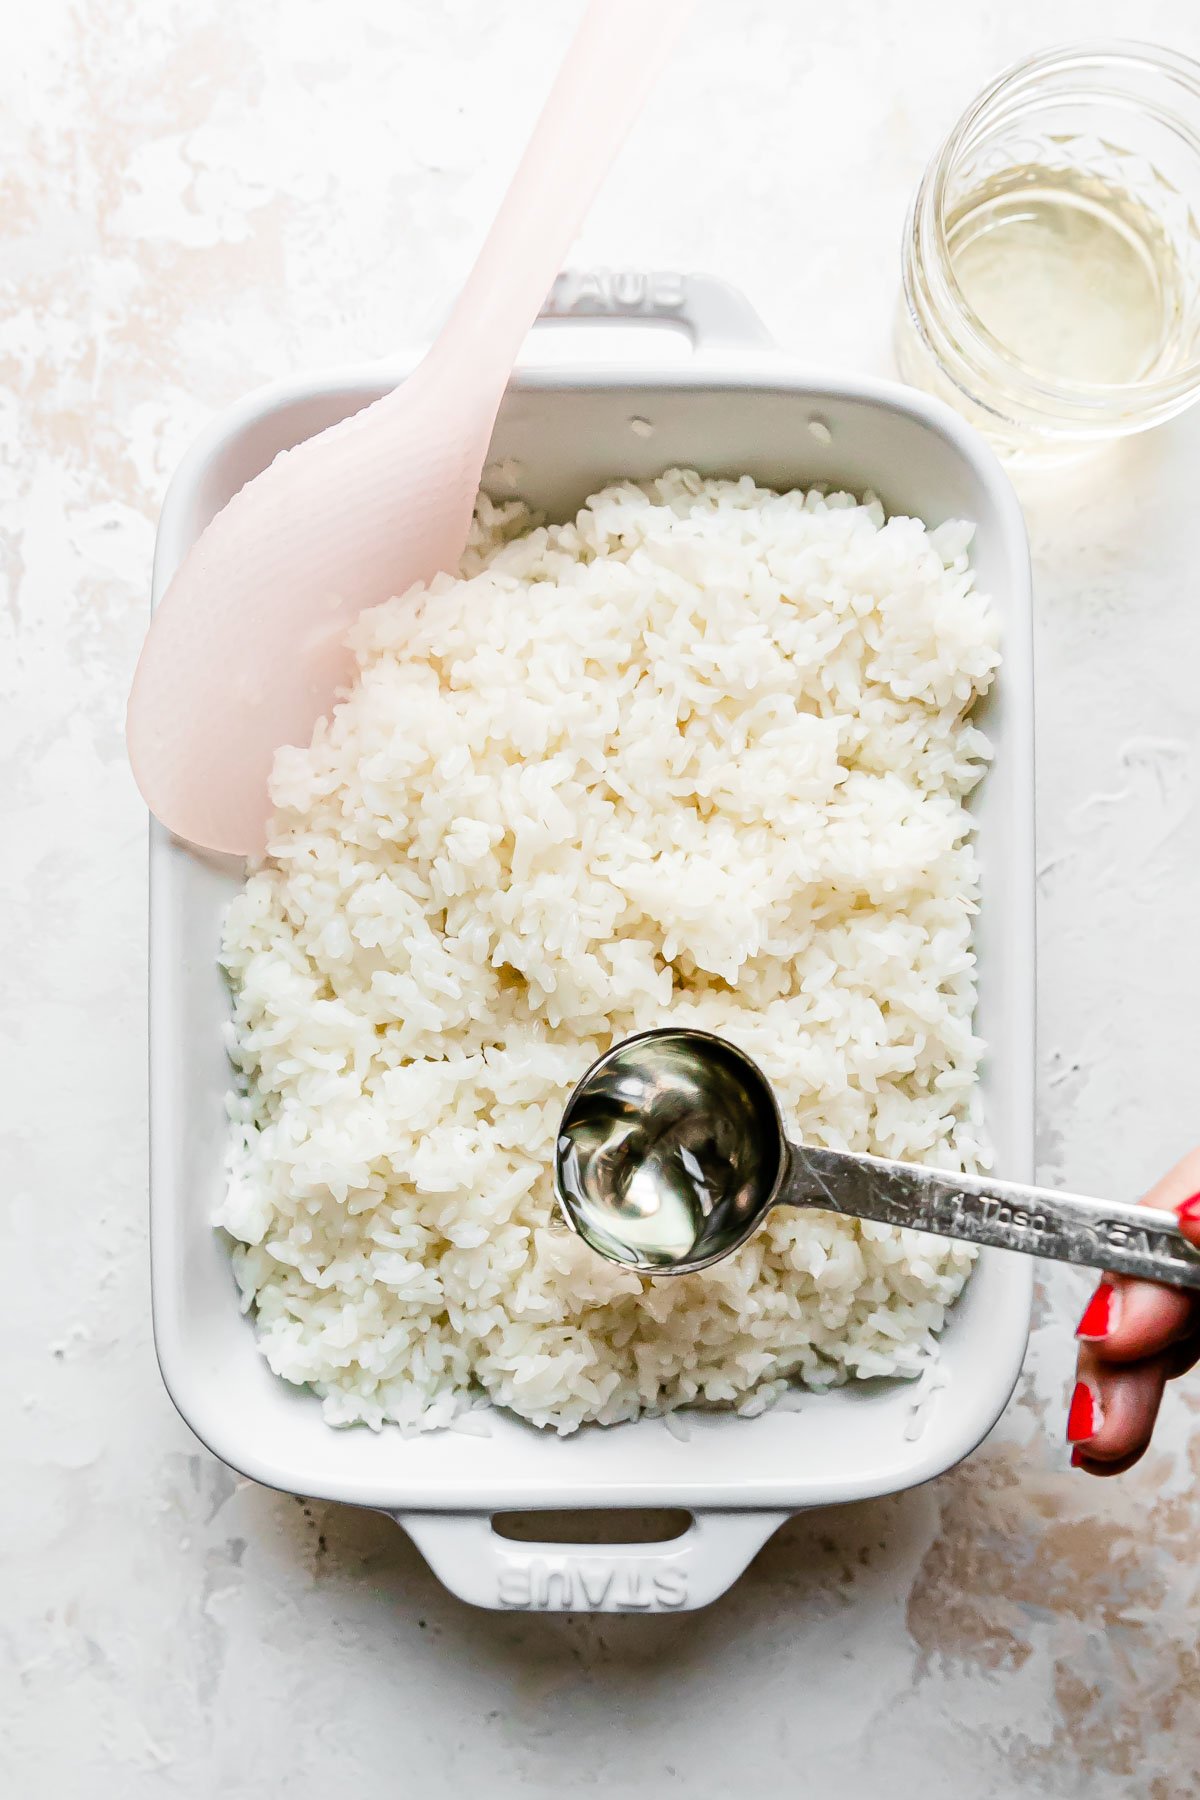
Prepare the seasoning liquid. Cook rice vinegar, mirin, sugar, & salt in a saucepan over medium-high heat. Once the sugar & salt dissolve, set it aside to cool. Tip! ⇢ Eliminate the extra dish to wash by measuring out all the ingredients in a liquid measuring cup & microwaving it in 30-second intervals, just until the sugar & salt dissolve.
Transfer the cooked rice to a shallow pan using a plastic rice paddle. Tip! ⇢ Rather than digging at the rice, be sure to use the edge of the rice paddle to gently scrape the rice out of the pot. Digging compacts the sushi rice – we want it to be nice & fluffy!
Season the rice. Spoon the prepared seasoning liquid over rice, using the edge of the paddle to gently toss it all together. Tip! ⇢ You won’t need all the seasoning! Work spoonful by spoonful, tasting as you go, to season the rice well without making it wet & mushy.
Sushi Stack Assembly
Building sushi stacks is all about creating beautiful layers. A sushi stack mold (pictured) helps to keep things really nice & neat, but you can also build a sushi stack using a measuring cup – just be sure to spritz the inside of the cup with olive oil spray & add the ingredients in the reverse order!
Full Recipe Directions, including step-by-step photos, are included in the Recipe Card, below.
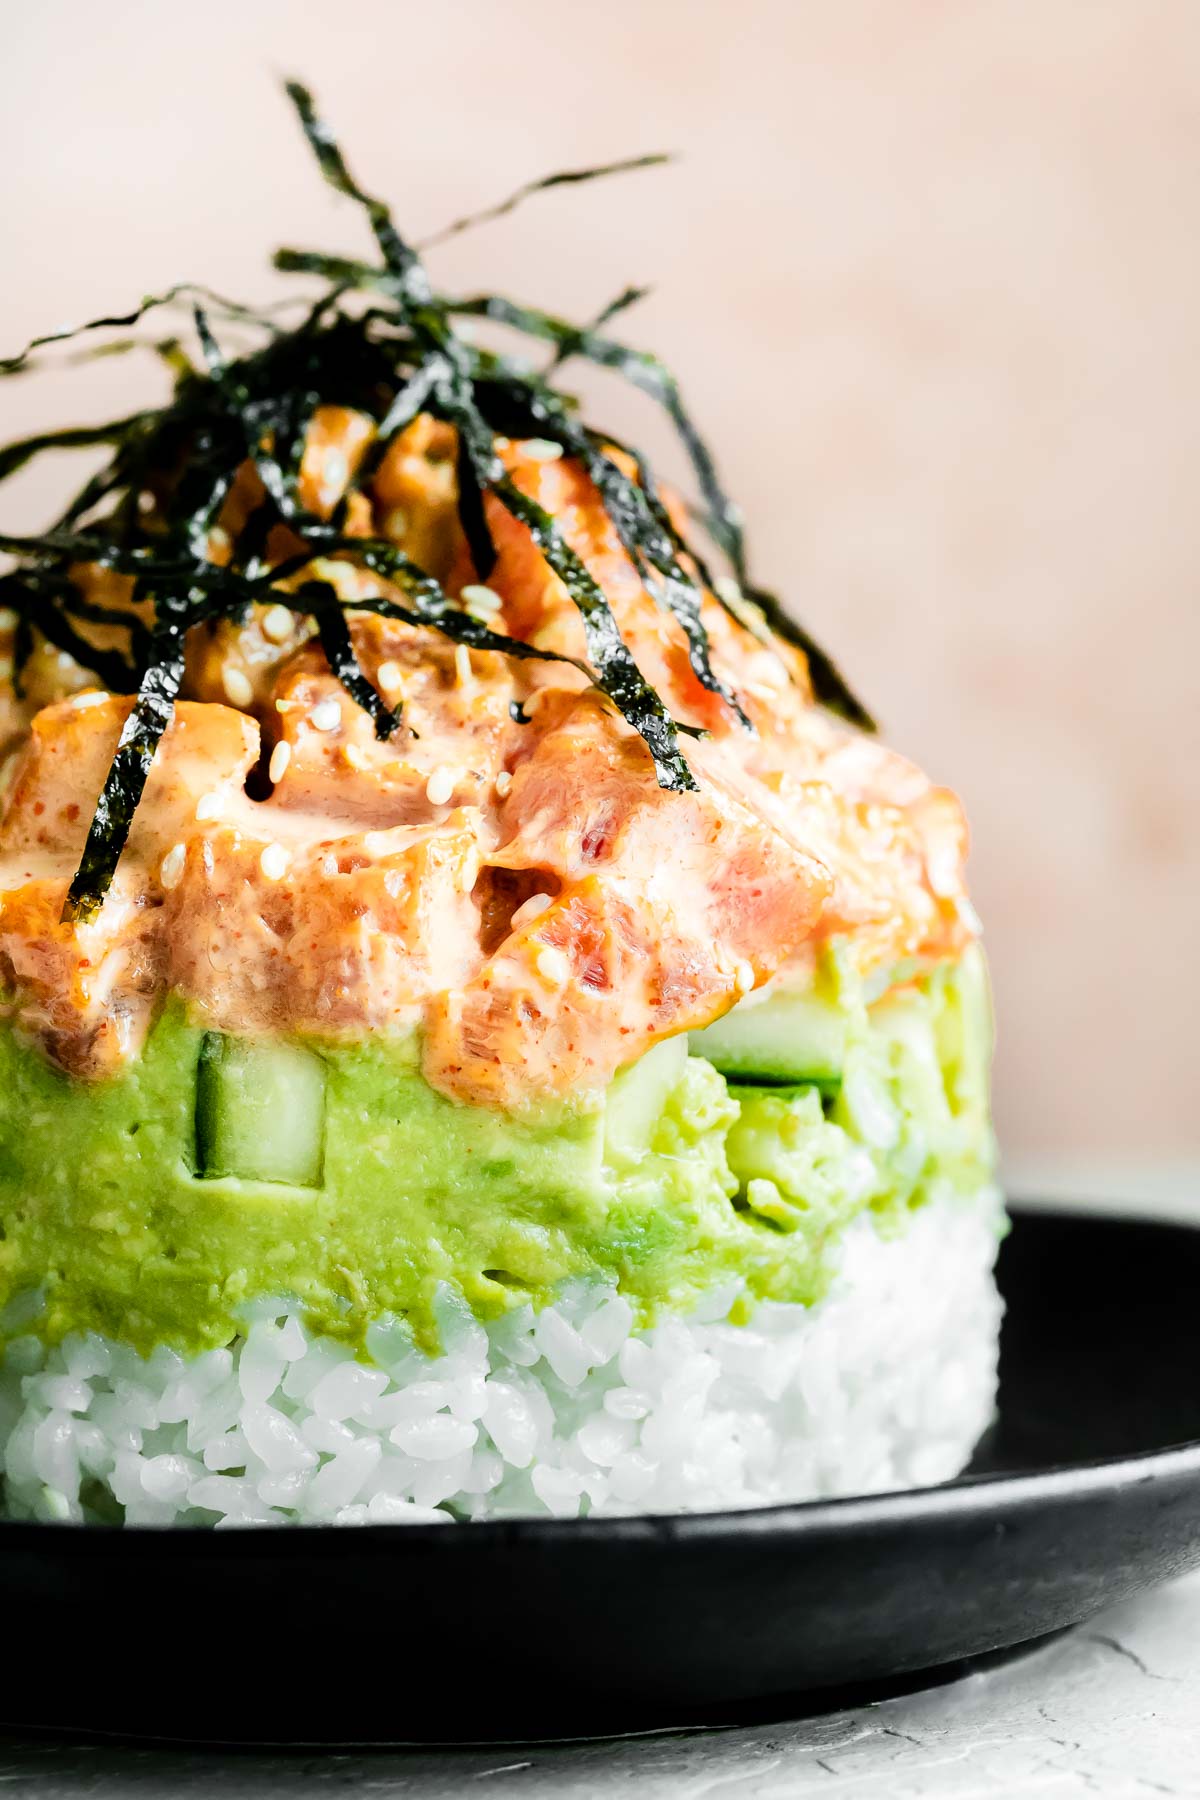
A few stacking tips! ⇢ The ratio of each component is key to keeping the sushi stacks nicely balanced. Spread each component evenly into the mold, then press down gently to create a sushi stack with nice, uniform layers. The ingredients are delicate, so be sure to not use too much force!
How to build a sushi stack using a sushi stack mold:
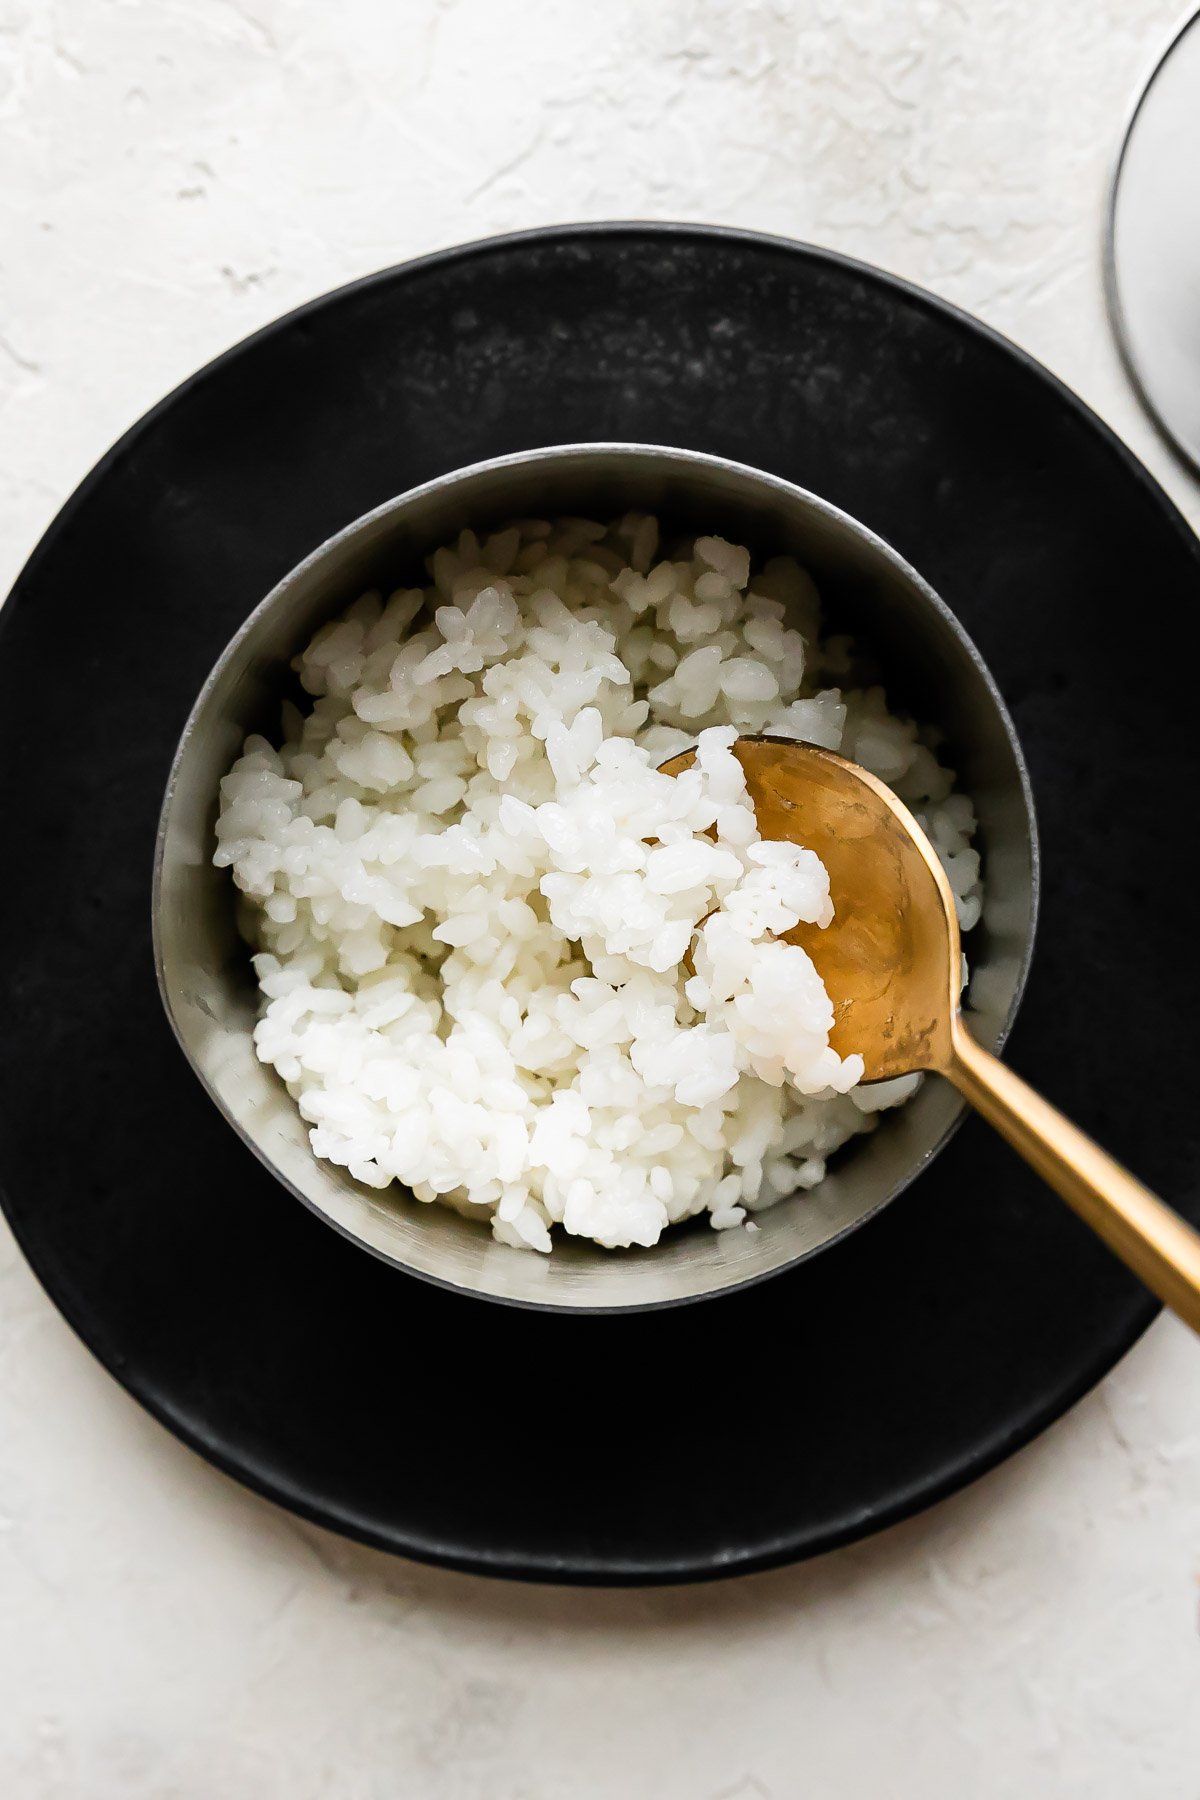
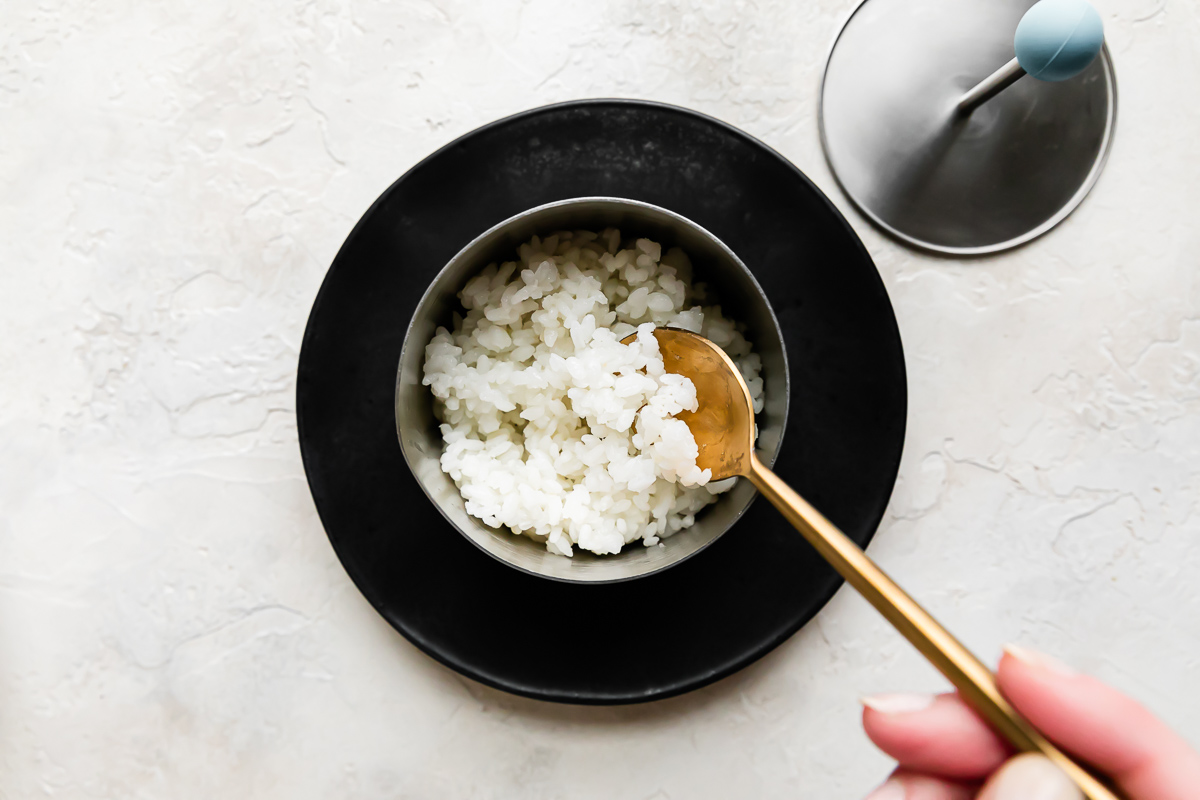
Layer #1: Sushi rice. Place the sushi stack mold on a small plate or a piece of parchment paper, then create a base layer with ½ cup of seasoned sushi rice. Tip! ⇢ Remember to gently handle the rice to keep it nice & fluffy. Use the edge of the rice paddle or a spoon to lightly press the rice across the bottom of the mold, rather than digging at it.
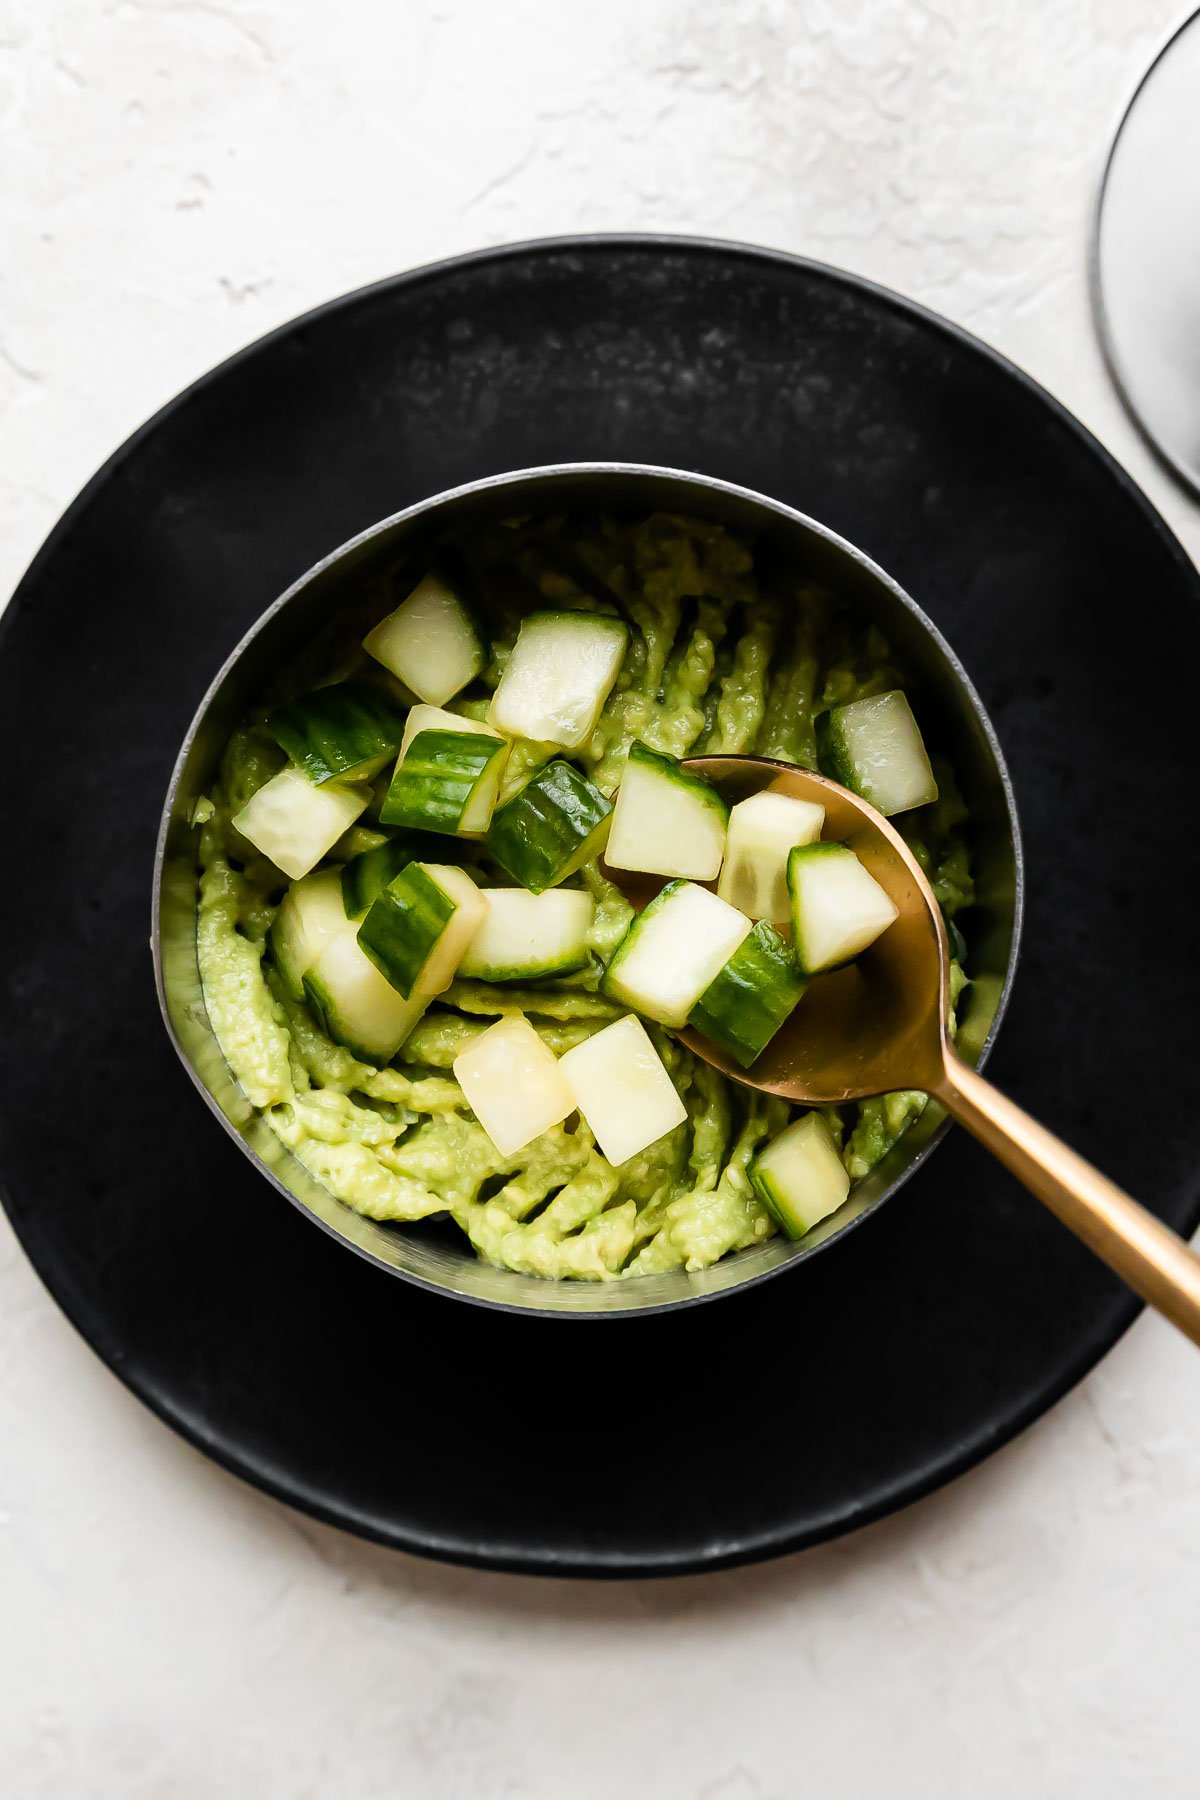
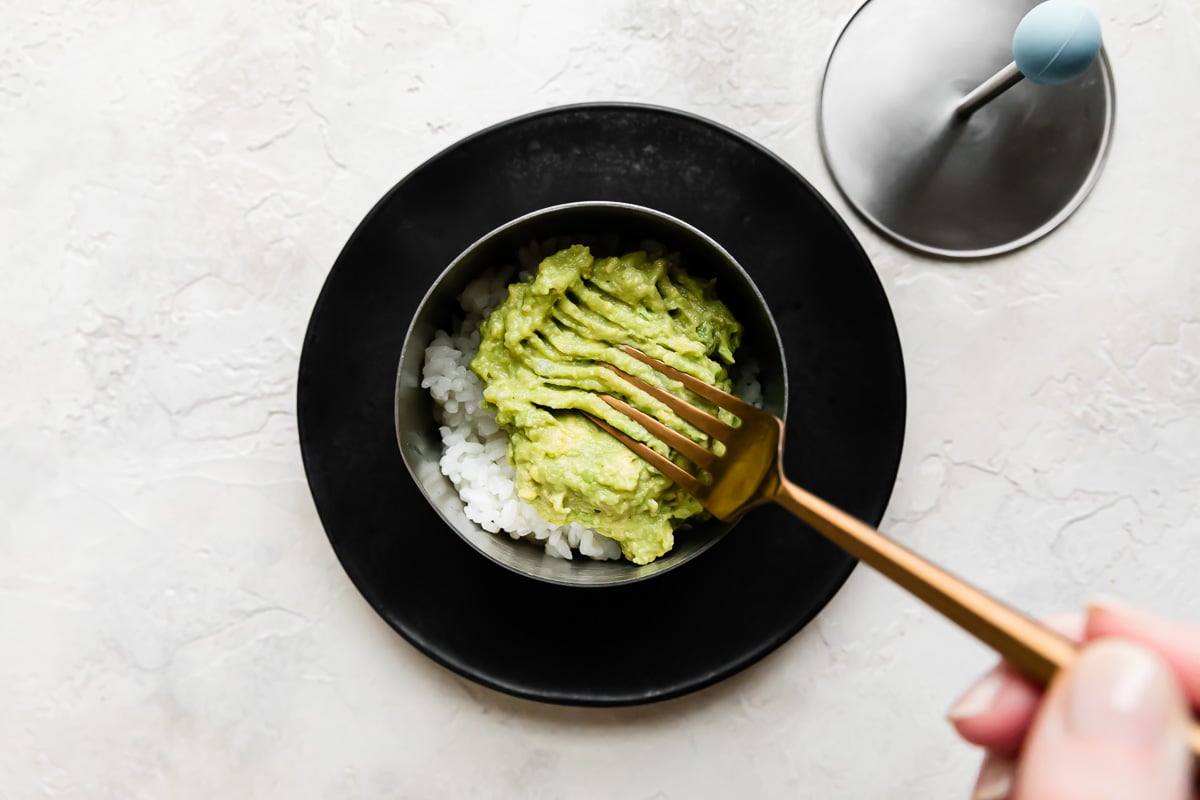
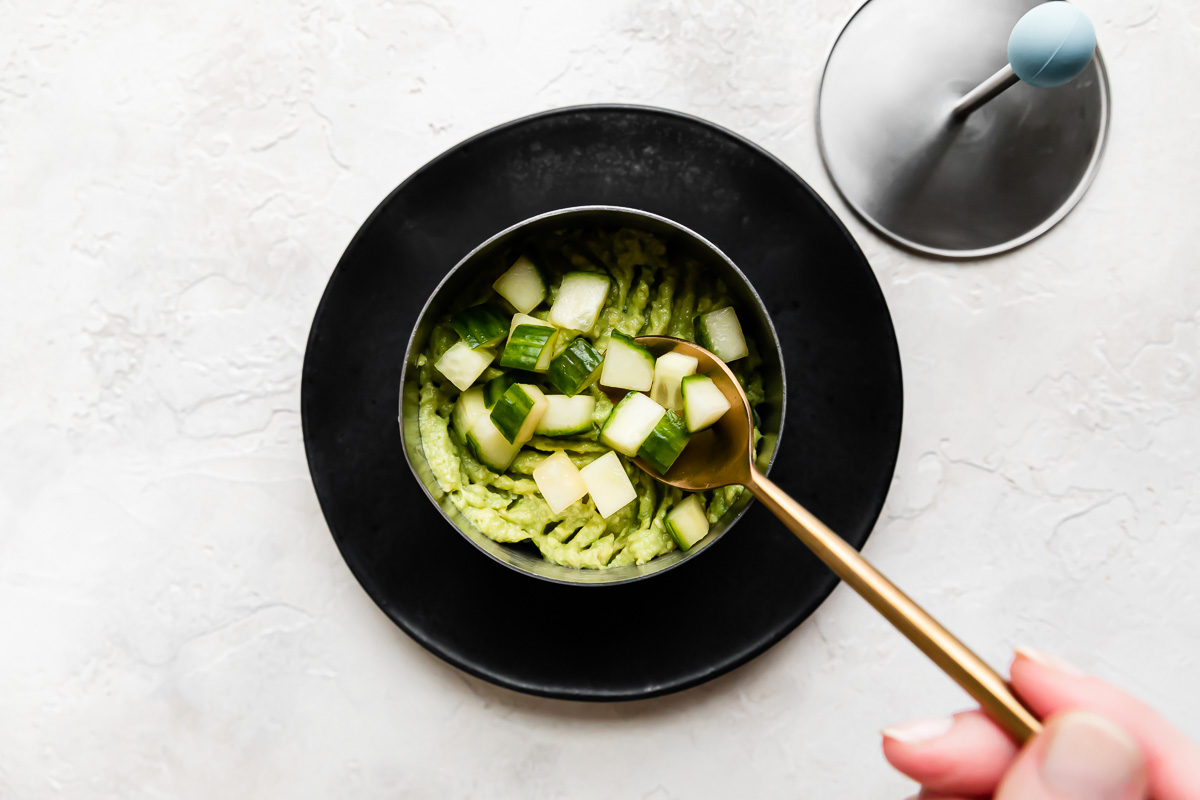
Layer #2: Avocado & cucumber. Place a heaping tablespoon of seasoned avocado on top of the sushi rice, spreading it out into an even layer, then top it off with a heaping tablespoon of diced cucumber. The small cubes should easily stay in place on the mashed avocado!
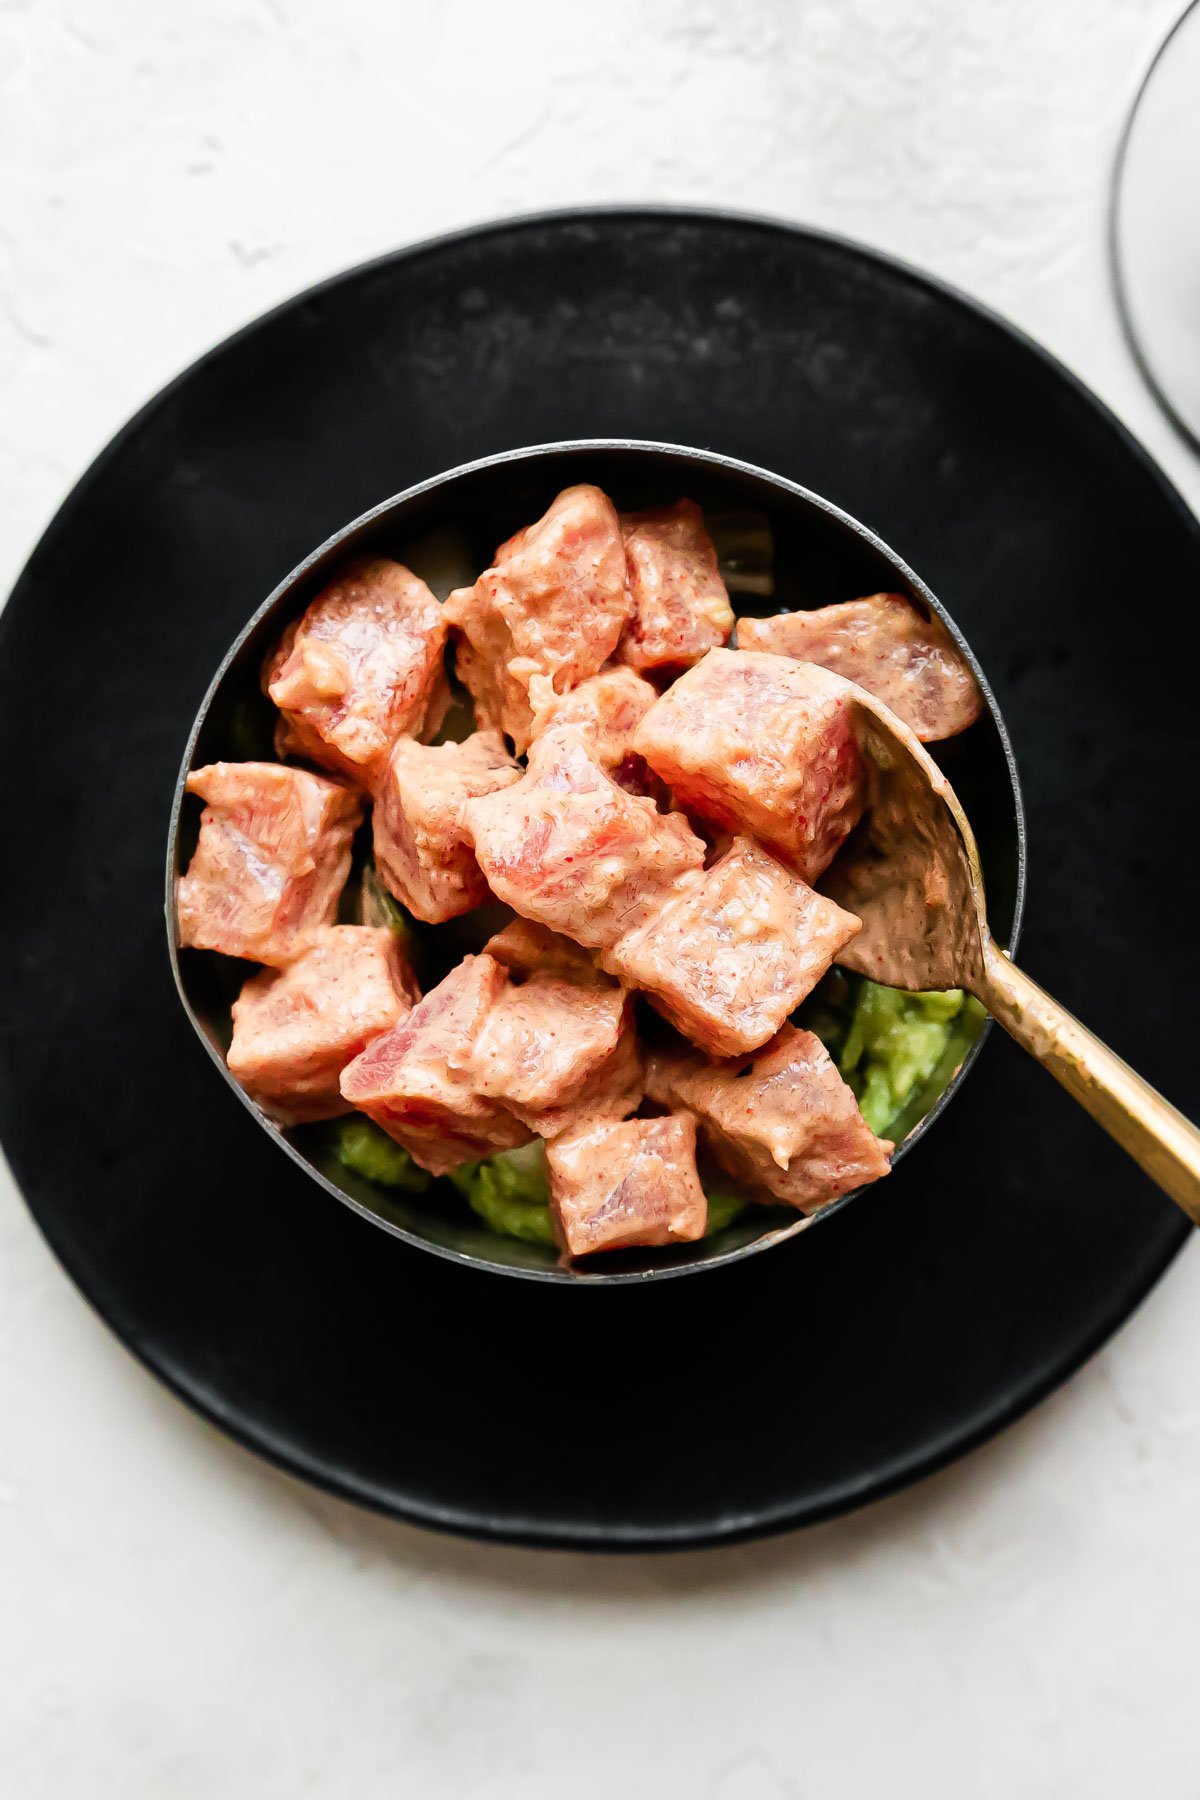
Layer #3: Spicy tuna. Pile a few tablespoons of spicy tuna over top, using a fork to gently spread the diced fish out into an even layer.
Remove the mold & repeat! Revealing your beautiful sushi stack is the best part. Tip! ⇢ Be sure to rinse the mold with water between each sushi stack to help prevent sticking as you work.
Serving Suggestions
Finish the assembled sushi stacks with a garnish of thinly sliced nori (seaweed sheets) & a sprinkle of toasted sesame seeds. Thinly sliced chives or scallions add a nice pop of color, & a little extra spicy tuna (or any other seafood you love!) on top also never hurts!
Once you have a platter of beautiful sushi stacks simply dig in & enjoy – they go down easy like a maki roll! For a full spread, serve the spicy tuna sushi stacks with steamed edamame, pickled ginger, & wasabi. Don’t forget a shallow bowl of shoyu for dipping & some extra spicy mayo on the side!

Spicy tuna sushi stacks are pure fun & perfect for moments like date night, Galentine’s dinner, or a Saturday movie night with friends. Your guests will love getting involved in preparation too! It’s a simple yet rewarding kitchen project, so put on some music, pour a glass of wine, & make this sushi stack recipe a group activity. Have fun with it!
We can’t wait for you to try this Spicy Tuna Sushi Stack recipe! We love that it results in an impressive stack with restaurant-worthy flavor, but it’s quite easy to throw together whenever a sushi craving strikes. Sushi stacks are pure fun – we’re pretty sure you’ll love them as much as we do!
If you do give them a try, be sure to let us know! Leave a comment with a star rating below. You can also snap a photo & tag @playswellwithbutter on Instagram. We LOVE hearing about your PWWB creations! ♡ Happy cooking!
More Recipes Like This:
Easy Recipes to Impress!


Spicy Tuna Sushi Stack
- Prep Time: 1 hour
- Cook Time: 1 hour
- Total Time: 1 hour 15 minutes
- Yield: serves 2-4 1x
- Category: Main Dishes, Appetizer Recipes
- Method: No-Cook
- Cuisine: Asian-Inspired, Japanese-American
Description
I’ve been obsessed with sushi stacks ever since they took the internet by storm a few years back, & these Spicy Tuna Sushi Stacks are my favorite version to date!
With gorgeous layers of seasoned sushi rice, avocado, cucumber, & creamy spicy ahi tuna, the flavors & textures of each sushi stack tastes just like a classic spicy tuna roll – all with the bonus that layering the ingredients (rather than wrapping them into maki rolls or hand rolls) makes things a whole lot easier.
A couple of quick notes to keep in mind:
- Sushi stacks are wonderfully versatile. If you don’t like tuna, swap it with salmon. If you prefer fully-cooked seafood, use imitation crab or cooked shrimp. You really can’t go wrong, & that’s half the fun – check the blog post, above, for more easy recipe variations!
- The sushi rice recipe below comes straight from my Japanese Great Grandma Yoshida’s kitchen. It’s perfectly tangy with not too much sweetness, & you can use it to season either short-grain sushi rice or medium-grain sticky white rice. Check the Recipe Notes, below, for family’s preferred brands.
- Properly prepping & cooking the rice is key to creating restaurant-worthy sushi rice at home. Using a quality rice cooker – like my favorite, the Zojirushi Micom Rice Cooker & Warmer NS-TSC10A pictured throughout this post – makes things a lot easier. Be sure to rinse your rice well, & let the rice cooker do the rest of the work!
Guaranteed to impress on any occasion, I hope you have so much fun making sushi stacks! Happy stacking! ♡
Ingredients
- sushi rice, below
- spicy tuna, below
- avocado mash (mash together 1 avocado + juice of ½ lemon + ½ teaspoon toasted sesame oil)
- ½ English cucumber, peeled if desired & diced into ¼-inch cubes (roughly ½ cup diced)
- for serving: toasted sesame seeds & nori seaweed, sliced into thin strips
for the sushi rice:
- ¾ cup Calrose rice, rinsed well (see Recipe Notes)
- ¼ cup Japanese rice vinegar
- 1 teaspoon mirin or sake (see Recipe Notes)
- 2–3 tablespoons white sugar
- 1 teaspoon kosher salt
- optional: ½ teaspoon msg
for the spicy tuna:
- 1 pound sashimi-grade ahi tuna, diced into ¼-inch cubes (see Recipe Notes)
- ¼ cup mayonnaise (Japanese-style, such as Kewpie, preferred)
- 1 heaping tablespoon sriracha
- 1 teaspoon soy sauce
- ½ teaspoon toasted sesame oil
- ¼ teaspoon white pepper
Instructions
- Rinse the rice: Using the measuring scoop that comes with the Zojirushi Micom Rice Cooker, measure & level 1 scoop of rice (approx. 6 ounces or ¾ cup rice if using standard English measuring cup). Transfer the rice to the rice cooker’s inner cooking pan. To rinse the rice, cover the rice with warm water, give it a good jostle with your hands to agitate the dust off the rice’s surface, then carefully drain the water. Repeat rinsing until the water runs clear – this takes a good minute or two; be patient! (Learn more! ⇢ How to Properly Wash Rice.)

- Cook the rice: Following the ratios provided in manufacturer’s directions, add water to the inner cooking pan. Place the inner cooking pan into the rice cooker & cook according to manufacturer’s directions. Once the rice is done, let it steam & rest for 5-10 minutes before seasoning the sushi rice.

- Season the sushi rice: Meanwhile, as the rice cooks, prepare the seasoning. Combine the Japanese rice vinegar, mirin, white sugar, salt, & msg (if using) in a small saucepan over medium-high heat. Bring the mixture to a boil & cook until the sugar is dissolved. Remove from the heat & set aside to cool. Once the rice is cooked, use a plastic rice paddle to transfer it to a shallow pan. Be sure to use the paddle to scrape the rice out of the pot rather than digging it – doing so compacts the rice & we want our sushi rice to be nice & light! Working a few spoonfuls at a time, add the prepared seasoning liquid to the rice & use the rice paddle to gently toss the seasoning throughout the rice. Use only enough seasoning to flavor the rice to taste – too much seasoning will cause the rice to be wet & mushy. You will likely have leftover seasoning, which is fine – save it for later use. Once seasoned, set the sushi rice aside for sushi stack assembly.
- Prepare the spicy tuna: Meanwhile, as the rice cooks, prepare the spicy tuna. To a medium bowl, add the mayonnaise, sriracha, soy sauce, toasted sesame oil, & white pepper. Mix to combine well. Add the cubed tuna then gently stir to coat well. Set aside for sushi stack assembly.
- Assemble the sushi stacks: Place a sushi stack mold on a serving plate or prepared surface. Gently add about ½ cup of the seasoned sushi rice into the mold, using a fork to spread it into an even layer without pressing down on the rice. Gently spread 1 heaping tablespoon smashed avocado over top, then layer on 1 heaping tablespoon of diced cucumber. Finish with 2 heaping tablespoons of spicy tuna, using a fork to spread it into an even layer. Use the press to lightly press down on the tuna &, at the same time, slide the ring up & off, revealing a beautifully layered sushi stack. Rinse the sushi stack mold, then repeat with remaining ingredients, building 4-6 sushi stacks in total. (Helpful tips! ⇢ To prevent sticking as you work, it’s helpful to rinse your utensils with a little water between uses, shaking off any excess moisture. To create really uniform, even layers, it’s also helpful to gently press down on the layers as you go – again, take care not to press down too forcefully, as it smashes the delicate ingredients.)
- Serving: Once the sushi stacks are assembled, give them a couple of finishing touches: top each stack with a final heaping tablespoon of the spicy tuna, then finish with a haystack of thinly sliced nori seaweed & a generous sprinkle of toasted sesame seeds. Serve immediately. Enjoy!

Notes
- Ingredient & Equipment Notes:
- Best rice for sushi rice: For best results, use either short-grain or medium-grain white rice for your sushi stacks. While sushi-style short-grain white rice works beautifully, my family is partial to Calrose-style medium-grain white rice (preferred brands: Botan & Kokuho Rose, though Hinode & Nishiki are great too).
- Best fish for sushi stacks: As the star of any sushi recipe, it’s important to use the best quality fish you can find. Since this recipe calls for a raw preparation, it’s also important to source your fish from somewhere you trust. While some swear by using only “sushi-grade” or “sashimi-grade” fish, these designations aren’t regulated – this is an interesting read on the matter. Rather than focusing on specific labels, I suggest heading to your local fishmonger & letting them guide you in the right direction. If you’re local to the Twin Cities Metro, I am a big fan of Coastal Seafoods – they have storefronts in both Minneapolis & St. Paul.
- Tuna substitutes: This is a great base recipe, so if you cannot find ahi tuna, feel free to swap it for salmon or whatever looks best at the fish counter. If you prefer to use fully cooked seafood, poached shrimp or imitation crab can be chopped & mixed with the spicy mayo. You could also top your sushi stacks with tempura shrimp or teryiaki salmon instead, drizzling the spicy mayo over top. Have fun with it!
- Sushi stack mold: We use this handy sushi stack mold, which is readily available online. You can also build sushi stacks using a ring mold or a standard English 1 cup measure. If using a measuring cup, be sure to lightly spray it with nonstick cooking spray first, then add the ingredients in reverse order (start with spicy tuna & finish with rice).
- Storage: Once assembled, sushi stacks are best enjoyed immediately – though you can cover them in plastic wrap & store them in the refrigerator for 1-2 hours before serving. Store any leftover components in separate airtight containers in the refrigerator for no more than 1 day. Reheat the rice in the microwave, then create a sushi bowl or build stacks (if desired).
Recipe and Food Styling by Jess Larson, Plays Well With Butter | Photography by Rachel Cook, Half Acre House.
Follow along with Plays Well With Butter on Instagram, YouTube, Facebook, and Pinterest for more unfussy recipes that pack a big punch of flavor!